An Easy to Build Piece for Any Room
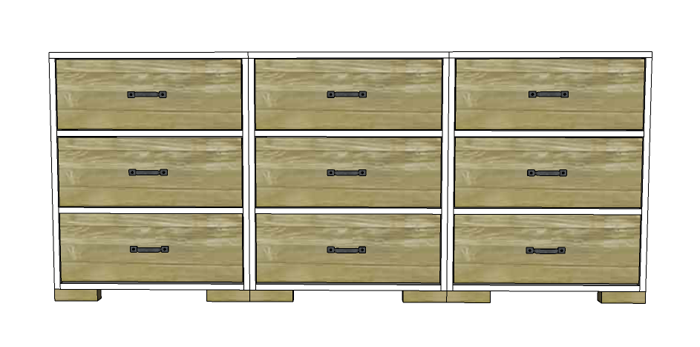
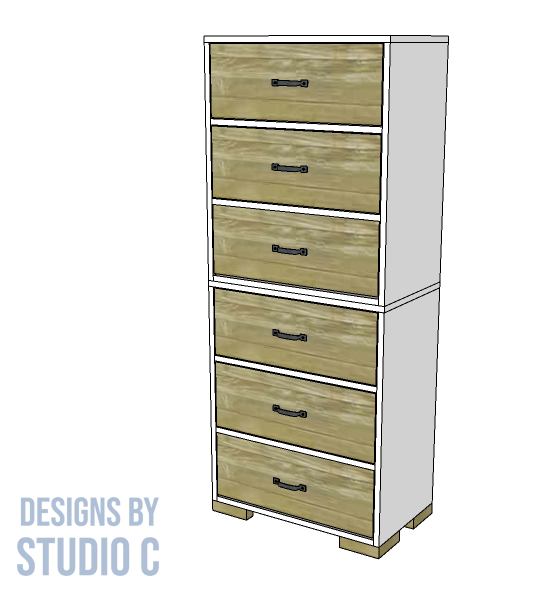
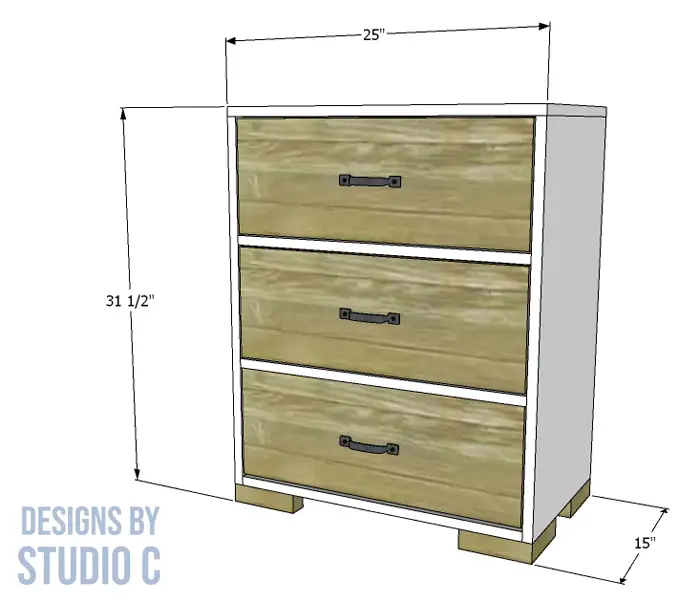
The plans to build a Calvin 3 drawer storage cabinet are super simple and inexpensive. Using one sheet of plywood and a few boards, this DIY storage cabinet with drawers can help solve storage issues anywhere needed. The bonus is that two or three can be built, and used side by side to create a console table, dresser or media stand (just make sure to screw the cabinets to each other and secure them to a wall for stability!). This cabinet is the perfect project for any skill level!
Materials (to build one cabinet with three drawers):
- 1-1/4″ pocket hole screws (<– affiliate link!)
- 1-1/4″ brad nails (to secure the back)
- 2″ brad nails
- 1-1/4″ screws (to secure the drawer fronts)
- 1-1/2″ screws (to secure the feet)
- Edge banding (<– affiliate link!)
- 3 sets of 14″ drawer slides
- Drawer pulls of choice
- Wood glue
- Sandpaper (80, 120, 220 grits)
- Finishing supplies
Lumber:
- 3 – 1×8 at 8′
- 1 – scrap of 2×6 at 2′
- 1 – 4′ x 4′ sheet of 1/4″ plywood
- 1 – 4′ x 8′ sheet of 3/4″ plywood
Cut List:
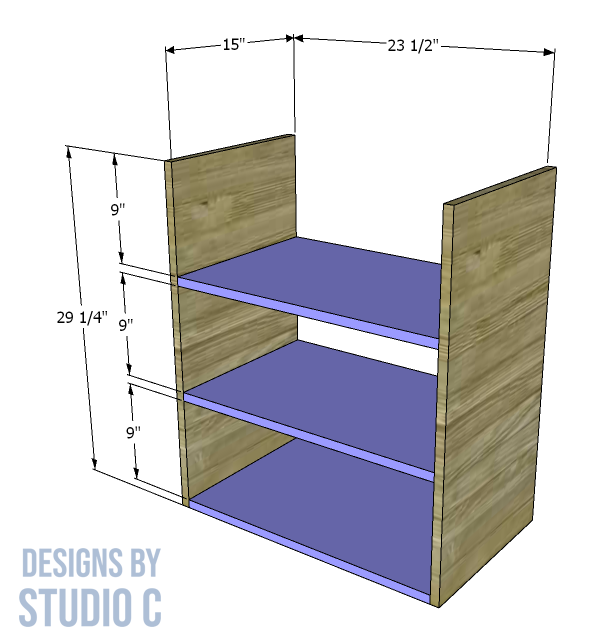
- 2 – 3/4″ plywood at 15″ x 29-1/4″ – Sides
- 3 – 3/4″ plywood at15″ x 23-1/2″ – Shelves
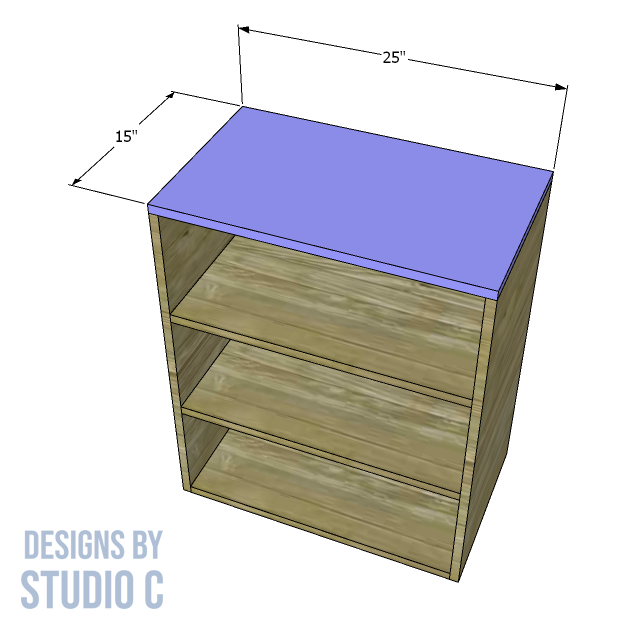
- 1 – 3/4″ plywood at 15″ x 25″ – Top
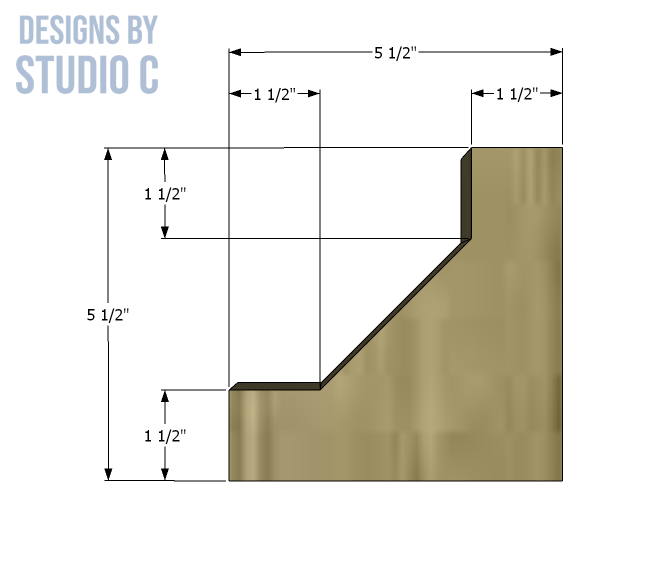
- 4 – 2×6 at 5-1/2″ – Feet
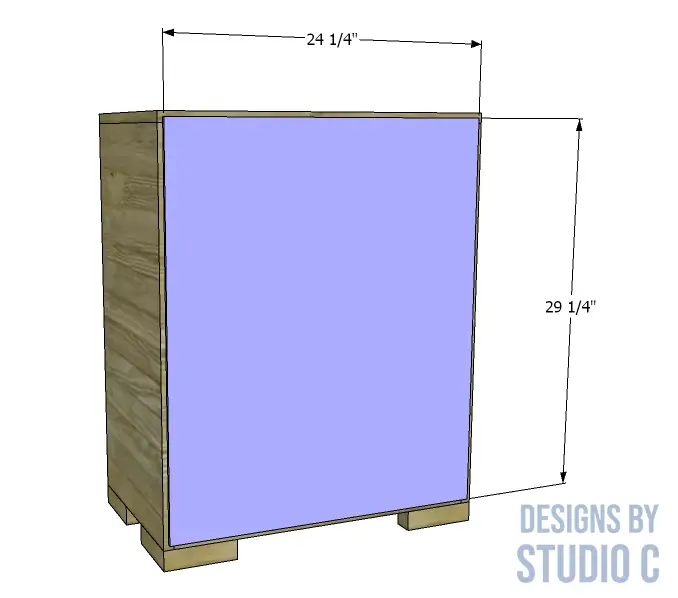
- 1 – 1/4″ plywood at 24-1/4″ x 29-1/4″ – Back
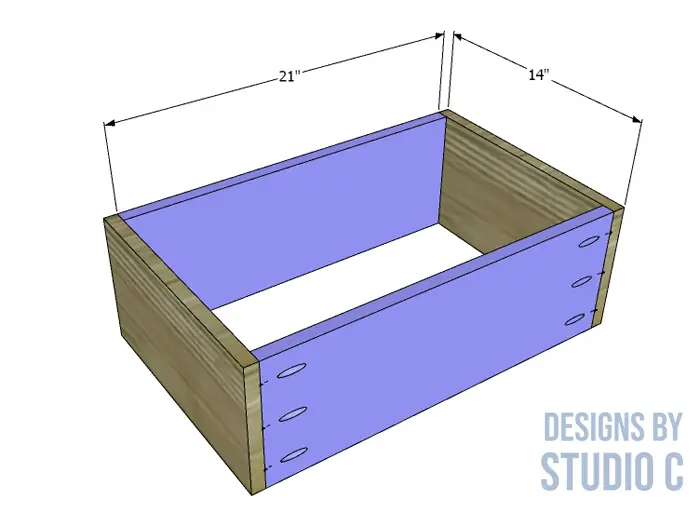
- 6 – 1×8 at 21″ – Drawer Box Front and Back
- 6 – 1×8 at 14″ – Drawer Box Sides
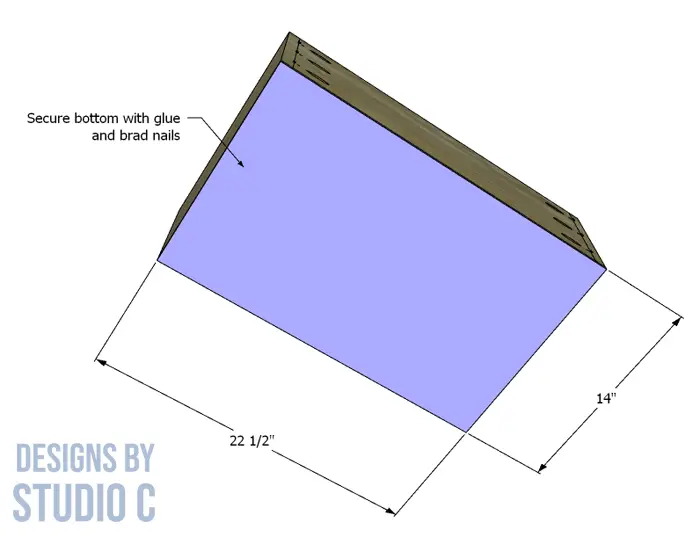
- 3 – 1/4″ plywood at 14″ x 22-1/2″ – Drawer Bottoms
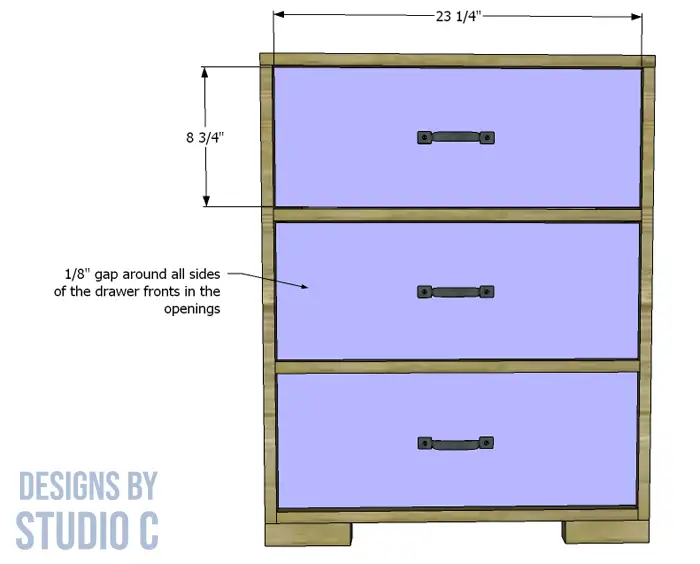
- 3 – 3/4″ plywood at 8-3/4″ x 23-3/4″ – Drawer Fronts
Notes About the Project:
- Apply edge banding to the exposed edges of the plywood prior to assembly
- Sand everything before putting it together
- If building more than one cabinet as a unit, secure them together with 1-1/4″ screws from the inside
Step One
Cut the pieces for the sides and the shelves. With the pocket hole jig set for 3/4″ material, drill pocket holes in each of the shorter ends of the shelves. Secure the shelves to the sides using glue and 1-1/4″pocket hole screws.
Step Two
Cut the piece for the top. Secure the top to the sides using glue and 2″ brad nails.
Step Three
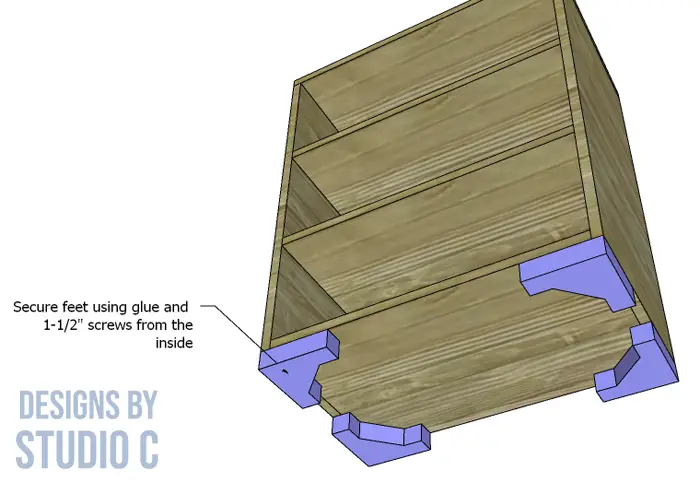
Cut the pieces for the feet to length. Draw cut lines on one face of each foot with a pencil, then cut using a jigsaw or a bandsaw. Secure the feet to the bottom corners, flush with each side, using glue and 1-1/2″ screws from the inside.
Step Four
Cut the piece for the back. Secure the back to the sides, top and shelves using glue and 1-1/4″ brad nails.
Step Five
Cut the pieces for the drawer boxes, and drill pocket holes in each end of the front and back pieces (see the drawing). Assemble the drawer box using glue and 1-1/4″ pocket hole screws.
Step Six
Cut the pieces for the drawer bottoms. Secure the bottoms to the drawer boxes using glue and 1-1/4″ brad nails.
Install the drawer slides according to the manufacturer’s instructions. Check out this quick tutorial on installing drawer slides. Insert the drawer into the opening, and make sure it slides freely. Make any necessary adjustments.
Step Seven
Cut the pieces for the drawer fronts. There will be a 1/8″ gap around all sides of the drawer front in the opening. Mark the position of the drawer hardware and shim the drawer front in the opening. Drive screws through the holes for the handles or knobs into the drawer box. Open the drawer and secure the drawer fronts from the inside using 1-1/4″ screws, then remove the screws on the outside. Finish drilling the holes for the handles or knobs, then install them.
See this post for an easy tutorial on installing drawer fronts!
Finish the cabinet as desired!
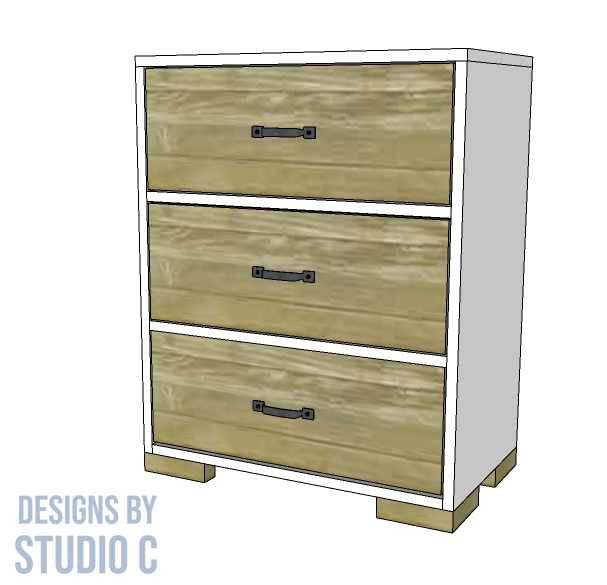
Have questions about the plans to build a Calvin 3 drawer storage cabinet? Leave a comment below!

