An Easy to Build End Table Using Pallets or Reclaimed Wood
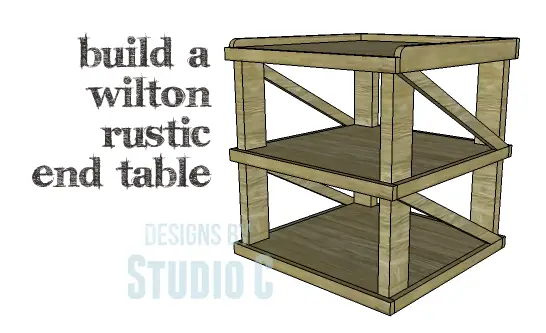
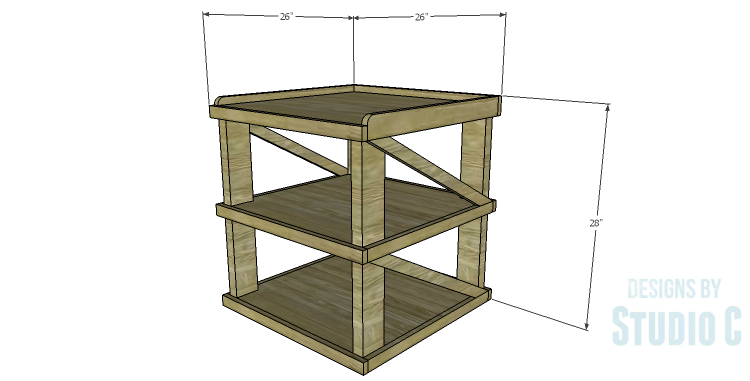
Using pallet boards or reclaimed wood in projects has been popular for some time. Most people, including myself, love the rustic look that old wood provides. The DIY furniture plans to build a Wilton rustic end table can be built using pallet boards, reclaimed wood, or even new wood with an aged finish. The table featured three shelves with angled braces on the sides, mainly for decoration. This is a super-simple plan, perfect for those new to woodworking, that can be completed in a few hours!
Materials:
- 1-1/2″ pocket hole screws (<– affiliate link!)
- 1-1/2″ nails, screws, or brad nails
- Wood glue (<– affiliate link!)
- Sandpaper (100, 150, 220 grits) (<– affiliate link!)
- Finishing supplies (primer & paint, or stain, sealer)
Lumber:
- Pallet boards or reclaimed wood in the following widths: 3/4″ x 1-1/2″, 3/4″ x 2-1/2″, and 1-1/2″ x 3-1/2″, as well as a few wide boards to piece together for the shelves
For new lumber:
- 3 – 1×2 at 6′
- 1 – 1×3 at 6′
- 1 – 2×4 at 6′
- 1 – 4′ x 8′ sheet of 3/4″ plywood (or boards pieced together to create the shelves and top)
Cut List:
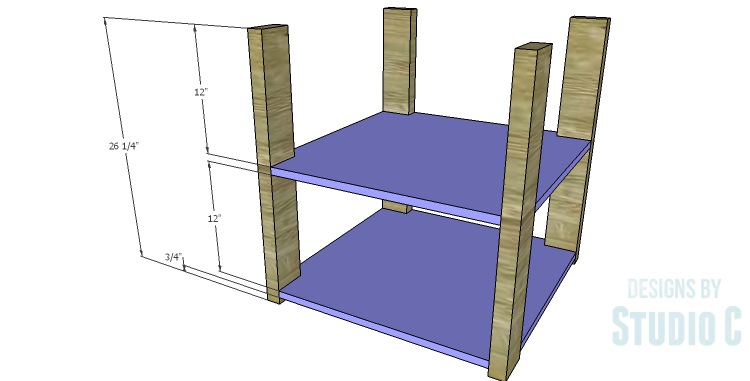
- 2 – 3/4″ plywood at 24-1/2″ x 24-1/2″ – Shelves
- 4 – 2×4 at 26-1/4″ – Legs
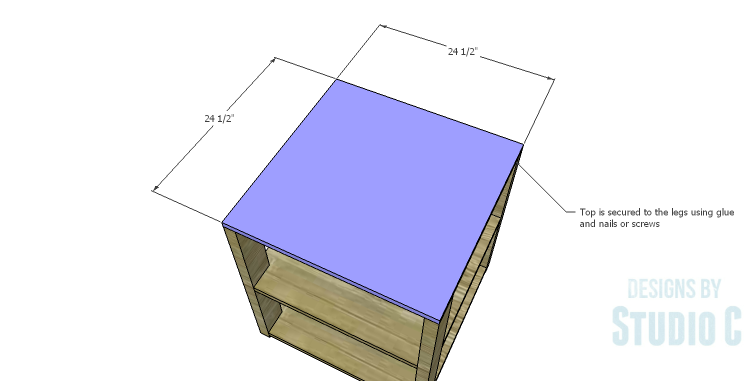
- 1 – 3/4″ plywood at 24-1/2″ x 24-1/2″ – Top
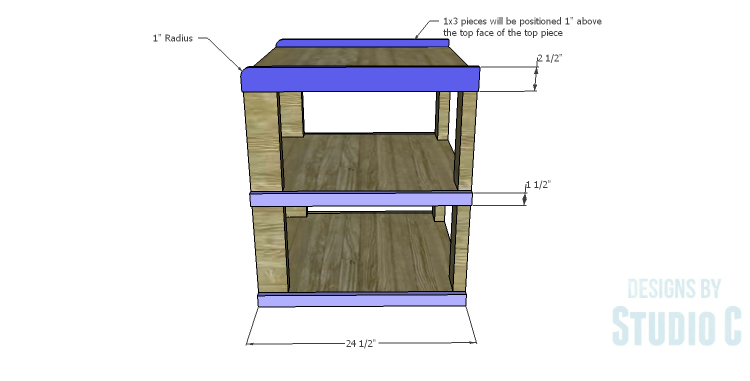
- 4 – 1×2 at 24-1/2″ – Side Trim
- 2 – 1×3 at 24-1/2″ – Side Trim
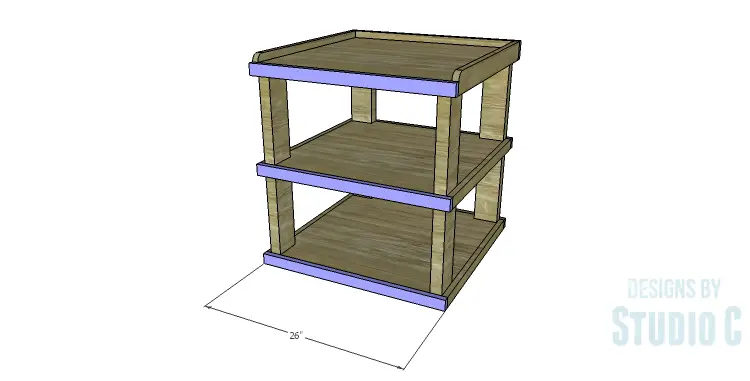
- 5 – 1×2 at 26″ – Front & Rear Trim
- 1 – 1×3 at 26″ – Upper Rear Trim
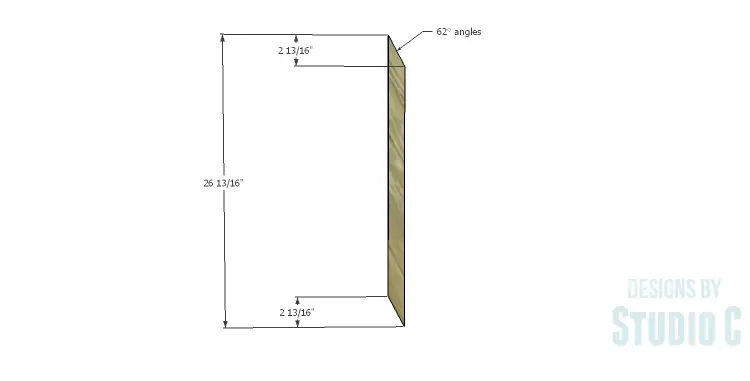
- 4 – 1×2 at 26-13/16″ – Side Bracing
Step One
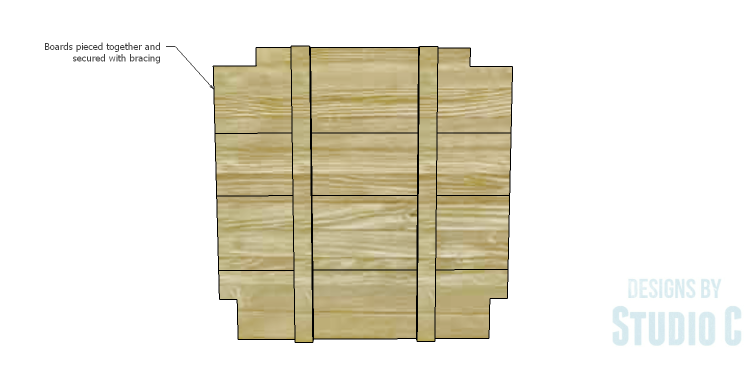
If using pallet boards or reclaimed wood, piece together a few wide boards to create the shelves. They can be pieced together using pocket holes and pocket hole screws, or by laying the panels side by side then placing narrow boards perpendicular to the wide boards and securing in place using glue and nails or screws. Make sure the pocket holes or bracing pieces will not interfere with the notches that will need to be cut for the legs!
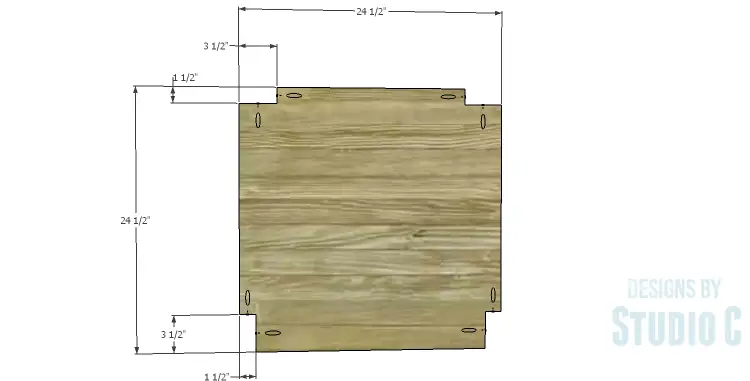
Cut the pieces for the shelves. Cut the notches using a jigsaw or a bandsaw. Using a portable pocket hole jig for 3/4″ material, drill pocket holes in the notches as shown. Secure the shelves to the legs using glue and 1-1/2″ pocket hole screws.
Step Two
Cut the piece for the top. Secure the top to the top of the legs using glue and 1-1/2″ nails, screws, or brad nails.
Step Three
Cut the pieces for the side trim. The 1×3 (2-1/2″ wide pieces) will have a 1″ radius cut at the corner of one end. These pieces will also sit 1″ above the top face of the top creating a lip around the top. The top edge of the 1×2 pieces will sit flush with the top face of the shelves. Secure the trim pieces in place using glue and 1-1/2″ nails, screws, or brad nails.
Step Four
Cut the pieces for the front & back trim. Secure the pieces as shown using glue and 1-1/2″ screws, nails, or brad nails.

Step Five
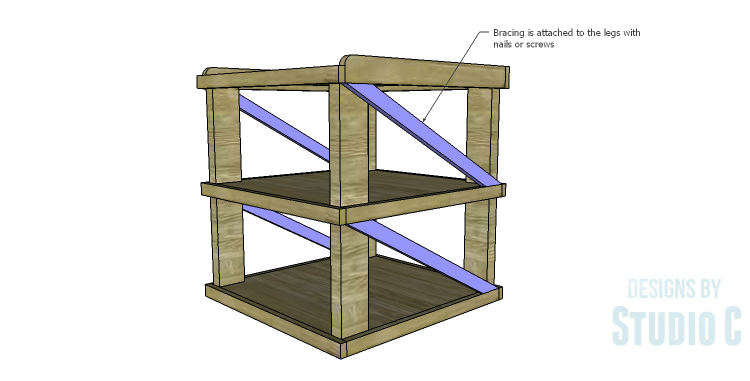
Cut the pieces for the side bracing. The angles in the ends of the boards can be cut by drawing a diagonal line on each end at the dimension indicated, then cut the angles using a jigsaw or a bandsaw. Secure the bracing to the legs as shown using 1-1/2″ nails, screws, or brad nails.
Finish as desired.
Here are a couple of other rustic or reclaimed projects to build:
The DIY furniture plans to build a Wilton rustic end table are really easy and the results will be fabulous regardless of the wood chosen! The table would also make a great nightstand! Have any questions about the plans? Leave a comment below!
Originally posted 2015-01-12 08:00:28.


1 Comment
Pingback: Wilton End Table – Free Woodworking Plan.com