
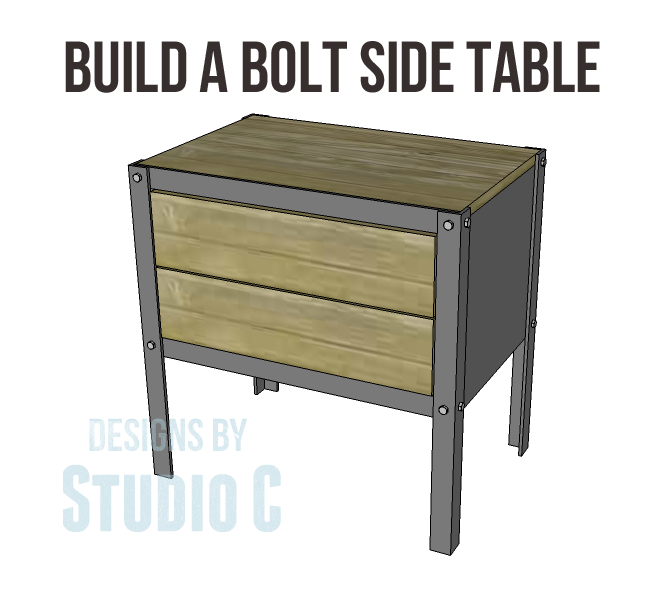
Build a Bolt Side Table
Free Plans to Build a Bolt Side Table
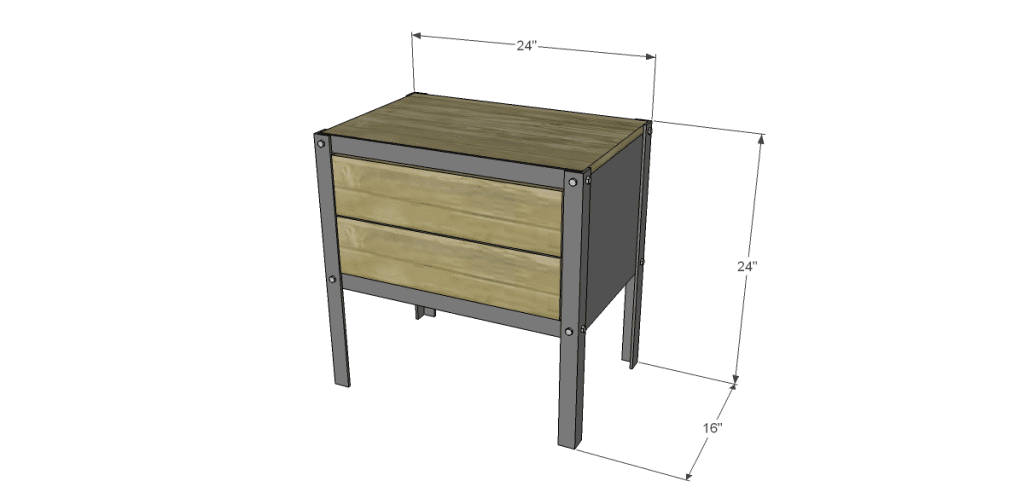
This is one really cool table! The free plans to build a Bolt side table feature metal legs and trim for a really cool industrial look. The sides and back can be painted to match the metal (in whatever color you choose) for a sleek overall look. It will provide much-needed storage and is sure to fit into any decor!
Materials:
- 1-1/4” pocket hole screws
- 1-1/4” brad nails
- ¾” long hex-head screws
- Edge banding, optional
- 8’ of 1-1/2” angle iron (1/8” thick)
- 4’ of 1-1/2” flat bar (1/8” thick)
- 2 sets of 14” drawer slides
- Paint to match the metal
- Finishing supplies
Lumber:
- 1 – 1×2 at 8′
- 1 – 3/4″ square dowel at 3′
- 1 sheet of 3/4″ plywood
Cut List:
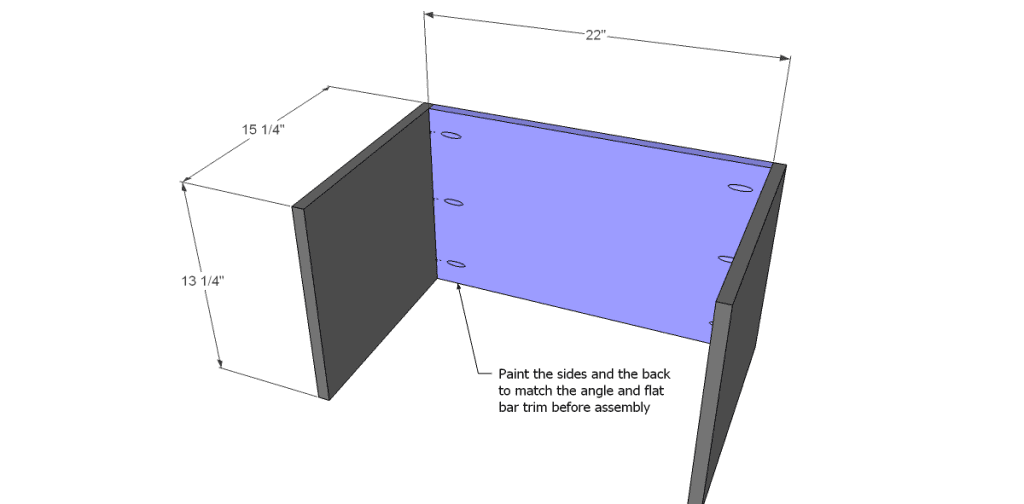
- 1 – ¾”plywood at 13-1/4” x 22” – Back
- 2 – ¾” plywood at 13-1/4” x 15-1/4” – Sides
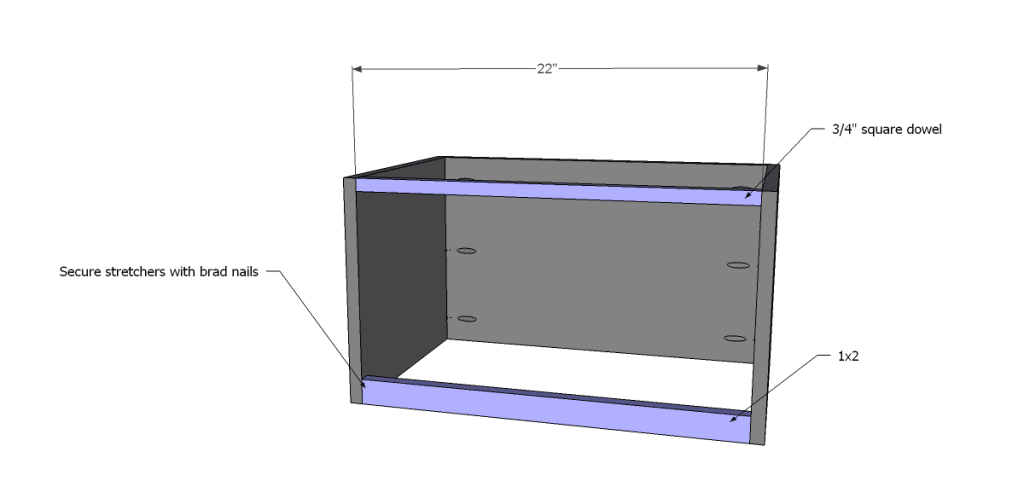
- 1 – ¾” square dowel at 22” – Upper Stretcher
- 1 – 1×2 at 22” – Lower Stretcher
- 1 – ¾” plywood at 15-1/4” x 23-1/2” – Top
- 4 – 1×2 at 14-5/8” – Drawer Spacers
- 2 – 1-1/2” flat bar at 23-1/2” – Trim
- 4 – 1-1/2” angle at 24” – Legs
- 2 – ¾” plywood at 12-1/2” x 18-1/2” – Drawer Bottom
- 4 – ¾” plywood at 5-5/16” x 12-1/2” – Drawer Sides
- 2 – ¾” plywood at 5-5/16” x 20” – Drawer Backs
- 2 – ¾” plywood at 5-5/16” x 20-3/4” – Drawer Fronts
Click on the drawings for a larger view!
Step One
Cut the pieces for the sides and back. Drill pocket holes in the back as shown. Secure to the sides using glue and 1-1/4” pocket hole screws. Paint the sides and back to match the metal before continuing with the assembly.
Step Two
Cut the pieces for the stretchers. Secure to the box using glue and 1-1/4” brad nails. The brad nails won’t interfere with the hex-head screws when the legs are installed.
 Step Three
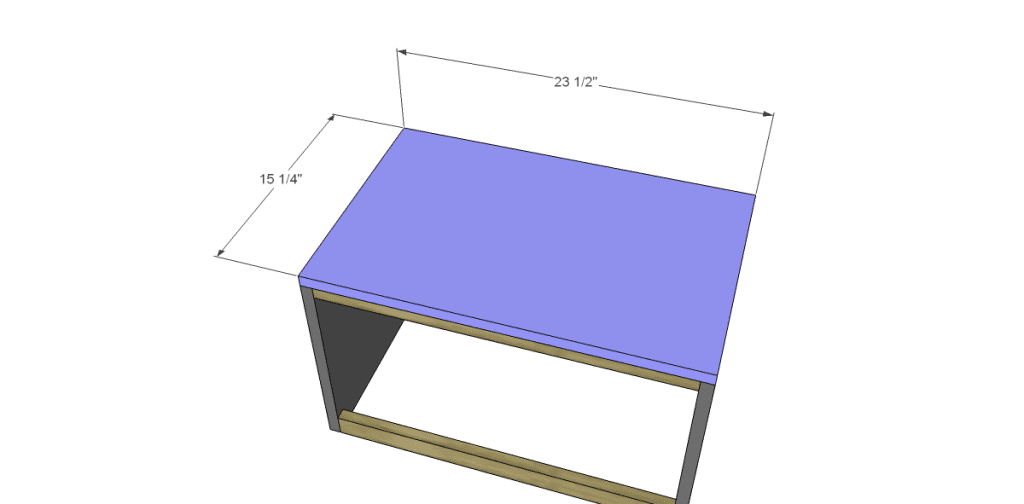
Cut the piece for the top. Position as shown then secure using glue and 1-1/4” brad nails.
 Step Four
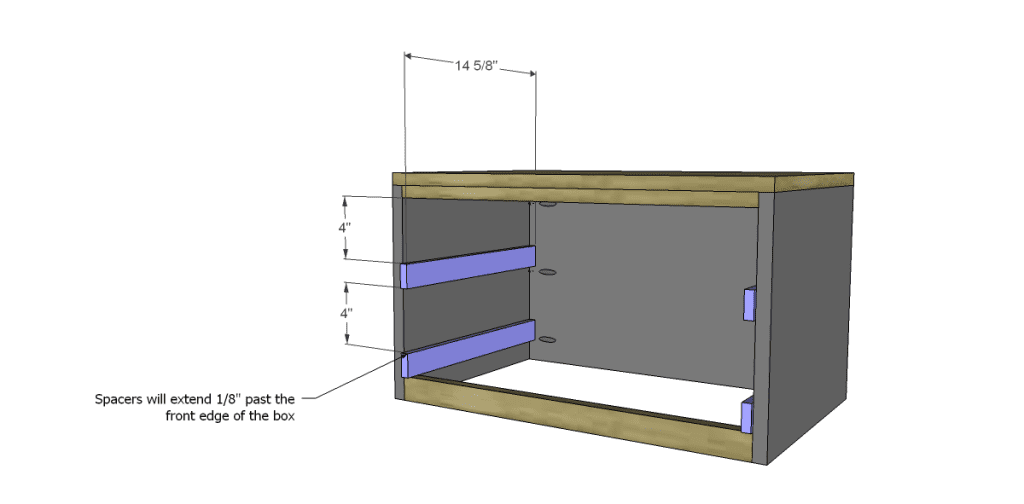
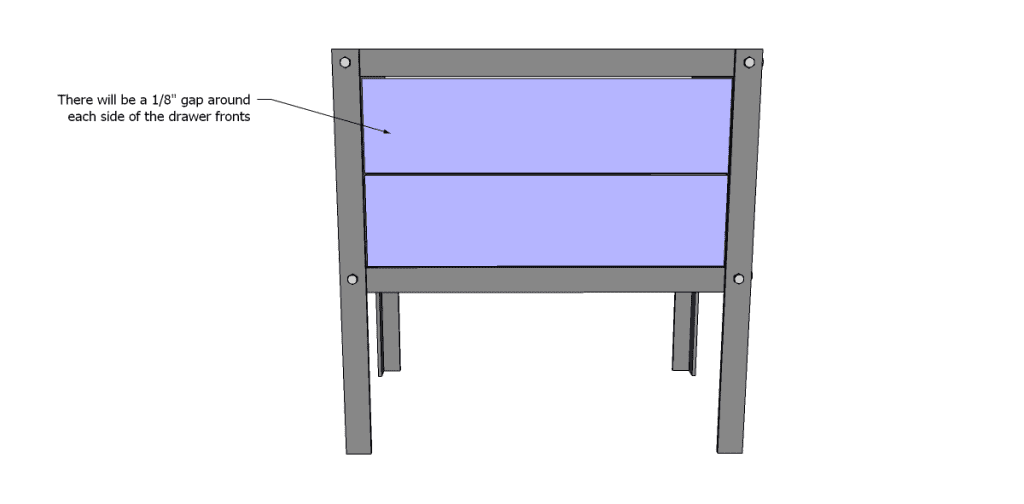
Cut the pieces for the drawer spacers. The spacers will extend past the front edge of the box by 1/8” (the thickness of the metal angle). Secure to the box using glue and 1-1/4” brad nails.
 Step Five
Cut the pieces for the trim. Secure to the stretchers with a bit of Liquid Nails. They will be fully secured by the hex-head screws when the legs are installed.
 Step Six
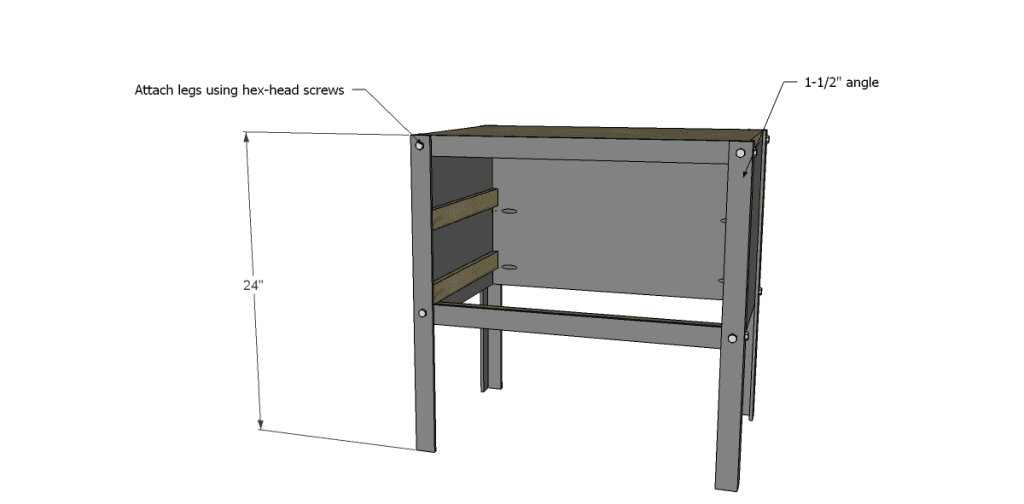
Cut the pieces for the legs. Position at the corners of the box and pre-drill holes at the top and bottom of the box. Secure with the hex-head screws.
 Step Seven
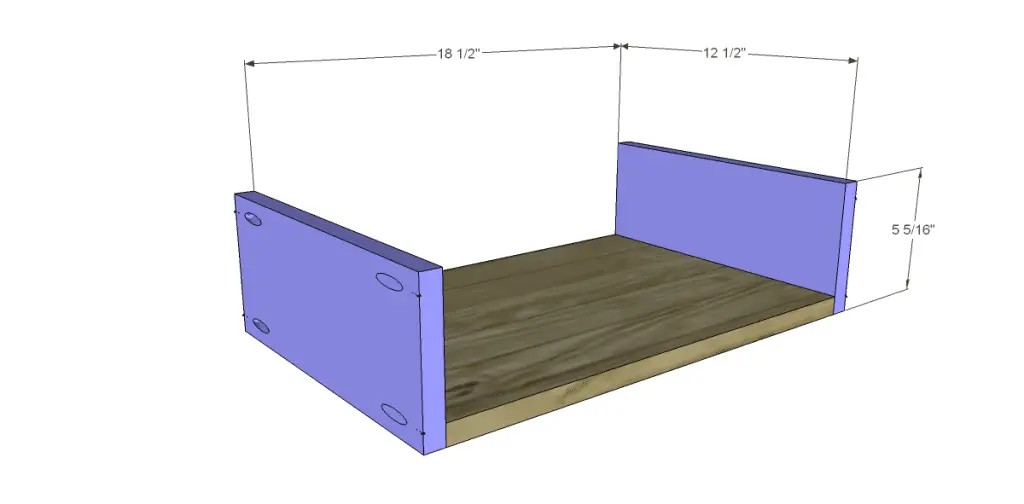
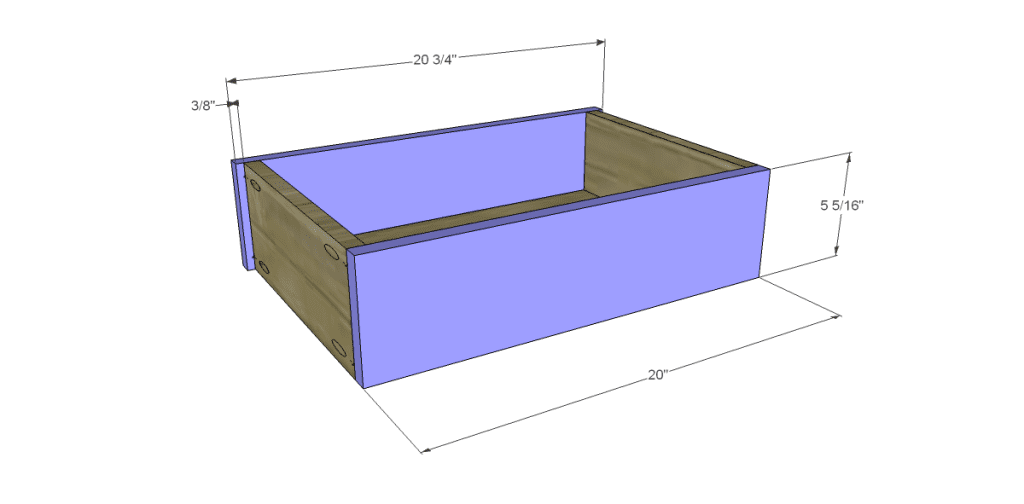
Cut the pieces for the drawers. Drill pocket holes in each end of the side pieces as well as all four edges of the bottom. Assemble as shown using glue and 1-1/4″ pocket hole screws. The fronts will overlap the drawer box by 3/8″ on each side.
Install the drawer slides according to the manufacturer’s instructions. See my post on how to install drawer slides for an easy tutorial! Make any necessary adjustments.
 Finish as desired!
Have questions about the free plans to build a Bolt side table? Leave a comment below!
Originally posted 2013-07-01 08:00:30.
[…] this side table which features metal legs and trim for a great industrial […]