Build a Beautiful Piece for the Indoors or Outdoors
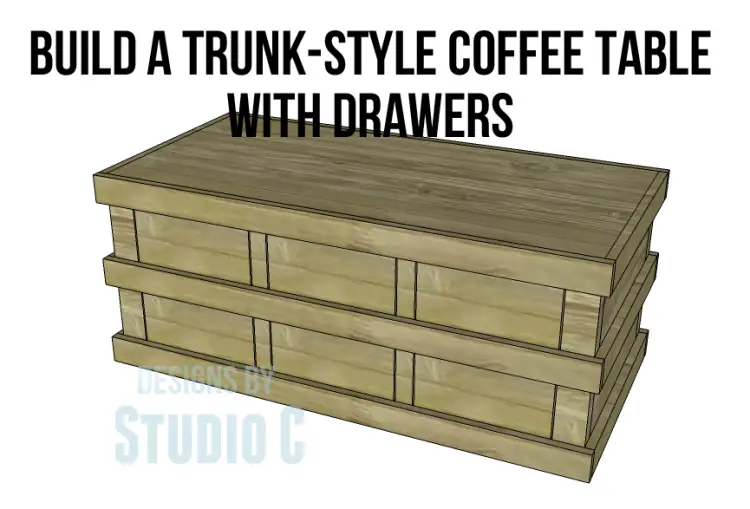
I could really use these coffee table plans with drawers. I have a lot of clutter I’d like to hide – magazines, knitting projects, snack stash, etc. and this would be the perfect furniture piece just for that! This table features six roomy drawers and will look fabulous with any finish!
Materials:
- 1-1/4” pocket hole screws (<– affiliate links!)
- 1-1/4” brad nails
- Edge banding, optional (<– affiliate links!)
- Cabinet pulls
- Wood glue
- Sandpaper (100, 150, 220 grits)
- Finishing supplies (primer & paint, or stain, sealer)
- Paste Wax
Lumber:
- 2 – 1×2 at 8′
- 4 – 1×3 at 8′
- 4 – 1×6 at 8′
- 1 – 2×3 at 8′
- 2 sheets of 3/4″ plywood (PureBond would be a great choice!)
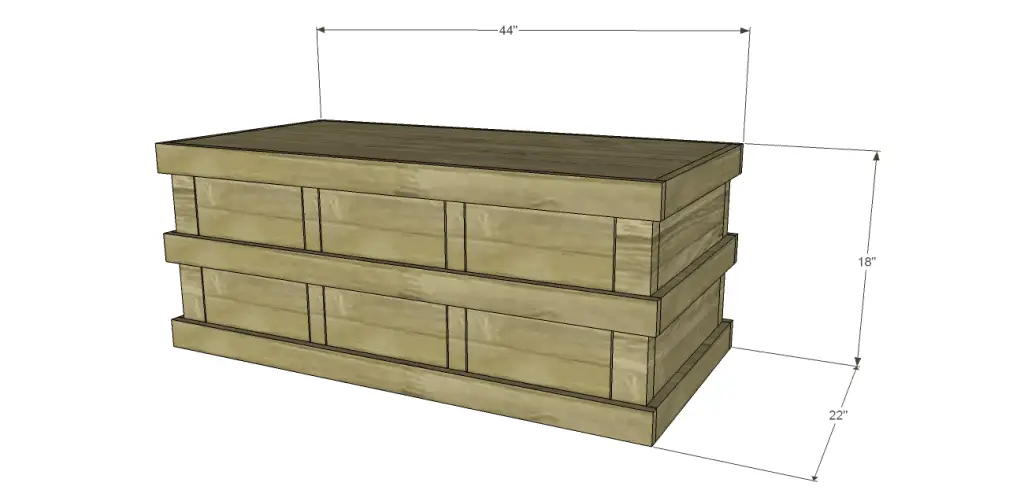
Cut List:
- 4 – 2×3 at 17-1/4″ – Legs
- 2 – 3/4″ plywood at 17-1/4″ x 17-1/2″ – Sides
- 1 – 3/4″ plywood at 17-1/4″ x 37-1/2″ – Back
- 3 – 1×3 (ripped to 1-3/4″ wide) at 37-1/2″ – Stretchers
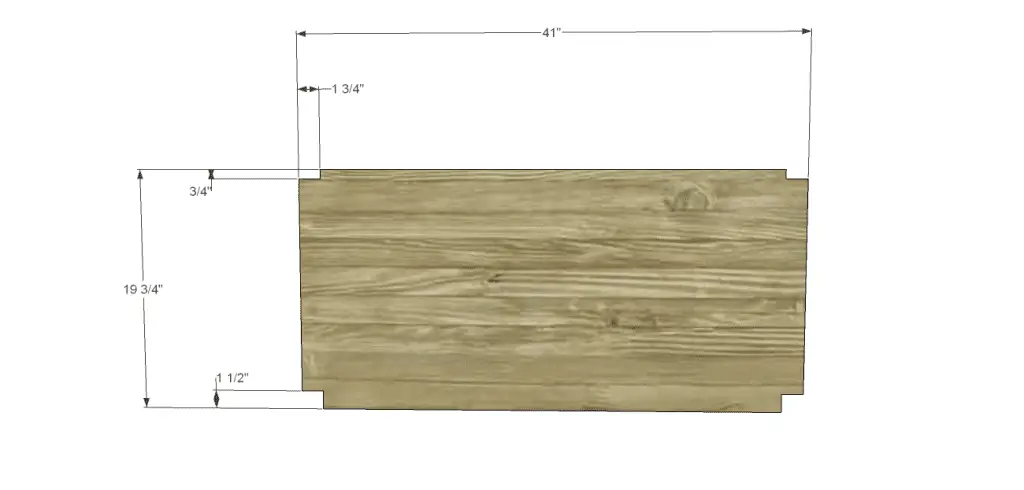
- 2 – 3/4″ plywood at 19-3/4″ x 41″ – Shelves
- 4 – 1×2 at 5-1/4″ – Upper & Lower Dividers
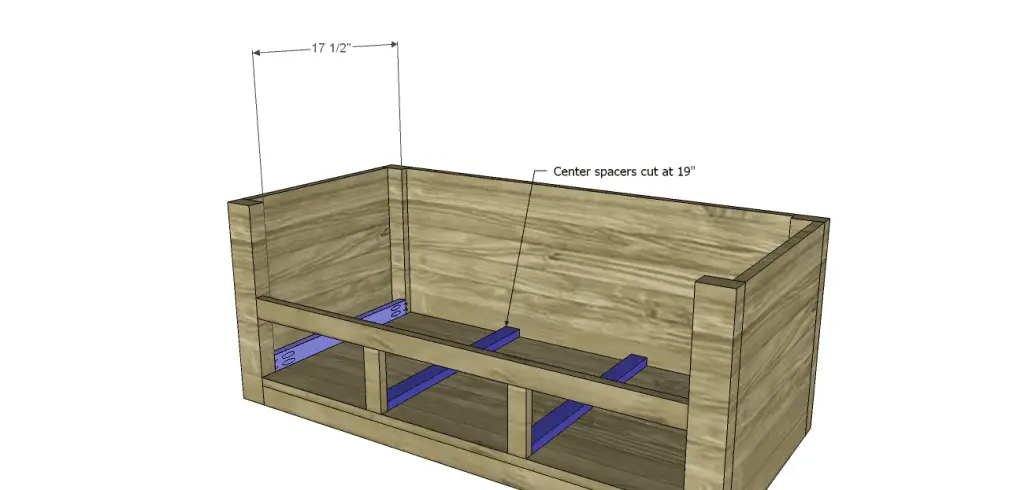
- 4 – 1×2 at 17-1/2″ – Drawer Spacers
- 4 – 1×2 at 19″ – Drawer Spacers
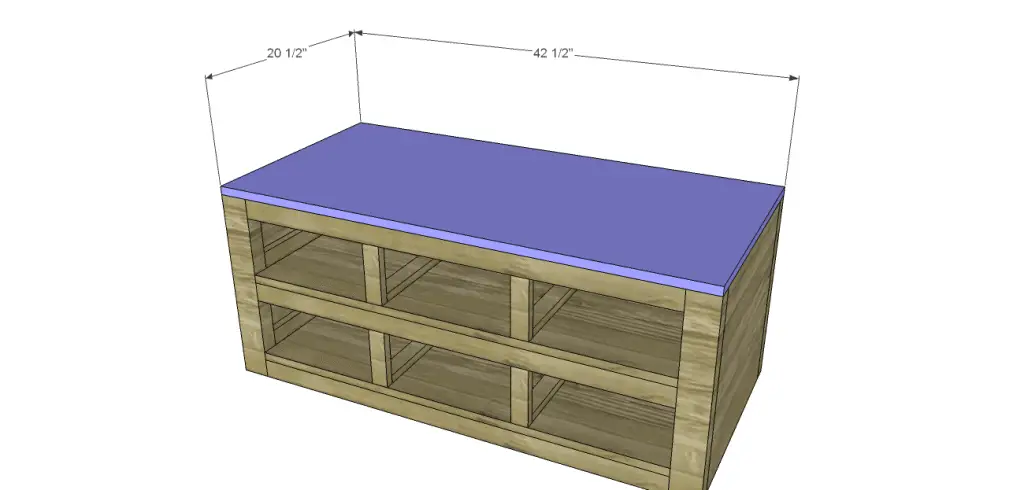
- 1 – 3/4″ plywood at 20-1/2″ x 42-1/2″ – Top
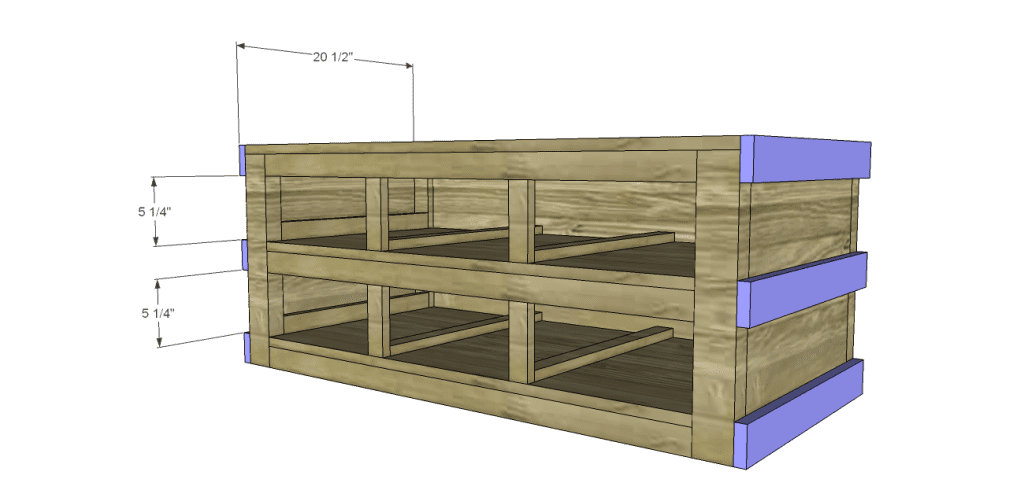
- 6 – 1×3 at 20-1/2″ – Side Trim
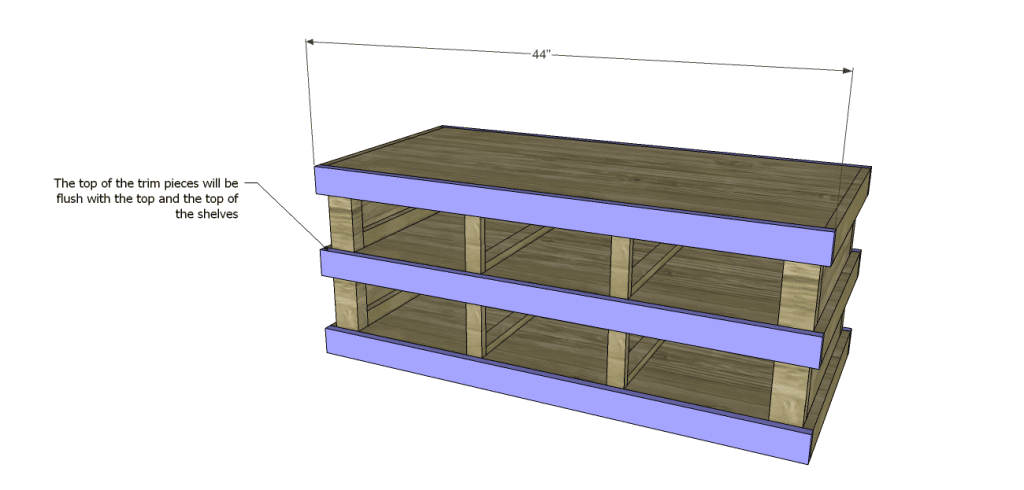
- 6 – 1×3 at 44″ – Front & Back Trim
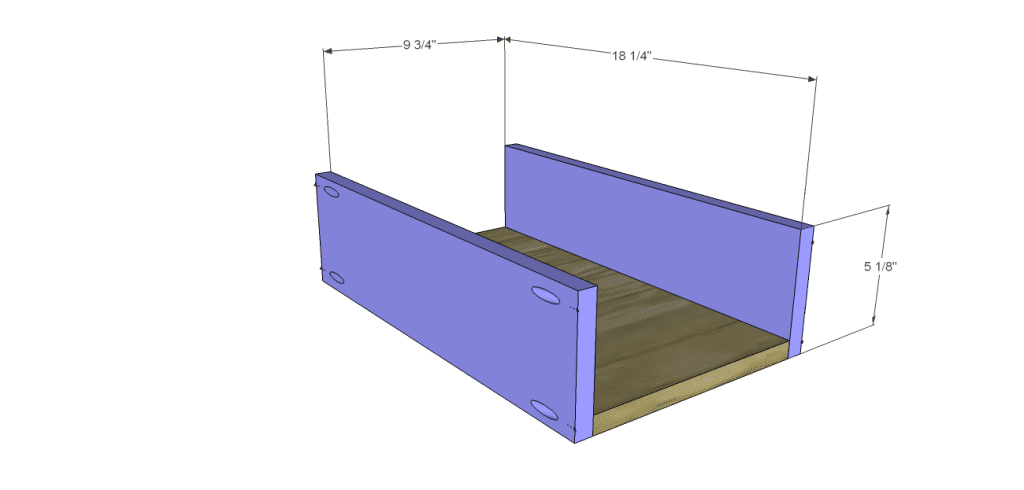
- 6 – 3/4″ plywood at 9-3/4″ x 18-1/4″ – Drawer Box Bottoms
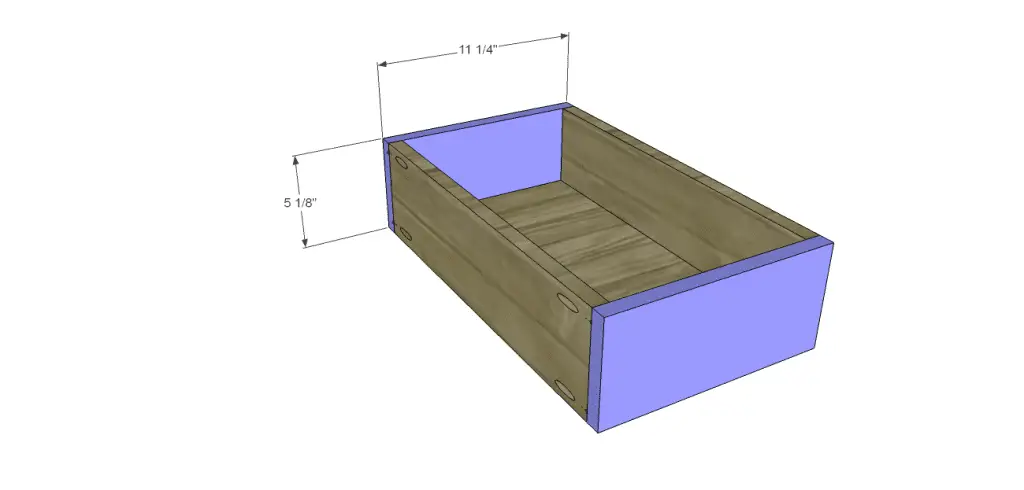
- 12 – 1×6 (ripped to 5-1/8″ wide) at 18-1/4″ – Drawer Box Sides
- 12 – 1×6 (ripped to 5-1/8″ wide) at 11-1/4″ – Drawer Box Front & Back
Notes:
Edge banding will be applied to the exposed edges of the plywood before assembly.
Step One
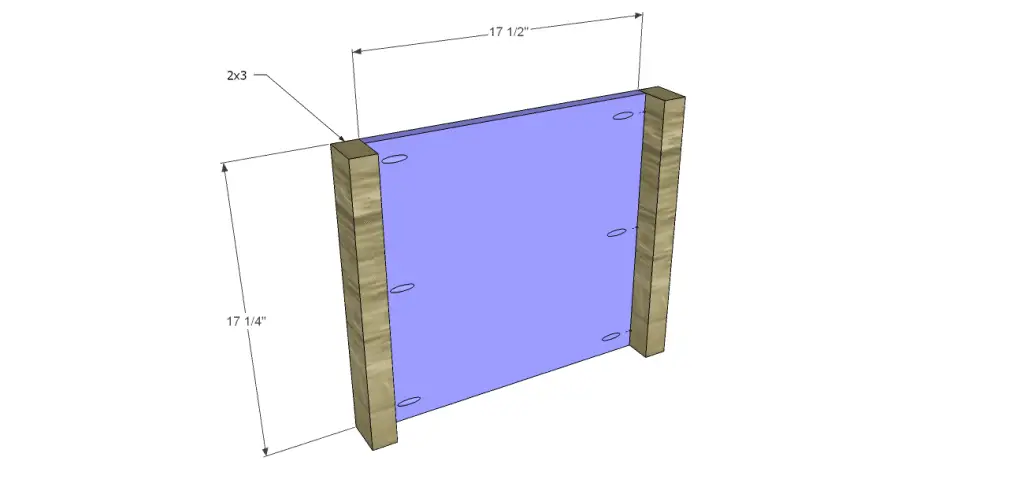
Cut the pieces for the legs and the side panels. With the pocket hole jig set for 3/4″ material, drill pocket holes in each end. Secure to the legs using glue and 1-1/4″ pocket hole screws. The outside face of the panel will be flush with the side face of the legs.
Step Two
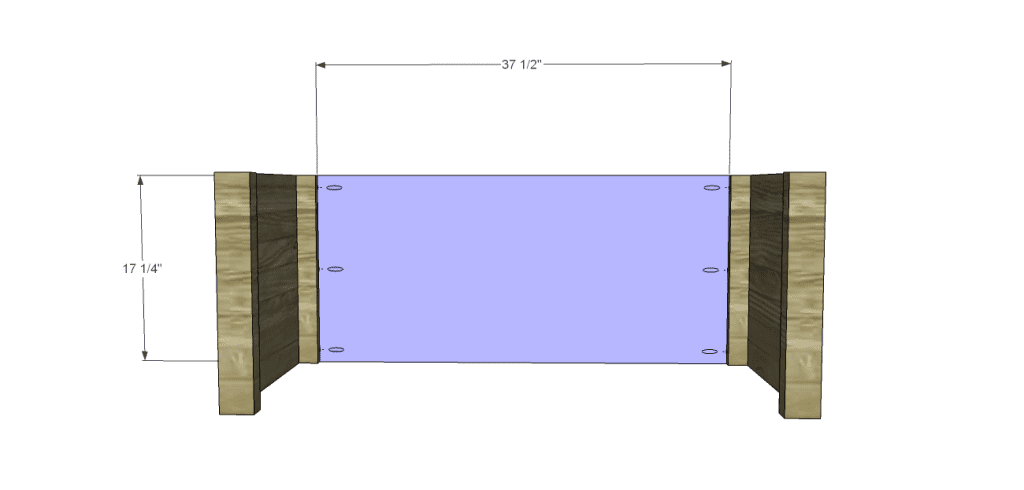
Cut the piece for the back and drill pocket holes in each end. Secure to the legs using glue and 1-1/4″ pocket hole screws. The outside face of the panel will be flush with the side face of the legs.
Step Three
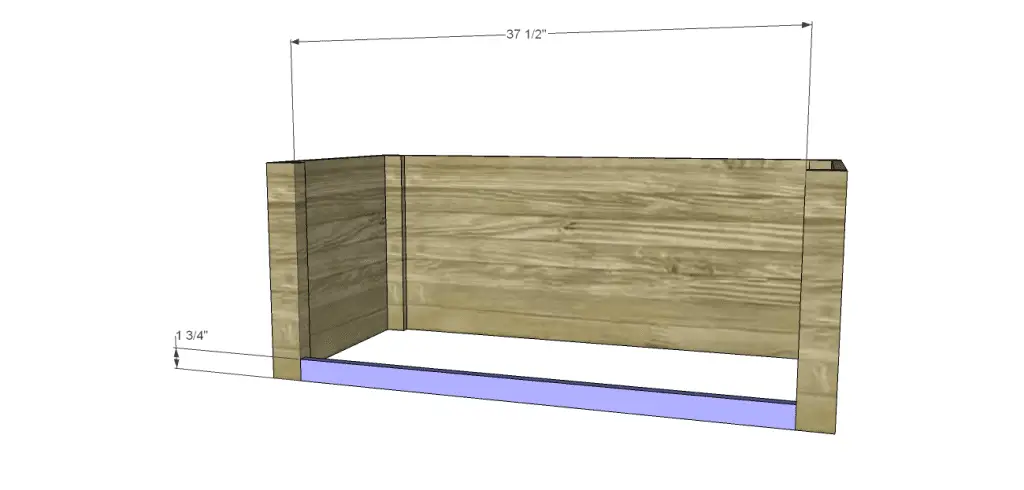
Cut the piece for the lowest stretcher and drill pocket holes at each end. Secure to the legs using glue and 1-1/4″ pocket hole screws.
Step Four
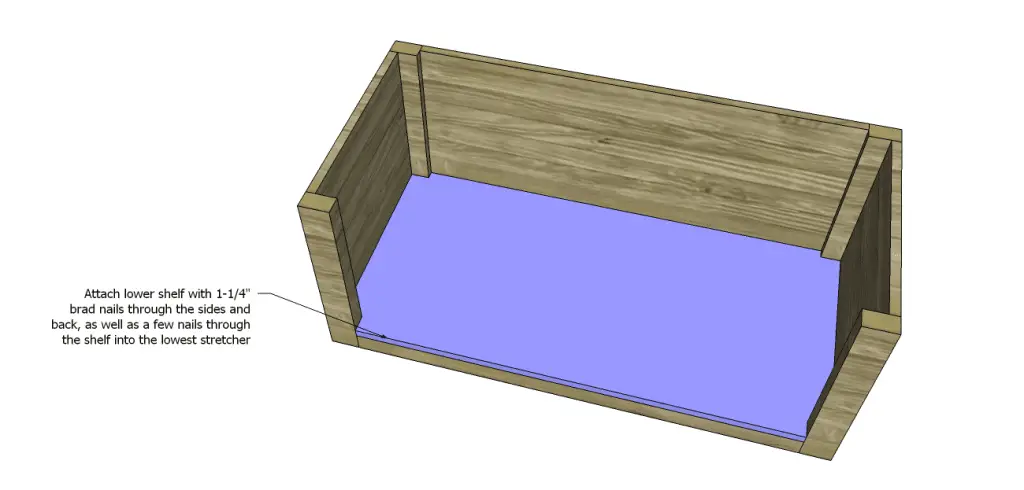
Cut the piece for the lower shelf and cut the notches with a jigsaw. Position as shown, then secure using glue and 1-1/4″ brad nails through the side panels and back panel into the shelf. Place a few nails through the front of the shelf into the stretcher.
Step Five
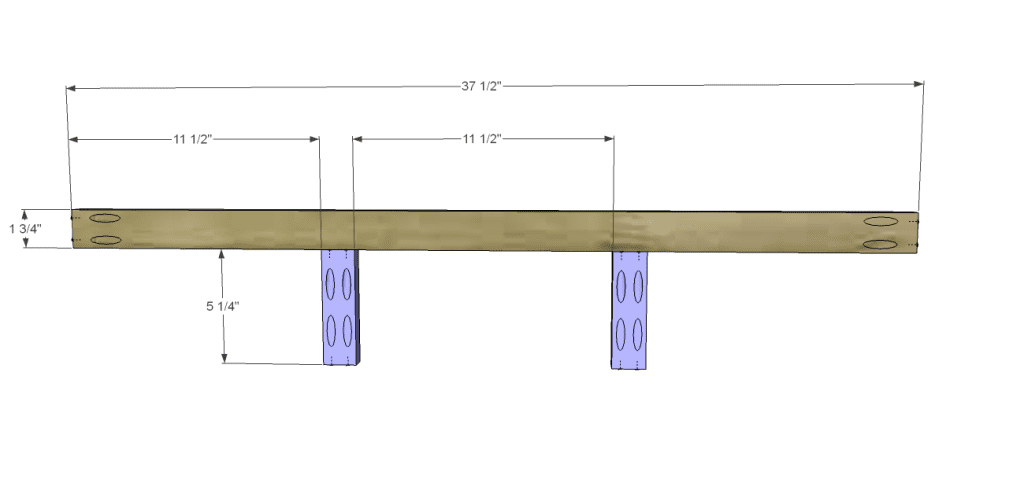
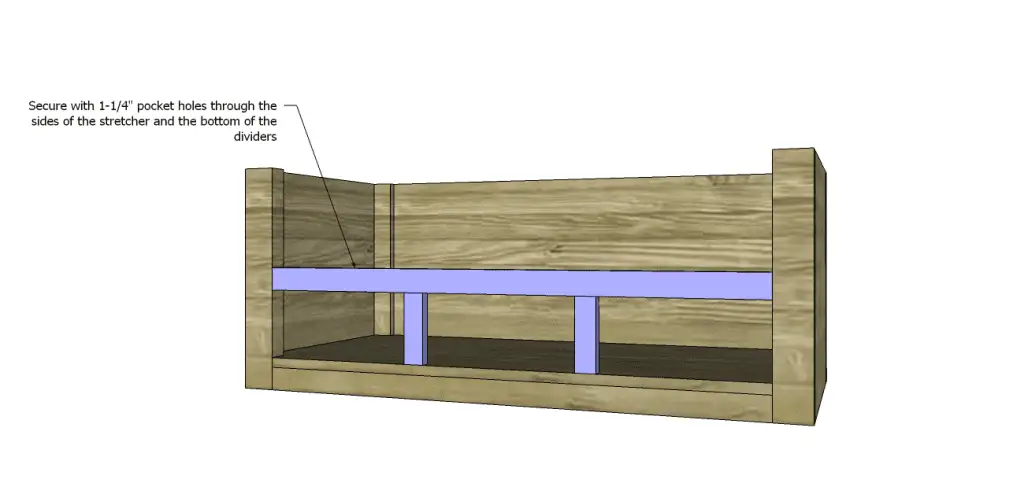
Cut the pieces for the lower stretcher and dividers. Drill pocket holes in each end of each piece, then assemble as shown using glue and 1-1/4″ pocket hole screws. Position the assembly as shown, then secure using glue and 1-1/4″ pocket hole screws.
Step Six
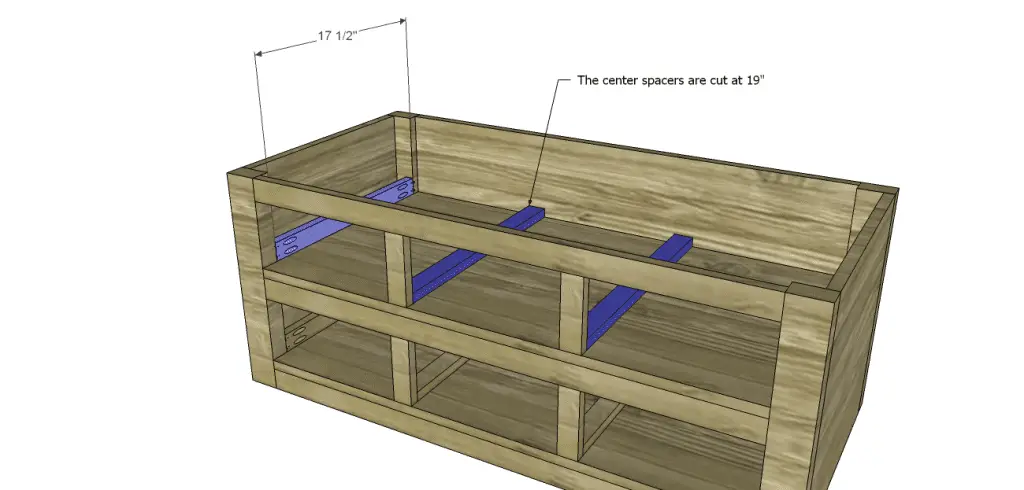
Cut the pieces for the lower spacers. Drill pocket holes in each end of the 17-1/2″ dividers then secure to the legs using glue and 1-1/4″ pocket hole screws. Secure the center dividers with glue and 1-1/4″ brad nails.
Step Seven
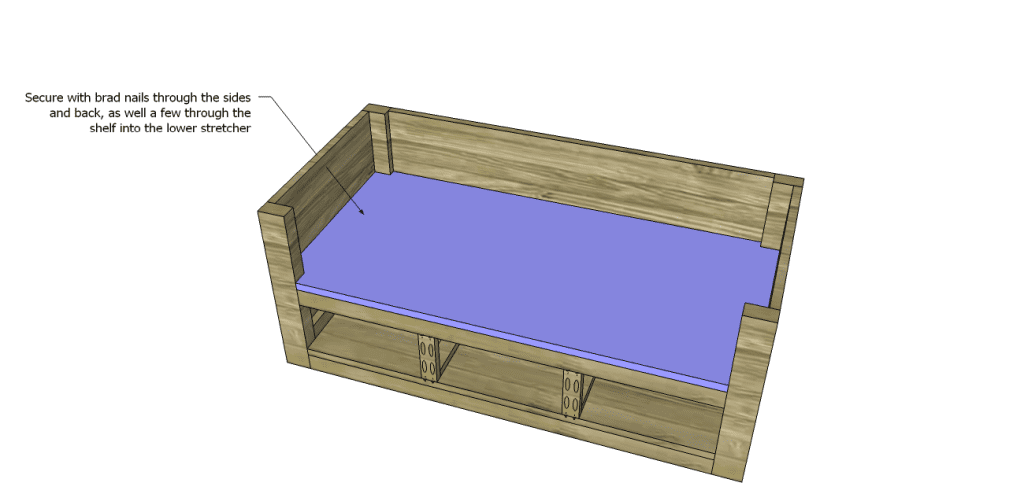
Cut the piece for the upper shelf and cut the notches with a jigsaw. Position as shown, then secure using glue and 1-1/4″ brad nails through the side panels and back panel into the shelf. Place a few nails through the front of the shelf into the stretcher.

Step Eight
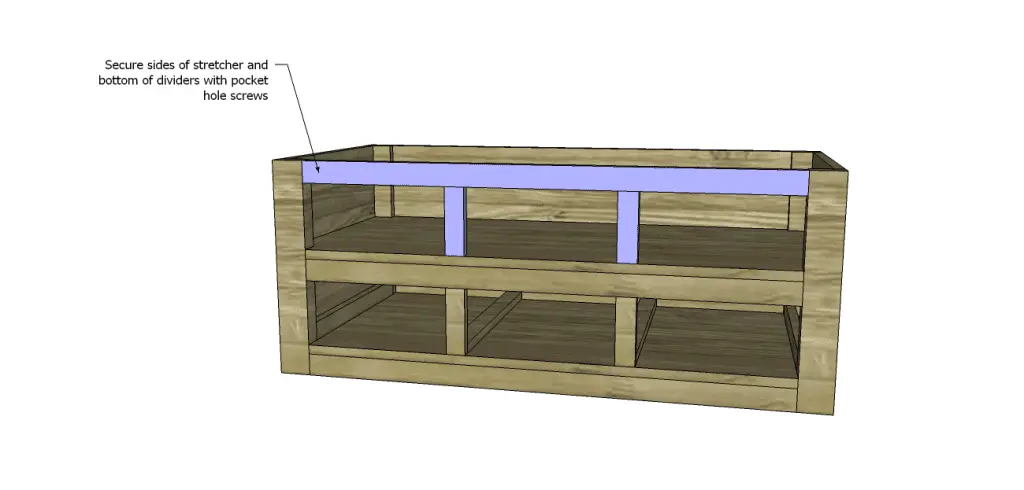
Cut the pieces for the upper stretcher and dividers. Drill pocket holes in each end of each piece, then assemble as shown using glue and 1-1/4″ pocket hole screws. Position the assembly as shown, then secure using glue and 1-1/4″ pocket hole screws.

Step Nine
Cut the pieces for the upper spacers. Drill pocket holes in each end of the 17-1/2″ dividers then secure to the legs using glue and 1-1/4″ pocket hole screws. Secure the center dividers with glue and 1-1/4″ brad nails.
Step Ten
Cut the piece for the top. Secure to the cabinet using glue and 1-1/4″ brad nails through the top into the legs, sides, back, and upper stretcher.
Step Eleven
Cut the pieces for the trim. Secure the side pieces first using glue and 1-1/4″ brad nails. Secure the front and back in the same manner. The top of the center and lower trim will be flush with the top of the shelves.
Step Twelve
Cut the pieces for the drawer boxes. Drill pocket holes in all four edges of the bottom as well as each end of the side pieces. Assemble the drawers as shown using glue and 1-1/4″ pocket hole screws.
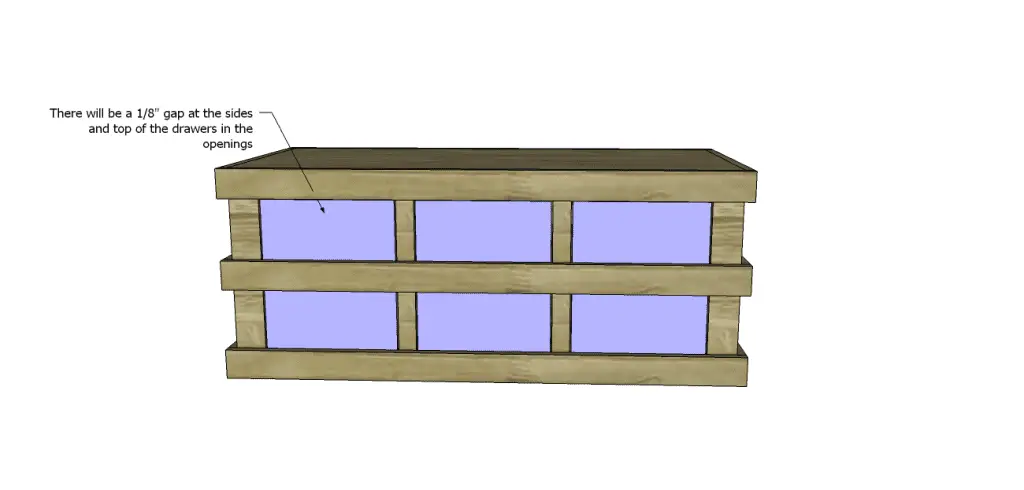
Finish as desired! Apply a coat of paste wax to the bottom of each drawer to help them slide smoothly in the openings.
These coffee table plans with drawers paired with your awesome building skills will produce a fabulous piece of furniture suitable for any decor! Need help? Leave a comment below!
Originally posted 2013-11-04 08:00:30.


7 Comments
It is never too late to start! If you ever want to try, let me know!! I’d be happy to walk you through it!
I wish I could spend the rest of my life playing with DIY woodwork! This sounds like so much fun! Sigh. I love tinkering with stuff.
I do, too, and I swear it gets me into tons of trouble!!
Pingback: Trunk Style Coffee Table – Free Woodworking Plan.com
Instead of scrolling, can you also post downloading plans?
In the past, I had a plugin to create a PDF or printable plans but it interfered with the site. There are dozens of websites that can convert, for free, a webpage to a PDF. A quick search on the internet should do the trick. Hope this helps!
Pingback: Build the Dante Reclaimed Wood Coffee Table | Designs by Studio C