Build a Beautiful Chest – Free Woodworking Plans
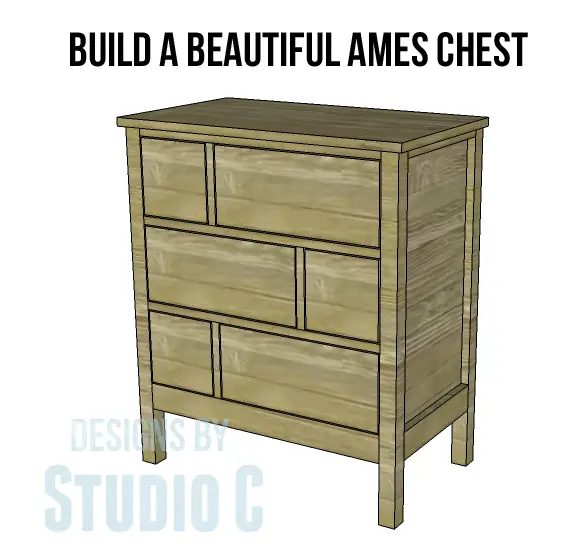
This is such a nice chest and if my home wasn’t already bursting at the seams from furniture overload, I would definitely build it! I love these plans to build the Ames Chest – especially the different size drawers and the way they are staggered. It would be such a nice compliment to any décor!
Materials:
- 1-1/4” pocket hole screws
- 2″ pocket hole screws
- 1-1/4” brad nails
- Edge banding for the plywood, optional
- Six sets of 12” drawer slides
- Six drawer knobs or handles
- Wood glue
- Sandpaper (100, 150, 220 grits)
- Finishing supplies (primer & paint, or stain, sealer)
Lumber:
- Two – 2×2 at 6’
- One – 2×3 at 6’
- Two – 1×2 at 6’
- Three – 1×6 at 8’
- One sheet of ¾” plywood
Cut List:
- Four – 2×2 at 31-1/4” – Legs
- Two – 1×2 at 13-1/2” – Side Frames
- Two – 2×3 at 13-1/2” – Side Frames
- Two – ¾” plywood at 12-1/2” x 22-1/2” – Side Panels
- Four – 1×2 at 23-1/2” – Back Frame & Front Stretchers
- Two – 2×3 at 23-1/2” – Back Frame & Front Stretcher
- One – 3/4” plywood at 22-1/2” x 23-1/2” – Back Panel
- Three – ¾” plywood at 7” x 14” – Dividers
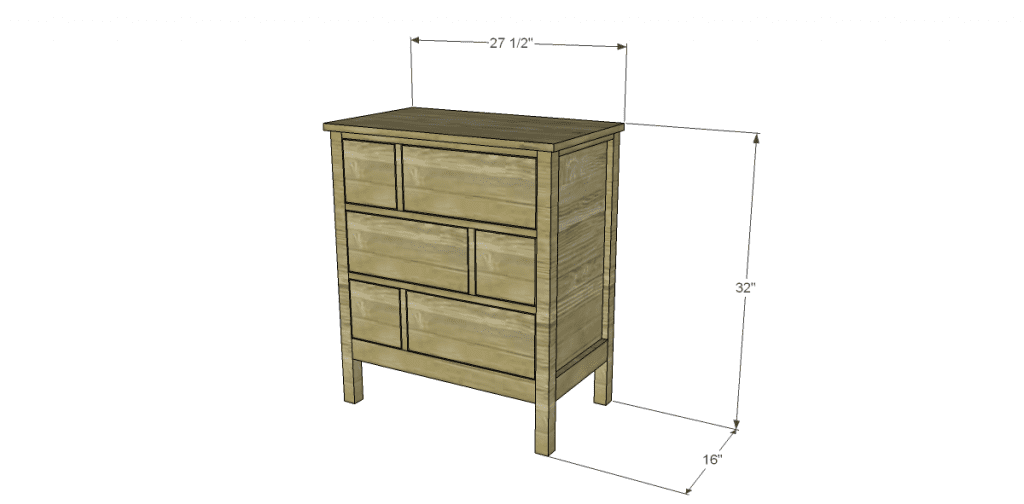
- One – ¾” plywood at 16” x 27-1/2” – Top
- Six – 1×6 at 6” – Small Drawer Boxes
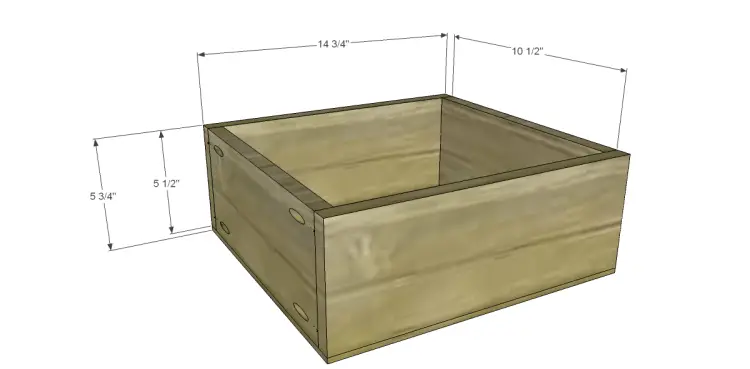
- Six – 1×6 at 14-3/4” – Large Drawer Boxes
- Twelve – 1×6 at 10-1/2” – Drawer Boxes
- Three – 1/4″ plywood at 6″ x 12″ – Small Drawer Bottoms
- Three – 1/4″ plywood at 12″ x 14-3/4″ – Large Drawer Bottoms
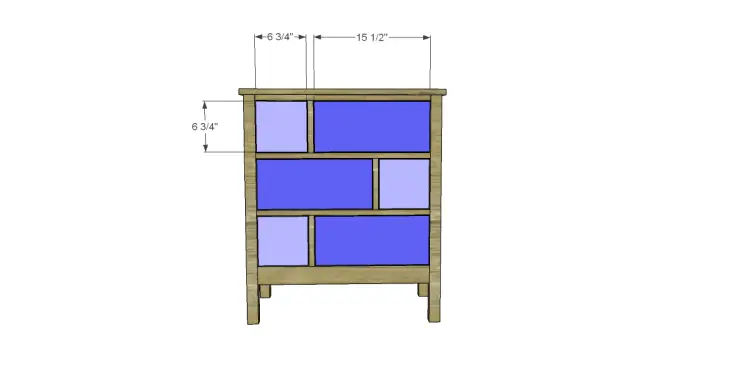
- Three – ¾” plywood at 6-3/4” x 6-3/4” – Small Drawer Fronts
- Three – ¾” plywood at 6-3/4” x 15-1/2” – Large Drawer Fronts
Notes About the Project:
Edge banding will be applied to the exposed edges of the plywood before assembly.
Step One
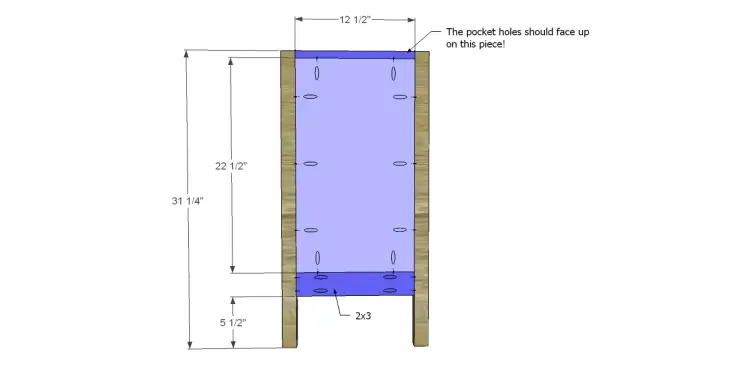
Cut the pieces for the legs, side frames, and side panels. Drill pocket holes around the side panels as shown as well as in each end of the frame pieces. Attach the panels to the frame pieces using glue and 1-1/4″ pocket hole screws. The back face of the panel should be flush with the back of the frame pieces.
Attach the panel and frame assembly to the legs using glue and pocket hole screws. Use 1-1/4″ pocket hole screws through the panels and upper frame pieces, and 2″ pocket hole screws through the lower frame piece.
Step Two
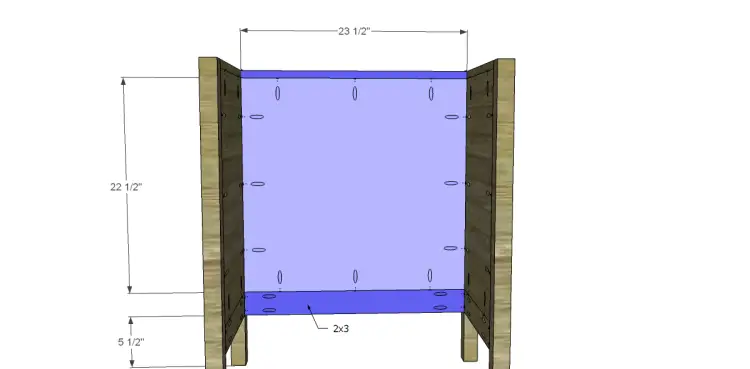
Cut the pieces for the back and back frame pieces. Assemble in the same manner as the side panels, using the proper screws in the corresponding pieces.
Step Three
Cut the pieces for the front stretchers. Drill pocket holes in each end of each piece. Attach the top 1×2 with the pocket holes facing up and the remaining 1×2 pieces with the pocket holes facing down. The 2×3 piece will have the pocket holes facing to the inside. Use glue and 1-1/4″ pocket hole screws in the 1×2 pieces, and 2″ pocket hole screws in the 2×3 piece.
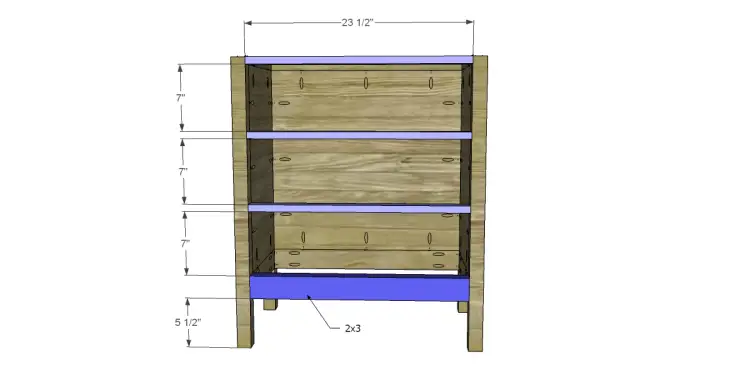
Step Four
Cut the pieces for the drawer dividers. Drill the pocket holes as shown. Attach to the front stretchers and the cabinet back at the spacing indicated using glue and 1-1/4″ pocket hole screws.
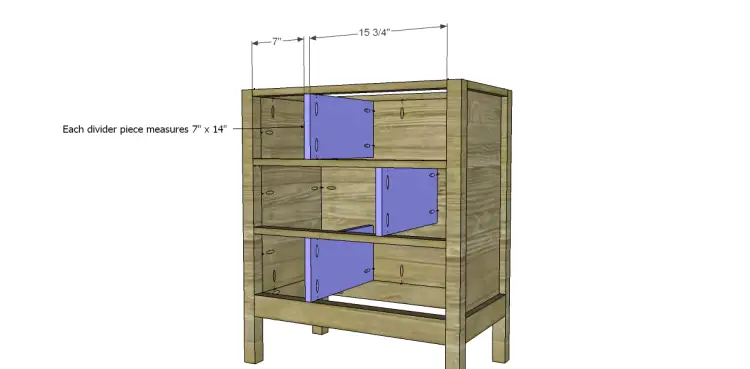
Step Five
Cut the piece for the top. Attach to the cabinet using glue and 1-1/4″ brad nails through the top into the sides, back, legs, and upper stretcher. The top will overhang the front and sides by 1/2″.
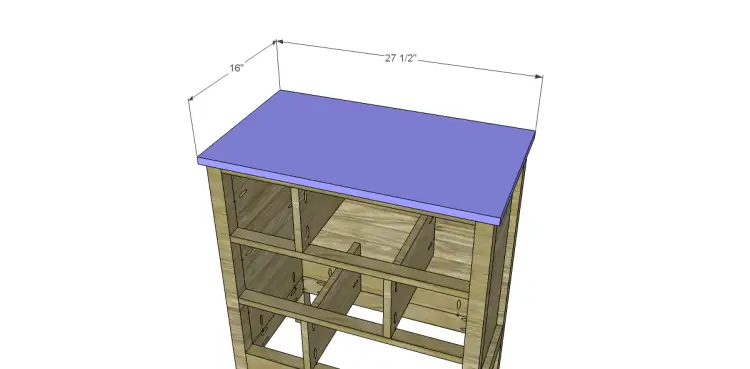
Step Six
Cut the pieces for the drawer boxes. Assemble as shown using glue and 1-1/4″ pocket hole screws.
Cut the pieces for the drawer bottoms and attach using glue and 1-1/4″ brad nails. Attach the drawer slide hardware according to the manufacturer’s instructions. Take a look at this easy tutorial on installing drawer slides. Make any necessary adjustments.
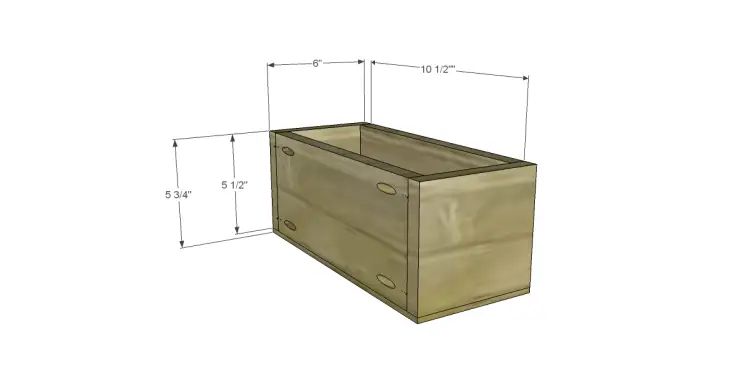
Step Seven
Cut the pieces for the drawer fronts. This easy tutorial on installing drawer fronts will be helpful! Attach the drawer hardware.
Finish the piece as desired! The plans to build the Ames Chest are very easy and perfectly geared toward any skill level. Any questions or are you stuck on the plan? Leave a comment below!
Originally posted 2014-01-03 08:00:24.

Comments are closed.