
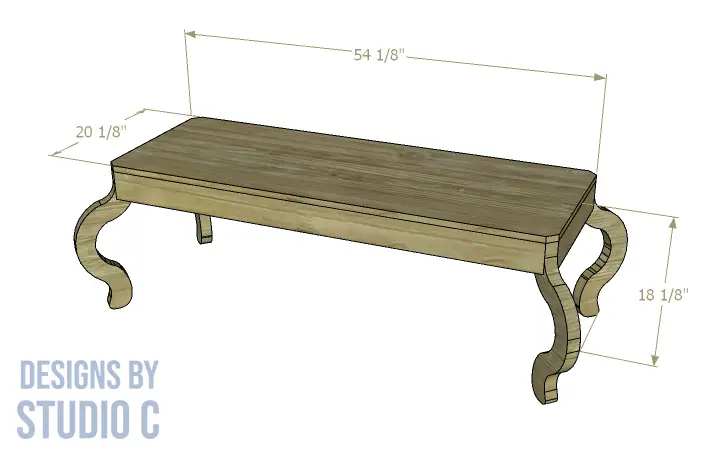
An Easy to Build Bench with Curved Legs
Don’t let the curved legs fool you into thinking this bench requires advanced skills to build… It certainly does not! The plans to build a Scarlet bench feature an upholstered top with elegantly curvy legs.
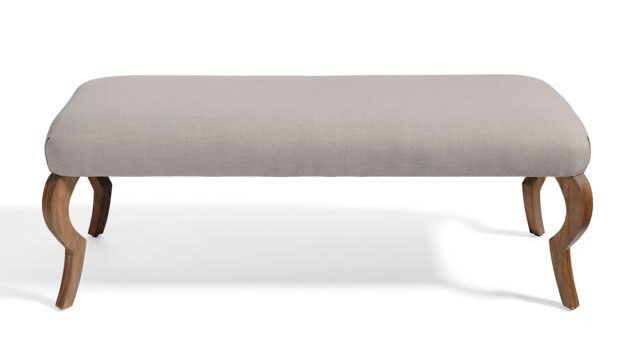
This is a great piece for the foot of a bed, in an entryway or even in a covered area outdoors! It is inspired by a piece from Grandin Road that is no longer available (photo included for reference!) and though the legs are not an exact match, it is close enough to make this a really fun build!
Materials:
- 2-1/2″ screws (<– affiliate link! SPAX® would be a great choice!)
- 2″ brad nails
- 1″ upholstery foam (<– affiliate link!)
- Fabric and batting of choice
- Sandpaper (80, 120, 220 grits)
- Wood glue
- Finishing supplies
Lumber:
- 2 – 2×4 at 8′
- 1 – 2×8 at 8′
- 1 – 4′ x 8′ sheet of 3/4″ plywood
Cut List:
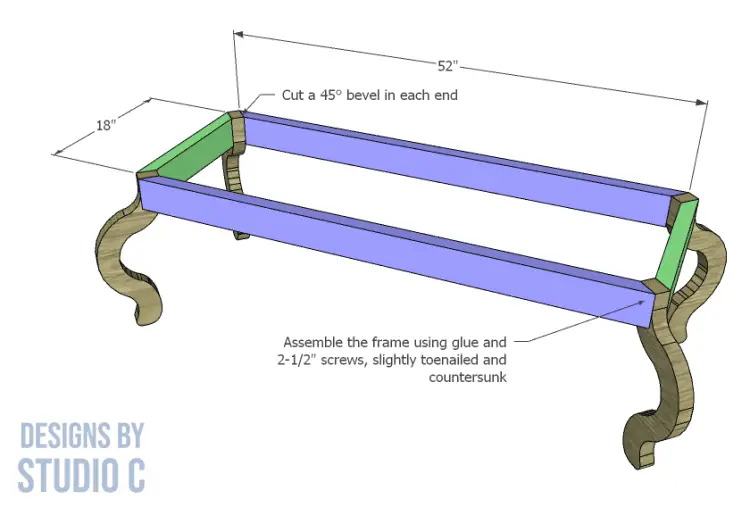
- 2 – 2×4 at 52″ – Frame Sides
- 2 – 2×4 at 18″ – Frame Ends
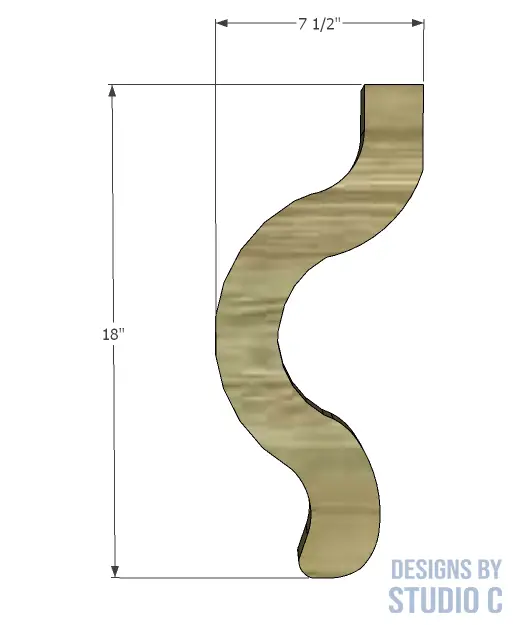
- 4 – 2×8 at 18″ – Legs
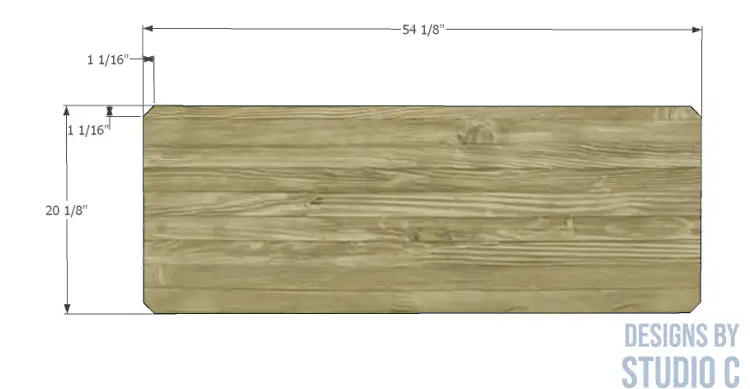
- 1 – 3/4″ plywood at 20-1/2″ x 54-1/8″ – Seat
Notes About the Project:
- Sand all of the pieces before assembling.
- In order to make the seat one continuous piece, a full sheet of plywood will have to be purchased. As an option, a scrap 2×4 can be secured to the sides of the frame and two pieces of 3/4″ plywood can be used. The seam can be secured to the scrap piece of 2×4.
Step One
Download and print the templates for the legs. Align the registration marks on the pages and tape the sheets together, then cut the template out. It can be transferred to poster board, if desired.
If using a bandsaw to cut all of the legs at once, stack the boards securing them with double-sided tape in the areas of the boards that will be cut away and not used. Use low-tack spray adhesive on the template to keep it secure on the board.
Step Two
Cut the pieces for the sides and the ends of the bench frames. Cut a 45° miter in each end of each piece. Secure the sides and ends to the legs using glue and 2-1/2″ screws, driving them flush with or just below the surface so they don’t interfere with the upholstery.
Step Three
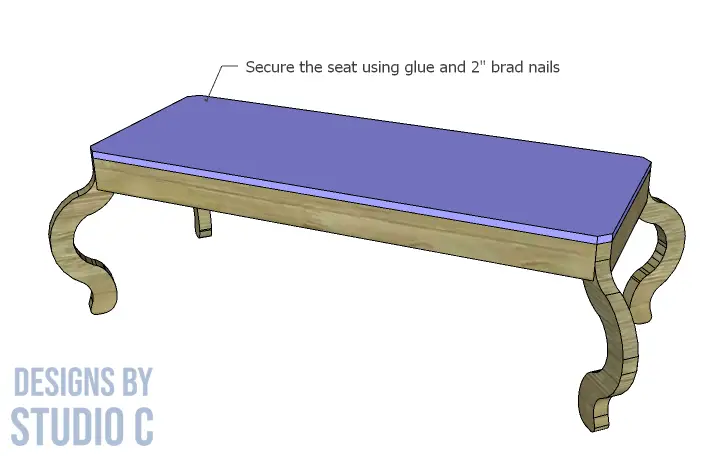
Cut the piece for the seat and secure to the frame using glue and 2″ brad nails.
Finish the bench frame as desired.
Step Four
Cover the edges of the top with duct tape. Cut the piece of foam just slightly larger than the seat. Spray the seat with adhesive and position the foam on top.
Cut a piece of batting large enough to cover the foam, wrap around the sides and ends of the bench, and staple to the underside of the frame. Repeat the process with the fabric.
Have questions about the plans to build a Scarlet bench? Leave a comment below!
Originally posted 2022-02-24 08:00:48.


Comments are closed.