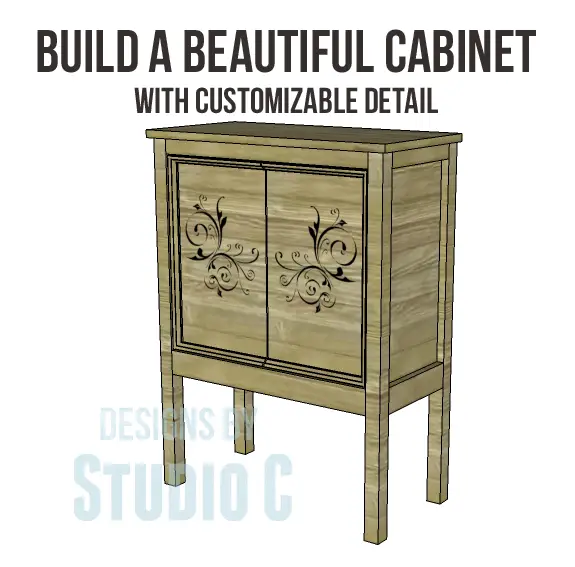
Build a Beautiful Cabinet with Customizable Detail on the Front
Free Plans to Build a Pier One Inspired Rivet Cabinet
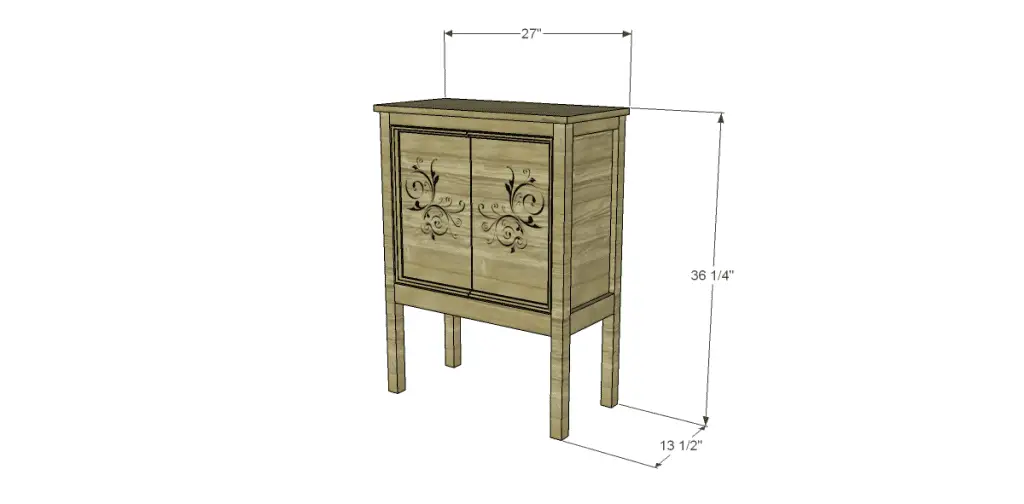
Here are free plans to build a Pier One inspired Rivet Cabinet with some really neat detail on the front… The inspiration piece has rivets in a scrolling pattern on the front. This detail can be recreated by drawing a pattern with a pencil then using upholstery tacks to create the design or by using a scroll stencil and paint!
Materials:
- 1-1/4″ pocket hole screws
- 2″ pocket hole screws
- 1-1/4″ brad nails
- Two cabinet pulls
- Two sets of hinges
- Upholstery tacks (<– affiliate link!) for detail on doors or stencil and paint
Lumber:
- 4 – 2×2 at 8′
- 1 – 2×3 at 8′
- 1 – piece of decorative trim at 8′
- 1 sheet of 3/4″ plywood
Cut List:
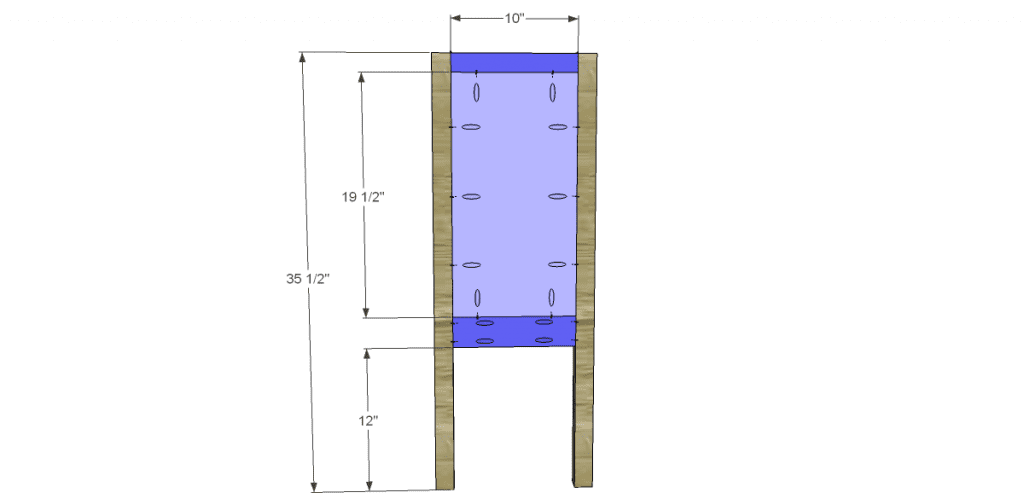
- 4- 2×2 at 35-1/2″ – Legs
- 2 – 2×2 at 10″ – Side Frames
- 2 – 2×3 at 10″ – Side Frames
- 2 – 3/4″ plywood at 10″ x 19-1/2″ – Side Panels
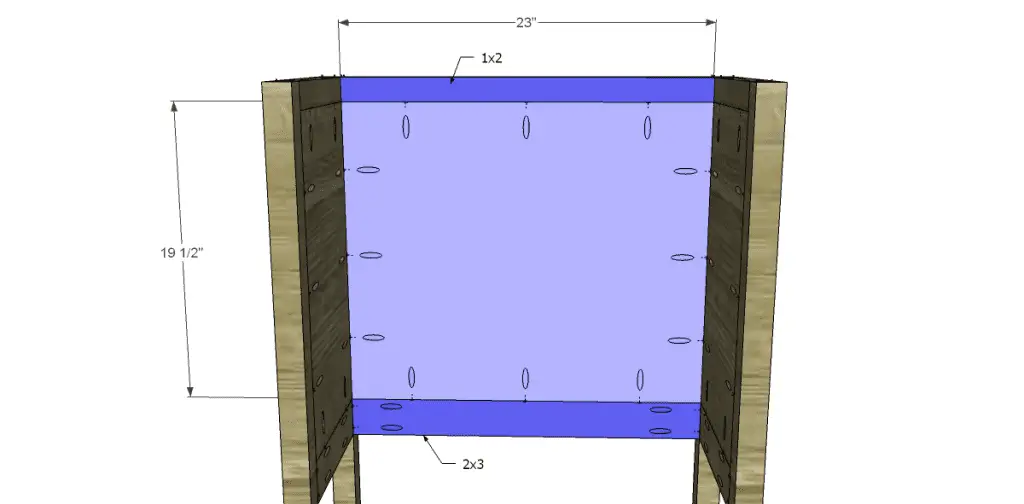
- 2 – 2×2 at 23″ – Back Frame & Front Stretcher
- 2 – 2×3 at 23″ – Back Frame & Front Stretcher
- 1 – 3/4″ plywood at 19-1/2″ x 23″ – Back Panel
- 2 – 3/4″ plywood at 10″ x 23″ – Shelf & Bottom
- 1 – 3/4″ plywood at 13-1/2″ x 27″ – Top
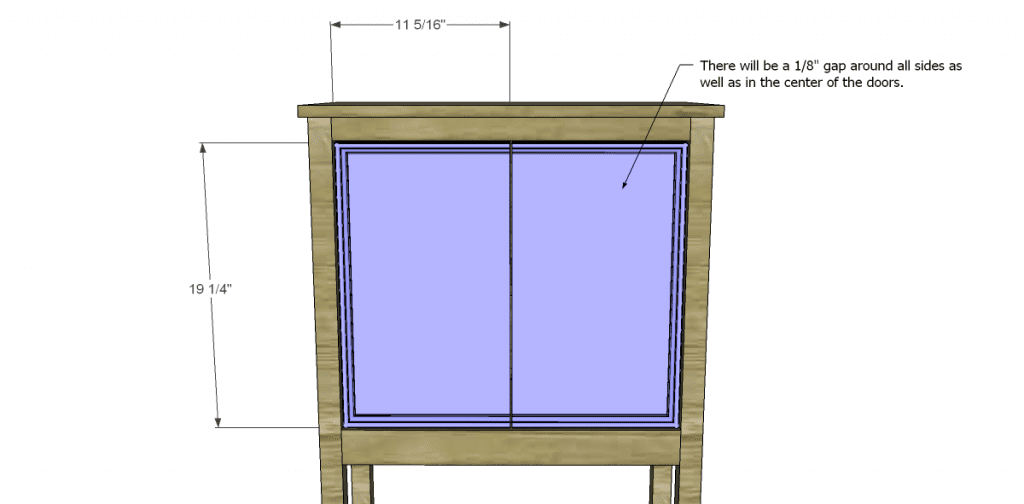
- 2 – 3/4″ plywood at 11-5/16″ x 19-1/4″ – Doors
- 4 – Trim at 11-5/16″
- 2 – Trim at 19-1/4″
Step One
Cut the pieces for the legs and side panels. Drill pocket holes in each end of the frame pieces as well as all four edges of the panel. Attach the frame pieces to the panels using glue and 1-1/4″ pocket hole screws. The back of the panel will be flush with the inside face of the frame pieces. Attach the sides to the legs using glue and 1-1/4″ pocket hole screws through the panel into the legs and 2″ pocket hole screws through the frame pieces into the legs.
Step Two
Cut the pieces for the back frame and panel. Drill pocket holes in each end of the frame pieces as well as all four edges of the panel. Attach the frame pieces to the panels using glue and 1-1/4″ pocket hole screws. The back of the panel will be flush with the inside face of the frame pieces. Attach the back to the legs using glue and 1-1/4″ pocket hole screws through the panel into the legs and 2″ pocket hole screws through the frame pieces into the legs.
Step Three
Cut the pieces for the front stretchers. Drill pocket holes at each end. Attach to the legs using glue and 2″ pocket hole screws.
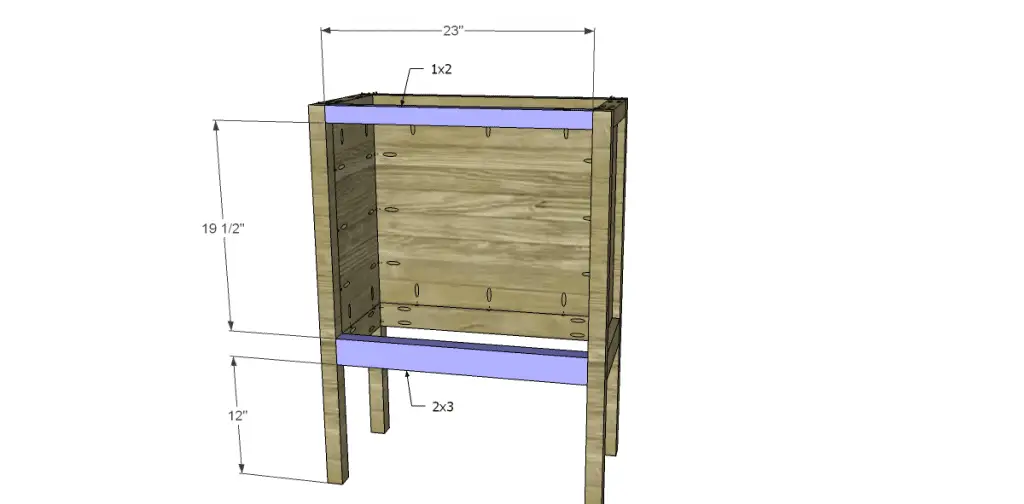
Step Four
Cut the pieces for the shelf and bottom. Drill pocket holes in all four edges of the bottom and only three edges of the shelf. Attach the bottom to the bottom stretcher and frame pieces using glue and 1-1/4″ pocket hole screws. The top of the bottom piece will be flush with the top of the front stretcher.
Position the shelf as shown then attach using glue and 1-1/4″ pocket hole screws.
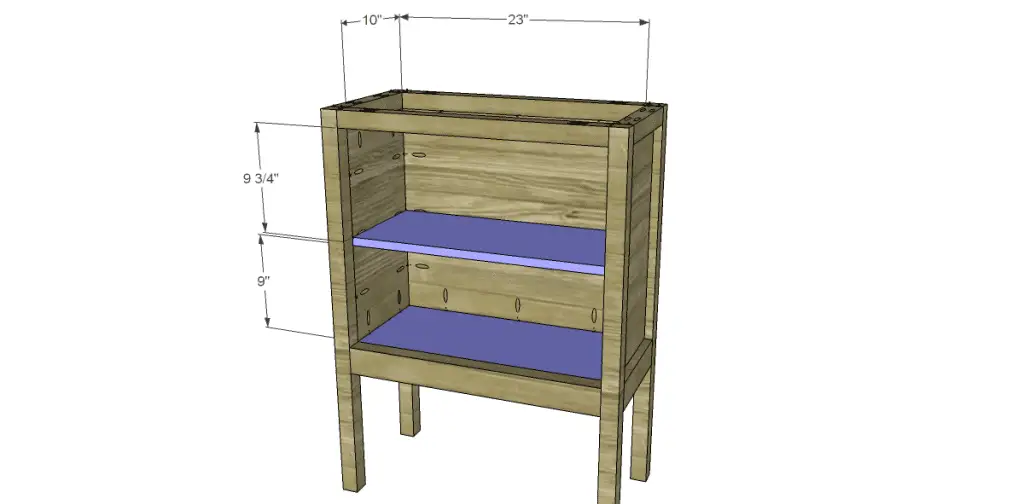
Step Five
Cut the piece for the top. The top will overhang the sides and front by 1/2″. Attach using glue and 1-1/4″ brad nails through the top into the stretcher and frame pieces.
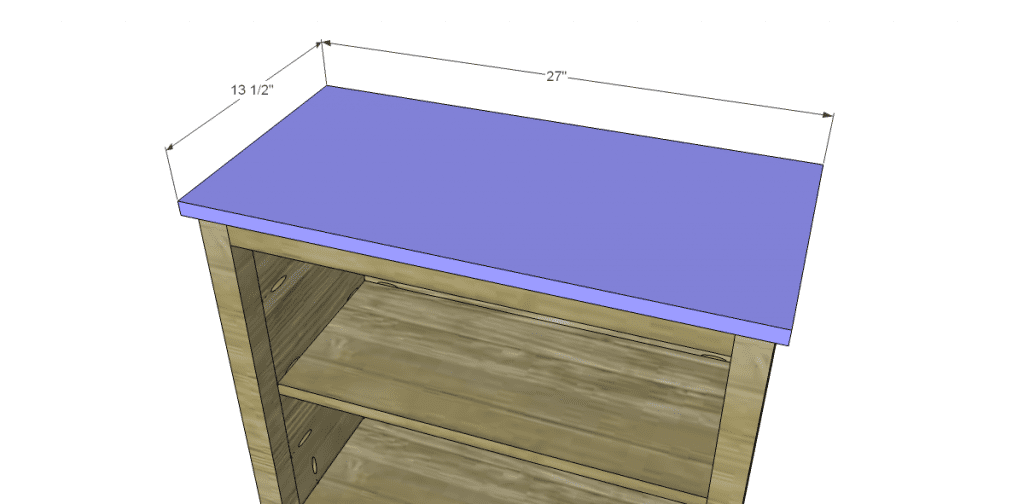
Step Six
Cut the pieces for the doors. Cut the pieces for the trim and miter the edges that will be the corners. Attach to the top, bottom, and one side of each door using glue and brad nails. Install the hinges and make any necessary adjustments, then install the cabinet pulls.
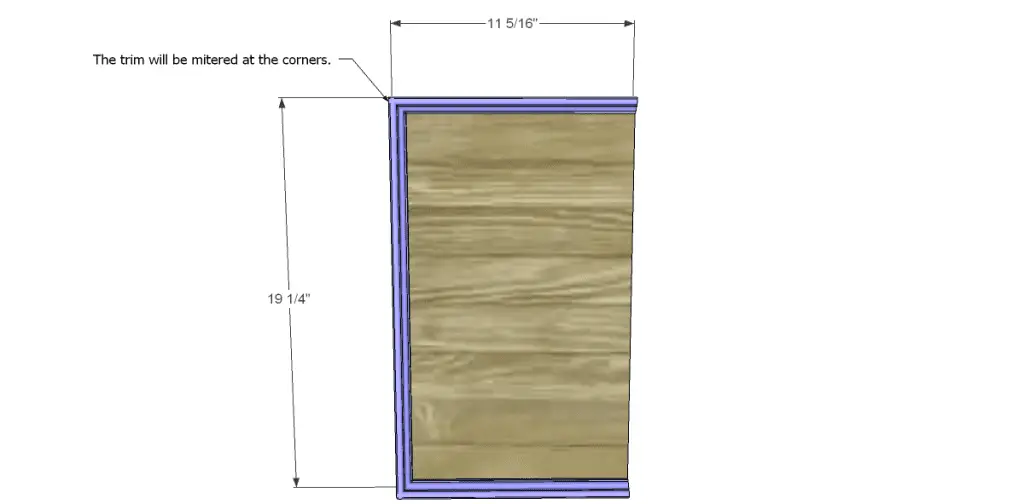
Finish as desired.
These free plans to build a Pier One inspired Rivet Cabinet are very simple to construct, and will produce an inexpensive piece of furniture! If you have any questions leave a comment below!
Originally posted 2014-01-08 08:00:17.


Please tell me you’re on Pinterest! I don’t have a specific need for this item but it makes me want to peruse your blog for other ideas for stuff I DO need. Thanks!
I am! Its under my name – Cher-Ann Texter… Thanks so much for stopping by! Hope to see you again soon!
I love the idea…very pretty.
Really beautiful Cher.
I love this, Cher! Thank you for sharing!
I think this is by far my favorite post of yours 🙂 Love the details on it Cher 🙂
May sound crazy, but I’d love to make a miniature version of this. Sort of reminds me of a jewelry box my mom had. I think it would be adorable.
Beautiful design…now if I was only more handy.
You can do it, I swear!