Build a Curvy Dining Table
Free Plans for a Piece in the Curvy Series
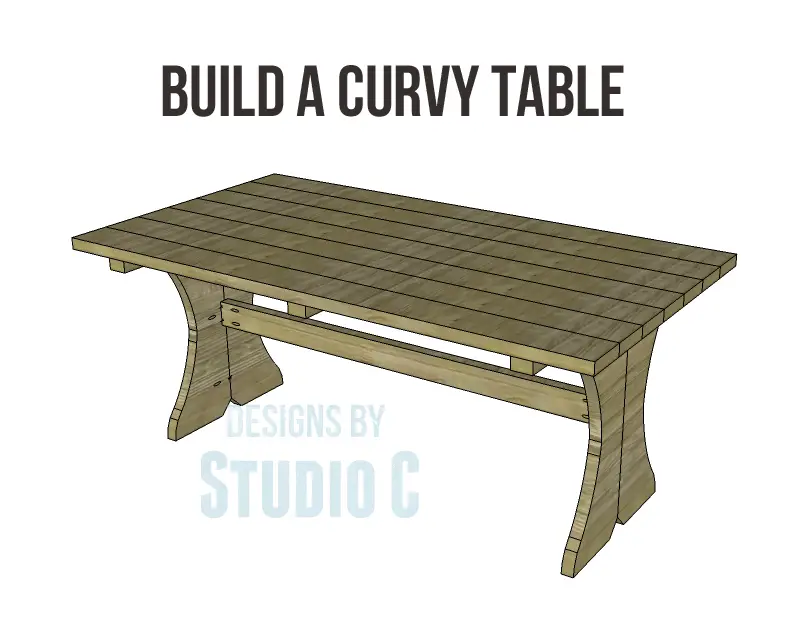
Here are plans for a super-cool and stylish table perfect for entertaining during the warm weather! The free plans to build a curvy Dining Table are easy to build and can be constructed in treated lumber, cedar, or regular pine lumber (as long as it is protected with a weather resistant finish!). Did you know that treated lumber can be painted once it dries? It usually has to dry for a season so if it is built this summer, it can be painted next summer! There are also plans for a matching bench and armchair!
Materials:
- 2-1/2″ pocket hole screws (<– affiliate link!)
- 2-1/2″ screws
- Finishing supplies
Lumber:
- 1 – 2×3 at 8′
- 1 – 2×4 at 6′
- 7 – 2×6 at 6′
- 2 – 2×12 at 6′
Cut List:
- 4 – 2×12 at 28-1/2″ – Legs
- 1 – 2×4 at 59″ – Stretcher
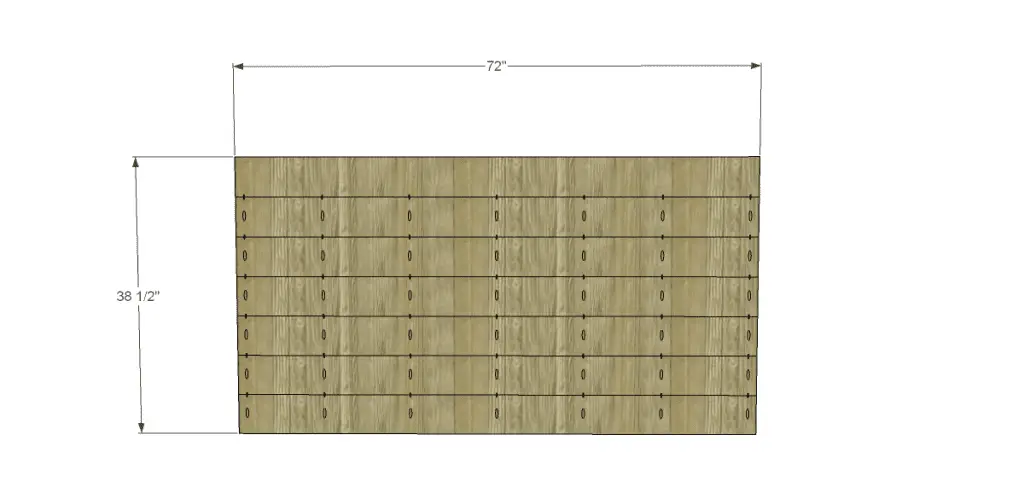
- 7 – 2×6 at 72″ – Top
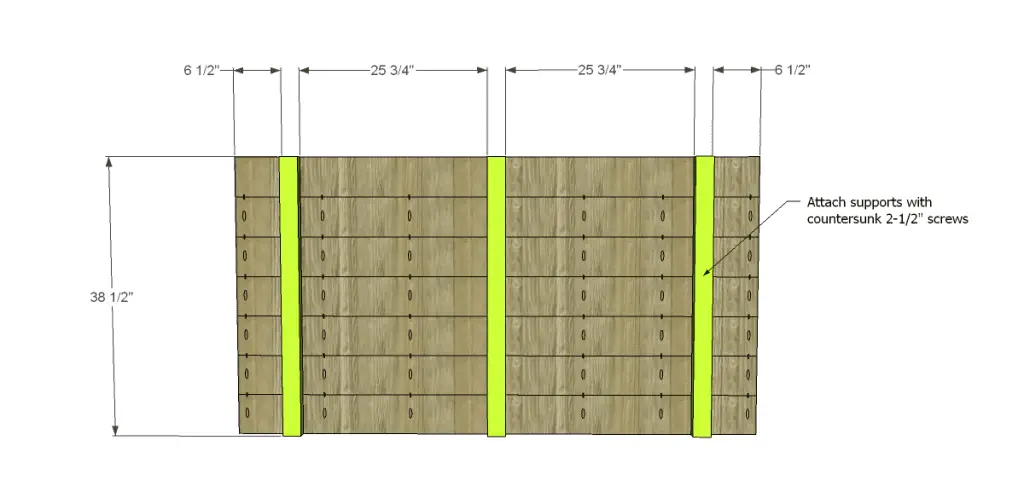
- 3 – 2×3 at 28-1/2″ – Top Supports
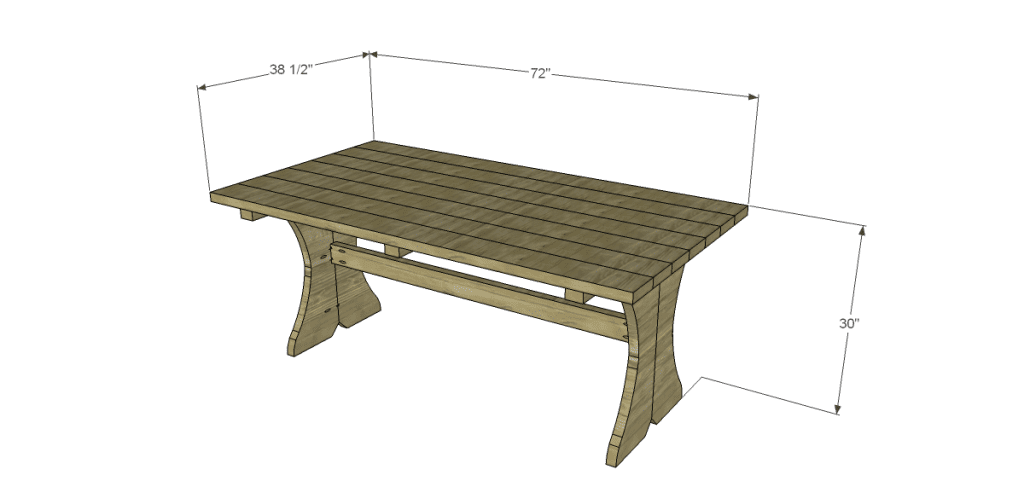
Click on the drawings for a larger view!
Step One
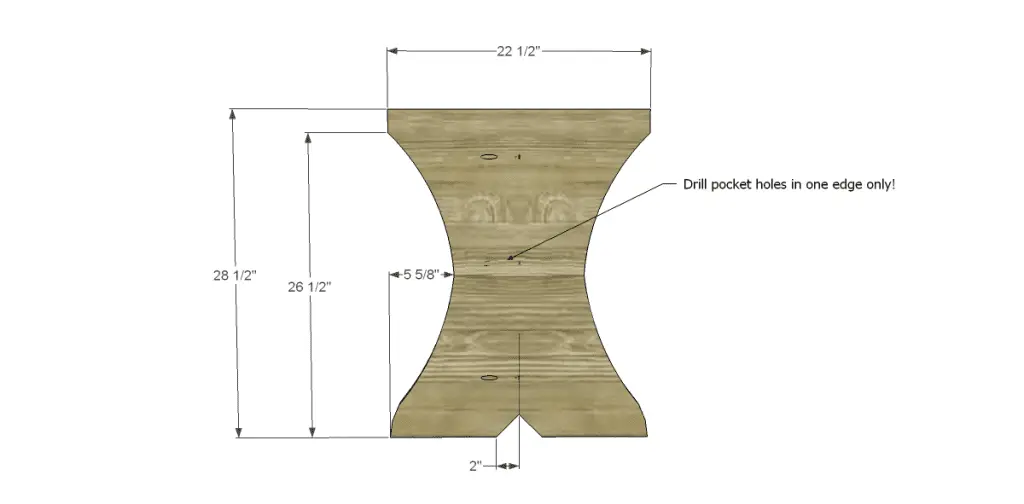
Cut the pieces for the legs. Cut the curves as desired using a jigsaw or a bandsaw, and drill pocket holes in one straight edge of two of the pieces. Assemble using glue and 2-1/2″ pocket hole screws.
Step Two
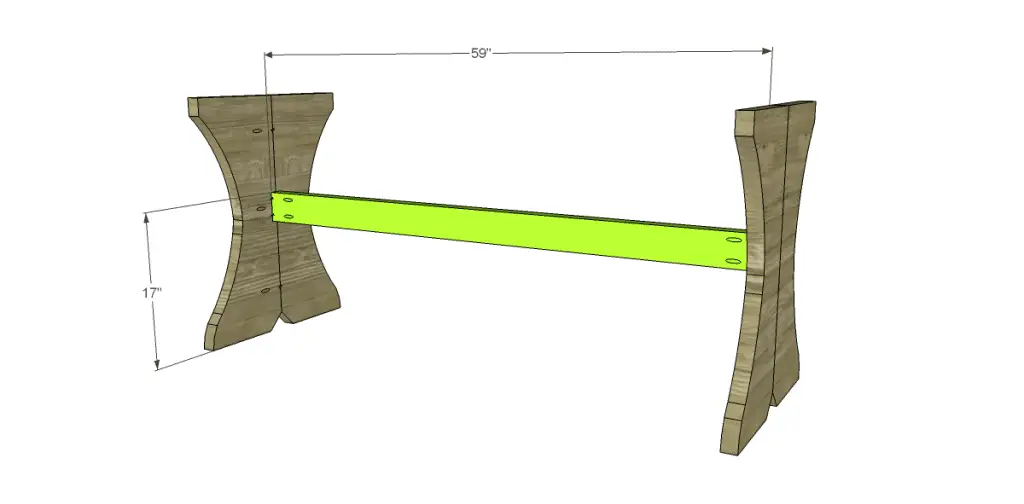
Cut the piece for the stretcher and drill pocket holes at each end. Position as shown and secure using glue and 2-1/2″ pocket hole screws.
Step Three
Cut the pieces for the top and drill pocket holes as shown. Assemble using glue and 2-1/2″ pocket hole screws.
Step Four
Cut the pieces for the top supports. Position as shown then secure using glue and countersunk 2-1/2″ screws.
Step Five
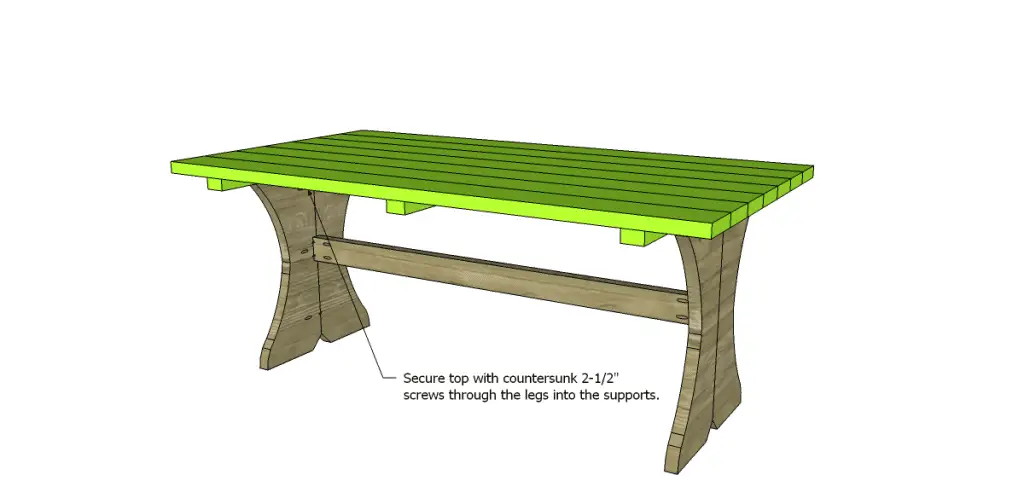
Position the top on the legs and secure using countersunk 2-1/2″ screws through the legs into the supports.
Finish as desired!
The free plans to build a Curvy Dining Table are the first in an excellent series that can be constructed for the indoors or outdoors! Have a question about this plan? Leave a comment below!
Originally posted 2013-05-27 12:00:36.


[…] I posted plans for the Curvy Table… Today’s plans are for the matching bench. The materials listed are for one bench, so […]
[…] plan is the last in the collection coordinating with the Curvy Dining Table and the Curvy Bench. Hope you like this collection as much as I do and if you build it, please […]
wow !! superb curvy dining table. It’s very easy to made and looks really beautiful where it grow your house or office looks.
Did you know that treated lumber can be painted once it dries?
There are only few people who shared this type of information on web. This table is really beautiful and I really like it.
Thank you very much! I appreciate the comment!!
[…] free plans to build a Curvy Armchair are the last in the collection coordinating with the Curvy Dining Table and the Curvy Bench. Hope you like this collection as much as I do and if you build it, please […]
[…] I posted plans for the Curvy Table… Today, I’m sharing the free plans to build a Curvy Bench to match. The materials listed are […]