Free Furniture Plans to Build a Lincoln Media Console
Discover the Perfect Addition to Your Living Room: The Lincoln Media Console!
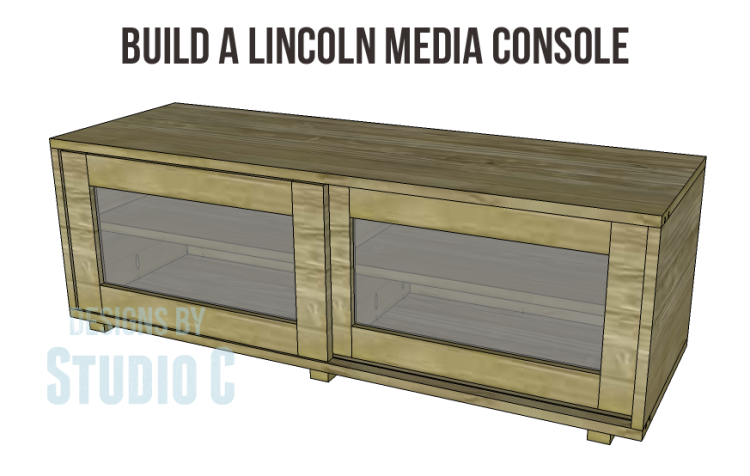
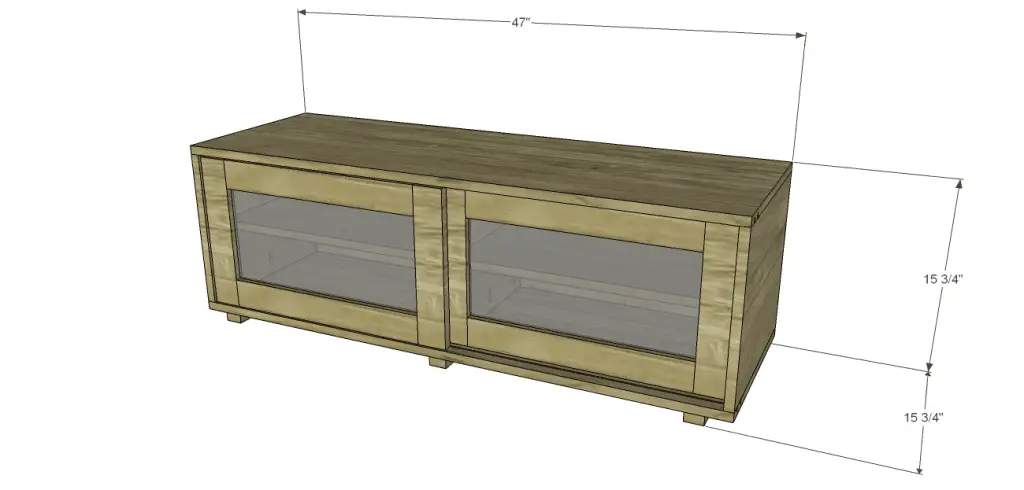
Looking for a new media console? Look no further… This one is chock full of style and storage! With a low profile and a shelf inside, this console features sliding front bypass doors that can be paneled with glass, Plexiglas, or decorative punched aluminum – maybe even speaker cloth to hide the surround sound! Awesome, right? These free furniture plans to build a Lincoln Media Console are easy to construct making this a project that can be completed in a relatively short period of time!
Materials:
- 1-1/4″ pocket hole screws
- 1-1/2″ screws
- Edge banding, optional (<– affiliate link!)
- Sliding bypass cabinet door hardware
- Wood glue
- Sandpaper (100, 150, 220 grits)
- Finishing supplies (primer & paint, or stain, sealer)
Lumber:
- 1 – 1×2 at 6′
- 2 – 1×3 at 8′
- 1 sheet of 3/4″ plywood
- Glass or plexiglas to fit the openings in the doors
Cut List:
- 2 – 3/4″ plywood at 15-3/4″ x 47″ – Top & Bottom
- 3 – 1×2 at 15-3/4″ – Bottom Supports
- 2 – 3/4″ plywood at 13-1/2″ x 15-3/4″ – Sides
- 1 – 3/4″ plywood at 13-1/2″ x 45-1/2″ – Back
- 1 – 3/4″ plywood at 12-3/4″ x 13-1/2″ – Divider
- 2 – 3/4″ plywood at 12-3/4″ x 22-3/8″ – Shelves
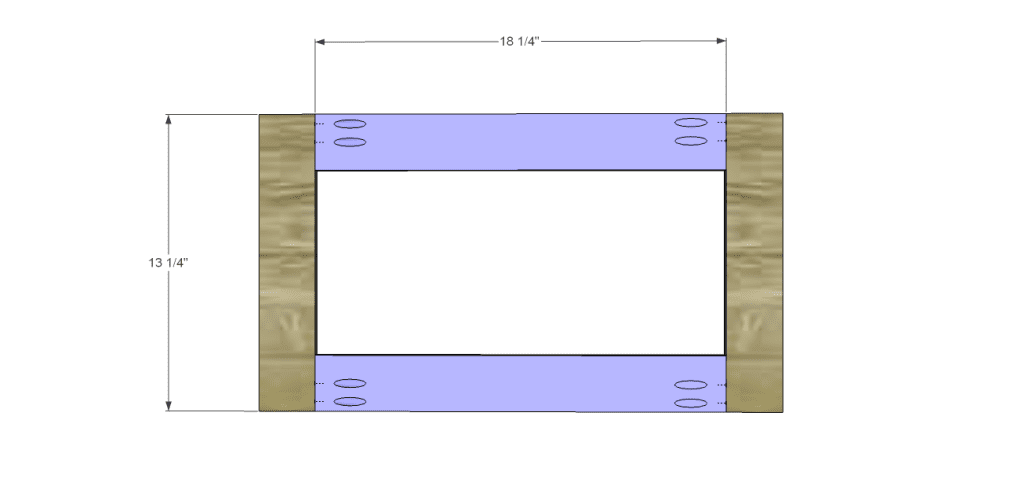
- 4 – 1×3 at 13-1/4″ – Door Frames
- 4 – 1×3 at 18-1/4″ – Door Frames
Notes:
Edge banding will be applied to the exposed edges of the plywood prior to assembly
Step One
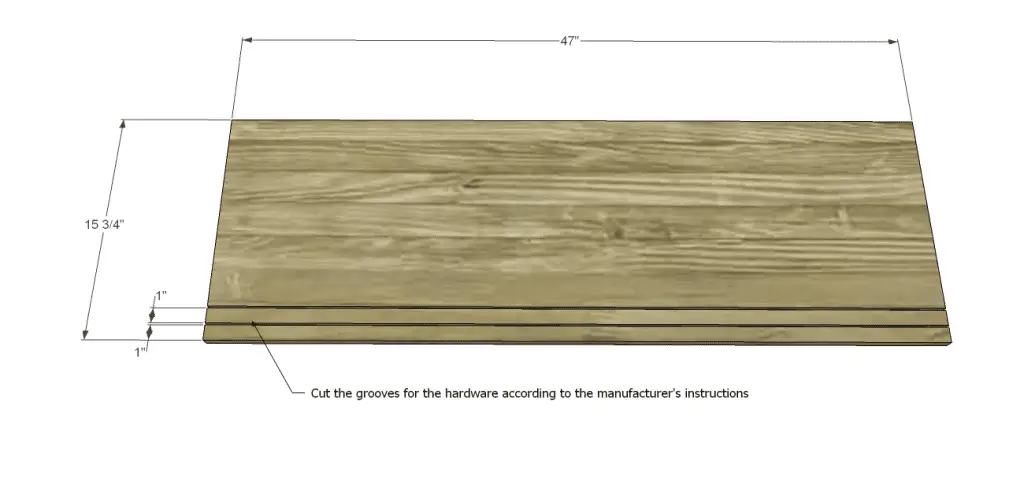
Cut the pieces for the top & bottom. The depth and width will be cut according to the manufacturer’s instructions. The front groove will be located at least 3/4″ to 1″ back from the front edge. The rear groove will be located 1″ from the front groove.
It will be easy to cut the grooves on the table saw. Set the height of the blade as specified by the manufacturer’s instructions for the depth of the groove. Set the fence at 3/4″ to 1″ away from the blade and run the board through the saw. The blade will cut the groove at the specified depth. Reset the rip fence at 1-7/8″ to 2-1/8″ from the blade to cut the second groove. This measurement will allow for the groove already cut, as well as the 1″ space between the grooves. Make a pass through the saw.
Set the top piece aside.
Step Two
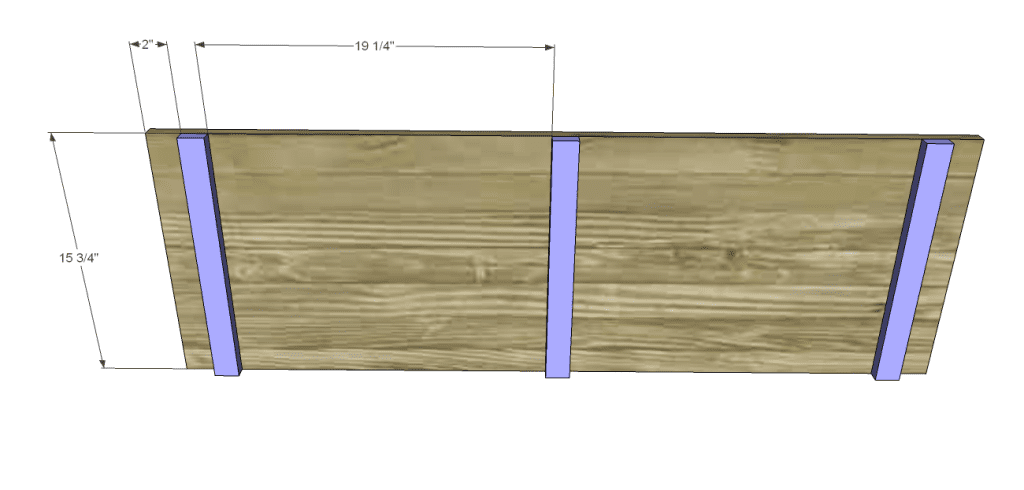
Cut the pieces for the bottom supports. Secure to the bottom as shown using glue and countersunk 1-1/4″ screws.
Step Three
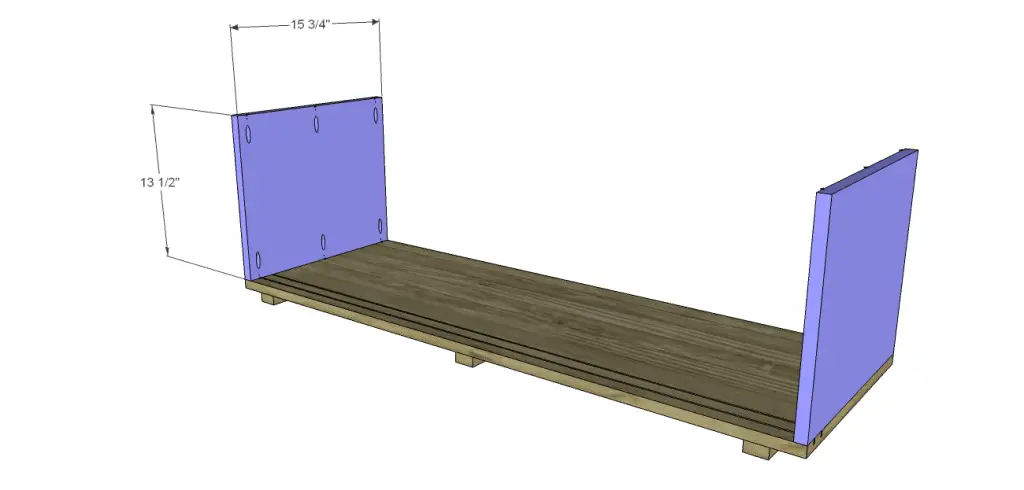
Cut the pieces for the sides. With the pocket hole jig set for 3/4″ material, drill pocket holes in the top and bottom edges of each piece. Secure to the bottom using glue and 1-1/4″ pocket hole screws.
Step Four
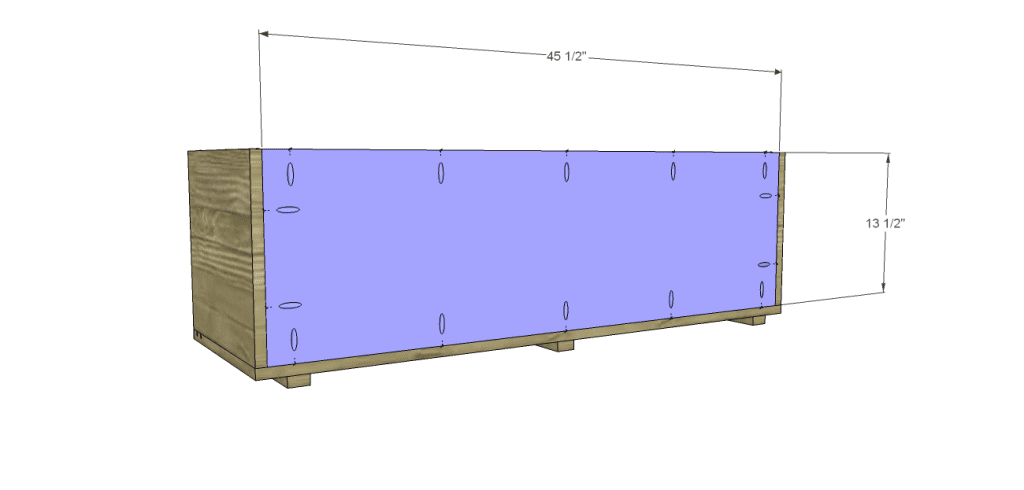
Cut the piece for the back and drill pocket holes in all four edges. Secure to the bottom and sides using glue and 1-1/4″ pocket hole screws.
Step Five
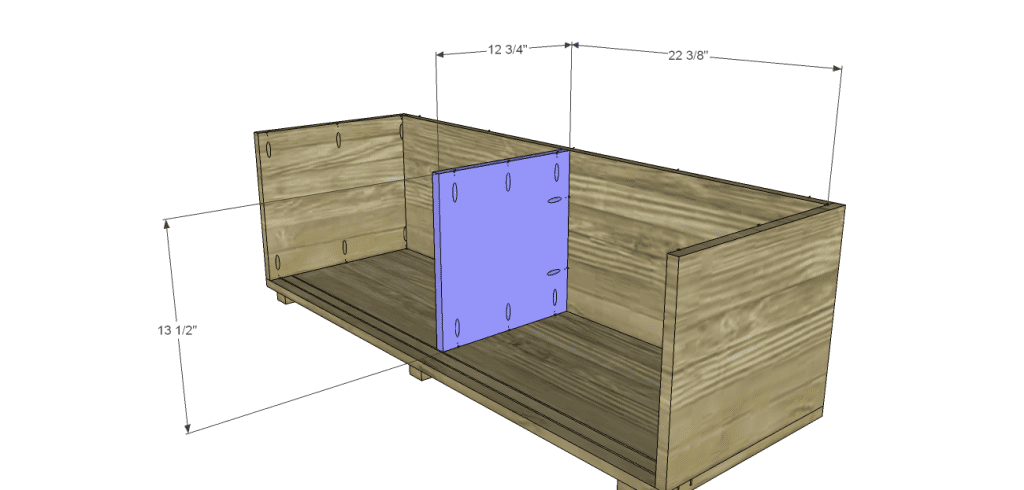
Cut the piece for the divider and drill pocket holes in the top and bottom edges, as well as the back edge. Secure to the bottom and back using glue and 1-1/4″ pocket hole screws.
Step Six
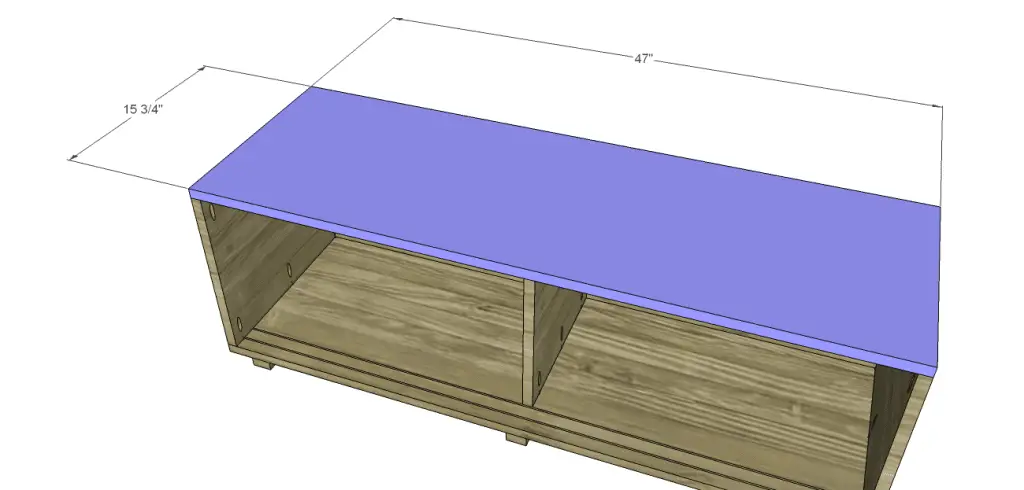
Position the top on the cabinet (with the grooves for the door hardware facing the front) and secure using glue and 1-1/4″ pocket hole screws through the back, sides, and divider.
Step Seven
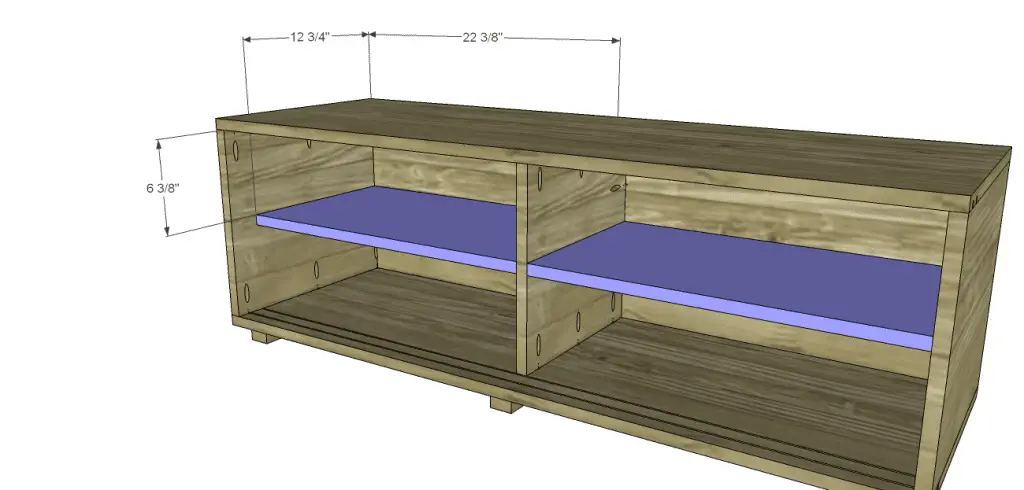
Cut the pieces for the shelves and drill pocket holes in the top and bottom edges, as well as the back edge. Secure to the sides, divider, and back using glue and 1-1/4″ pocket hole screws.
Step Eight
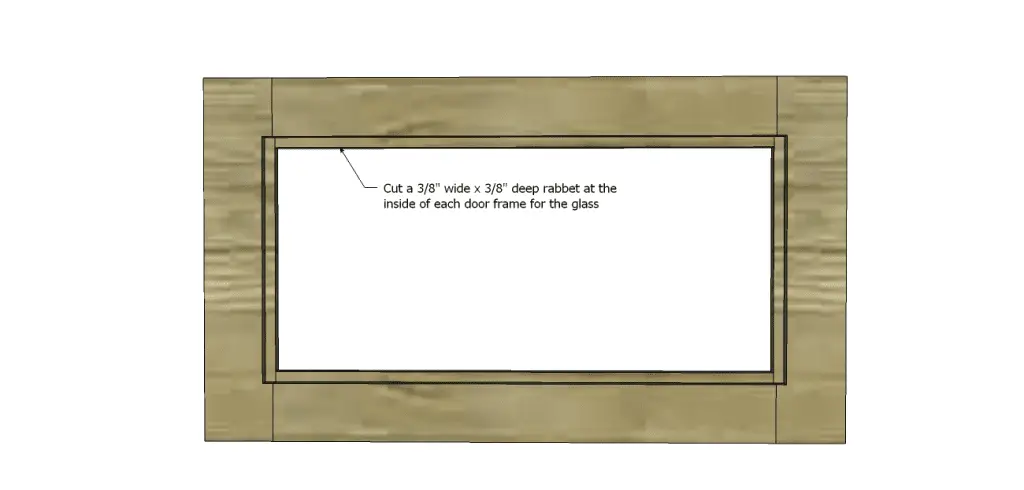
Cut the pieces for the door frames. Drill pocket holes in each edge of the shorter pieces. Assemble the frame as shown using glue and 1-1/4″ pocket hole screws. Locate the pocket hole screws as shown. Use a router and a 3/8″ rabbeting bit to cut a 3/8″ deep rabbet at the inside of the frame to allow for the glass. Use a hammer and a chisel to square the corners.
Run a bead of silicone along the rabbet and position the glass on top.
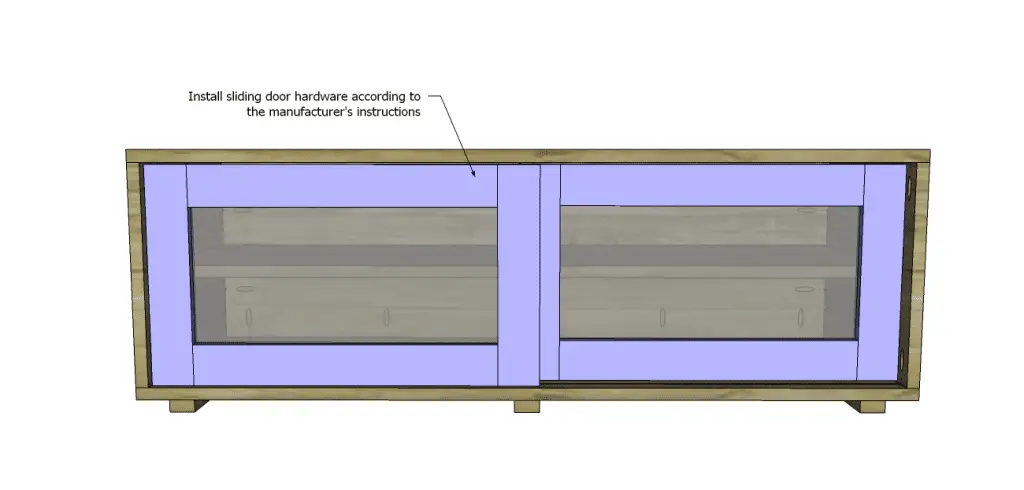
Install the sliding door hardware according to the manufacturer’s installation instructions.
Finish as desired.
These free furniture plans to build a Lincoln Media Console will help you create a piece of furniture that is inexpensive yet looks like you spent a million bucks on it! Need help? Contact me at cher {at} designsbystudioc {dot} com!
Originally posted 2014-06-20 08:00:27.


I, literally, just bought a console like this a few months ago. It’s gorgeous but I paid a fortune! Wish I could have none about your plans before paying for it!
Awww, thanks Jessica!
I like that it hides all the cords! I HATE cords…
I don’t like seeing all of the cords nor do I like untangling them!
I’m with Linda on this one, don’t want to look at cords. Great design Cher.
Thank you, Elle, I appreciate it!
having trouble finding the by-pass door track
Hi, Bryan! There is no “track”, per se, but the plans are written for hardware like this: http://www.rockler.com/sliding-door-hardware. Hope this helps!
[…] Plans to Build a Lincoln Media Console.This media console features sliding doors and lots of storage space. Build it using these free woodworking […]