Build an Asian Style Cabinet
An Easy to Build Cabinet with Drawers and Doors
I really love Asian style furniture! I love the angles and the clean lines! To me, it represents calm! Anyway, today’s plans are for an Asian style cabinet complete with two drawers and a shelf concealed behind two doors. I promise, the free DIY woodworking plans to build an Asian-Style Cabinet are easy, once the angles and bevels are cut! The best part is that there are tons of different styles of Asian hardware that will look great on this cabinet!
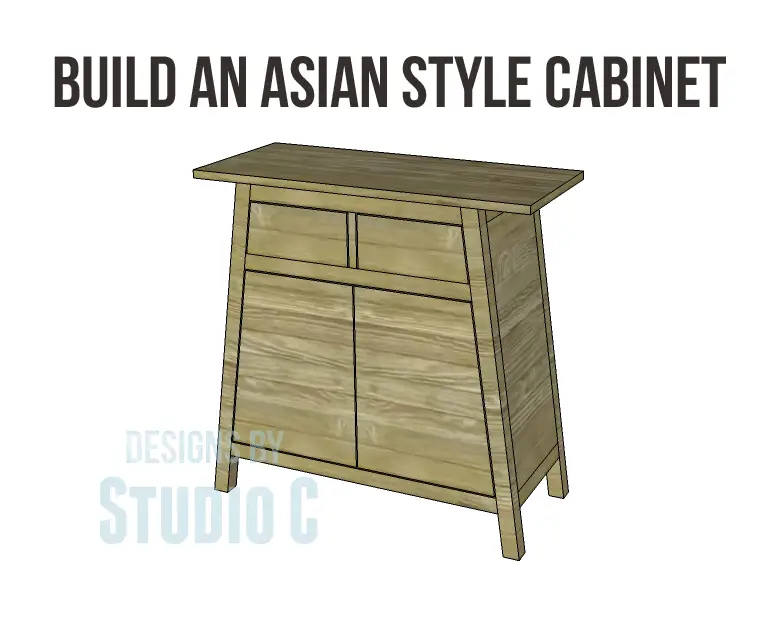
Materials:
- 1-1/4″ pocket hole screws
- 1-1/4″ brad nails
- 2 sets of hinges
- 4 cabinet pulls (this website has some of the coolest Asian style hardware!)
- Edge banding, if desired
- Finishing supplies
Lumber:
- 2 – 1×2 at 8′
- 2 – 2×2 at 6′
- 1 full sheet of 3/4″ plywood
- 1 half sheet of 3/4″ plywood
Cut List:
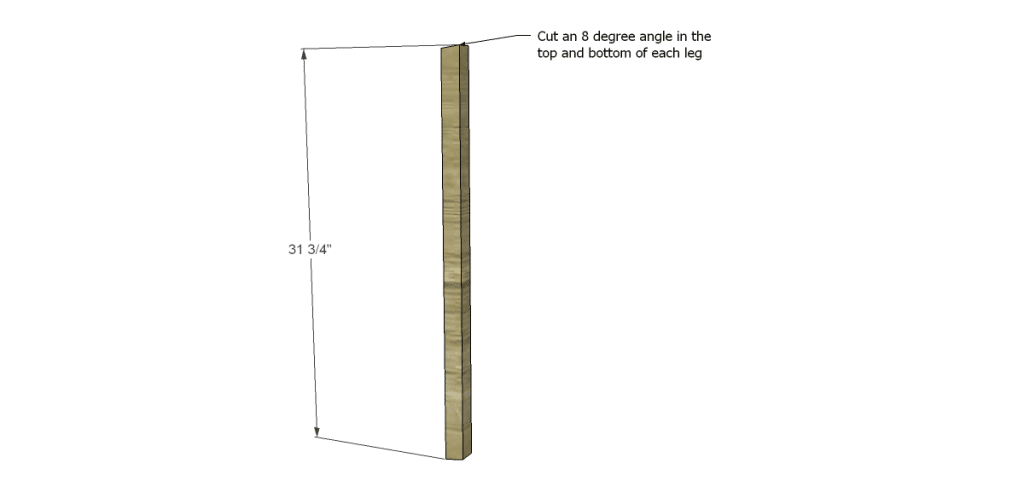
- 4 – 2×2 at 31-3/4″ – Legs
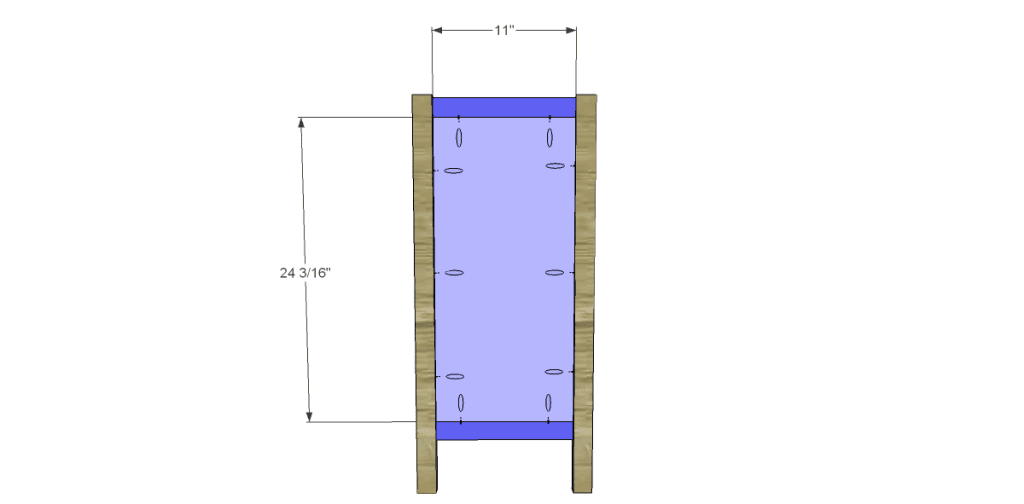
- 4 – 1×2 at 11″ – Side Frames
- 2 – 3/4″ plywood at 11″ x 24-3/16″ – Side Panels
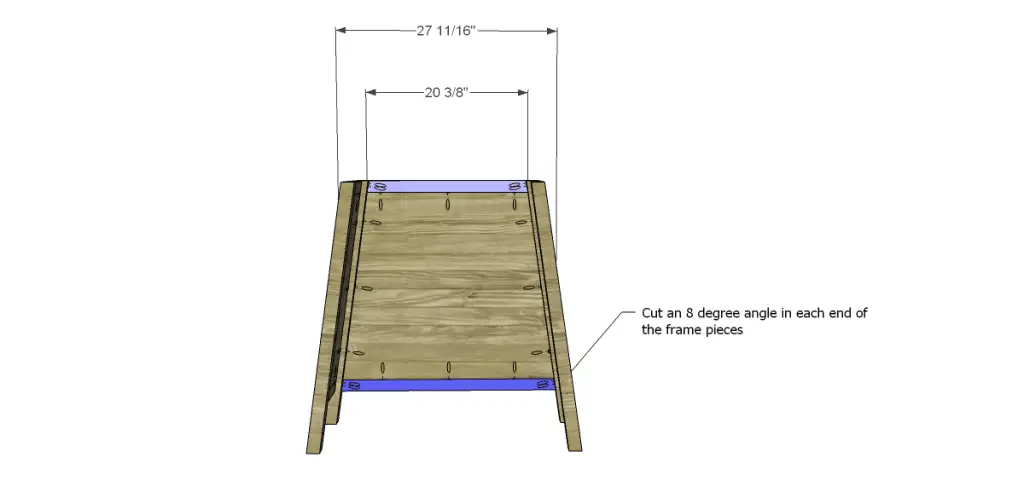
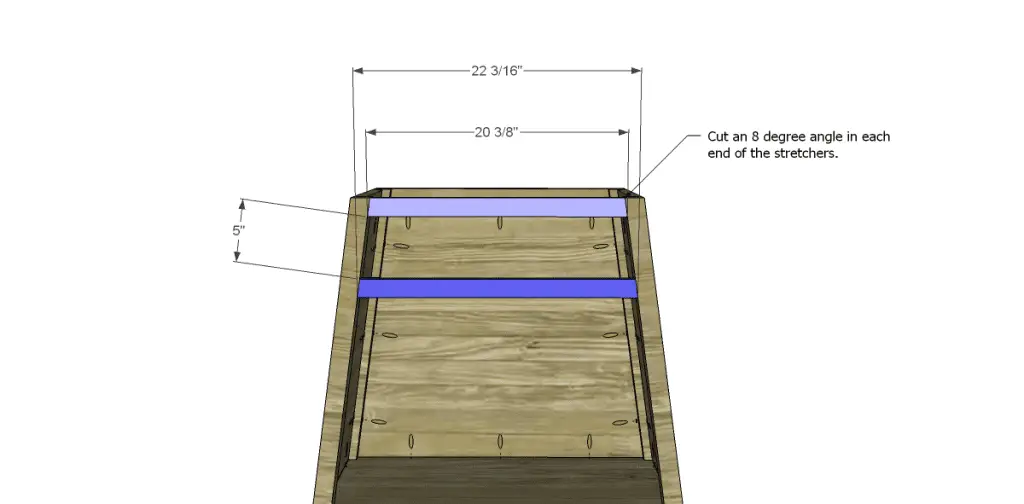
- 2 – 1×2 at 20-3/8″ – Back Frame & Upper Front Stretcher
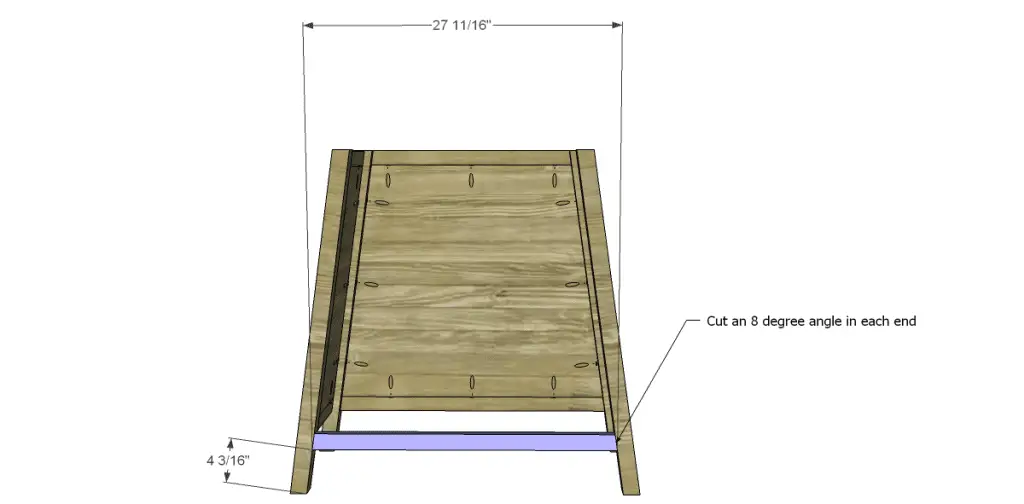
- 2 – 1×2 at 27-11/16″ – Back Frame & Lower Front Stretcher
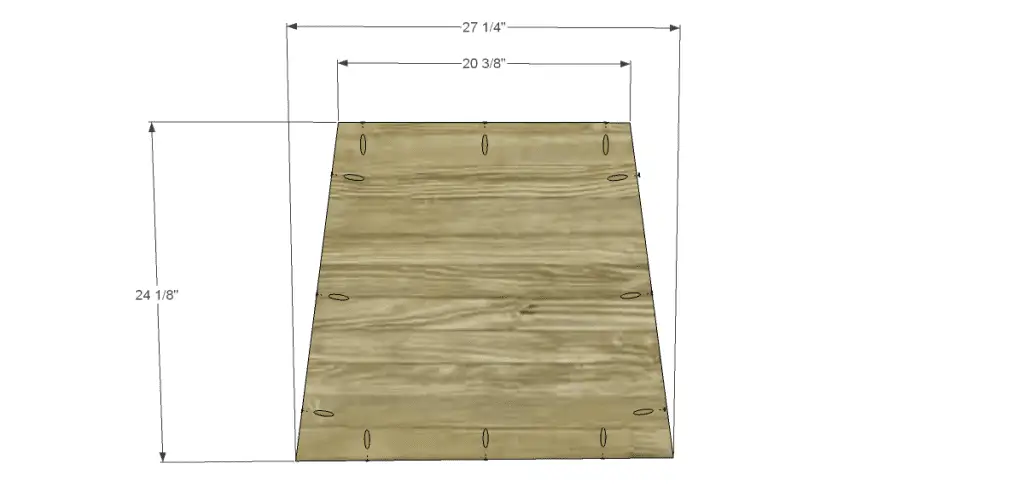
- 1 – 3/4″ plywood at 20-3/8″ x 27-1/4″ – Back Panel
- 1 – 3/4″ plywood at 12-1/2″ x 28-3/4″ – Bottom
- 1 – 1×2 at 22-3/16″ – Middle Stretcher
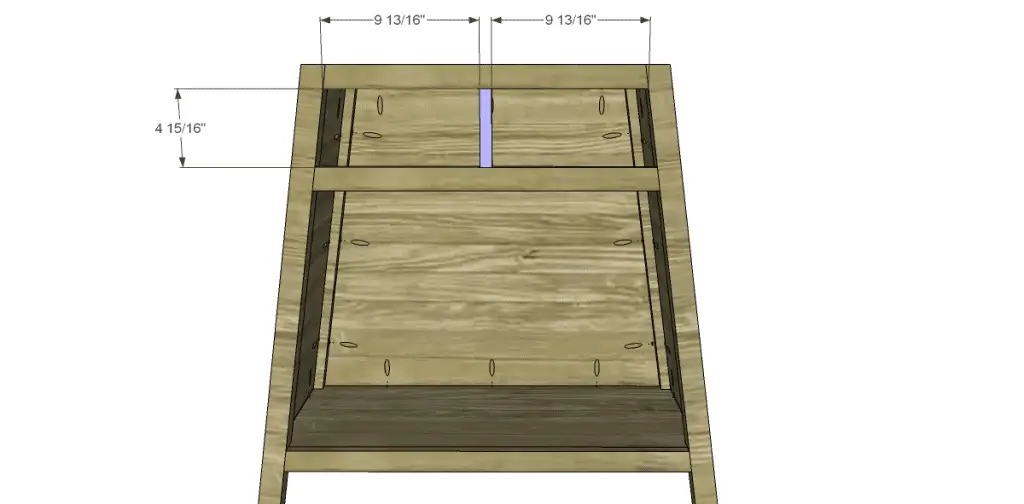
- 1 – 3/4″ square dowel at 4-15/16″ – Drawer Divider
- 1 – 3/4″ plywood at 12-1/2″ x 23-5/16″ – Shelf
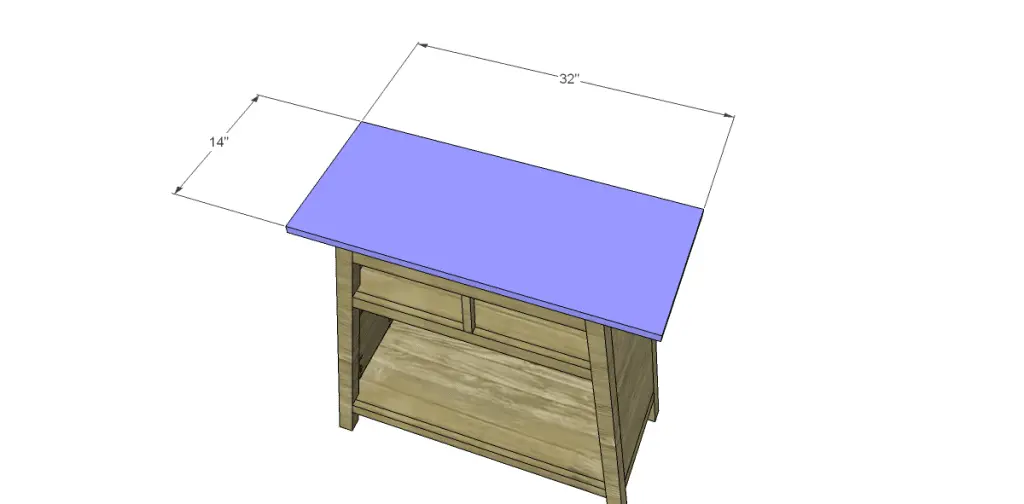
- 1 – 3/4″ plywood at 14″ x 32″ – Top
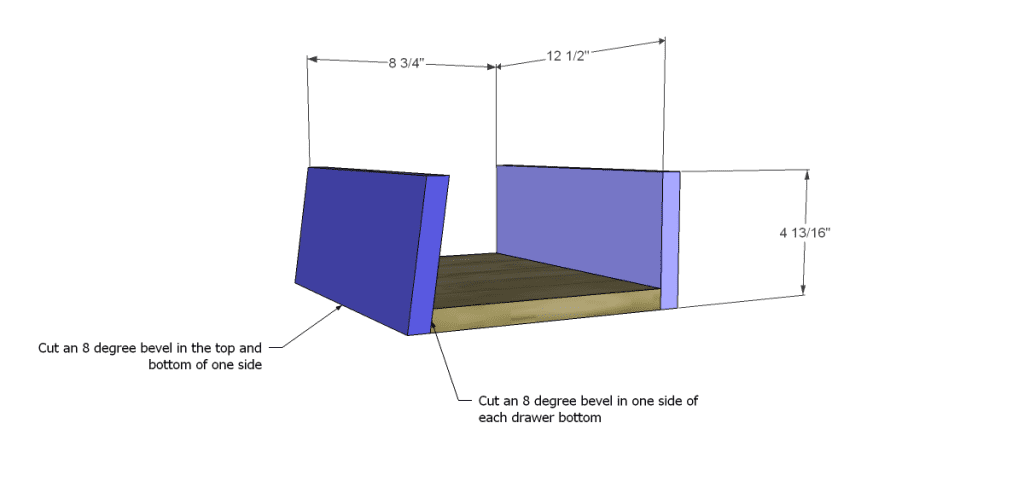
- 2 – 3/4″ plywood at 8-3/4″ x 12-1/2″ – Drawer Bottoms
- 4 – 3/4″ plywood at 4-13/16″ x 12-1/2″ – Drawer Sides
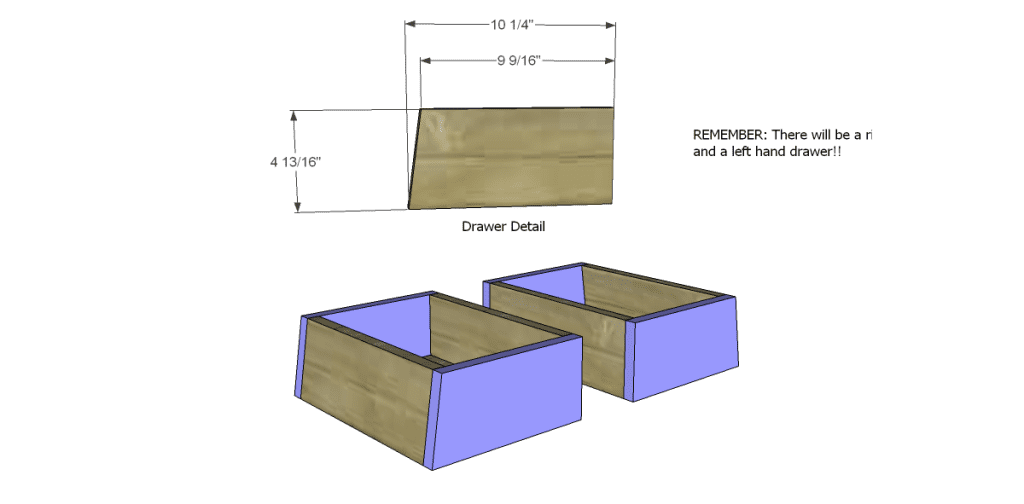
- 4 – 3/4″ plywood at 4-13/16″ x 10-1/4″ – Drawer Front & Back
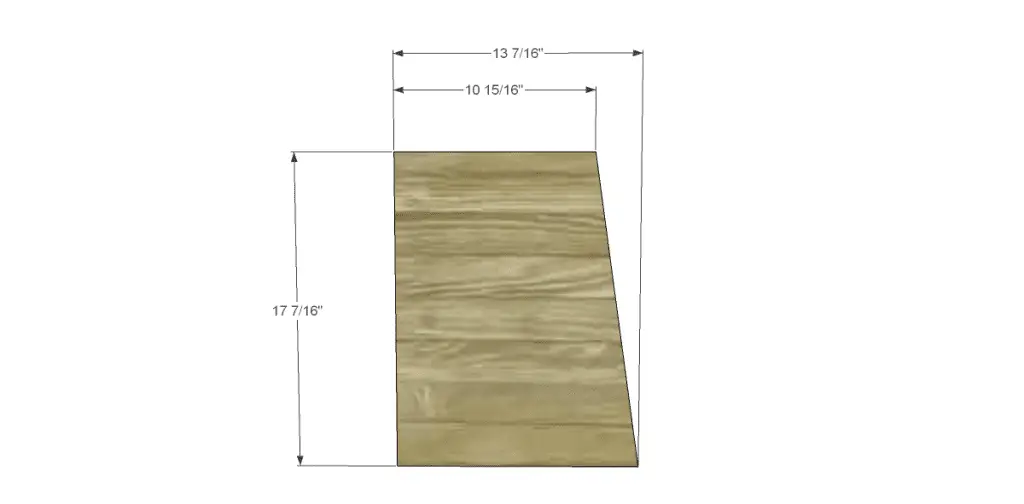
- 2 – 3/4″ plywood at 13-7/16″ x 17-7/16″ – Doors
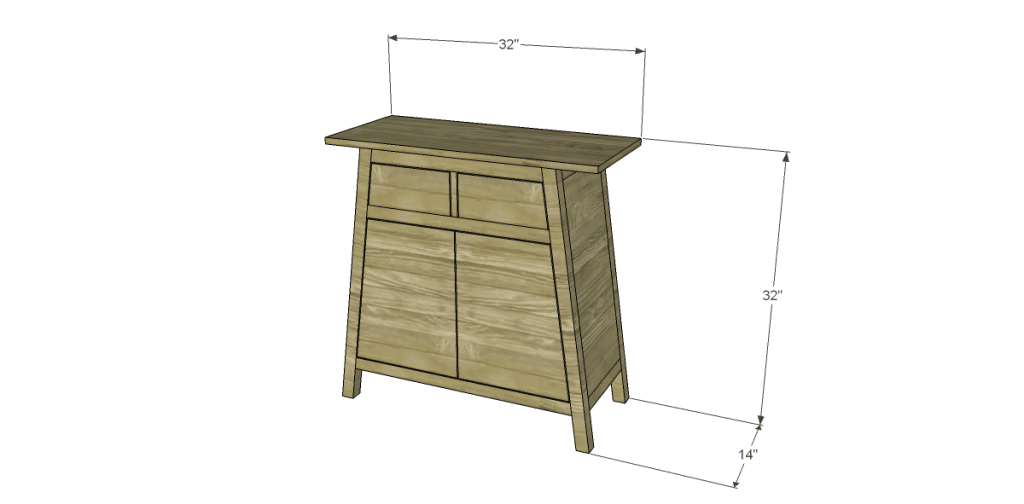
Step One
Cut the pieces for the legs. Cut an 8 degree angle in each end as shown.
Cut the pieces for the side frames and panels. Drill pocket holes in each end of the frame pieces as well as all four edges of the panel. Attach the frame pieces to the panels using glue and 1-1/4″ pocket hole screws. Attach the panel assembly to the legs using glue and 1-1/4″ pocket hole screws. The outside face of the panels will be flush with the outside face of the legs. The legs will be oriented so that they lean to the inside of the cabinet!
Step Two
Cut the pieces for the back frame and the back panel. Attach the frame pieces to the panel using glue and 1-1/4″ pocket hole screws. Attach the panel assembly to the legs using glue and 1-1/4″ pocket hole screws. The outside face of the panel will be flush with the outside face of the legs.
Step Three
Cut the pieces for the lower stretcher and the lower shelf. Cut 8 degree angles in each end of the stretcher, then drill pocket holes in each end. Secure to the front legs as shown using glue and 1-1/4″ pocket hole screws. The outside face of the stretcher will be flush with the outside face of the legs.
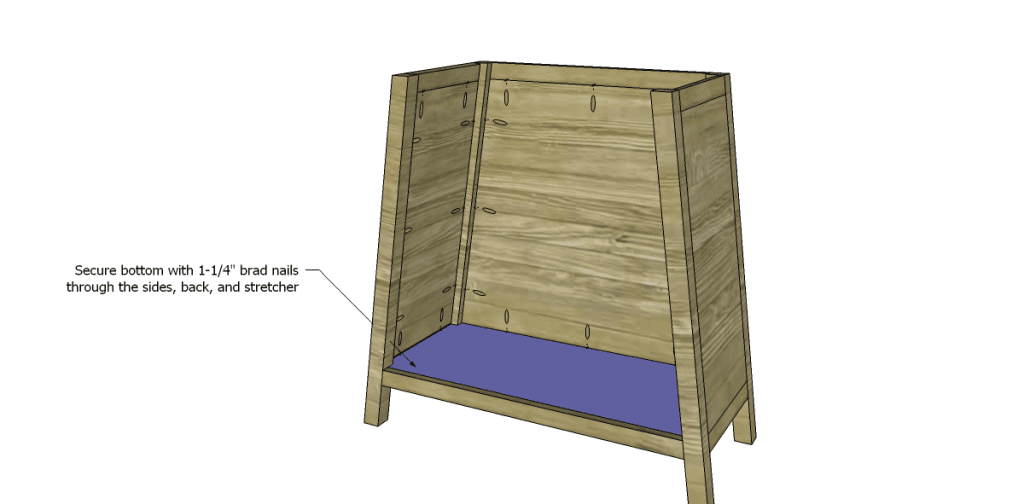
Cut the notches in the shelf using a jigsaw. Position as shown with the top face of the shelf flush with the top of the lower stretcher. Secure in place using glue and 1-1/4″ brad nails through the sides, back, and stretcher.
Step Four
Cut the pieces for the upper and middle stretchers as well as the drawer divider. Cut 8 degree angles in each end of the stretchers, then drill pocket holes in each end. Secure to the front legs as shown using glue and 1-1/4″ pocket hole screws. The outside face of the stretchers will be flush with the outside face of the legs.
Drill one pocket hole in each end of the drawer divider. Secure to the upper and middle stretchers as shown using glue and 1-1/4″ pocket hole screws.
Step Five
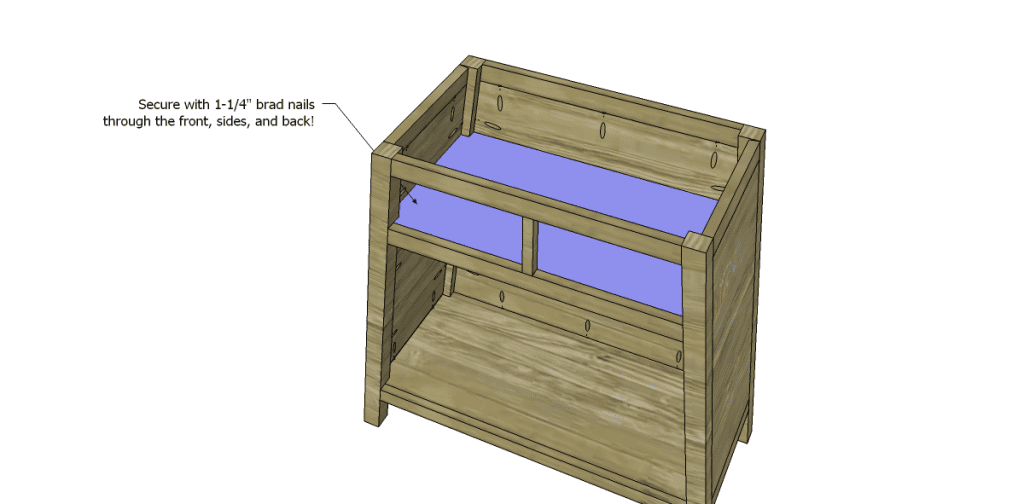
Cut the piece for the shelf. Cut the notches in the shelf using a jigsaw. Position as shown with the top face of the shelf flush with the top of the middle stretcher. Secure in place using glue and 1-1/4″ brad nails through the sides, back, and stretcher.
Step Six
Cut the piece for the top. The front and back will be flush with the cabinet, and the sides will overhang by 4-1/2″. Secure in place with glue and 1-1/4″ brad nails.
Step Seven
Cut the pieces for the drawers. Cut an 8 degree bevel along one edge of each of the bottom pieces. Cut an 8 degree bevel in each end of ONE side for EACH drawer. Secure the sides to the bottoms as shown using glue and 1-1/4″ brad nails. Cut the front and back pieces as shown. Secure to the sides and bottom using glue and 1-1/4″ brad nails. Rub a coat of paste wax on the bottom of each of the drawers as well as on the shelf. This will help the drawers slide more smoothly!
Step Eight
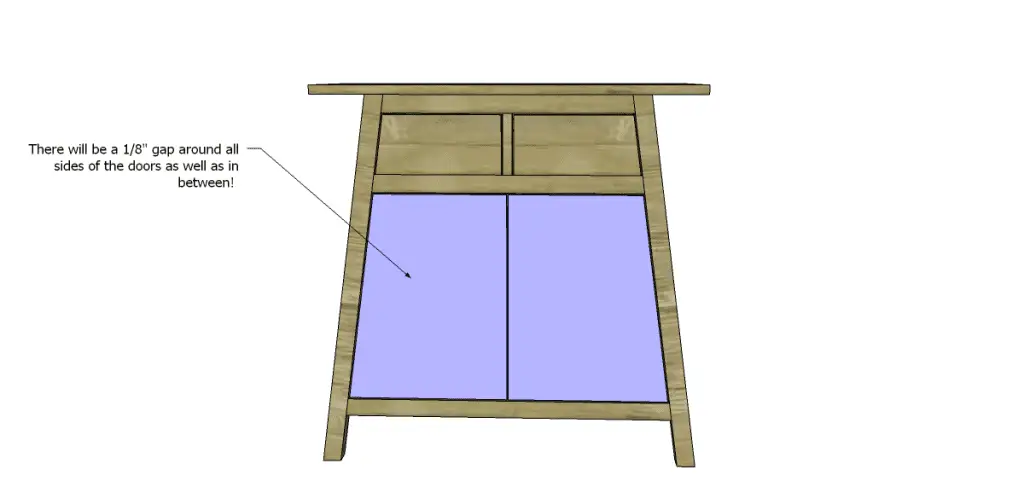
Cut the pieces for the doors. Attach the hinges to the doors, then attach the doors to the cabinet. There will be a 1/8″ gap around all sides of the doors as well as in between them. Attach the cabinet pulls or other hardware as necessary.
 Finish as desired!
The free DIY woodworking plans to build an Asian-Style Cabinet will help you construct a piece of furniture that will be awesome with any decor! Have a request for a plan? Contact me at cher {at} designsbystudioc {dot} com or designsbystudioc {at} gmail {dot} com. I would love to create an easy to build plan for you!
Originally posted 2013-08-21 08:00:21.


Wow very innovated and modern. Love it!
Thank you so much!
[…] Free DIY Woodworking Plans to Build an Asian Style Cabinet I really love Asian style furniture! I love the angles and the clean lines! To me, it represents calm! Anyway, today's plans are for an As… […]
Love it, but how do you keep the drawers aligned, and how do you keep them from pulling all the way out?
Hi, RogerP! Thanks so much! To keep the drawers from pulling all the way out, a small scrap of wood can be attached to the inside back of the drawer so that it sticks up above the drawer. When the drawer is pulled, this piece will hit the front stretcher which will keep it from being pulled all the way out. As for keep ing them aligned, spacers can be nailed to the drawer shelf behind the divider to keep the drawers in line. Hope this helps and if you have further questions, please ask! 🙂