
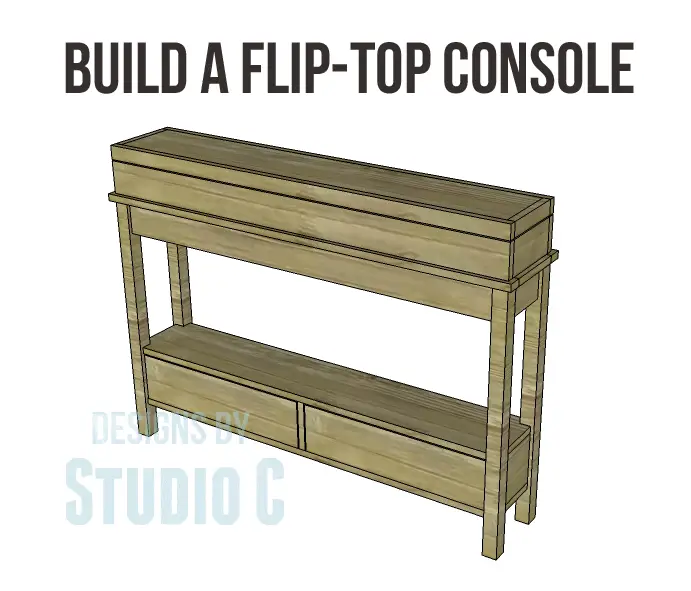
Build a Flip Top Console
Plans to Build a Beautiful Console Table with a Unique Feature
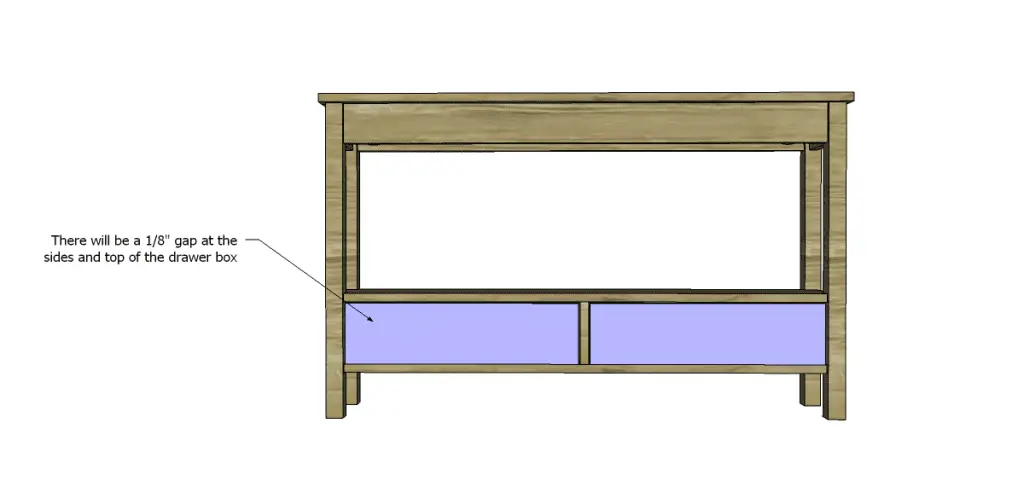
This is a great console table… Who couldn’t use a great console table? These free DIY woodworking plans to build a Flip Top Console have a lidded box on the top and two drawers on the bottom which also double as a shelf. The box on the top is completely optional! This would be the perfect piece to try the Glue-Resist Technique – c’mon, I know you’re dying to try it!
Materials:
- 1-1/4″ pocket hole screws
- 1-1/4″ brad nails
- Edge banding, optional
- 2 drawer pulls
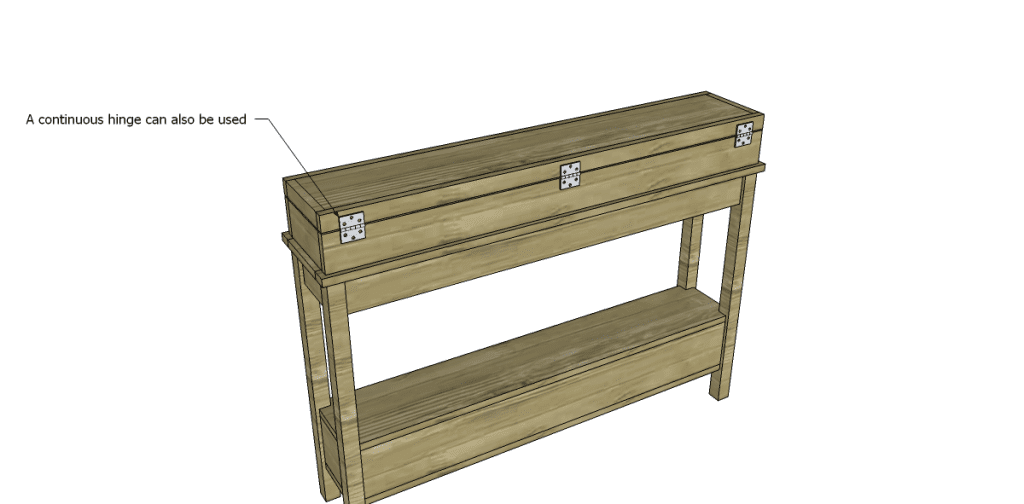
- 3 hinges or 1 continuous hinge
- Finishing supplies
Lumber:
- 3 – 1×2 at 8′
- 3 – 1×4 at 8′
- 1 – 1×6 at 8′
- 2 – 2×2 at 6′
- 1 sheet of 3/4″ plywood
Cut List:
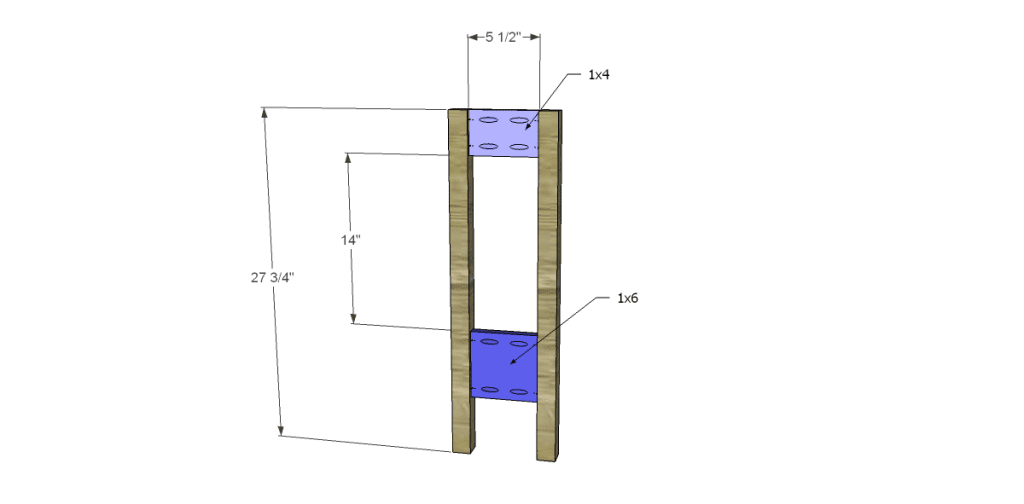
- 4 – 2×2 at 27-3/4″ – Legs
- 2 – 1×4 at 5-1/2″ – Upper Side Stretchers
- 2 – 1×6 at 5-1/2″ – Lower Side Stretchers
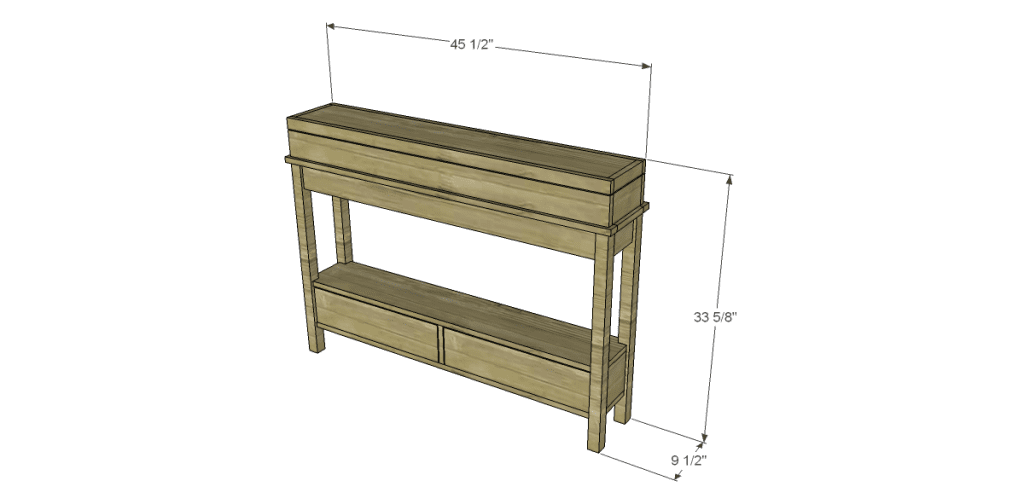
- 2 – 1×4 at 42-1/2″ – Upper Aprons
- 1 – 1×6 at 42-1/2″ – Lower Apron
- 2 – 3/4″ plywood at 7-3/4″ x 44-3/4″ – Drawer Cubby Top and Bottom
- 1 – 3/4″ plywood at 5-1/2″ x 7″ – Drawer Divider
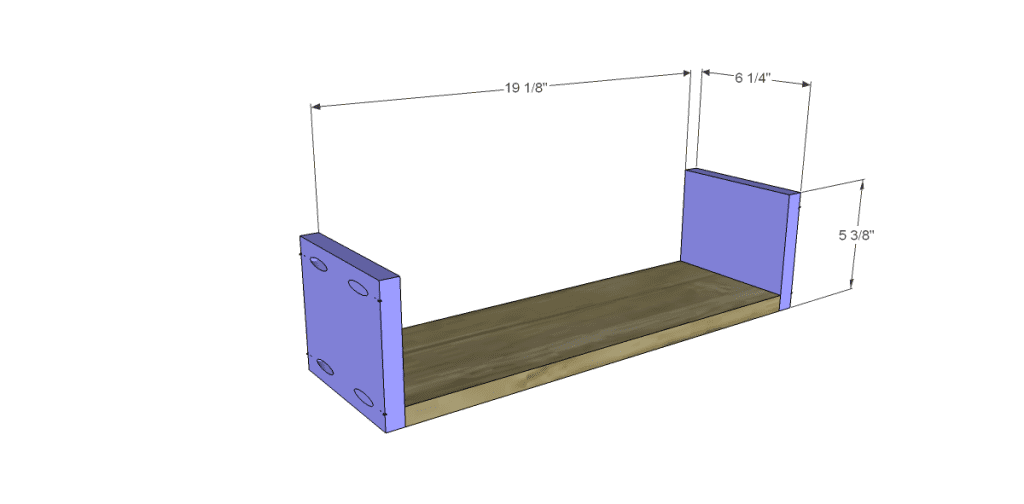
- 2 – 3/4″ plywood at 6-1/4″ x 19-1/8″ – Drawer Box Bottoms
- 4 – 3/4″ plywood at 5-3/8″ x 6-3/4″ – Drawer Box Sides
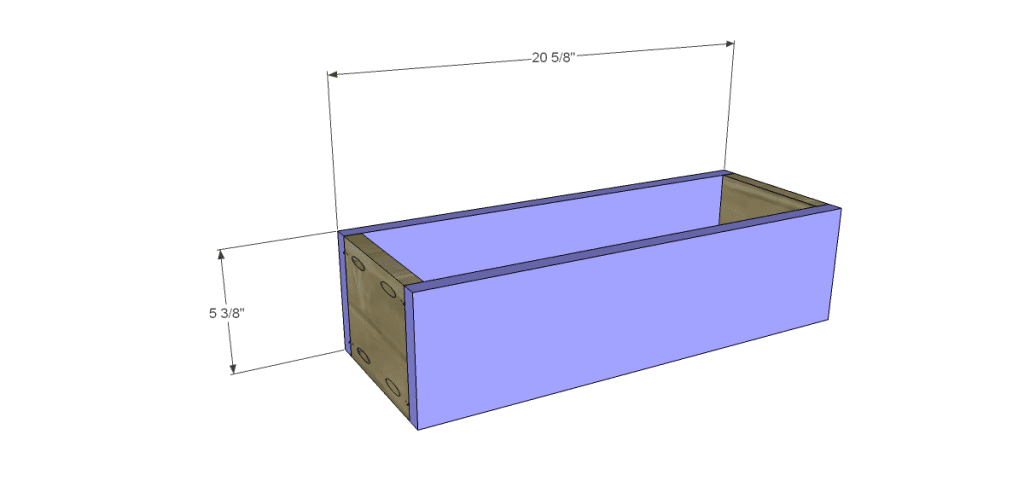
- 4 – 3/4″ plywood at 5-3/8″ x 20-5/8″ – Drawer Box Front & Back
- 2 – 1×2 at 6-1/2″ – Top Trim
- 2 – 1×2 at 46-1/2″ – Top Trim
- 1 – 3/4″ plywood 6-1/2″ x 43-1/2″ – Top Panel
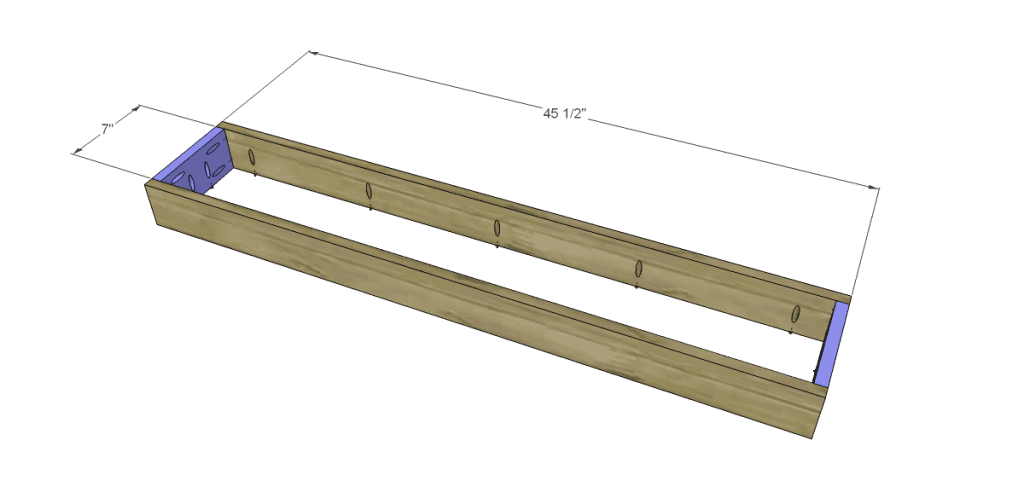
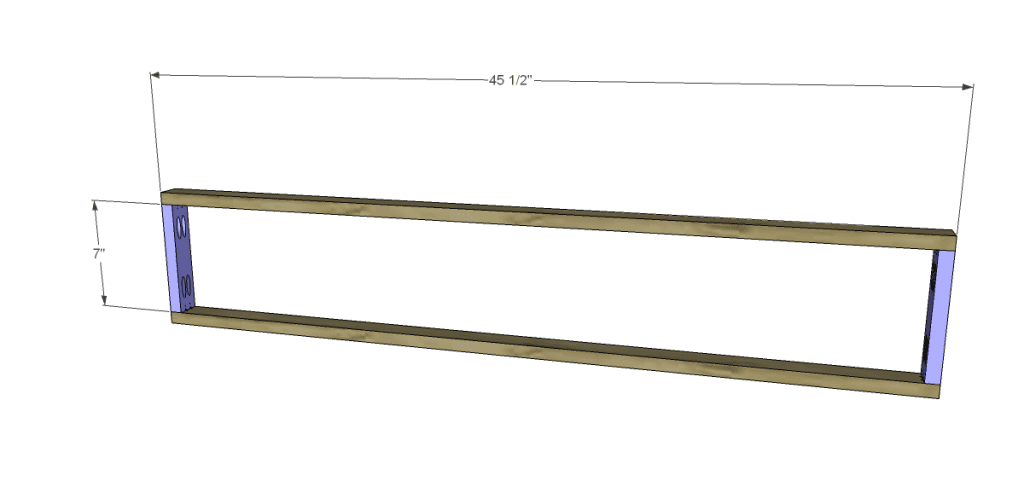
- 2 – 1×4 at 7″ – Top Box Sides
- 2 – 1×4 at 45-1/2″ – Top Box Front & Back
- 2 – 1×2 at 7″ – Box Lid Sides
- 2 – 1×2 at 45-1/2″ – Box Lid Front & Back
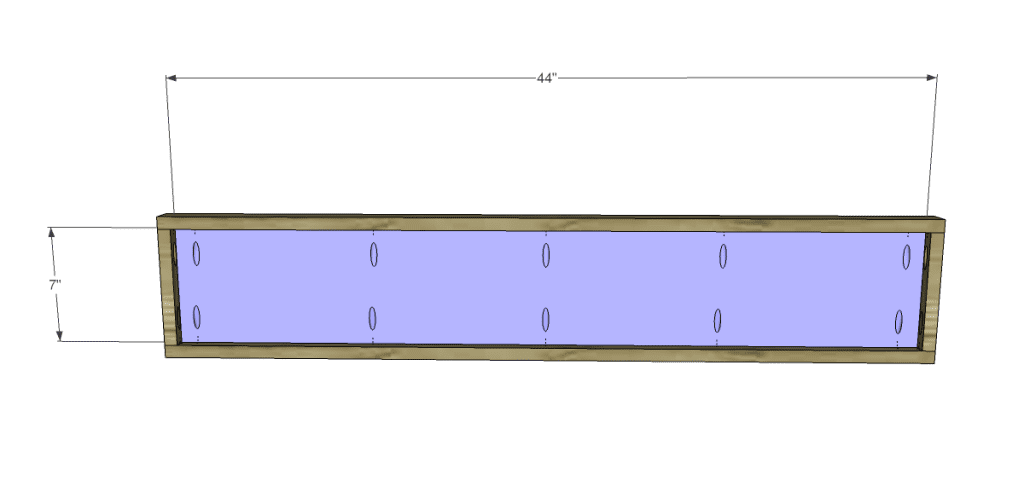
- 1 – 3/4″ plywood at 7″ x 44″ – Box Lid Top
Click on the drawings for a larger view!
Step One
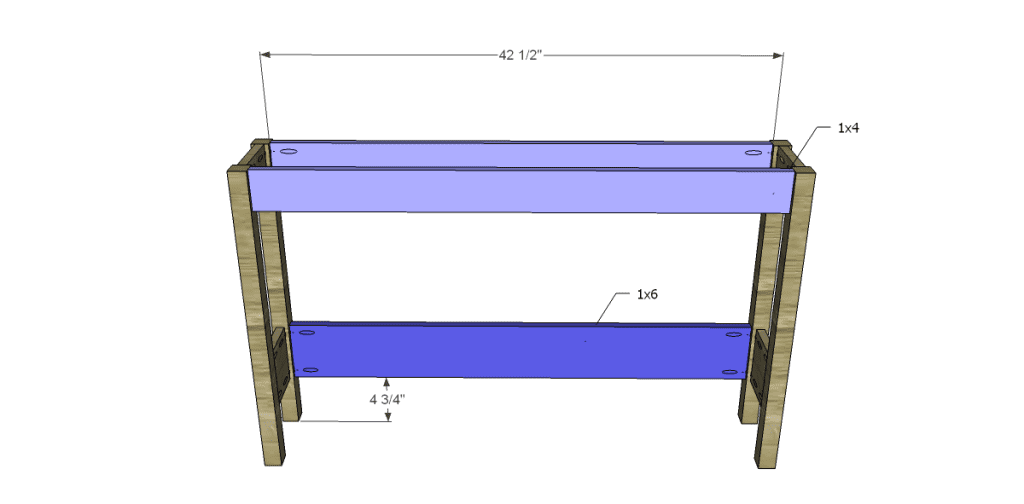
Cut the pieces for the legs and the stretchers. Drill pocket holes in each end of the sides. They are very short and if it is a tight fit for a regular drill, consider using a close-quarter drill or an angle drill attachment. Secure the stretchers centered on the legs (3/8″ from the front edge of the legs, 3/8″ from the back edge of the legs) using glue and 1-1/4″ pocket hole screws.
Step Two
Cut the pieces for the aprons and drill pocket holes in each end. Center the stretchers (in the same manner as the stretchers) on the legs and secure using glue and 1-1/4″ pocket hole screws.
Step Three
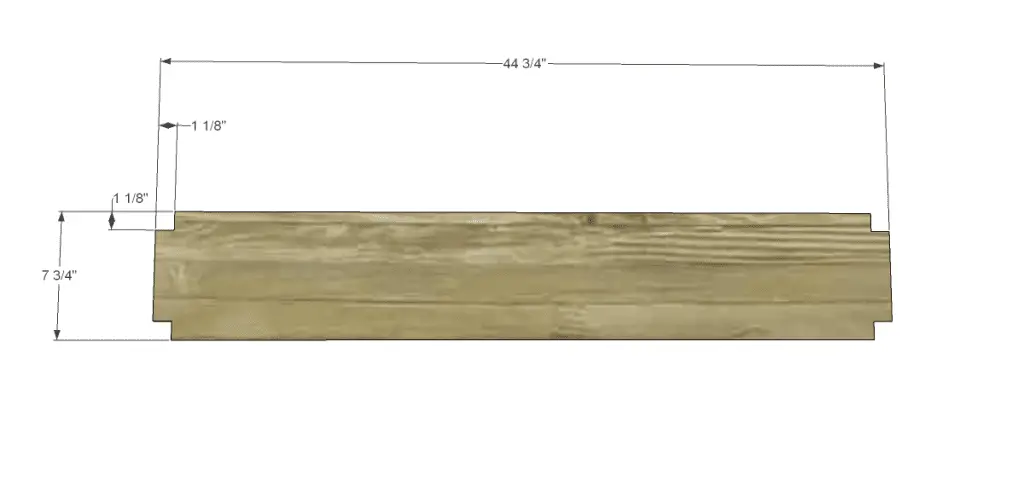
Cut the pieces for the drawer cubby. Cut the notches using a jigsaw. Position on the top and bottom of the stretchers and aprons, then secure using glue and 1-1/4″ brad nails.

Step Four
Cut the piece for the drawer divider. Position as shown, then secure using glue and 1-1/4″ brad nails.

Step Five
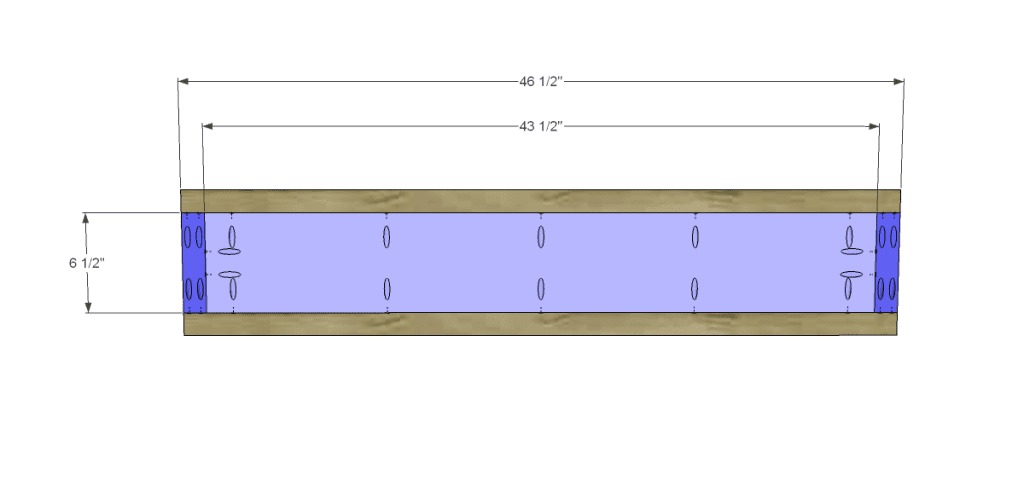
Cut the pieces for the top trim and panel. Drill pocket holes in all four edges of the panel as well as each end of the shorter trim pieces. Attach the side pieces using glue and 1-1/4″ pocket hole screws, then secure the front and back in the same manner. Rout a decorative edge on the outside of the trim, if desired.
 Step Six
Cut the pieces for the drawer boxes. Drill pocket holes ine ach end of the sides as well as all four edges of the bottom. Assemble as shown using glue and 1-1/4″ pocket hole screws. Apply a coat of paste wax to the bottom of the drawer to allow it to slide easily.
Step Seven
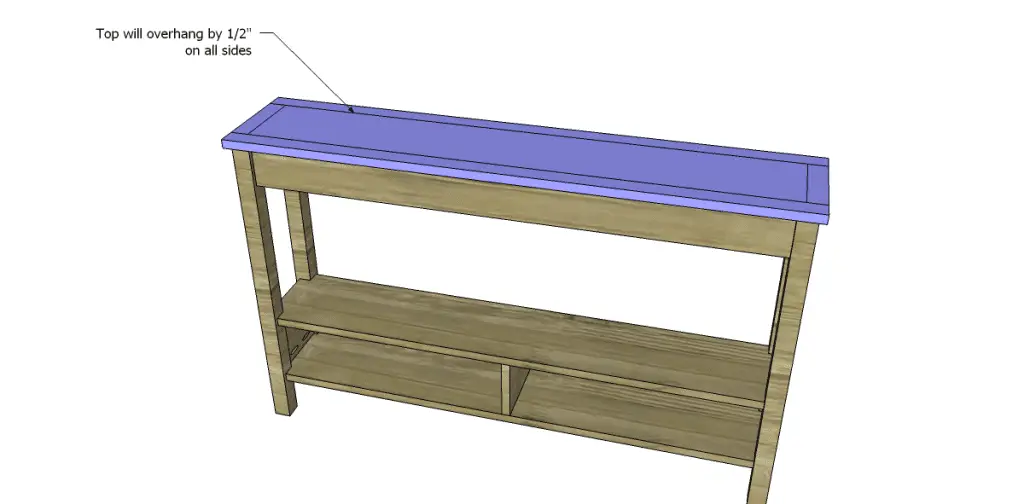
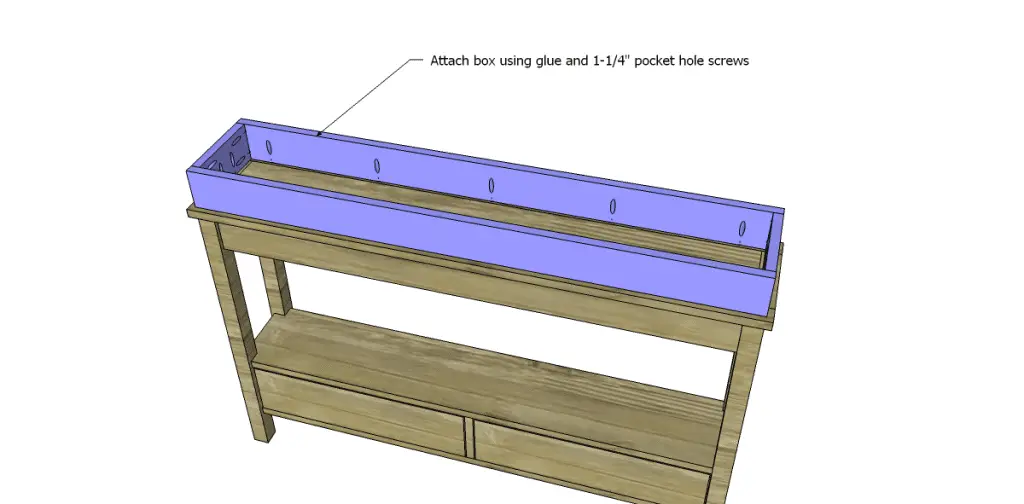
Cut the pieces for the top box. Drill pocket holes in each end of the shorter pieces as well as one long edge of each of the longer pieces. Assemble the frame as shown using glue and 1-1/4″ pocket hole screws. Attach to the top, locating the box 1/2″ in from each side, with glue and 1-1/4″ pocket hole screws.
Step Eight
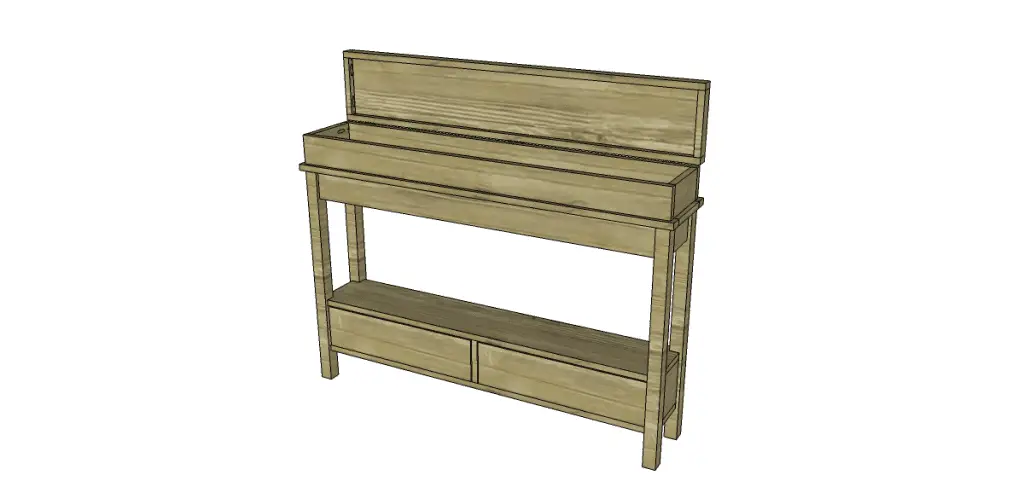
Cut the pieces for the box lid. Drill pocket holes in each end of the shorter frame pieces as well as one long edge of each of the longer frame pieces. Assemble the frame as shown using glue and 1-1/4″ pocket hole screws. Drill pocket holes in all four edges of the top panel. Secure to the frame using glue and 1-1/4″ pocket hole screws. The outside face of the panel will be flush with the top edge of the box lid. Install the hinges according to the manufacturer’s instructions.
Finish as desired!
The free DIY woodworking plans to build a Flip Top Console are super simple, and this is another project that can be completed in a weekend! Have a request for a plan? Contact me at cher {at} designsbystudioc {dot} com or designsbystudioc {at} gmail {dot} com. I would love to create an easy to build plan for you!
Originally posted 2013-08-28 08:00:05.