Build a Beadboard Drying Rack
A Wall Mounted Clothing Drying Rack for the Laundry Room
During my laundry room makeover, I decided I might like a better place to hang items that cannot be put in the dryer rather than plastic hangers suspended from wire shelving. I came across this wall mounted clothing drying rack and figured it would be an easily hackable build! The free plans to build a beadboard drying rack are easy to follow and construct, plus it is quite the inexpensive build!
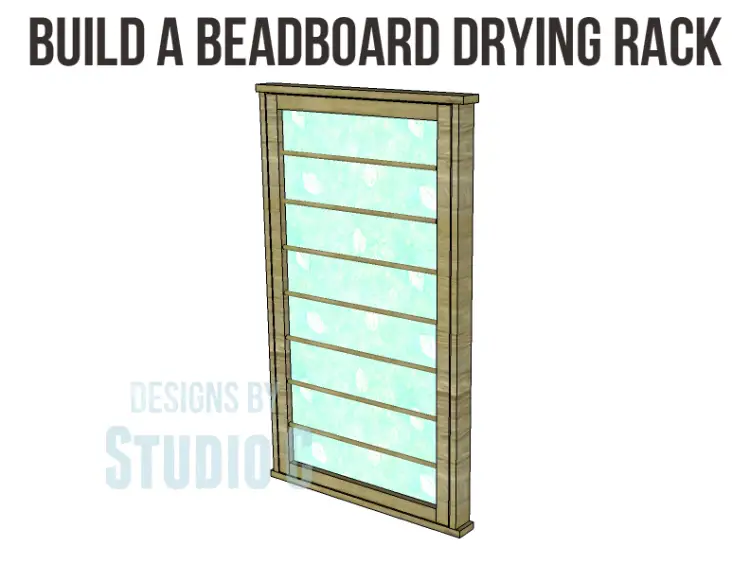
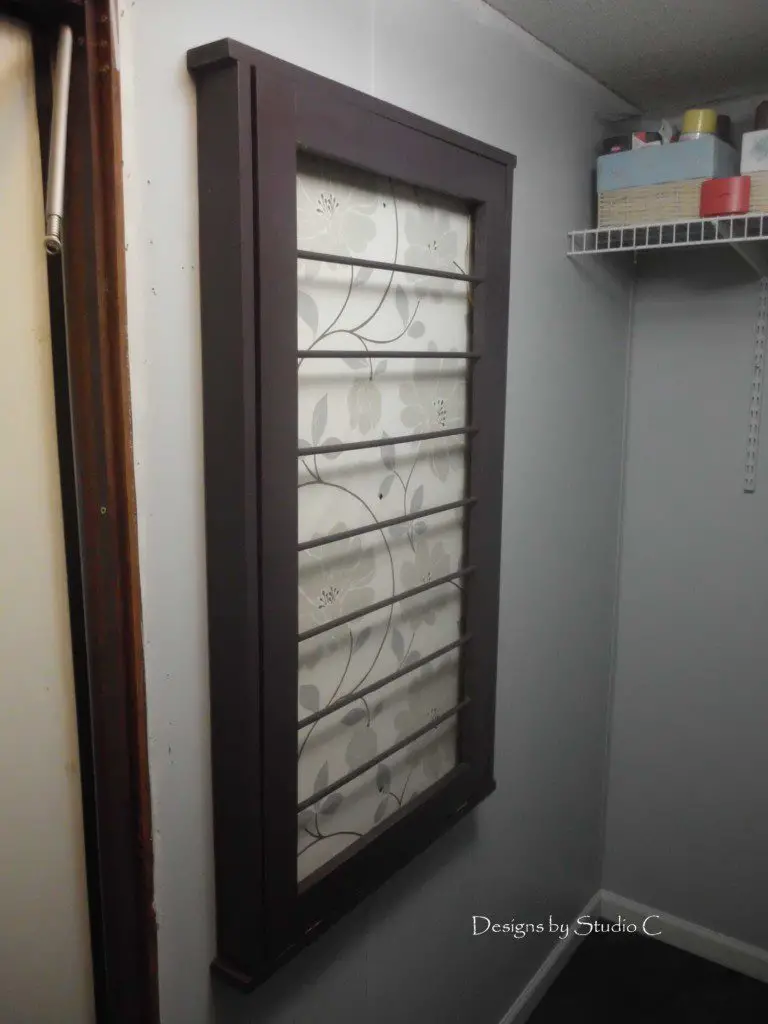
The beadboard drying rack plans are created for the Medium size (inspired by Ballard Designs) and can be easily adjusted for the Small or Large sized wall mounted drying rack (though this size is plenty large enough!).
Materials:
- 1-1/4″ pocket hole screws
- One set of hinges
- One magnetic catch
- Four 1/2″ panhead screws
- Two pieces of twill tape or nylon webbing each measuring approximately 16″ long
- Finishing supplies
Lumber:
- 1 – 1×2 at 8′
- 1 – 1×2 at 4′
- 7 – 3/8″ dowels at 3′
- 1 – 1×3 at 8′
- 1 – 1×3 at 6′
- 1 – quarter sheet of 3/4″ plywood
Cut List:
- 2 – 1×2 at 42″ – Door Frame
- 2 – 1×2 at 20″ – Door Frame
- 7 – 3/8″ dowels at 21″ – Rungs
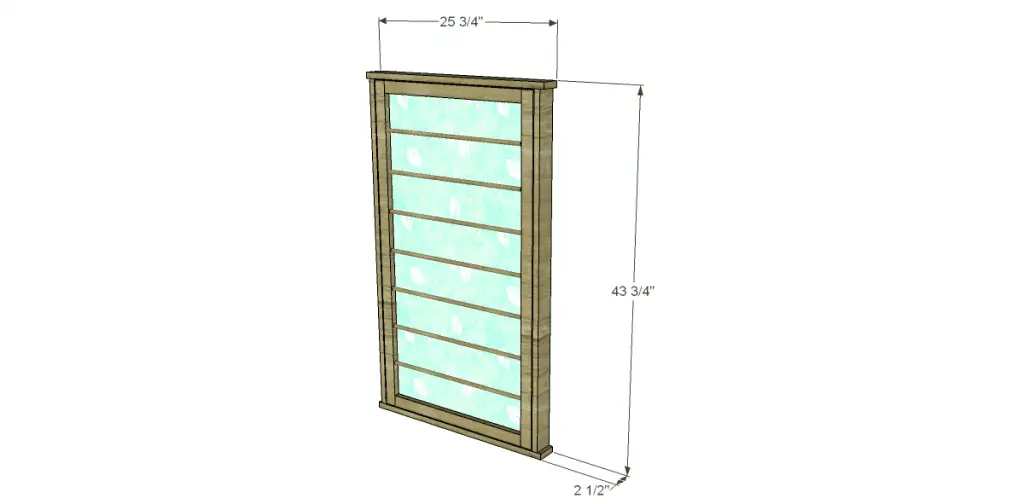
- 2 – 1×3 at 25-3/4″ – Case Top & Bottom
- 2 – 1×3 at 42-1/4″ – Case Sides
- 1 – 3/4″ plywood at 23-1/4″ x 42-1/4″ – Back
Step One
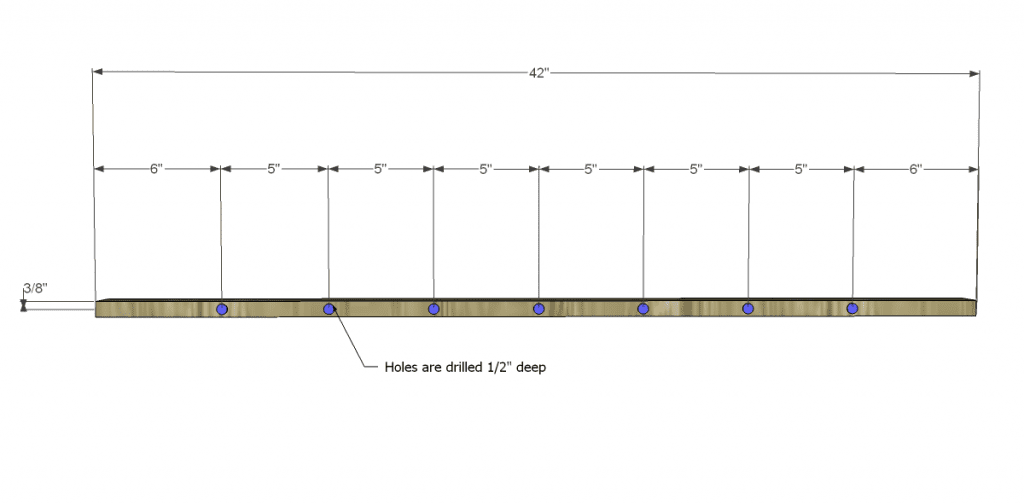
Cut the pieces for the door frame, including the dowels. Mark and drill the holes in each of the longer pieces for the dowels. The dowels are spaced 5″ apart on center and the holes should be 1/2″ deep.
I marked all of the holes then used my drill press to drill the holes. A 3/8″ Forstner bit or 3/8″ paddle bit can also be used.
Step Two
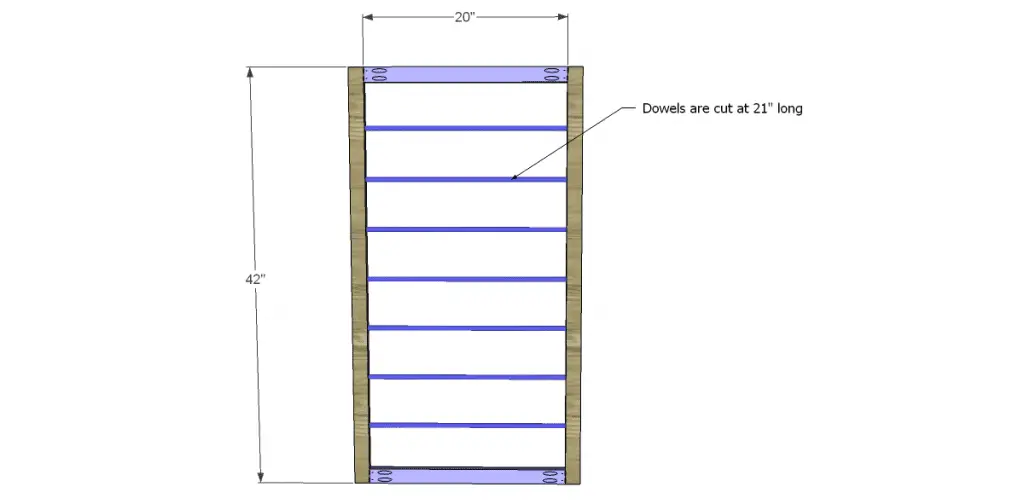
Drill pocket holes in each end of the shorter frame pieces. Attach the pieces to one long piece, with the dowel holes facing in, using glue and 1-1/4″ brad nails. Place the dowels in each of the holes, then position the other long frame piece. A rubber mallet may be used to tap the frame piece in place. Secure using 1-1/4″ pocket hole screws.
Step Three
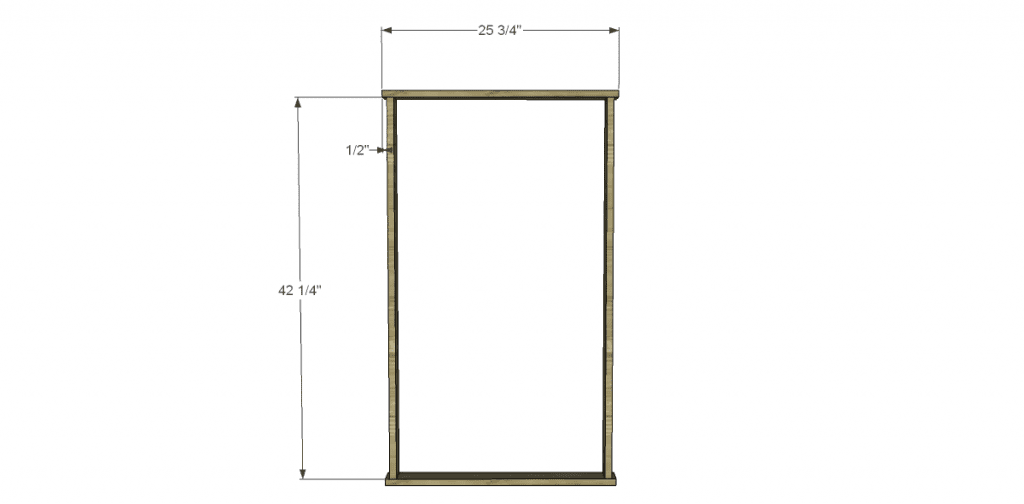
Cut the pieces for the case frame. Drill pocket holes in each end of the longer pieces. The top and bottom will overlap the sides by 1/2″. Secure in place using glue and 1-1/4″ pocket hole screws.
Step Four
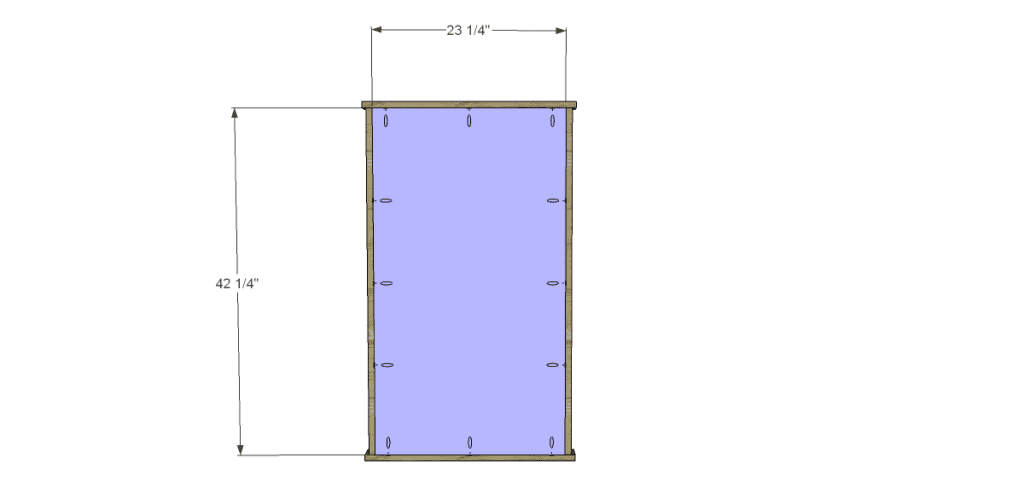
Cut the piece for the back and drill pocket holes in all four edges. Secure to the case frame with the back of the panel flush with the back edge of the frame using glue and 1-1/4″ pocket hole screws.
Step Five
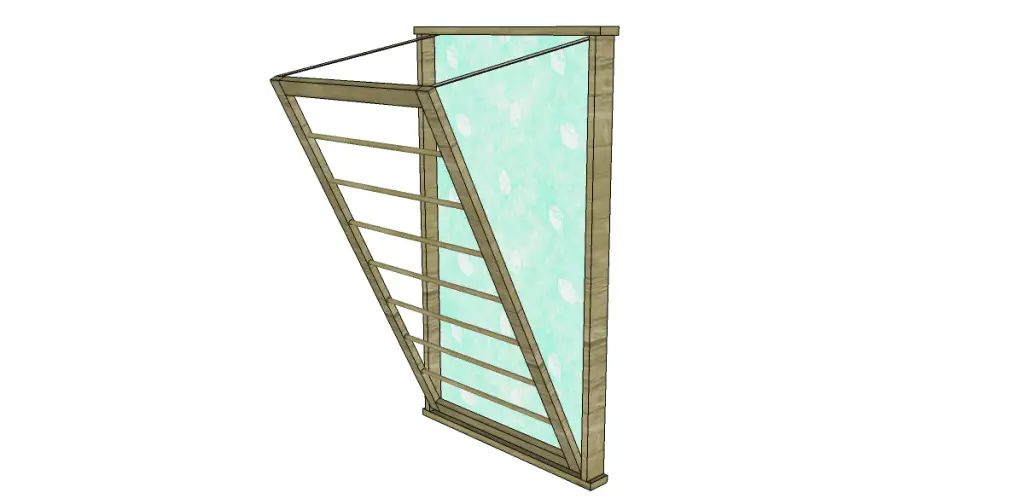
Finish as desired. Attach the hinges to the door, then to the inside bottom of the case. There will be a 1/8″ gap around all sides of the door. Attach the magnetic catch at the inside center of the case frame at the top. Cut the twill tape to length and fold over about 1″ at each end. Attach the twill tape to the inside of the cabinet, then to the doors using the panhead screws. Nylon webbing (belting), ribbon, or even lightweight chain can be used – its just a piece to hold the door partially open.
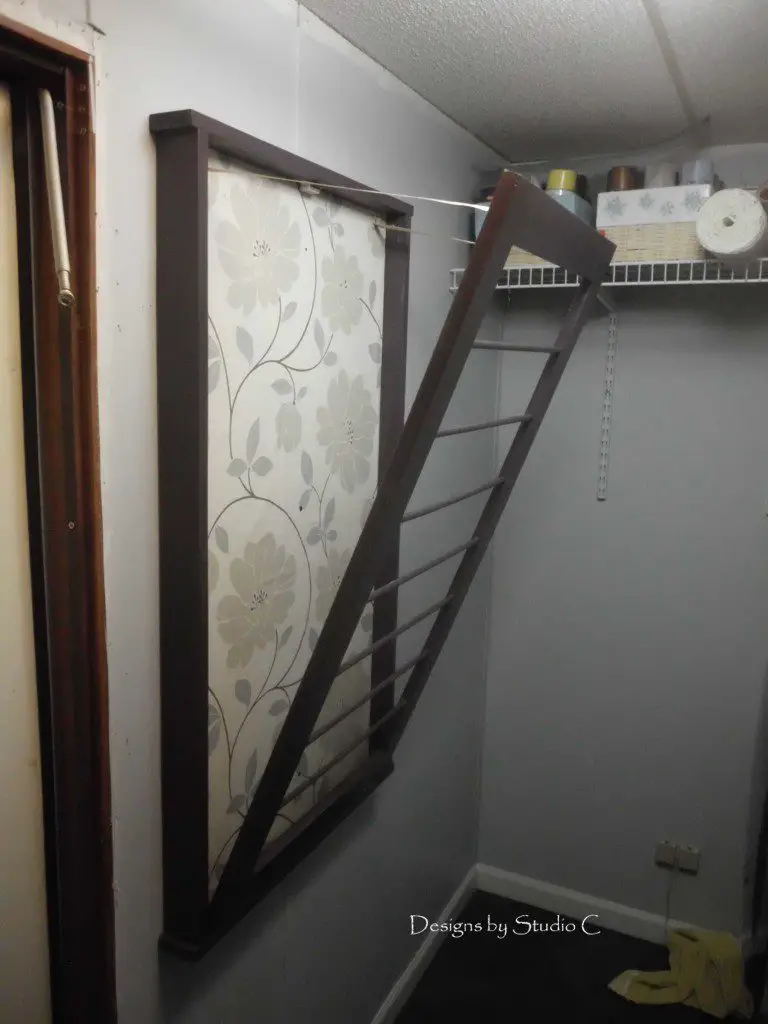
Finish as desired. I covered the back piece of the laundry room drying rack with wallpaper, then painted the entire case using Valspar spray paint in Purple Fury. I also used three coats of Spar Varnish on the door just to protect it from moisture.
Have any questions about the free plans to build a beadboard drying rack? Leave a comment below!
Originally posted 2012-12-05 08:00:56.
