Create Your Dream Bedroom with a DIY Queen Platform Bed
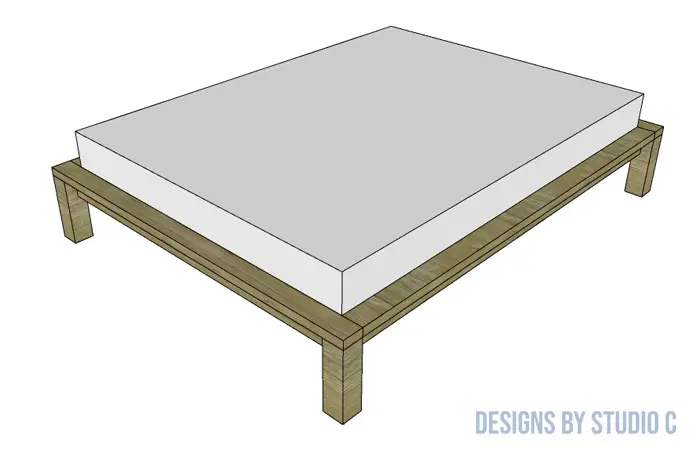
When my daughter asked for a new bed frame because she outgrew her old one, I was super-excited to build it for her! Little did I know that this bed would become the bane of my existence for a few weeks (*eyeroll*). I couldn’t get the finish right because I tried something new that was not even close to the same level of awesome I normally use but that is a story for a different day. The DIY queen platform bed plans are super-easy to build, use off-the-shelf lumber with pocket screws, and is now finished in a lovely whitewashed stain (<– affiliate link!).

Materials:
-
- 2-1/2″ pocket hole screws (<– affiliate link!)
- 1-1/4″ screws
- 2-1/2″ screws
- Wood glue (<– affiliate link!)
- Sandpaper (80, 120, 220 grits)
- Finishing supplies (Stain and sealer or primer and paint)
Lumber:
- 2 – 1×2 at 8′
- 9 – 2×4 at 8′
- 1 – 4×4 at 8′
- 20 – 1x3x8′ for the slats (fewer slats can be used with a larger spacing in between them)
Cut List:
- 4 – 4×4 at 12″ – Legs
- 2 – 2×4 at 61″ – End Rails
- 2 – 2×4 at 68″ – Top End Rails
- 2 – 2×4 at 81″ – Side Rails
- 2 – 2×4 at 81″ – Top Side Rails
- 2 – 1×2 at 81″ – Slat Supports
- 1 – 2×4 at 81″ – Center Support
- 2 – 2×4 at 12″ – Center Support Legs
- 20 – 1x3s at 61″ – For the slats (Or however many slats you need!)
Notes About the Project:
- Drill the pocket holes first, then sand everything prior to assembly
- The ends and sides can be finished as assemblies, then stained
- The center support does not need to be stained
Step One
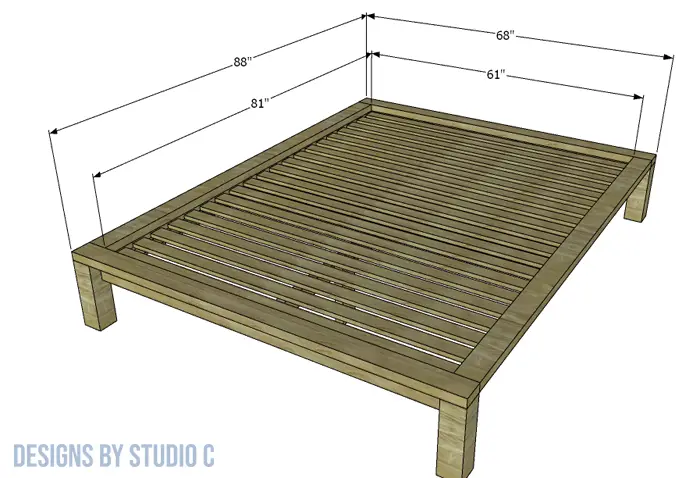
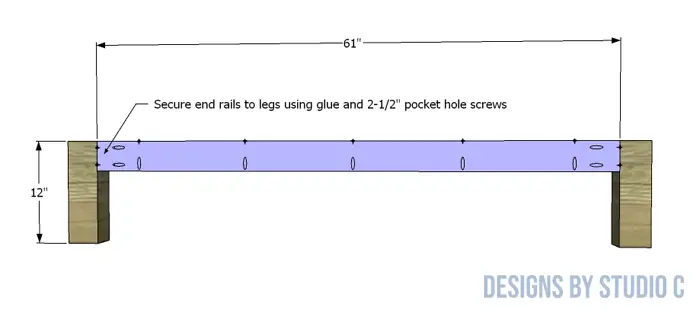
Cut the pieces for the legs and the end rails. Drill pocket holes along one long edge of the end rails (to secure the top end rail), as well as two pocket holes in each end (to secure to the legs). Secure the end rails to the legs using glue and 2-1/2″ pocket hole screws, making sure the back face of the end rails is flush with one face of each of the legs.
Step Two
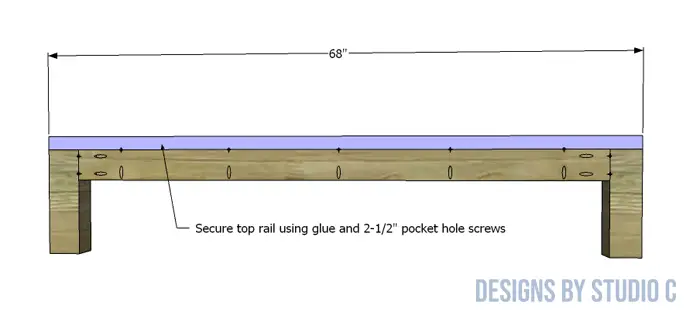
Cut the pieces for the top end rails. Apply a glue to the top of the legs and along the top of the end rails, then position the top rail in place. Secure the top rail using glue and 2-1/2″ pocket hole screws.
Step Three
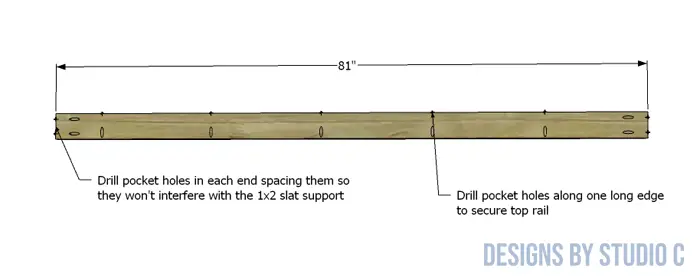
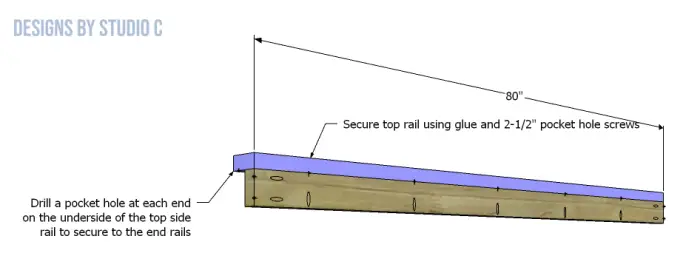
Cut the pieces for the side rails and top side rails. Drill pocket holes along one long edge of each of the side rails, as well as two pocket holes in each end spacing them at least 2 inches apart to allow for the slat support. Also drill one pocket hole in each end of the top side rail to secure to the top end rail (see drawing!). Apply glue to the top of the side rail, and secure to the top side rail with 2-1/2″ pocket hole screws.
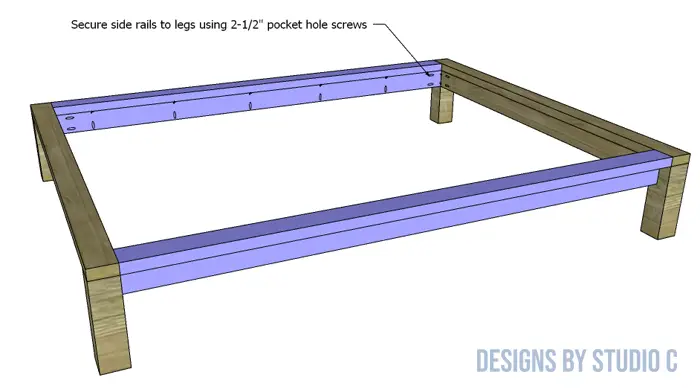
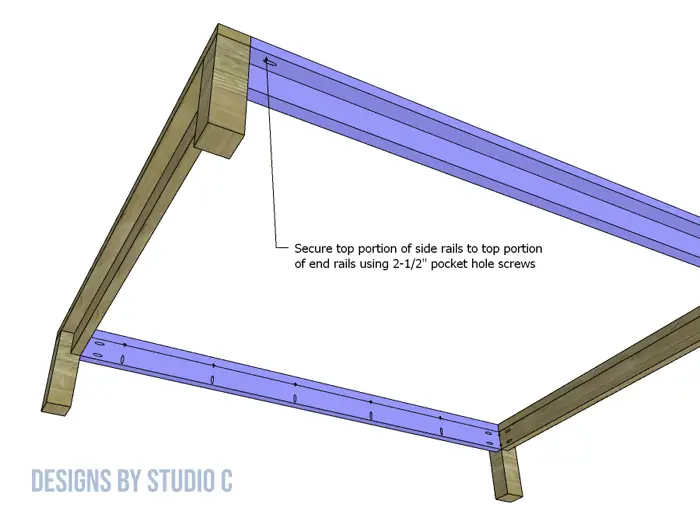
Secure the side rails to the legs using 2-1/2″ pocket hole screws but DO NOT USE GLUE so that the bed can be disassembled, if necessary. Secure the top side rails to the top end rails using one 2-1/2″ pocket hole screw in each end.
Step Four
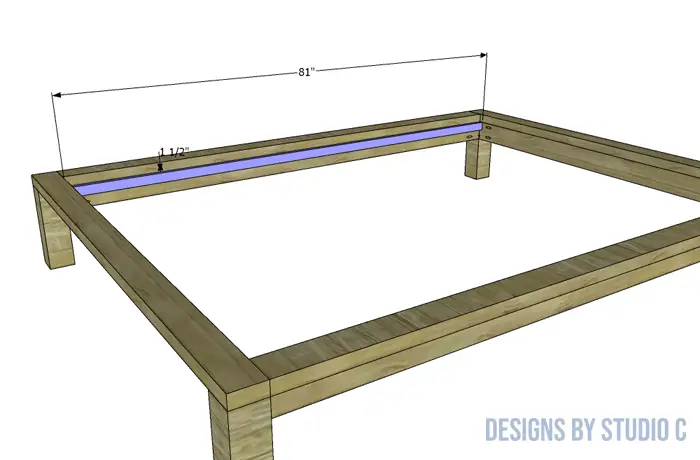
Cut the pieces for the slat supports. Secure the supports to the side rails using 1-1/4″ screws, locating them 2-1/2″ down from the top face of the top side rail.
Step Five
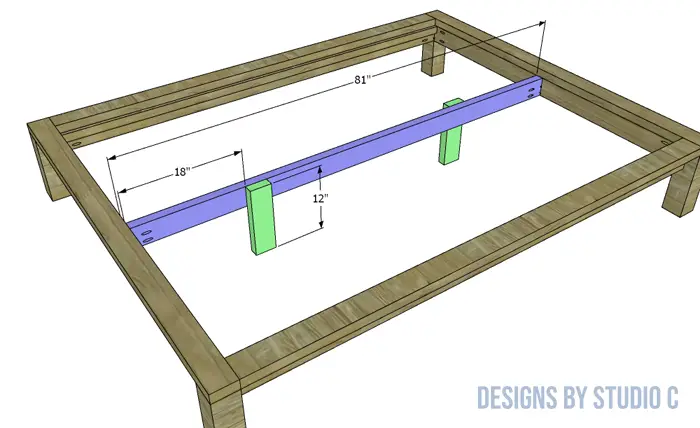
Cut the pieces for the center support and the support legs. Drill pocket holes in each end of the center support. Secure the legs to each end of the support using glue and 2-1/2″ screws.
Secure the center support to the center of the end rails, located 2-1/2″ down from the top face of the top end rail, using 2-1/2″ pocket hole screws. DO NOT USE GLUE!
Step Six
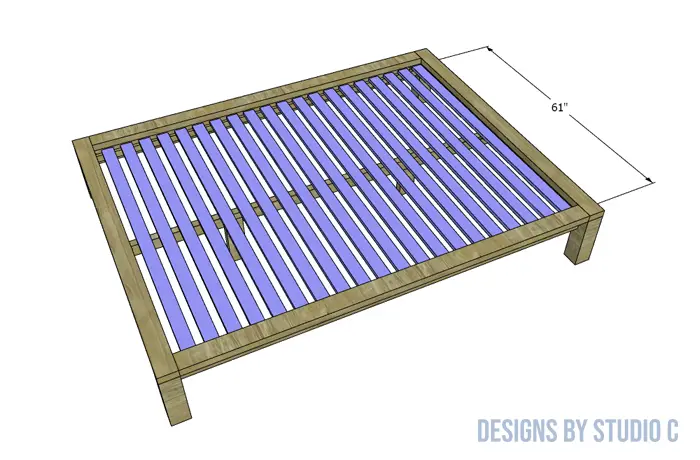
Cut the pieces for the slats and secure them, evenly spaced, along the slat supports and center support using 1-1/4″ screws (and no glue here, either!).

Finish as desired.
This DIY queen platform bed is easy to build, even if this is your first project! Have questions? Leave a comment below!
Originally posted 2024-03-14 08:00:27.


Comments are closed.