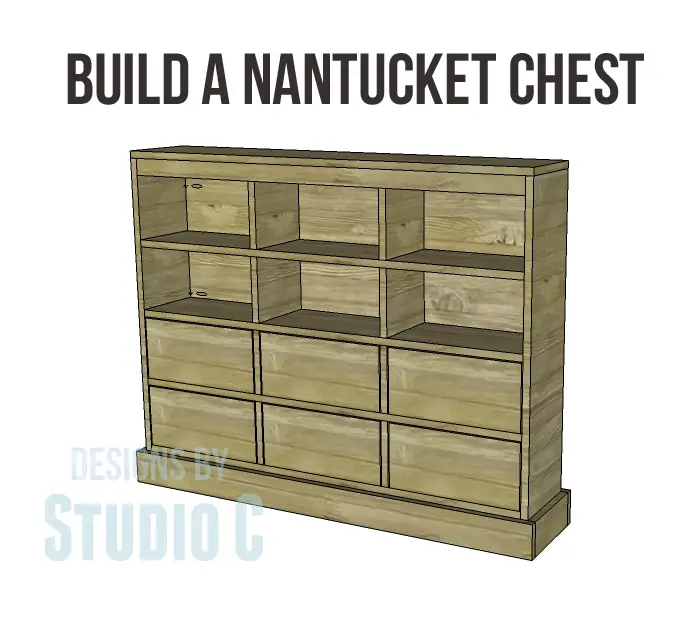
Build a Nantucket Chest
Let’s Get Crafty: How to Build the DIY Nantucket Chest!
Hey there! If you’re looking for a fun project to spruce up your home, check out these awesome free DIY woodworking plans to build a beautiful Nantucket Chest that’s perfect for any room in your house – whether it’s your entryway, hallway, dining room, or even your bedroom. And the best part? This slim and stylish chest won’t take up too much space, but it’ll give you plenty of storage for all your shoes, gloves, hats, and more. So why not give it a try? Your home will thank you!
Materials:
- 1-1/4″ pocket hole screws (<– affiliate link!)
- 1-1/4″ brad nails
- 6 drawer pulls
- 6 baskets or boxes to fill the upper cubbies (approx. 13″ L x 7″ W x 6″ H)
- Finishing supplies
Lumber:
- 1 half sheet of 3/4″ plywood
- 1 full sheet of 3/4″ plywood
Cut List:
- 2 – 3/4″ plywood at 8-1/2″ x 35-1/4″ – Sides
- 1 – 3/4″ plywood at 8-1/2″ x 43-1/2″ – Bottom
- 2 – 3/4″ plywood at 3-1/2″ x 8-1/2″ – Bottom Supports
- 1 – 3/4″ plywood at 31″ x 43-1/2″ – Back
- 2 – 3/4″ plywood at 7-3/4″ x 31″ – Dividers
- 3 – 3/4″ plywood at 7-3/4″ x 43-1/2″ – Dividers
- 1 – 3/4″ plywood at 1-3/4″ x 43-1/2″ – Stretcher
- 1 – 3/4″ plywood at 8-1/2″ x 45″ – Top
- 6 – 3/4″ plywood at 6-1/4″ x 12-1/4″ – Drawer Bottoms
- 12 – 3/4″ plywood at 6-1/4″ x 6-5/8″ – Drawer Sides
- 12 – 3/4″ plywood at 6-5/8″ x 13-3/4″ – Drawer Front & Back
- 2 – 3/4″ plywood at 3-1/2″ x 8-1/2″ – Lower Trim
- 2 – 3/4″ plywood at 3-1/2″ x 46-1/2″ – Lower Trim
Step One
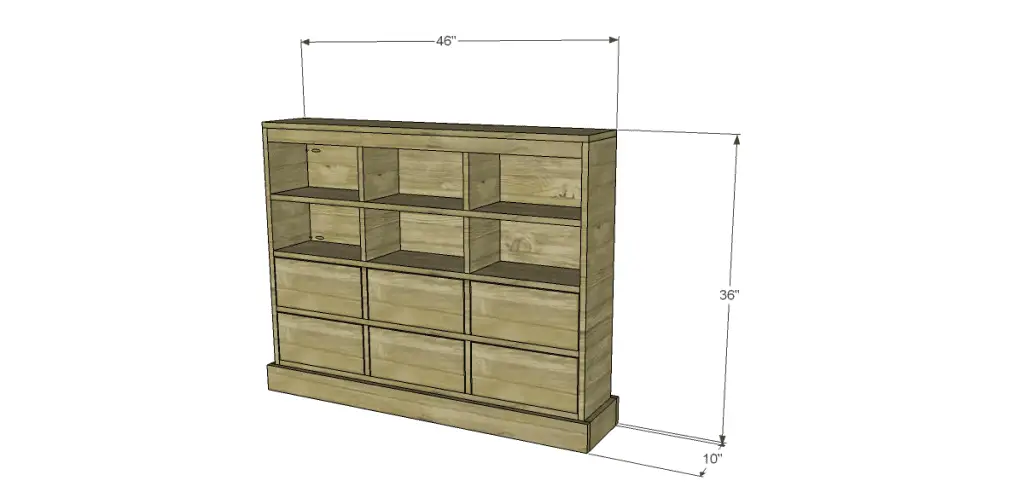
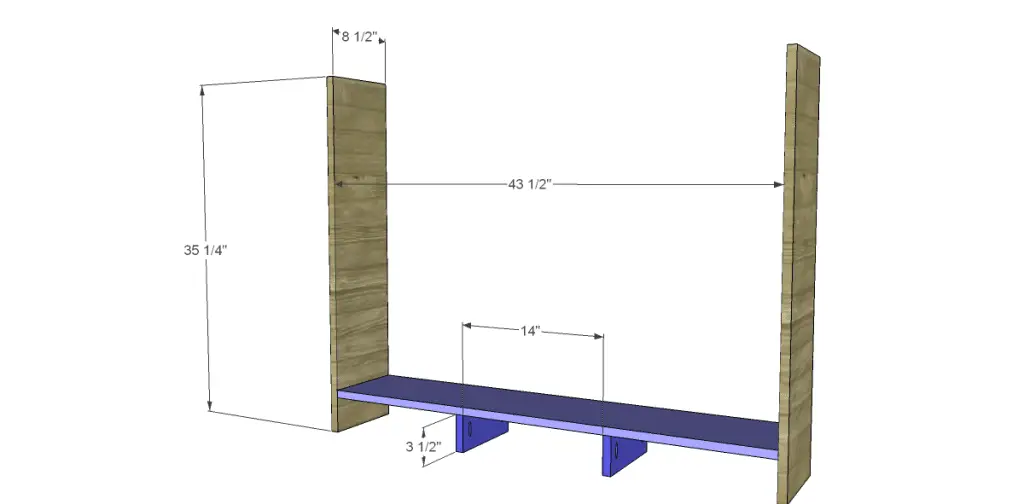
Cut the pieces for the sides, bottom, and bottom support. Drill pocket holes in one longer edge of each support, as well as each end of the bottom. Attach the supports to the bottom using glue and 1-1/4″ pocket hole screws, then attach the bottom to the sides using glue and 1-1/4″ pocket hole screws.
Step Two
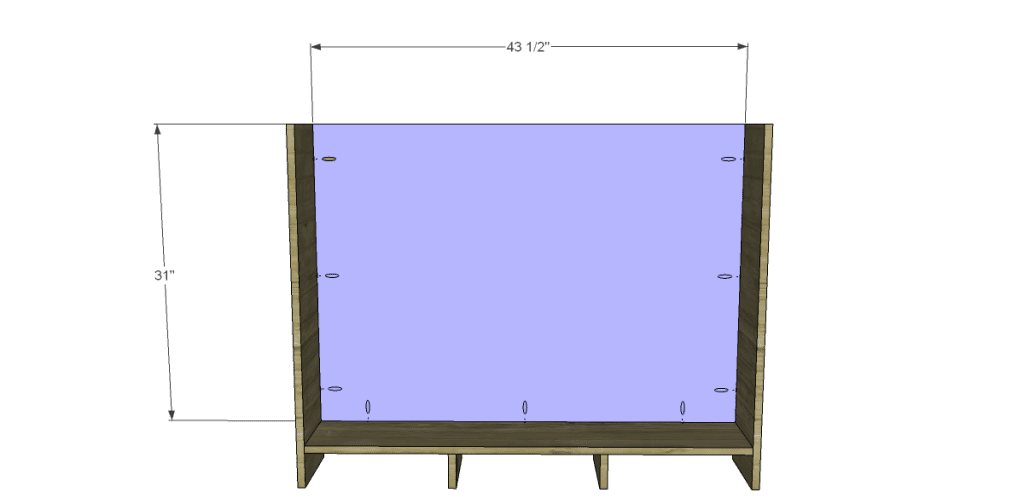
Cut the piece for the back and drill pocket holes in three edges as shown. Position on the bottom with the outside face flush with the outside edges of the sides and bottom, then secure using glue and 1-1/4″ pocket hole screws.
Step Three
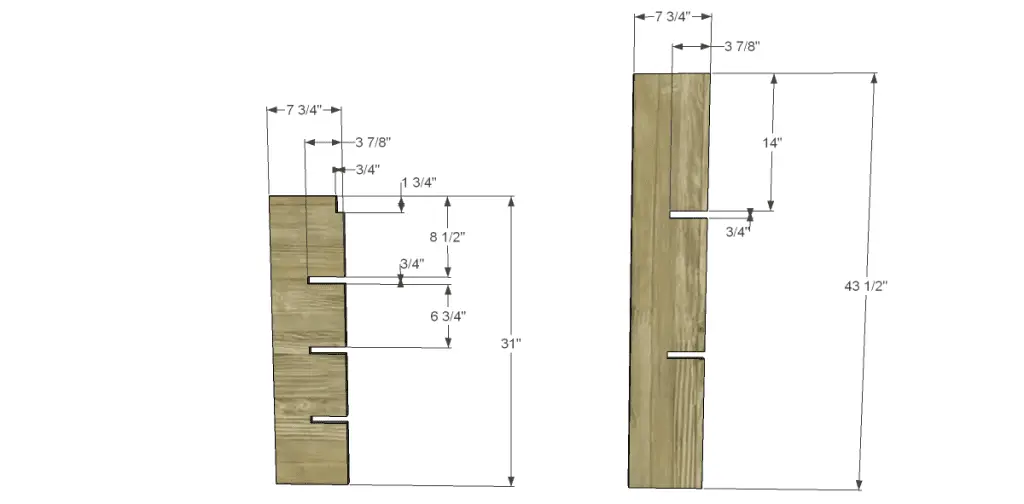
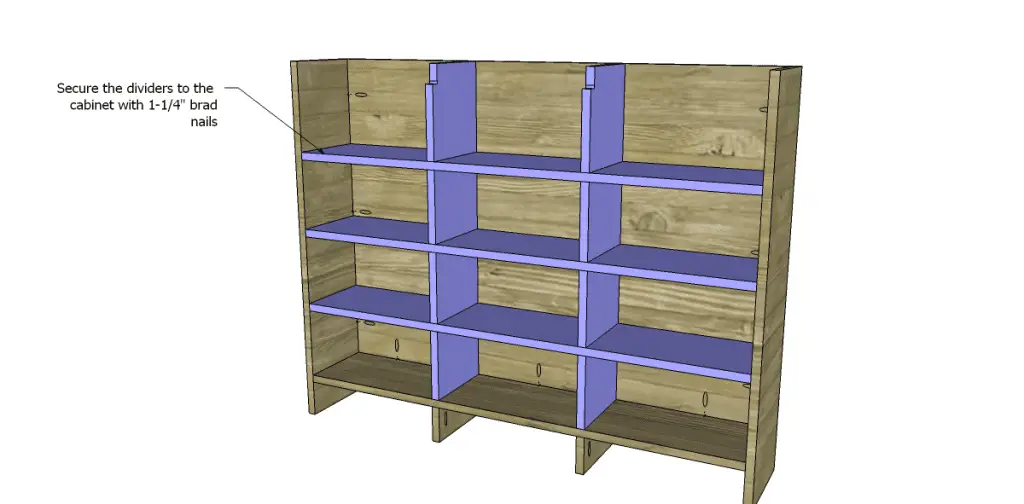
Cut the pieces for the dividers. Mark the notches as shown then cut them using a jigsaw or a bandsaw. Assemble the dividers as shown then secure in the cabinet with glue and 1-1/4″ brad nails through the sides and back into the dividers.
Step Four
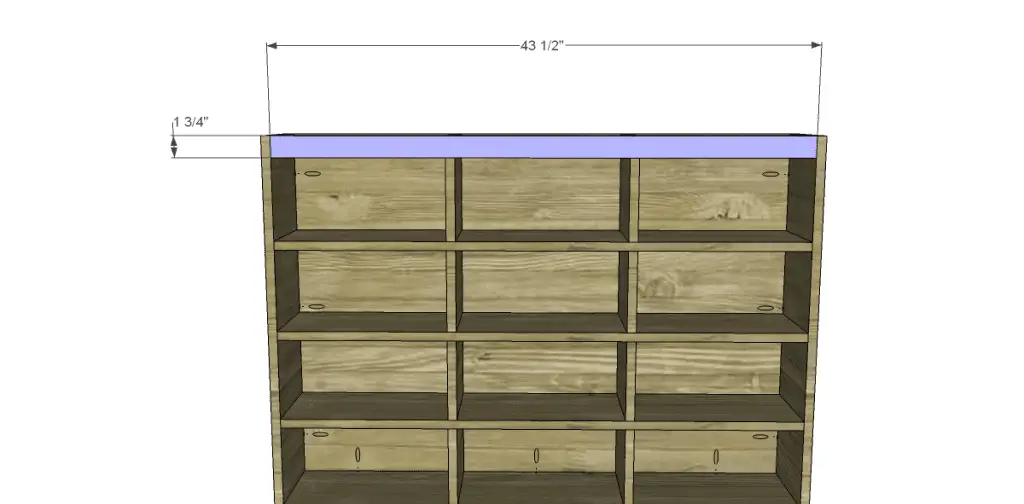
Cut the piece for the stretcher and drill pocket holes in each end. Attach to the cabinet as shown using glue and 1-1/4″ pocket hole screws. Drive a couple of brad nails through the stretcher into the vertical dividers.
Step Five
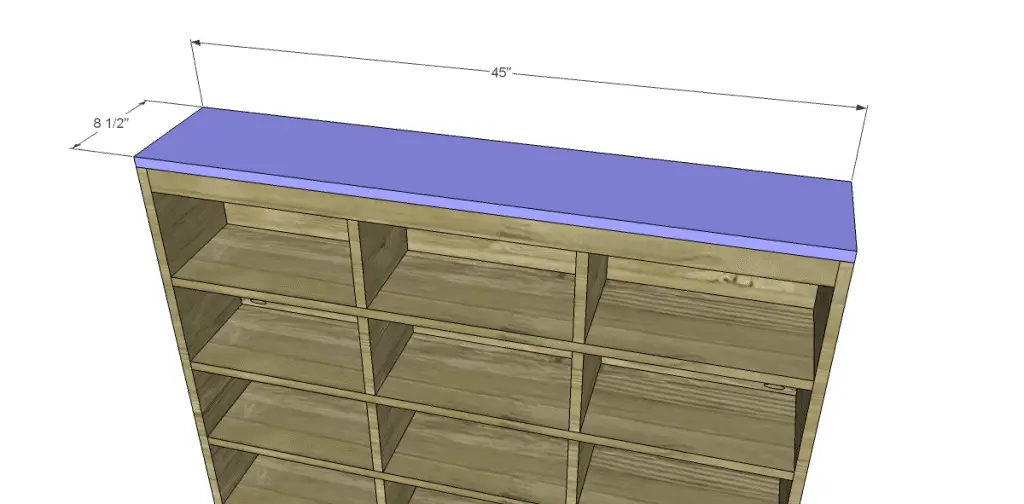
Cut the piece for the top. Secure to the cabinet using glue and 1-1/4″ brad nails.
Step Six
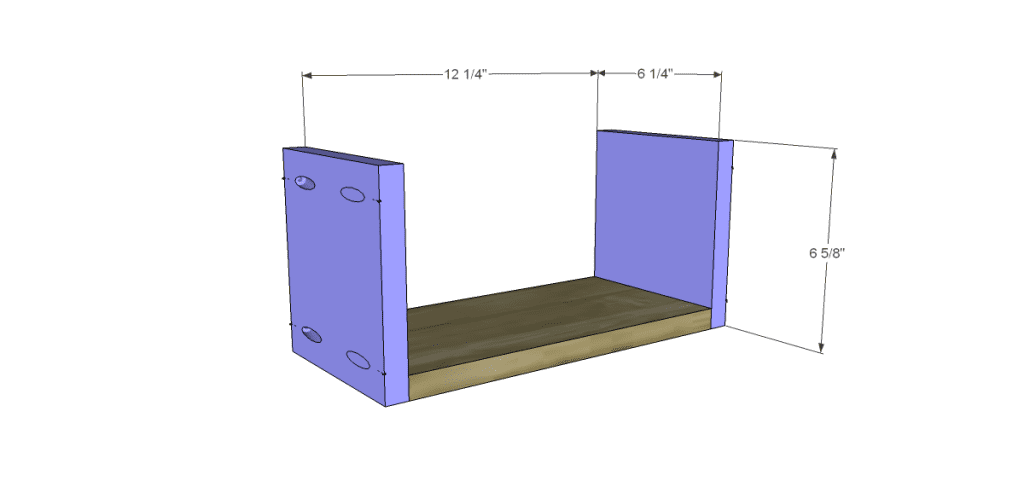
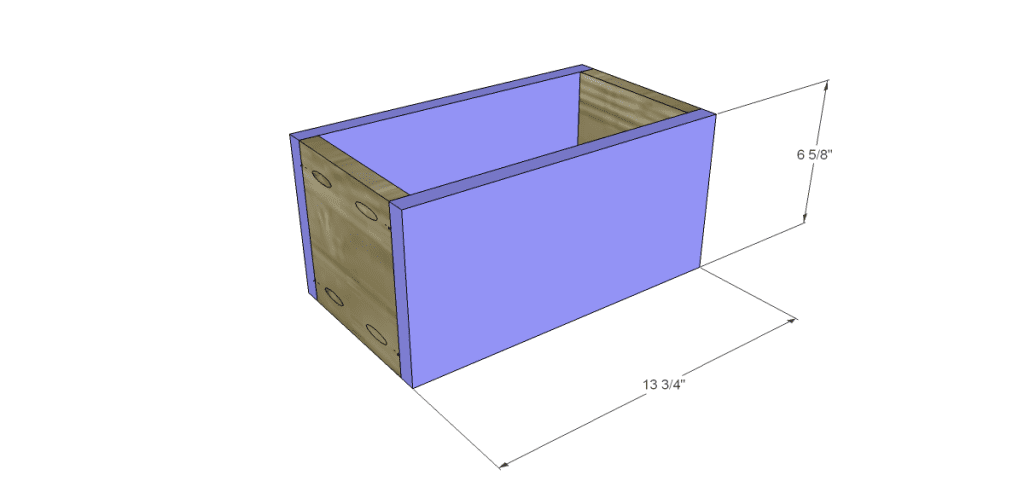
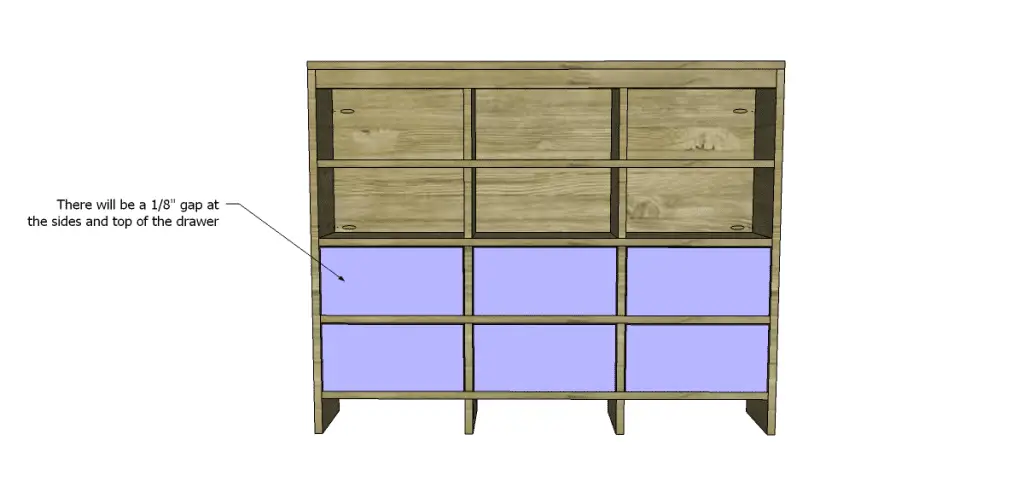
Cut the pieces for the drawers. Drill pocket holes in all four edges of the bottom, as well as each end of the sides. Attach the sides to the bottom as shown using glue and 1-1/4″ pocket hole screws. Attach the front and back using glue and 1-1/4″ pocket hole screws.
Step Seven
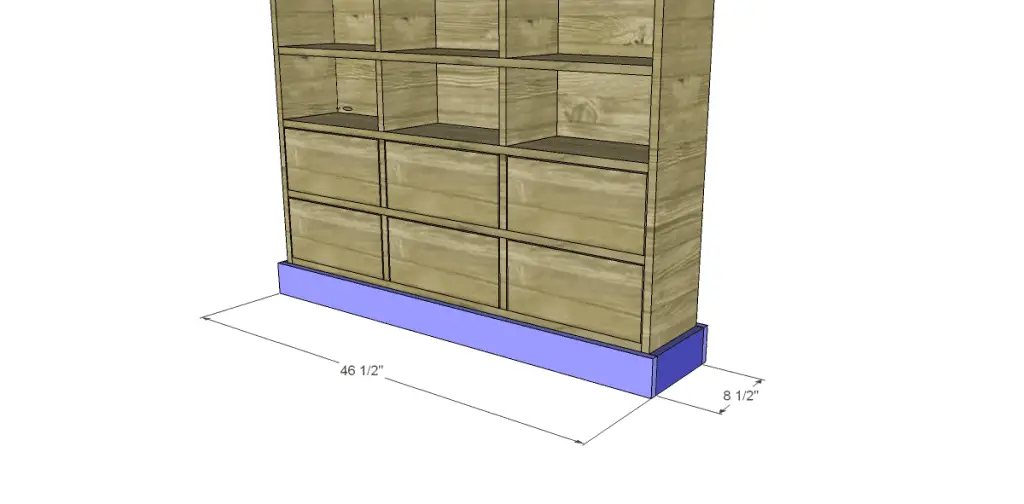
Cut the pieces for the trim. Secure the side pieces first using glue and 1-1/4″ brad nails, then secure the front and back pieces using glue and 1-1/4″ brad nails.
Finish as desired!
The free DIY woodworking plans to build a Nantucket Chest are super easy, and would be a great first project! Have you built from any of my other plans? Share your fabulous work with me… Send photos to cher {at} designsbystudioc {dot} com or designsbystudioc {at} gmail {dot} com. I would love to feature your build on DbSC!
