DIY Plans to Build a Trim Detail Cabinet
A Cabinet with Simple Trim on the Doors & Sides
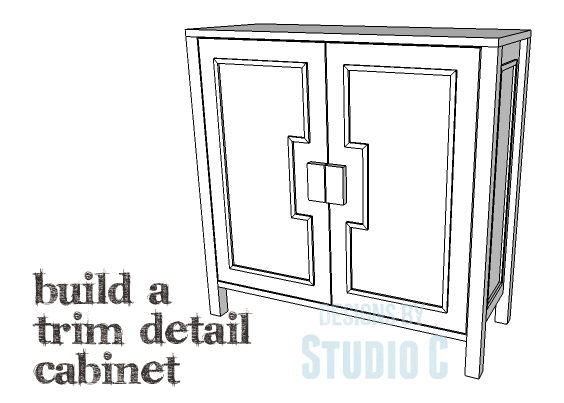
Hey there! This super cute and sleek cabinet is given a touch of elegance with its narrow trim. If you’re into DIY projects, we’ve got the perfect plans for you to build your very own Trim Detail Cabinet. It features a lovely square pattern trim on the doors and sides, along with a handy shelf inside. The handles on the doors are made from simple lumber, so no need to worry about fancy materials. Best part? This cabinet is a breeze to build and you can have it finished in just one weekend. How awesome is that?
Materials:
- 1-1/4″ pocket hole screws (<– affiliate link!)
- 5/8″ brad nails
- 1-1/4″ brad nails
- Edge banding
- 2 sets of hinges
- Wood glue
- Sandpaper (100, 150, 220 grits)
- Finishing supplies (primer & paint, or stain, sealer)
Lumber:
- 1 – 1×2 at 6′
- 2 – 2×2 at 6′
- 1 – 4′ x 4′ sheet of 1/4″ plywood
- 1 – 4′ x 8′ sheet of 3/4″ plywood
- 6 – 1/4″ thick x 1/2″ trim
Cut List:
- 4 – 2×2 at 33-1/4″ – Legs
- 2 – 3/4″ plywood at 11″ x 29-1/4″ – Side Panels
- 4 – 1/4″ thick x 1/2″ wide trim at 7″ – Side Trim
- 4 – 1/4″ thick x 1/2″ wide trim at 25-1/4″ – Side Trim
- 1 – 3/4″ plywood at 14″ x 31″ – Bottom
- 2 – 1×2 at 31″ – Stretchers
- 1 – 3/4″ plywood at 13-1/4″ x 31″ – Shelf
- 1 – 3/4″ plywood at 14″ x 34″ – Top
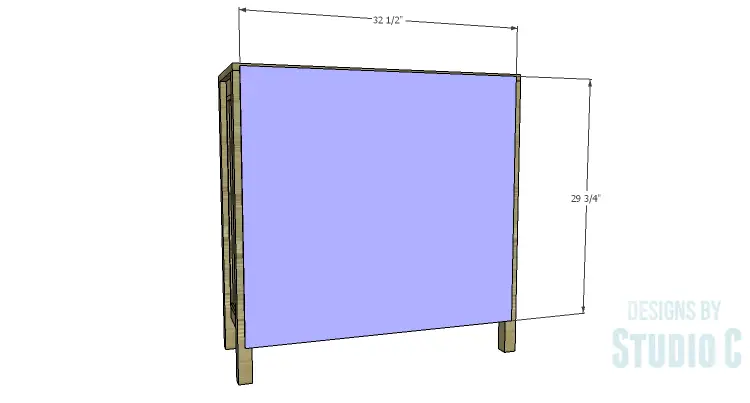
- 1- 1/4″ plywood at 29-3/4″ x 32-1/2″ – Back
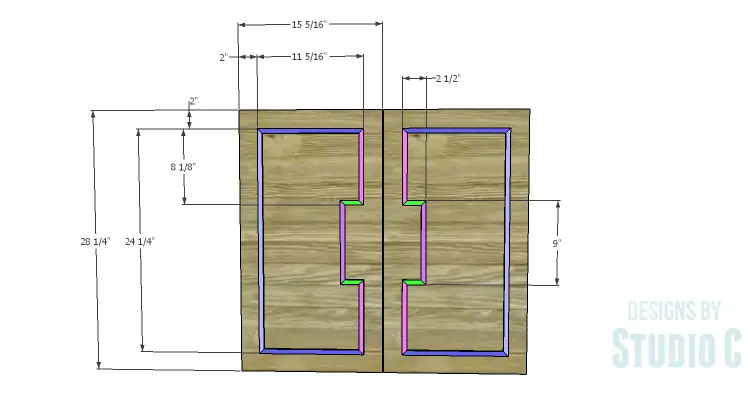
- 2 – 3/4″ plywood at 15-5/16″ x 28-1/4″ – Door Base
- 4 – 1/4″ thick x 1/2″ wide trim at 24-1/4″ – Door Trim
- 4 – 1/4″ thick x 1/2″ wide trim at 11-5/16″ – Door Trim
- 4 – 1/4″ thick x 1/2″ wide trim at 8-1/8″ – Door Trim
- 4 – 1/4″ thick x 1/2″ wide trim at 2-1/2″ – Door Trim
- 2 – 1/4″ thick x 1/2″ wide trim at 9″ – Door Trim
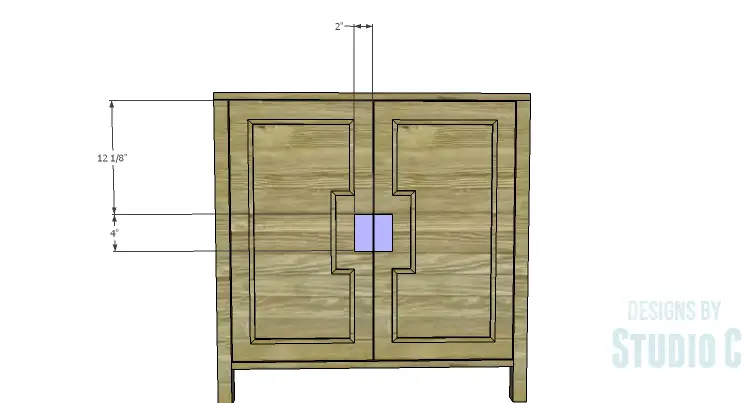
- 2 – scraps of 1x lumber at 2″ x 4″ – Door Handles
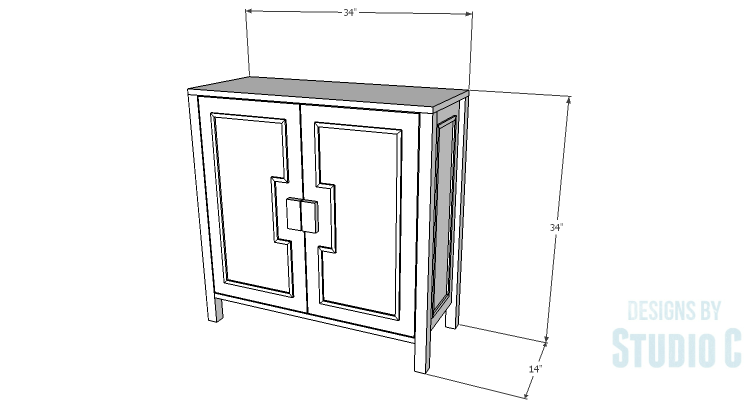
Edge banding will be applied to the exposed edges of the plywood prior to assembly.
Step One
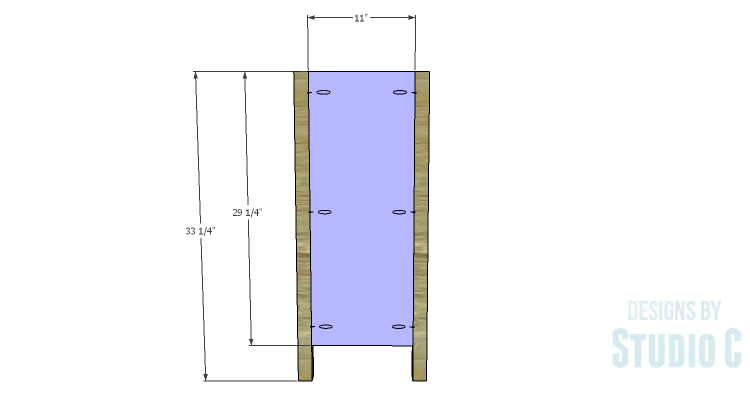
Cut the pieces for the legs and the side panels. With the pocket hole jig set for 3/4″ material, drill pocket holes in each long edge of the side panels. Secure the sides to the legs using glue and 1-1/4″ pocket hole screws. The inside face of the panels will be flush with the inside faces of the legs.
Step Two
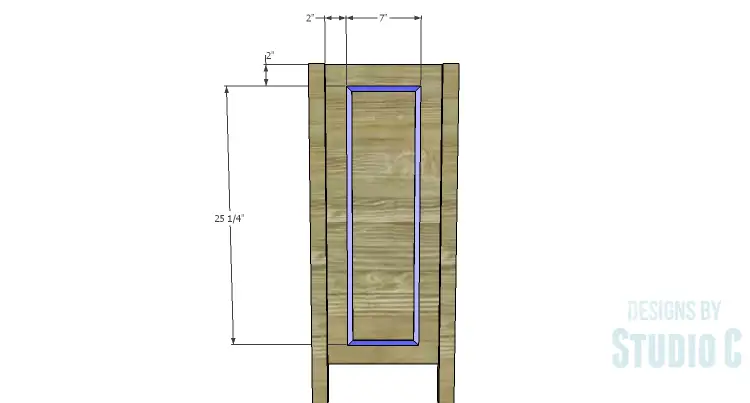
Cut the pieces for the side trim. Secure the trim to the sides as shown using glue and 5/8″ brad nails.
Step Three
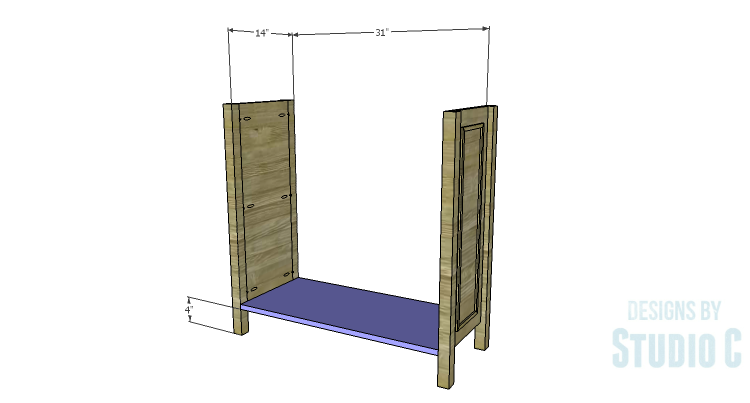
Cut the piece for the bottom and drill pocket holes in the shorter edges. Secure the bottom to the lower edge of the side panels and the legs using glue and 1-1/4″ pocket hole screws.
Step Four
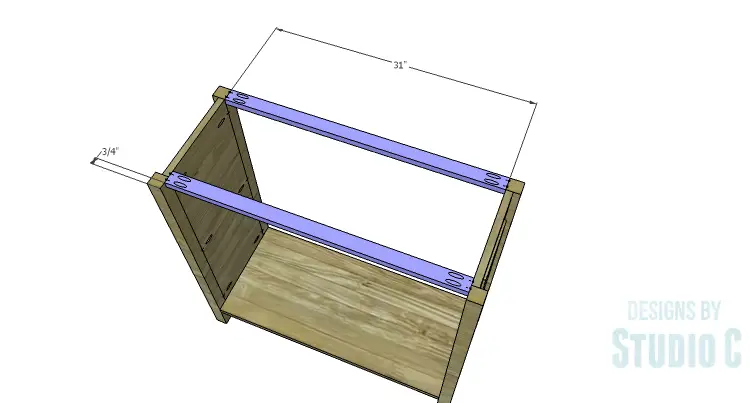
Cut the pieces for the stretchers and drill pocket holes in each end. Secure the stretchers to the sides using glue and 1-1/4″ pocket hole screws. The front stretcher will be located 3/4″ back the front faces of the legs.
Step Five
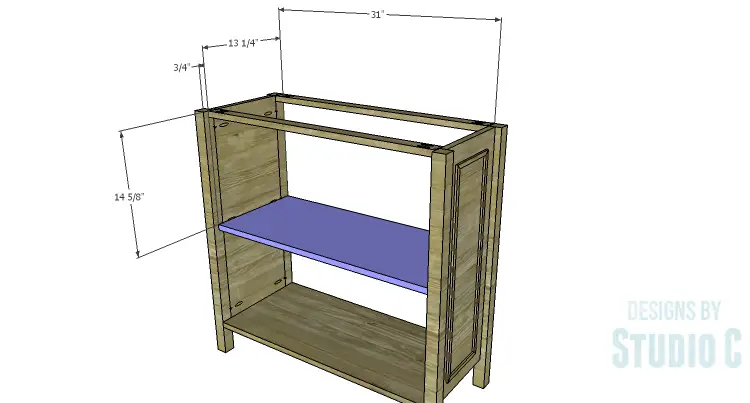
Cut the piece for the shelf and drill pocket holes in the shorter edges. Secure the shelf to the side panels and the legs using glue and 1-1/4″ pocket hole screws. The shelf is located 3/4″ back from the front faces of the legs and will be flush with the back.
Step Six
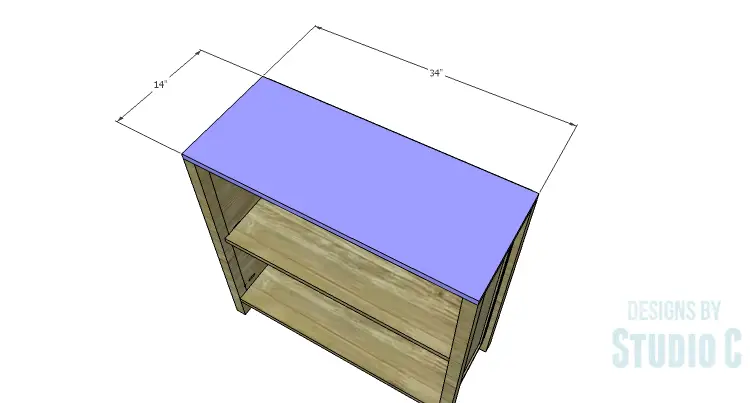
Cut the piece for the top. Secure the top to the legs and the stretchers using glue and 1-1/4″ brad nails.
Step Seven
Cut the piece for the back. Secure the back to the legs, bottom, shelf, and top using glue and 5/8″ brad nails.
Step Eight
Cut the pieces for the doors. Cut the pieces of trim and assemble as shown. Secure the trim in place using glue and 5/8″ brad nails.
Step Nine
Cut the pieces for the door handles. Secure to the center edge of the doors securing in place using glue and 1-1/4″ brad nails.
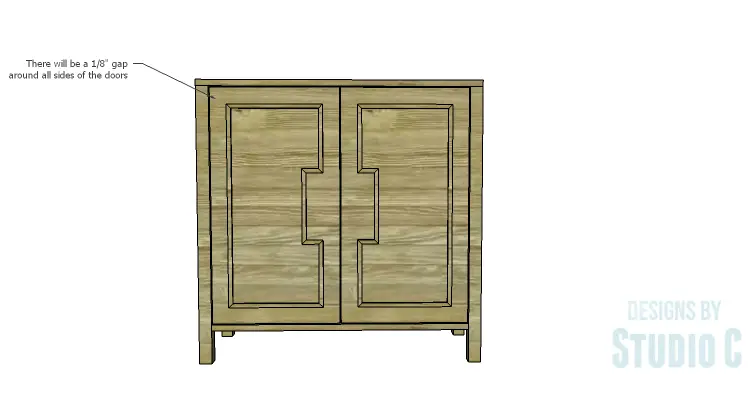
Install the hinges on the doors, then install the doors in the cabinet. There will be a 1/8″ gap around all sides of the doors as well as in between.
Finish as desired.
This cabinet is a fabulous addition to a variety of spaces – an entryway, dining room, bedroom, or a bathroom. Have any questions about the DIY plans to build a Trim Detail Cabinet? Leave a comment below!

