Build a Simply Classic Coffee Table
DIY Furniture Plans to Build Coffee Table with Simple Lines
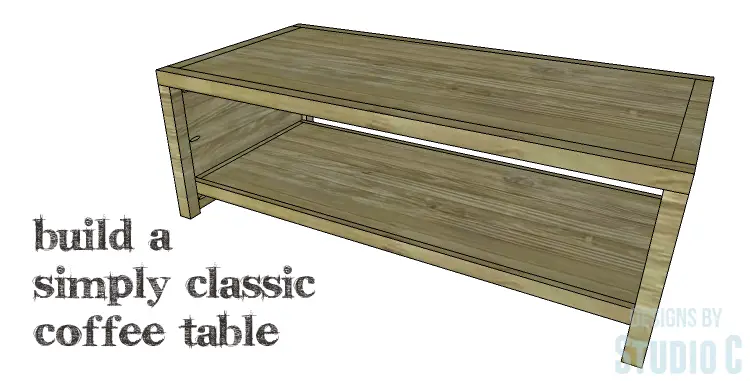
Hey there! Have you ever heard the saying “less is more”? Well, that’s definitely true when it comes to furniture. The Simply Classic Coffee Table is a perfect example of this! It’s simple yet stylish, and it’s sure to make a statement in any room. With its plain top and sides, and a handy shelf underneath, this coffee table is easy to build with our DIY furniture plans. Plus, you can customize it with any finish you like to match your decor. Trust us, this table will look fabulous in any room of your home!
Materials:
- 1-1/4″ pocket hole screws (<– affiliate link!)
- 2-1/2″ pocket hole screws
- 1-1/4″ screws
- Edge banding, optional
- Wood glue
- Sandpaper (100, 150, 220 grits)
- Finishing supplies (primer & paint, or stain, sealer)
Lumber:
- 2 – 1×2 at 6′
- 2 – 2×2 at 4′
- 2 – 2×2 at 6′
- 1 – 4′ x 8′ sheet of 3/4″ plywood
Cut List:
- 4 – 2×2 at 16-1/2″ – Legs
- 2 – 2×2 at 48″ – Side Frames
- 2 – 2×2 at 21″ – End Frames
- 1 – 3/4″ plywood at 21″ x 45″ – Top Panels
- 2 – 3/4″ plywood at 16-1/2″ x 21″ – Side Panels
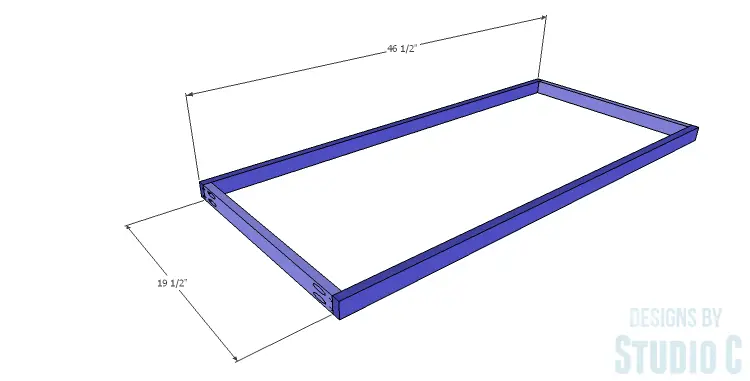
- 2 – 1×2 at 19-1/2″ – Shelf Frame
- 2 – 1×2 at 46-1/2″ – Shelf Frame
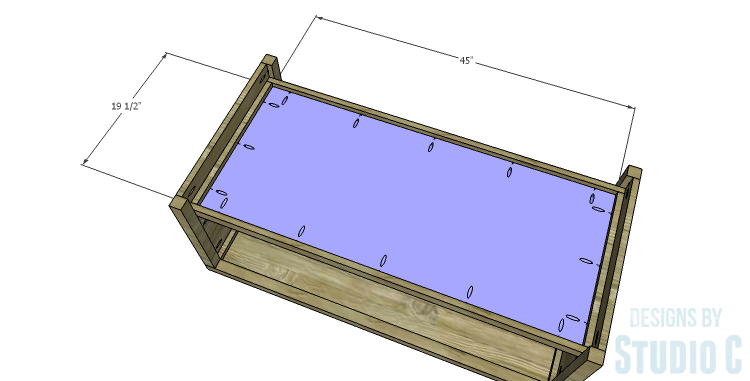
- 1 – 3/4″ plywood at 19-1/2″ x 45″ – Shelf

Step One
Cut the pieces for the legs and side frames. With the pocket hole jig set for 1-1/2″ material, drill pocket holes in one end only of each leg. Secure the legs to the side frame pieces using glue and 2-1/2″ pocket hole screws.

Step Two
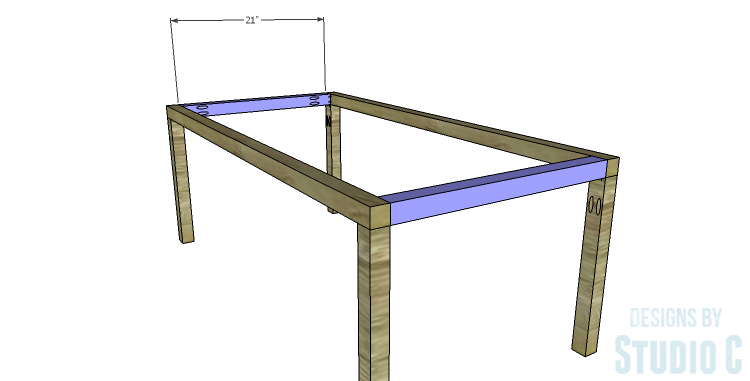
Cut the pieces for the end frames and drill pocket holes in each end. Secure the end frame pieces to the side frames using glue and 2-1/2″ pocket hole screws.
Step Three
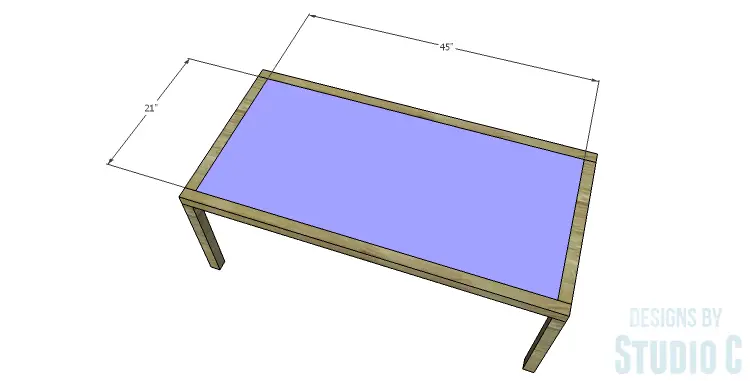
Cut the piece for the top panel. Set the pocket hole jig for 3/4″ material and drill pocket holes in all four edges of the top panel. Secure the top panel to the side and end frames using glue and 1-1/4″ pocket hole screws. The outside face of the panel will be flush with the top face of the side and end framing pieces.
Step Four
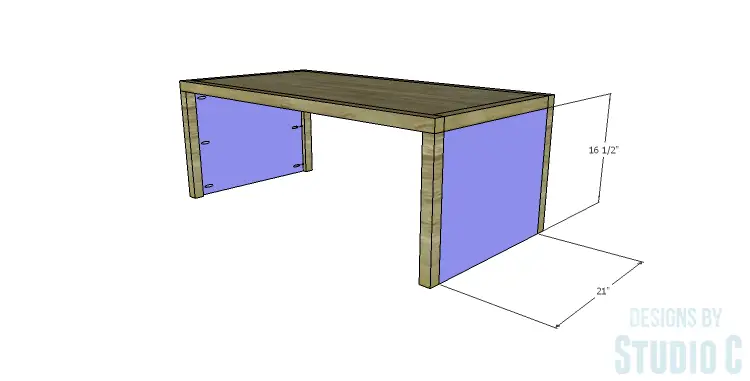
Cut the pieces for the side panels and drill pocket holes in the side and top edges. Secure the panels to the side legs and end frames using glue and 1-1/4″ pocket hole screws. The outside face of the panels will be flush with the outside faces of the legs.
Step Five
Cut the pieces for the shelf. Drill pocket holes in each end of the shorter shelf frame pieces. Assemble the frame with the pocket holes facing out – this way they won’t be visible!
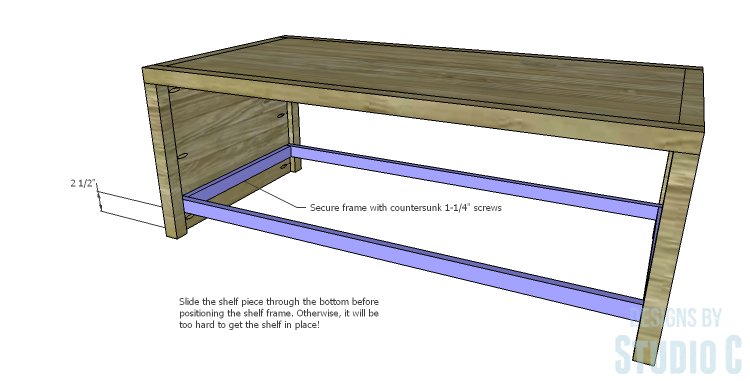
Position the frame as shown, then secure in place using glue and 1-1/4″ countersunk screws.
Step Six
Cut the piece for the shelf and drill pocket holes in all four edges. Secure the shelf to the inside of the frame using glue and 1-1/4″ pocket hole screws. The top face of the shelf will be flush with the top face of the frame.
Finish as desired.
The DIY furniture plans to build a Simply Classic Coffee Table are perfect for those new to woodworking – or those looking for a quick and easy project! Have any questions about the plans? Leave a comment below!
Originally posted 2014-12-03 08:00:10.


[…] Classic Coffee Table free planThis is an easy coffee table to build and still features plenty of storage on the shelf below. Here are the step-by-step instructions. […]
[…] This is an easy coffee table to build and still features plenty of storage on the shelf below. Here are the step-by-step instructions. […]