Build a Shed with Old Doors – Part Three
Part One of this fabulous shed focused on the cut list, the materials and any related notes about the project while Part Two focused on building the platform and the framing for the walls. Part Three in the series of DIY plans to build a shed with old doors focuses on the trusses and the roof.
The trusses are very easy to build using 2x4s and are assembled with pocket hole screws. They are secured to the side framing with roof truss ties, then the roof decking is applied. the final step for the roof is adding the drip edge, felt and shingles.
Don’t forget to check out Part One for the material and supply list!
Step One
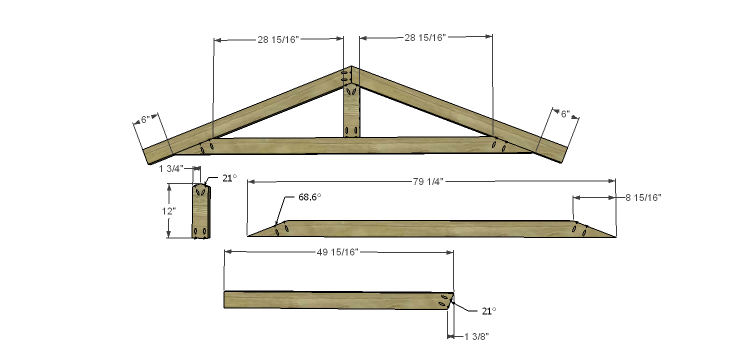
Cut the pieces for the trusses. Cut the angles as shown, and drill pocket holes in each end of the bottom piece and the center piece, as well as the angled edge of three of the upper truss pieces. Mending plates and screws can also be used instead of pocket holes.
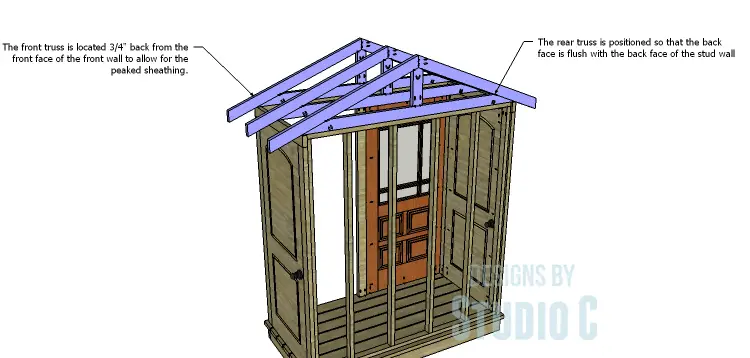
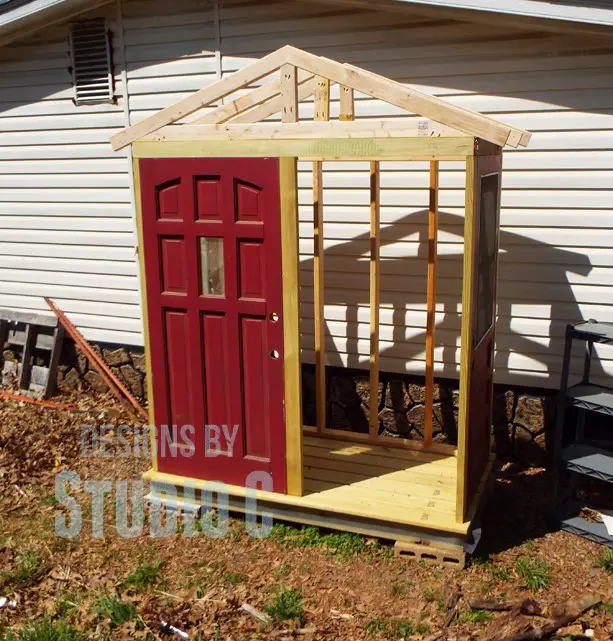
Use the roof truss ties and 1” screws to secure the trusses to the top of the side walls. The front truss will be located approximately ¾” back from the front wall to allow for the peaked sheathing piece. The rear truss will be flush with the back edge of the stud wall.
Step Two
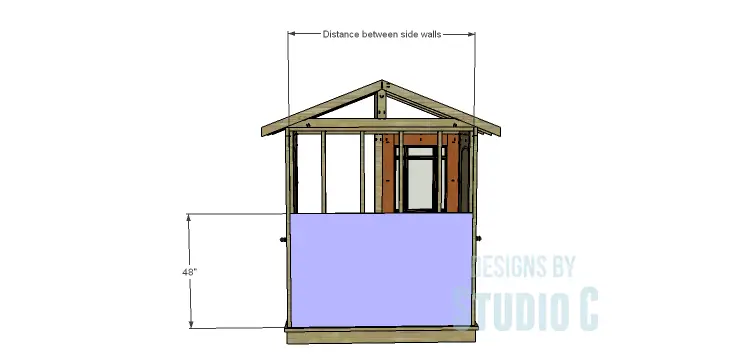
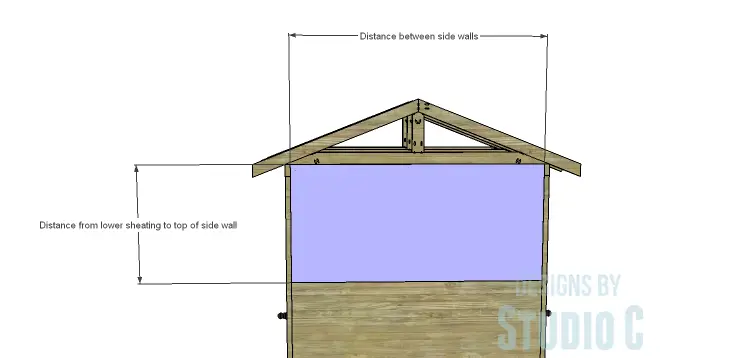
Measure the length of the stud wall at the back and cut a piece of sheathing to fit, using the entire 4’ width. Secure this piece to the stud wall using 2-1/2” screws. Measure the distance from the top of this sheathing piece to the bottom of the rear truss and cut a piece of sheathing to fit. Secure in place using 2-1/2” screws.
Step Three
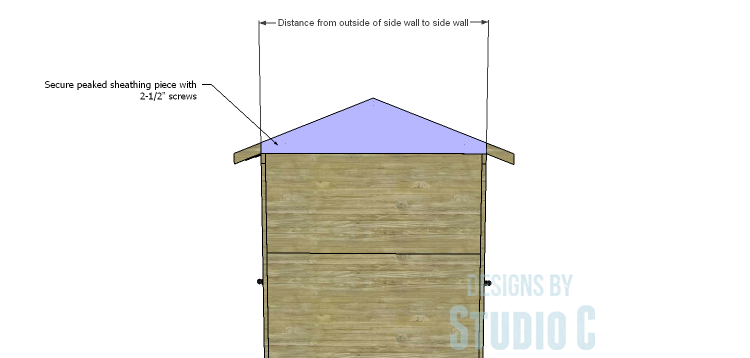
To cut the peaked sheathing pieces, measure the truss from the top peak to the bottom center, then measure across the truss from side wall to side wall. Transfer the markings to the sheathing and cut out two pieces. Secure the one piece to the front, and one piece to the back using 2-1/2” screws.
Step Four
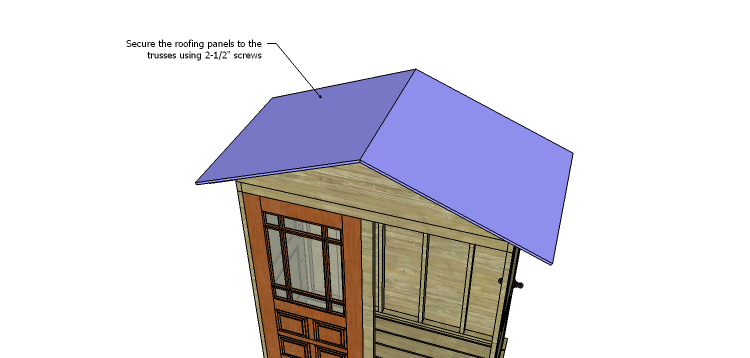
Cut the pieces of sheathing for the roofing panels. The panels will overhang the front and back by 1”, plus should be longer than the lower edge of the trusses (at the eaves) by 1”. Secure the panels to the trusses using 2-1/2” screws.
Step Five
Cut the drip edge to fit the roofing panels. Use an adhesive such as Flash Mate to secure the drip edge to the panels.
Cut two pieces of roofing felt to fit on the lower edge of the roofing panels and secure in place using a few staples. Center a third piece of roofing felt on the peak of the roof. The sides will lay over the remaining part of the roof that is exposed and will overlap the top of the roofing felt pieces that were previously applied.
Install the shingles starting at the bottom and working up by laying them so they overlap the drip edge by approximately 1”, securing in place with 1” roofing nails. Lay the next row but do not align the seams. Continue until the roofing panels are covered.
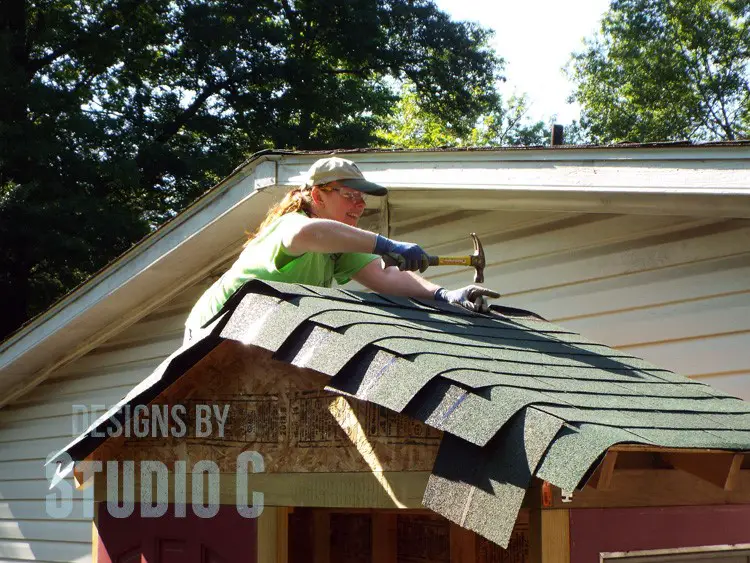
For the peak, cut the shingles at each tab – there will be three pieces per tab. Center each piece over the peak, layering one on top of the other, securing in place on each side with 1” roofing nails. When you get to the end, cut a piece of shingle to fit, securing in place with exterior silicone. (Do not use nails – this will cause a leak!) The heat of the sun will “bake” the shingles in place. A box knife with a hook blade (<– affiliate link!) is excellent for trimming the excess shingles!
For more information, read the packaging on the shingles – they are really easy to install!
In the final post in the series, Part Four, we will hang the door, add shelving inside and I’ll share what I used to cover the holes in the doors left by the doorknobs. Have questions about the DIY plans to build a shed with old doors – the trusses and the roof? Leave a comment below!




Comments are closed.