
DIY Plans to Build a Riley End Table
The First of a New Collection
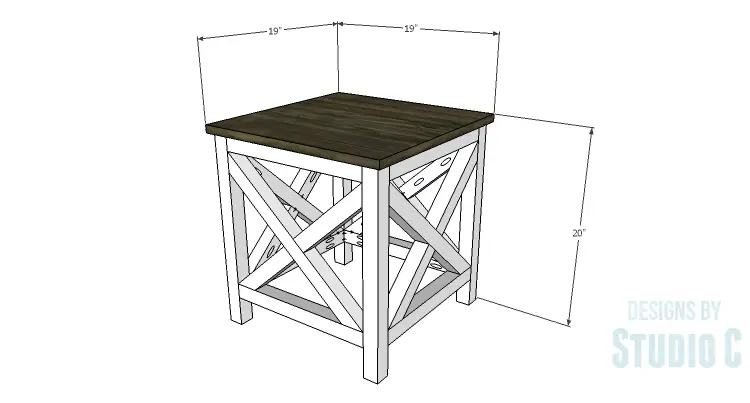
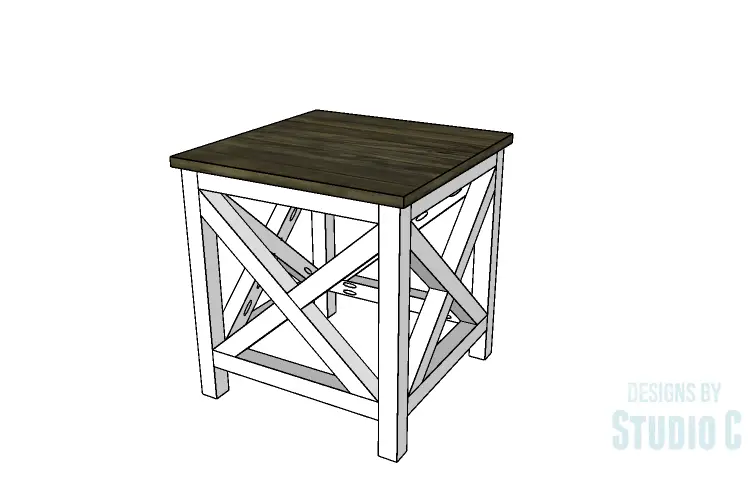
I kind of like the idea of creating collections… This way, there are several plans for different pieces of furniture that are similar in design. The DIY plans to build a Riley End Table feature X detailing on each side of the base. This is a plain and simple table, and requires no special skills or tools to build it!
Materials:
- 2-1/2″ pocket hole screws (<– affiliate link!)
- 1-1/4″ brad nails
- Edge banding, optional (<– affiliate link!)
- Wood glue
- Sandpaper (100, 150, 220 grits)
- Finishing supplies (primer & paint, or stain, sealer)
Lumber:
- 5 – 2×2 at 8′
- 1 – 2′ x 2′ sheet of 3/4″ plywood
Cut List:
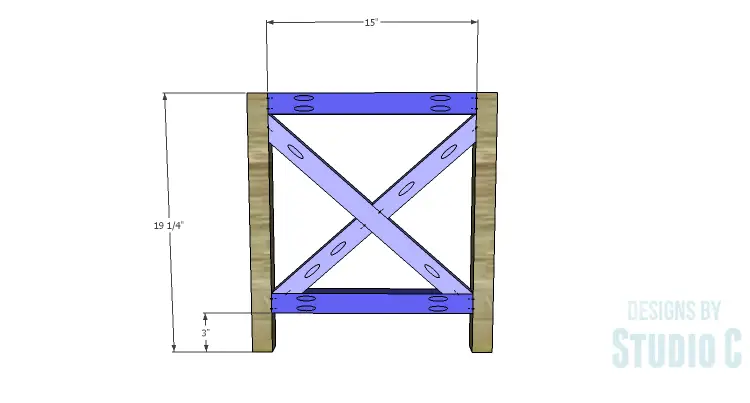
- 4 – 2×2 at 19-1/4″ – Legs
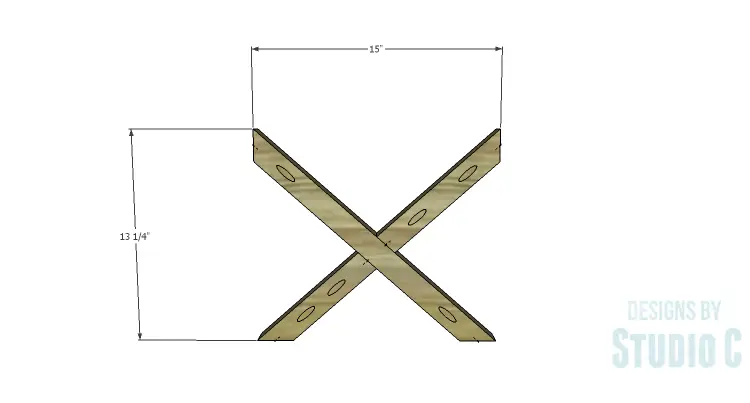
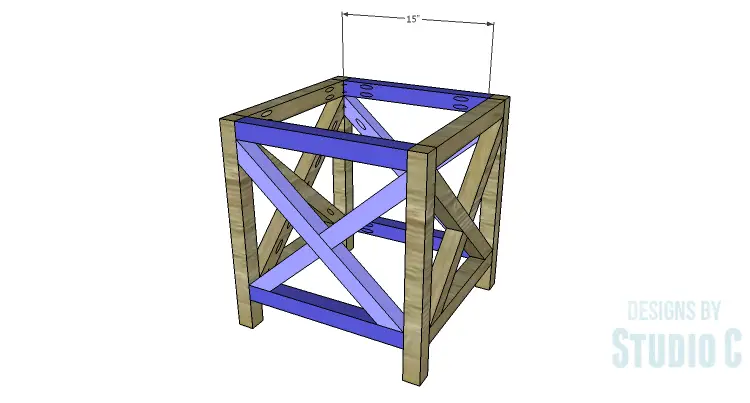
- 8 – 2×2 at 15″ – Framing
- 4 – 2×2 at 20″ – X Detail
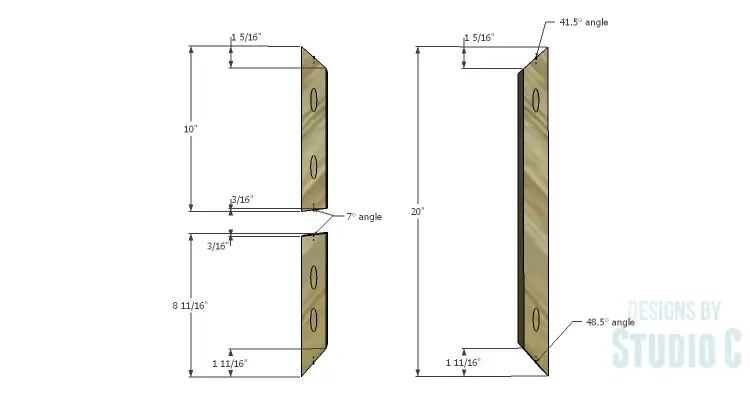
- 4 – 2×2 at 10″ – X Detail
- 4 – 2×2 at 8-11/16″ – X Detail
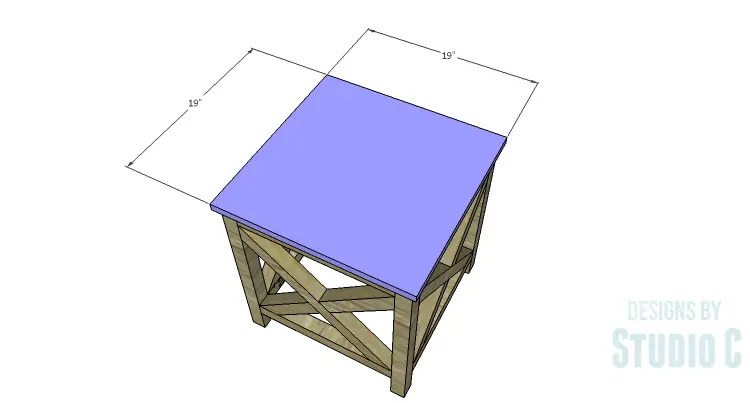
- 1 – 3/4″ plywood at 19″ x 19″ – Top
Click on the drawings for a larger view!
Step One
Cut the pieces for the legs, the framing, and the X detail. Mark the angles for the X detail by drawing a line across the board at the dimension given, then drawing another line from the corner of one end of the piece to the end of the line on the opposite side. Cut the angle using a jigsaw or a bandsaw.
With the pocket hole jig set for 1-1/2″ material, drill one pocket hole each end of the angled pieces as shown. Assemble the X detail using glue and 2-1/2″ pocket hole screws.
Drill pocket holes in each end of the framing pieces. Secure the framing pieces to the legs as shown using glue and 2-1/2″ pocket hole screws. Insert the X detail piece into the frame (trimming the angles, if necessary), then secure the X detail to the legs using glue and 2-1/2″ pocket hole screws.
Step Two
Secure the remaining framing pieces to the legs using glue and 2-1/2″ pocket hole screws. Insert the remaining X detail into the frames securing in place using glue and 2-1/2″ pocket hole screws.
Step Three
Cut the piece for the top. The top will overhang the frame by 1/2″ on all sides. Secure the top using glue and 1-1/4″ brad nails.
Finish as desired.
The table would be great built as a pair and used indoors or outdoors (properly finished, of course!). They would also make a great set of nightstands in the bedroom! Have any questions about the DIY plans to build Riley End Table? Leave a comment below!
Originally posted 2015-01-29 08:00:14.

[…] I posted plans for the Riley End Table, a table featuring X detail at each side. The DIY plans to build a Riley Coffee Table feature the […]
[…] this square end table that features an X design on the sides. Here are the step-by-step […]
[…] I posted plans for the Riley End Table, a table featuring X detail at each side. The DIY plans to build a Riley Coffee Table feature the […]