DIY Plans to Build a Dylan Storage Bench
An Easy Bench to Build plus Storage Crates
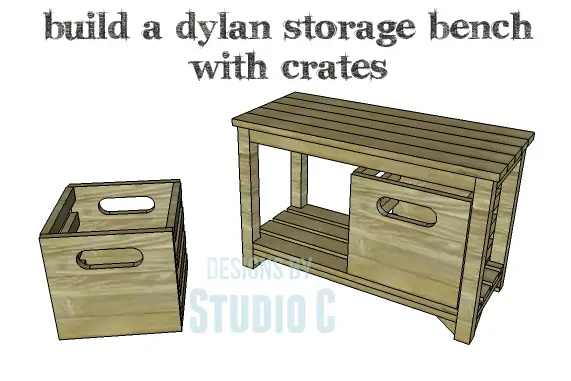
This is a quick and easy plan, especially for those new to woodworking. The DIY plans to build a Dylan storage bench also feature two super-easy to build crates for storing shoes, bags, pet food, etc. which can also be customized with a stencil to match your decor!
Materials:
- 1-1/4″ pocket hole screws (<– affiliate link)
- 2-1/2″ pocket hole screws (<– affiliate link)
- 1-1/4″ brad nails
- Wood glue
- Sandpaper (100, 150, 220 grits)
- Finishing supplies (primer & paint, or stain, sealer)
Lumber:
- 1 – 1×2 at 8′
- 1 – 1×3 at 4′
- 4 – 1×3 at 6′
- 1 – 1×12 at 4′
- 1 – 1×12 at 8′
- 2 – 2×2 at 8′
Cut List:
- 4 – 2×2 at 17-1/4″ – Legs
- 2 – 2×2 at 9″ – Side Stretchers
- 2 – 1×2 at 9″ – Side Stretchers
- 2 – 2×2 at 24″ – Front & Back Stretchers
- 2 – 1×2 at 24″ – Front & Back Stretchers
- 8 – 1×2 at 2″ – Decorative Brackets, optional
- 4 – 1×3 at 27″ – Shelf Slats
- 5 – 1×3 at 28″ – Seat Slats
- 4 – 1×12 at 11-3/4″ – Crate Ends
- 2 – 1×12 (ripped to 10-1/2″ wide) at 11-3/4″ – Crate Bottoms
- 16 – 1×2 at 10-1/2″ – Crate Sides
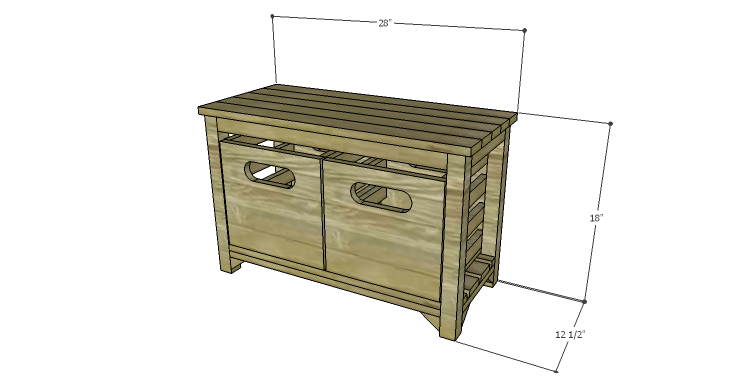
Click on the drawings for a larger view!
Step One
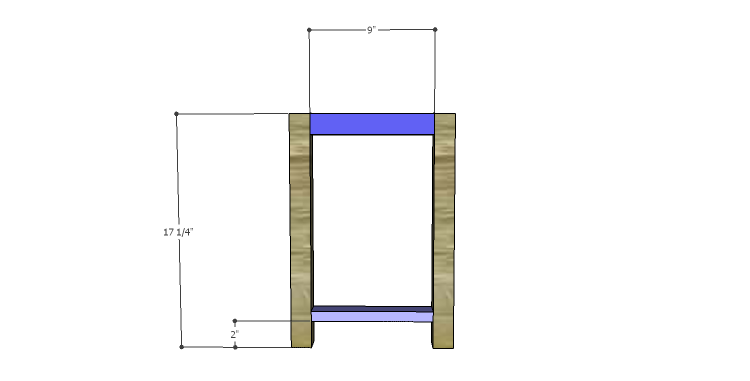
Cut the pieces for the legs and the side framing. With the pocket hole jig set for 1-1/2″ material, drill pocket holes in each end of the 2×2 pieces. Attach the 2x2s to the upper part of the leg as shown using glue and 2-1/2″ pocket hole screws.
Set the pocket hole jig for 3/4″ material and drill pocket holes in each end of the 1×2 pieces. Secure the 1x2s to the legs as shown using glue and 1-1/4″ pocket hole screws. Orient the pocket holes so they face down, and if the area is too tight to secure the screws, a close-quarter drill or right angle drill attachment may have to be used.
Step Two
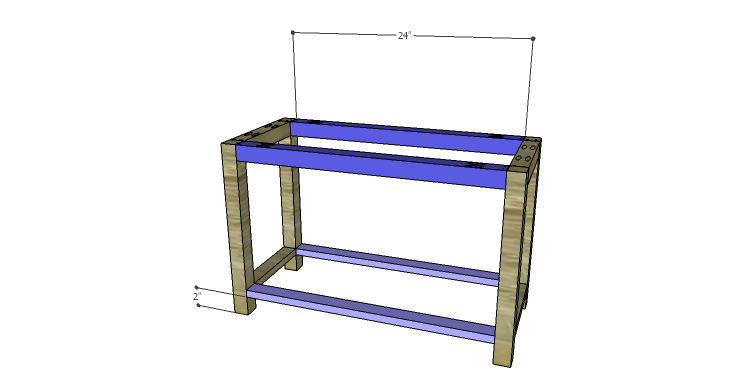
Cut the pieces for the front and back stretchers. Set the pocket hole jig for 1-1/2″ material and drill pocket holes in each end of the 2×2 pieces. Attach the 2x2s to the upper part of the leg as shown using glue and 2-1/2″ pocket hole screws.
Set the pocket hole jig for 3/4″ material and drill pocket holes in each end of the 1×2 pieces. Secure the 1x2s to the legs as shown using glue and 1-1/4″ pocket hole screws.
Step Three
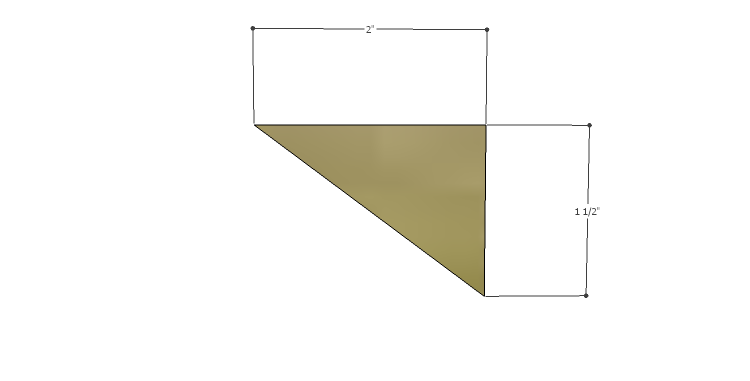
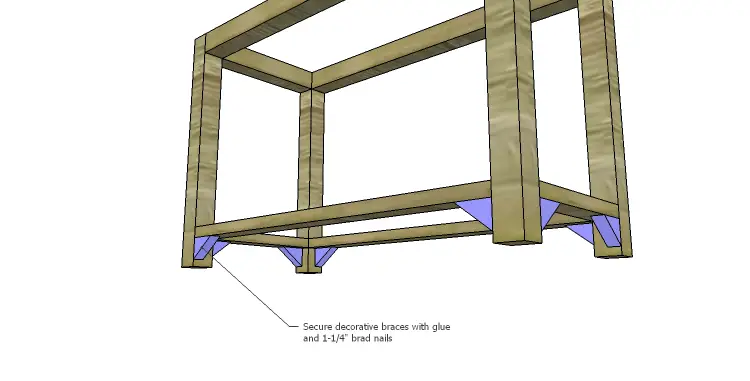
Cut the pieces for the decorative braces. The pieces are totally optional! Secure the pieces under the lower stretchers using glue and 1-1/4″ brad nails.
Step Four
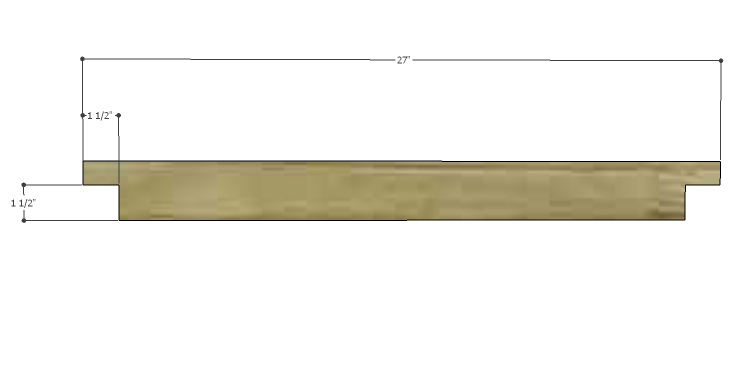
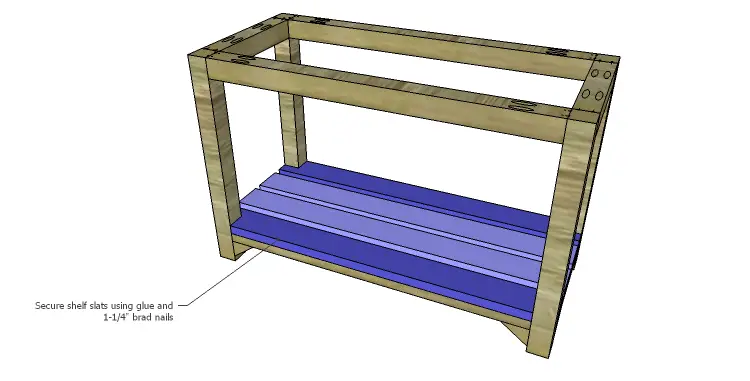
Cut the pieces for the shelf slats. Cut 1-1/2″ x 1-1/2″ notches in each of the outer slats using a jigsaw or bandsaw. Secure the slats to the lower stretchers using glue and 1-1/4″ brad nails spacing the center slats evenly.
Step Five
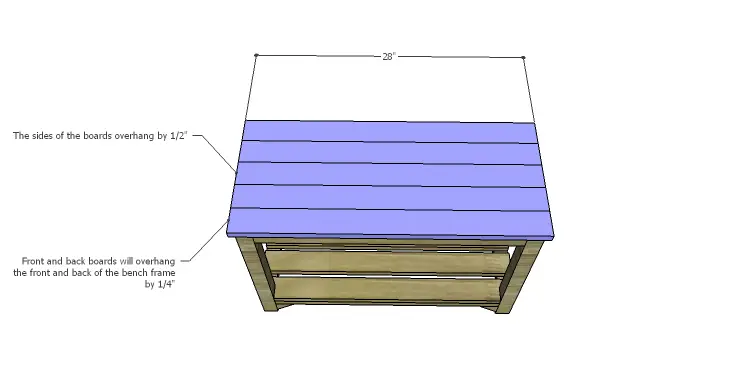
Cut the pieces for the seat slats. The slats will overhang the sides by 1/2″, and the front and back slats will overhang by 1/4″. Secure in place using glue and 1-1/4″ brad nails.
Step Six
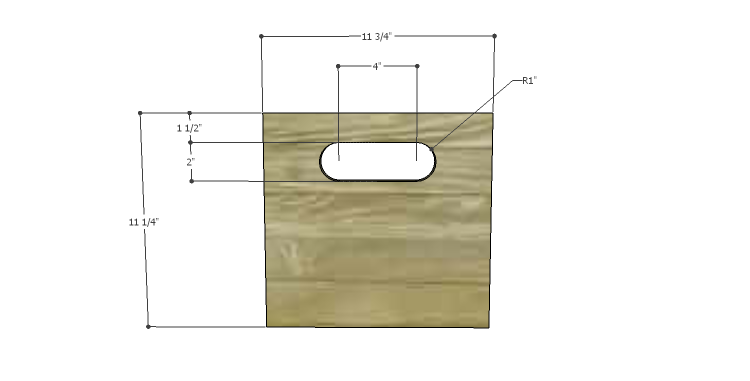
Cut the pieces for the crates. Mark the placement for the handles on the end pieces – the handles will be created by cutting two holes with a 2″ hole saw spaced at 4″ on center (the center of one hole to the center of the other). After the holes have been cut, draw a straight line at the top and bottom of the holes to connect them, then cut along the lines with a jigsaw.
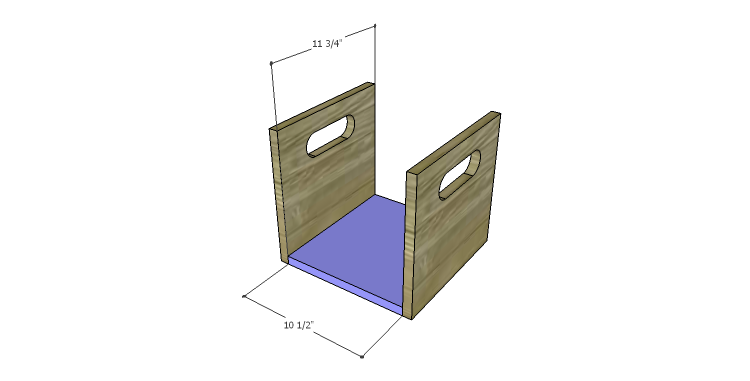
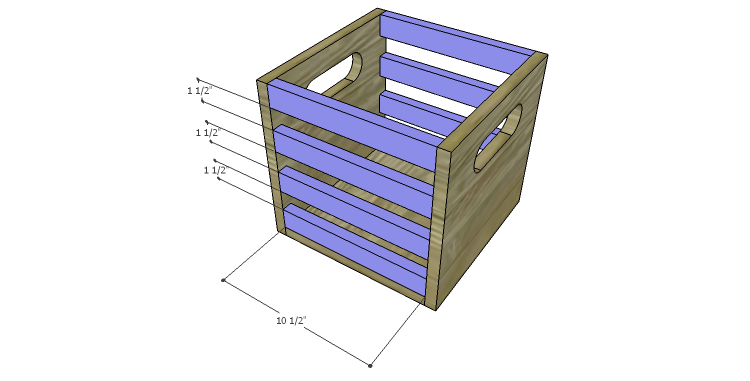
Attach the bottom pieces to the lower edge of the ends using glue and 1-1/4″ brad nails. Cut the pieces for the sides and secure them using glue and 1-1/4″ brad nails. The pieces will be spaced approximately 1-1/2″ apart.
Finish as desired.
This bench is the perfect addition to the mudroom or entryway! It is also a great piece to put at the foot of the bed… Have any questions about the DIY plans to build a Dylan storage bench? Leave a comment below or contact me at cher {at} designsbystudioc {dot} com!
Originally posted 2014-09-08 08:00:44.


[…] with Storage Crates free plan.With these free plans you can build the bench and also the storage crates. Measuring just 28 inches long it would be perfect for a small space or kids […]