A Media Stand with Faux Drawer Detailing
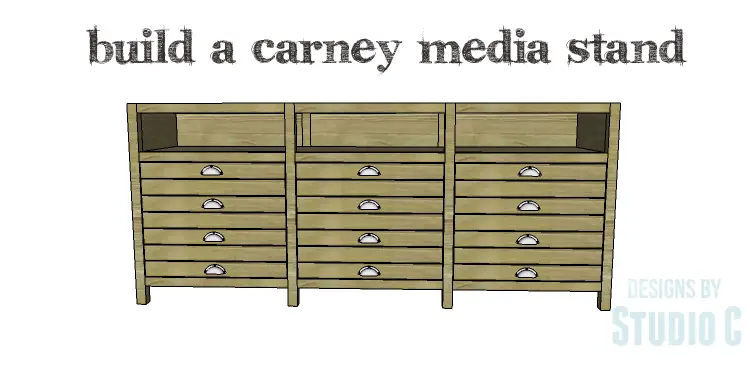
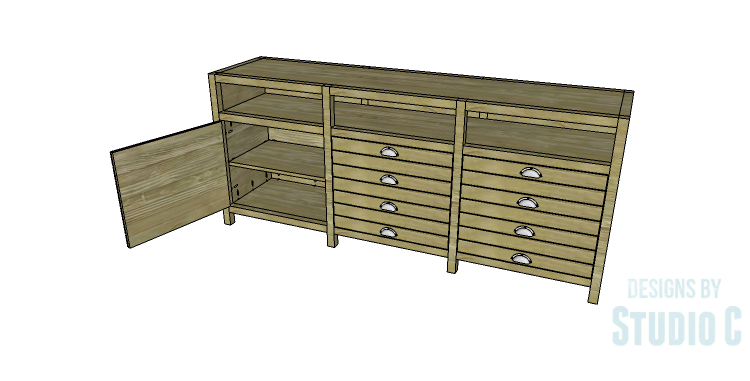
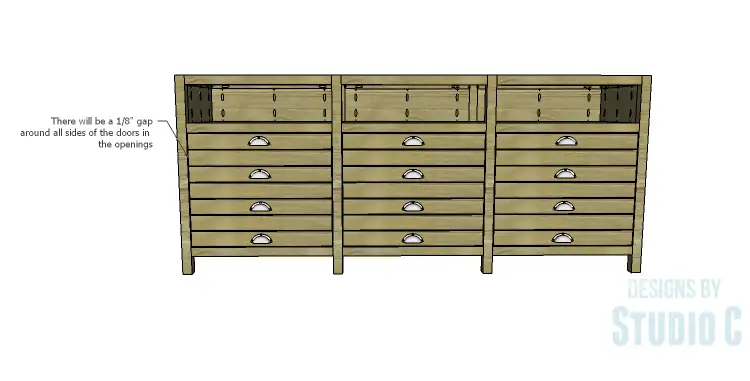
Do you like the look of Printmaker’s Furniture (furniture with the look of tons of small drawers)? The DIY plans to build a Carney Media Stand feature open shelving at the top with shelving behind three doors. The doors have slats on the front to resemble narrow drawers, with cabinet pulls attached to the front. This media stand is really easy to build, inexpensive, and can be completed in a weekend!
Materials:
- 1-1/4″ pocket hole screws (<– affiliate link!)
- 2-1/2″ pocket hole screws
- Edge banding, optional
- Cabinet pulls
- 3 sets of hinges
- Wood glue
- Sandpaper (100, 150, 220 grits)
- Finishing supplies (primer & paint, or stain, sealer)
Lumber:
- 9 – 2×2 at 8′
- 1 – 2′ x 2′ sheet of 1/4″ plywood
- 1 – 2′ x 4′ sheet of 1/4″ plywood
- 1 – 2′ x 2′ sheet of 1/2″ plywood
- 1 – 2′ x 4′ sheet of 1/2″ plywood
- 2 – 4′ x 8′ sheets of 3/4″ plywood
Cut List:
- 8 – 2×2 at 32″ – Legs
- 6 – 2×2 at 15″ – Side Framing
- 2 – 3/4″ plywood at 6″ x 15″ – Upper Side Panels
- 2 – 3/4″ plywood at 15″ x 18-1/2″ – Lower Side Panels
- 18 – 2×2 at 23″ – Front & Back Framing
- 3 – 3/4″ plywood at 6″ x 23″ – Upper Back Panels
- 3 – 3/4″ plywood at 18-1/2″ x 23″ – Lower Back Panels
- 4 – 3/4″ plywood at 15″ x 72″ – Shelves
- 3 – 1/2″ plywood at 18-1/4″ x 22-3/4″ – Door Base Panels
- 21 – 1/4″ plywood at 2-1/2″ x 22-3/4″ – Door Slats (“Faux Drawers”)
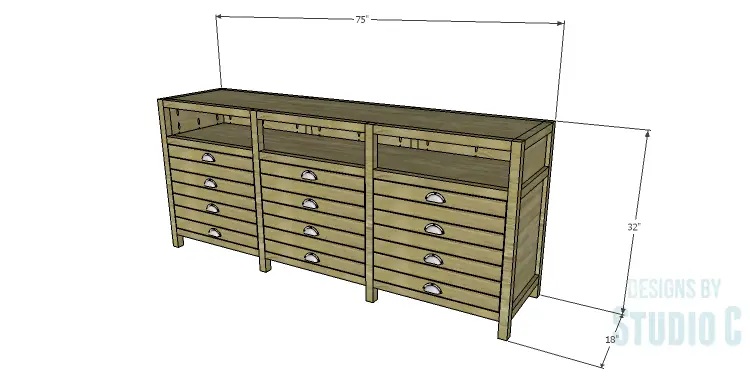
Click on the drawings for a larger view!
Step One
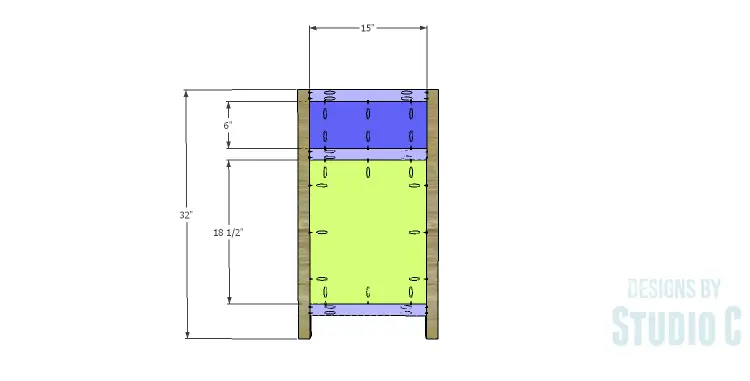
Cut the pieces for the legs, the side framing, and the side panels. With the pocket hole jig set for 1-1/2″ material, drill pocket holes in each end of the framing pieces. Secure the framing to the legs using glue and 2-1/2″ pocket hole screws.
Set the pocket hole jig for 3/4″ material and drill pocket holes in the panels. The pocket holes can be drilled in all four edges of the lower panels but only the two long edges of the shorter panels. Secure the panels to the legs and framing using glue and 1-1/4″ pocket hole screws. The back faces of the panels will be flush with the back face of the framing.
Step Two
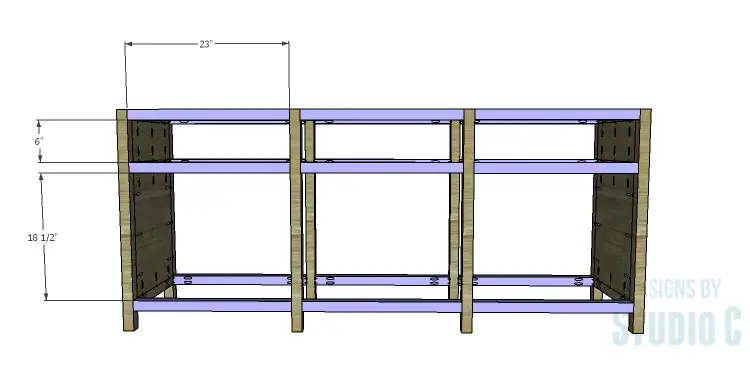
Cut the pieces for the front and back framing. Set the pocket hole jig for 1-1/2″ material and drill pocket holes in each end of each piece. Secure the framing to the legs as shown using glue and 2-1/2″ pocket hole screws.
Step Three
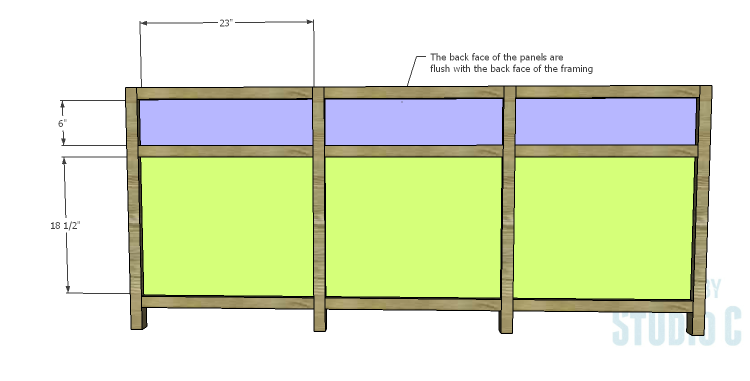
Cut the pieces for the back panels. Set the pocket hole jig for 3/4″ material and drill pocket holes in the panels. The pocket holes can be drilled in all four edges of the lower panels but only the two long edges of the shorter panels. Secure the panels to the legs and framing using glue and 1-1/4″ pocket hole screws. The back faces of the panels will be flush with the back face of the framing.
Step Four
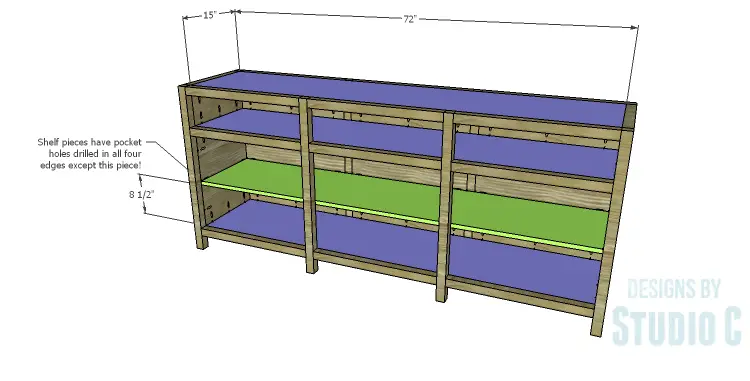
Cut the pieces for the shelves. Pocket holes can be drilled in all four edges of three of the shelving pieces.
For the fourth shelving piece, drill pocket holes in the side and back edges, and in the paces where the shelf will meet the middle front legs. If using edge banding, apply the edge banding to the front edge of this shelf prior to assembly.
Install the shelves securing in place using glue and 1-1/4″ pocket hole screws. It will be easier to start with the top first and work your way down to the bottom. The top face of the shelves will be flush with the top face of the framing (except for the shelf highlighted in green in the drawing).
Step Five
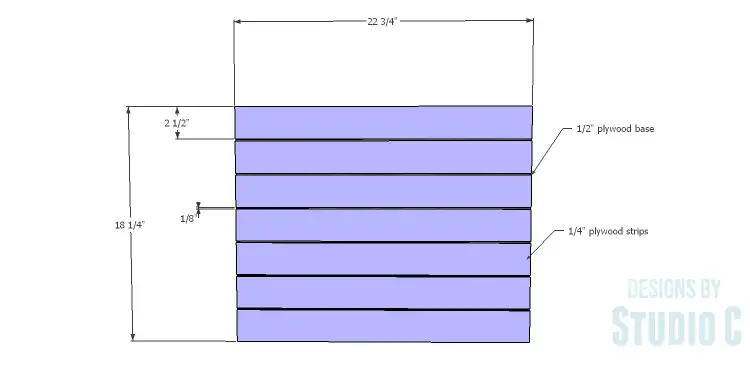
Cut the pieces for the doors and the door slats. If using edge banding, apply it to the exposed edges of the door base prior to assembly. Spread glue on the face of the slats, then position the door slats on the base panel, spacing them 1/8″ apart. Wiggle the pieces a little to create suction, then clamp in place until dry.
There will be a 1/8″ gap around all sides of the doors in the openings. Install the hinges on the doors, then install the doors in the cabinets. Drill the holes for the cabinet pulls, then install the pulls.
Fill the pocket holes and finish as desired!
This media stand would also double as a storage cabinet for linens, towels, extra dishes, etc., and would look great in any room! Have any questions about the DIY plans to build a Carney Media Stand? Leave a comment below!
Originally posted 2015-01-19 08:00:17.

Comments are closed.