Build a Montauk Console Table Inspired by Pottery Barn
A Knock-Off Console Table Inspired by a Catalog Retailer
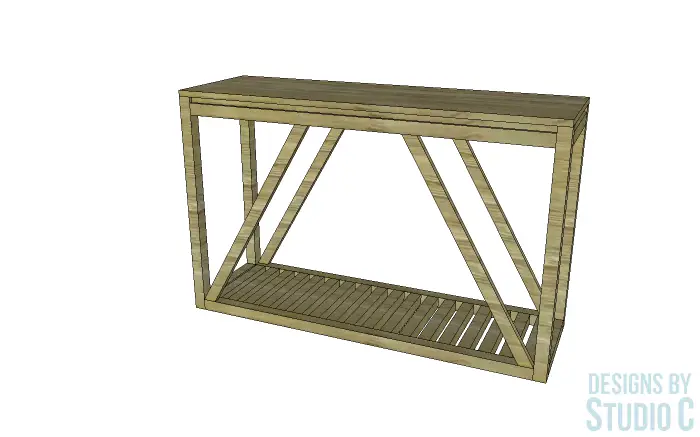
This console table is another super-easy build. The DIY furniture plans (suitable for any skill level) to build a Montauk Console Table are inspired by Pottery Barn using straight off-the-shelf boards. The console table features a slatted bottom with angled bracing on the front and back. The top “floats” on 1×1 pieces and is constructed out of 3/4″ plywood. This is an excellent piece for any room plus the project can be completed in a weekend!
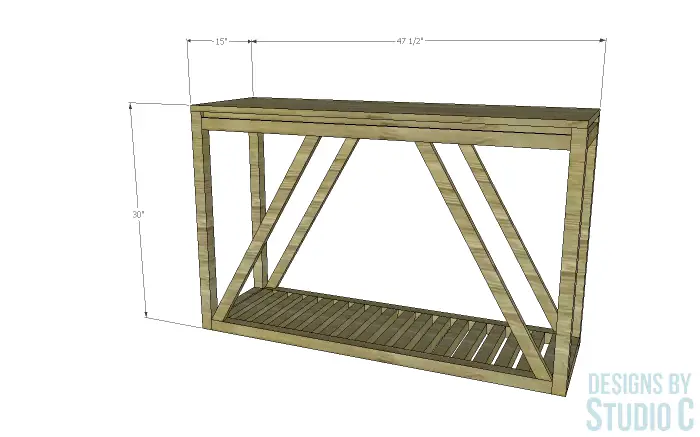
The table is constructed using pocket hole screws but can also secured using countersunk 3″ screws.
Materials:
- 2-1/2″ pocket hole screws
- 2″ brad nails
- Edge banding, optional (<– affiliate link!)
- Wood glue
- Sandpaper (80, 120, 220 grits)
- Finishing supplies
Lumber:
- 3 – 3/4″ square dowels
- 2 – 1×2 at 6′
- 7- 2×2 at 8′
- 1 – 2′ x 4′ sheet of 3/4″ plywood
Cut List:
- 4 – 2×2 at 12″ – Base Frame & Upper Stretchers
- 4 – 2×2 at 44-1/2″ – Base Frame &Upper Stretchers
- 4 – 2×2 at 29-1/4″ – Base Frame Legs
- 18 – 2×2 at 12″ – Lower Slats
- 4 – 1×2 at 30-3/8 – Angled Braces
- 2 – 1×1 at 12″ – Top Spacer
- 2 – 1×1 at 44-1/2″ – Top Spacer
- 1 – 3/4″ plywood at 15″ x 47-1/2″ – Top
Notes About the Project:
- Edge banding will be applied to the exposed edges of the top prior to assembly.
- The top “floats”… The spacers can be made using 3/4” pieces ripped off of a 1x board or by using square dowels.
- Countersunk screws can be used in place of the pocket holes, if desired.
- It may be easier to sand all of the pieces prior to assembly.
Step One
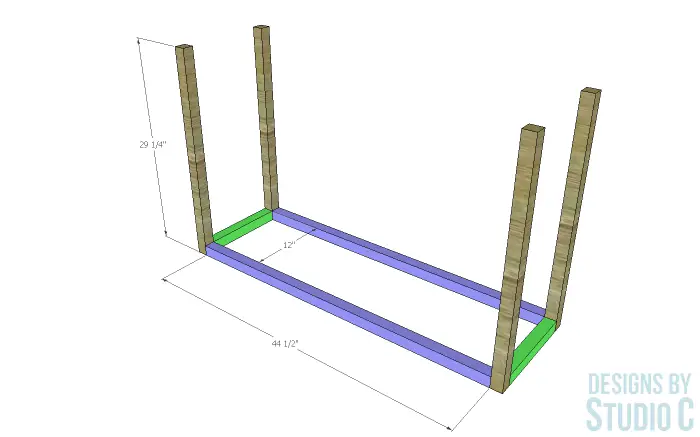
Cut the pieces for the base frame and the upper stretchers. With the pocket hole jig set for 1-1/2″ material, drill pocket holes in each end of the framing and stretcher pieces. Secure the framing pieces to the legs using glue and 2-1/2″ pocket hole screws. Set the stretchers aside…
Step Two
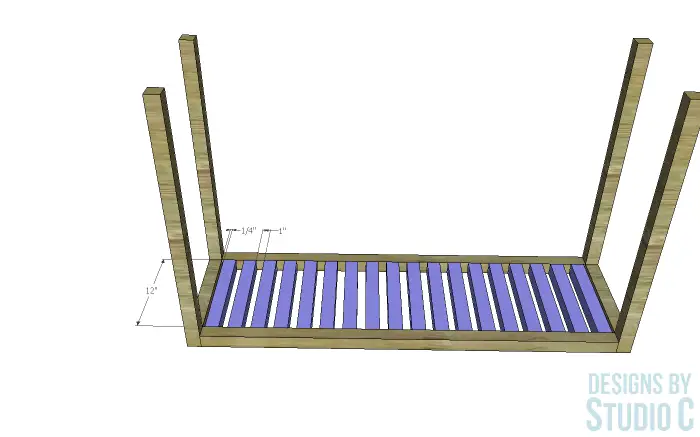
Cut the pieces for the slats and drill pocket holes at each end. Secure the slats to the base frame as shown in the drawing using glue and 2-1/2″ pocket hole screws.
Step Three
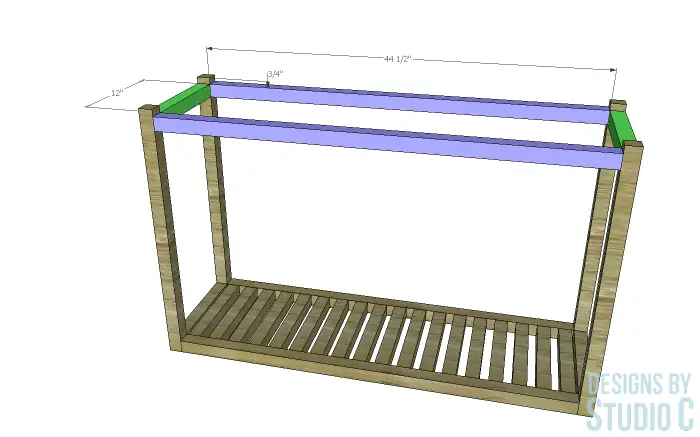
Secure the stretchers to the top of the legs, locating them 3/4″ down from the top of the legs, using glue and 2-1/2″ pocket hole screws.
Step Four
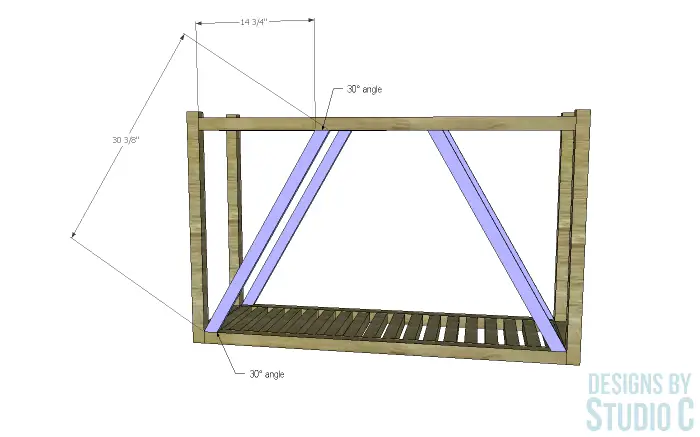
Cut the pieces for the angled braces, and cut a 30° angle in each end (see drawing for reference). Secure the braces to the base frame and upper stretchers using glue and 2″ brad nails. The front faces of the braces will be flush with the front faces of the framing and stretchers.
Step Five
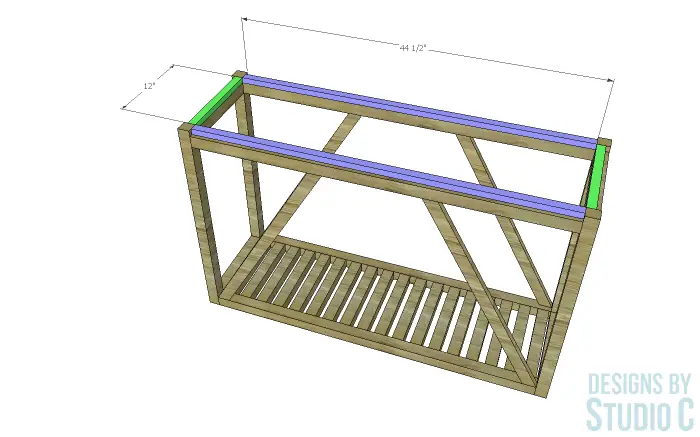
Cut the pieces for the spacers. Secure them on top of the upper stretchers using glue and 2″ brad nails. The inside facces of the spacers should be flush with the inside faces of the stretchers.
Step Six
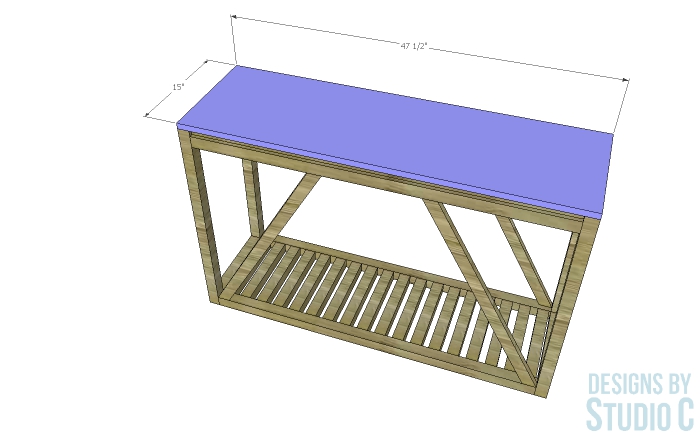
Cut the piece for the top and apply the edge banding. The edges of the top will be flush with the outside faces of the upper stretchers and will not hang over. Secure the top using glue and 2″ brad nails.
Finish the table as desired.
Have questions about the DIY furniture plans to build a Montauk Console Table inspired by Pottery Barn? Leave a comment below!

