The Easiest Bookcase to Build…
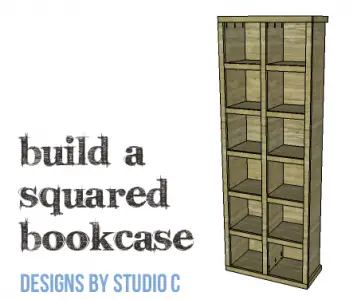
I’m in the process of working on remodeling my dining room which included removing a sort of “built in” corner cabinet. It really served no functionality (except to hide a hoard of candles and candleholders). I’d like to replace it with something like this… The DIY furniture plans to build a Squared Bookcase are truly the easiest plans ever, plus the bookcase has lots of cubbies that can be put to good use! The bookcase uses boards that are straight off the shelf and can be completed in a weekend.
Materials:
- 1-1/4″ pocket hole screws
- 1-1/2″ brad nails
- 1-3/4″ brad nails
- Wood glue
- Sandpaper (100, 150, 220 grits)
- Finishing supplies (primer & paint, or stain, sealer)
Tools needed:
- Miter saw
- Circular saw (for cutting the back piece)
- Drill
- Pocket hole jig
- Right angle drill attachment (for tight spaces)
- Pneumatic brad nailer with compressor
- Sander
Lumber:
- 3 – 1×2 at 6′
- 3 – 1×2 at 8′
- 3 – 1×12 at 6′
- 3 – 1×12 at 8′
- 1 – 4′ x 8′ sheet of 1/4″ plywood
Cut List:
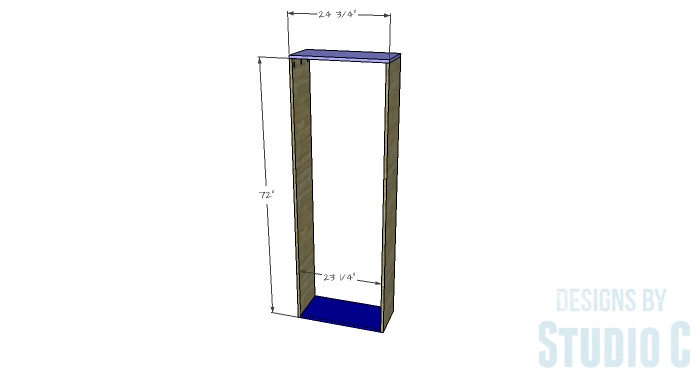
- 2 – 1×12 at 72″ – Outer Box Sides
- 1 – 1×12 at 23-1/4″ – Outer Box Bottom
- 1 – 1×12 at 24-3/4″ – Outer Box Top
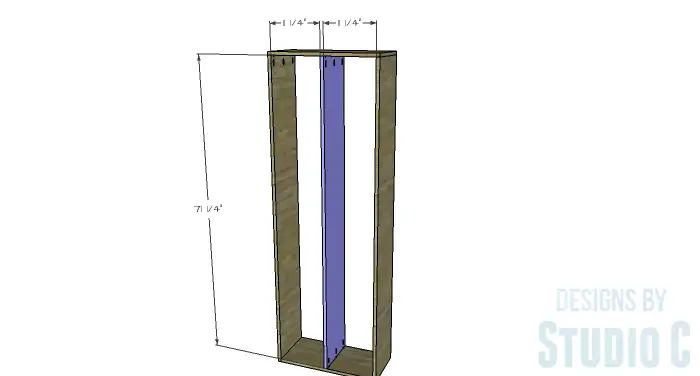
- 1 – 1×12 at 71-1/4″ – Divider
- 10 – 1×12 at 11-1/4″ – Shelves
- 1 – 1×2 at 24-3/4″ – Bottom Support
- 1 – 1/4″ plywood at 24″ x 72-3/8″ – Back
- 4 – 1×2 at 11-1/4″ – Side Top & Bottom Trim
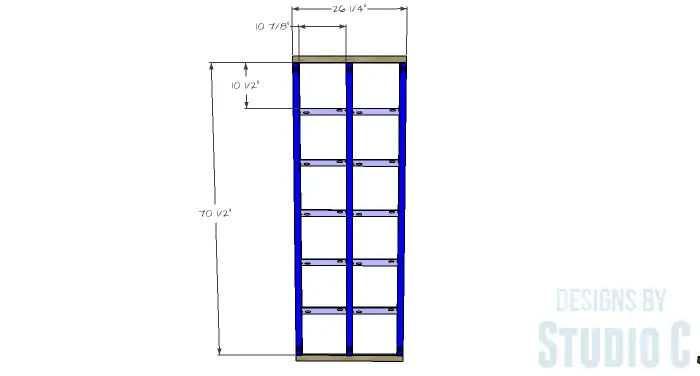
- 3 – 1×2 at 70-1/2″ – Face Frame
- 2 – 1×2 at 26-1/4″ – Face Frame
- 10 – 1×2 at 10-7/8″ – Face Frame
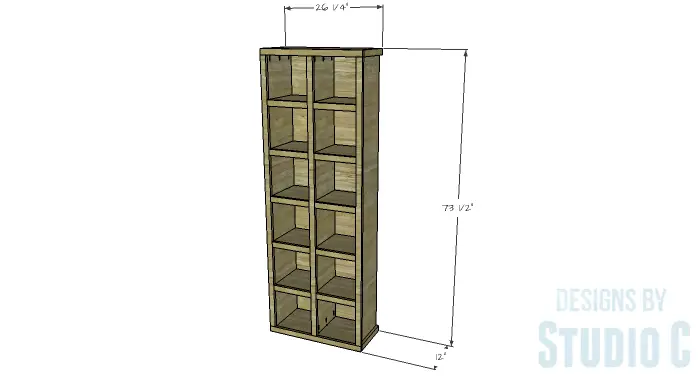
Click on the drawing for a larger view!
Step One
Cut the pieces for the outer box sides, top and bottom. With the pocket hole jig set for 3/4″ material, drill pocket holes in each end of the bottom piece, as well as the top edge of the sides. Assemble the box using glue and 1-1/4″ pocket hole screws.
Step Two
Cut the piece for the center divider and drill pocket holes in each end. Secure the divider to the top and bottom using glue and 1-1/4″ brad nails.
Step Three
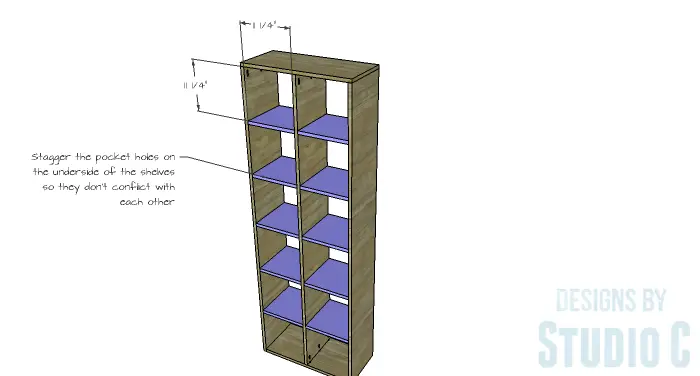
Cut the pieces for the shelves and drill pocket holes in each end. When drilling the pocket holes, stagger them so the pocket hole screws won’t interfere with those on the corresponding shelf. Secure the shelves to the divider and sides using glue and 1-1/4″ pocket hole screws.
Step Four
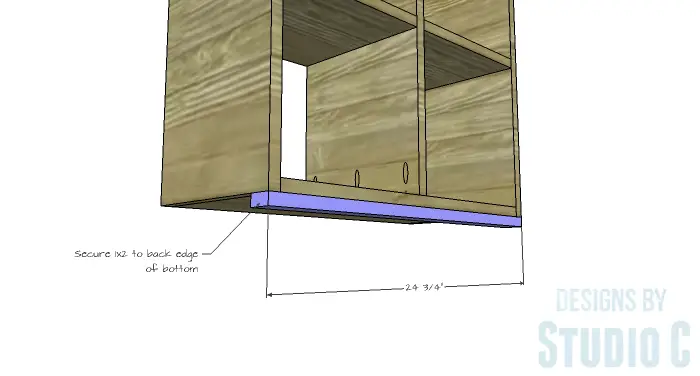
Cut the piece for the bottom support and secure it to the bottom back edge using glue and 1-1/2′ brad nails.
Step Five
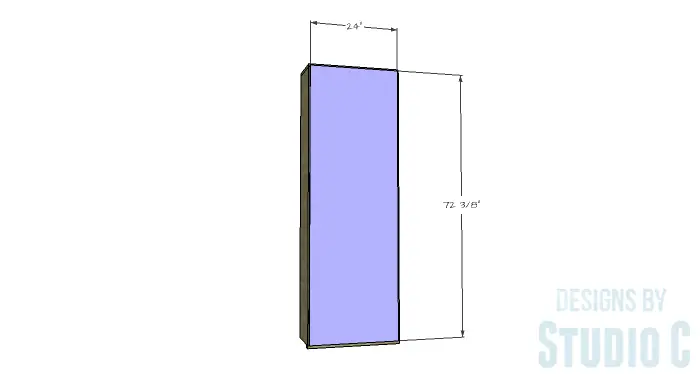
Cut the piece for the back. Center it, securing in place with glue and 1-1/4″ brad nails.
Step Six
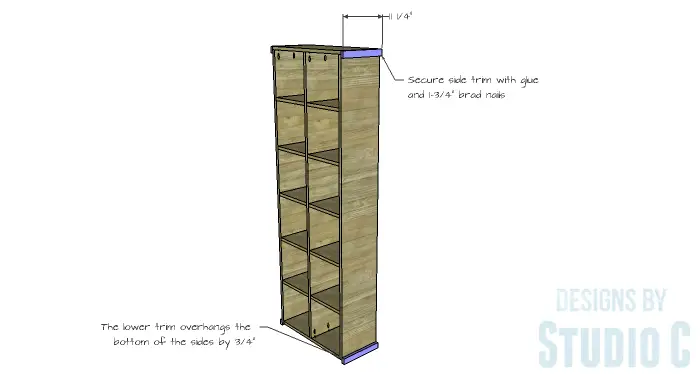
Cut the pieces for the upper and lower side trim. The upper trim will be flush with the top while the lower trim will overhang the lower edge of the sides by 3/4″. Secure the trim in place using glue and 1-1/2″ brad nails.
Step Seven
Cut the pieces for the face frame. Drill pocket holes in each end of the shorter horizontal pieces and the long vertical pieces as shown in the drawing.
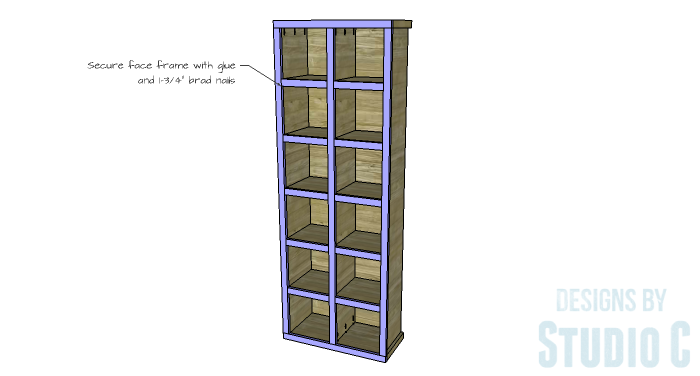
Secure the face frame to the front of the bookcase. The top edge of the shorter horizontal pieces will line up with the top face of the shelves. The sides will line up with the upper and lower side trim. Secure the face frame in place using glue and 1-3/4″ brad nails.
Fill the holes and finish as desired.
This bookcase will look fabulous in any room and the plans are suitable for those new to woodworking! Have any questions about the DIY furniture plans to build a Squared Bookcase? Leave a comment below!
Originally posted 2016-02-15 08:00:06.



Comments are closed.