
Build a Round Dining Table Pedestal Base
An Easy to Build Base for a Round Table – DIY Furniture Plans
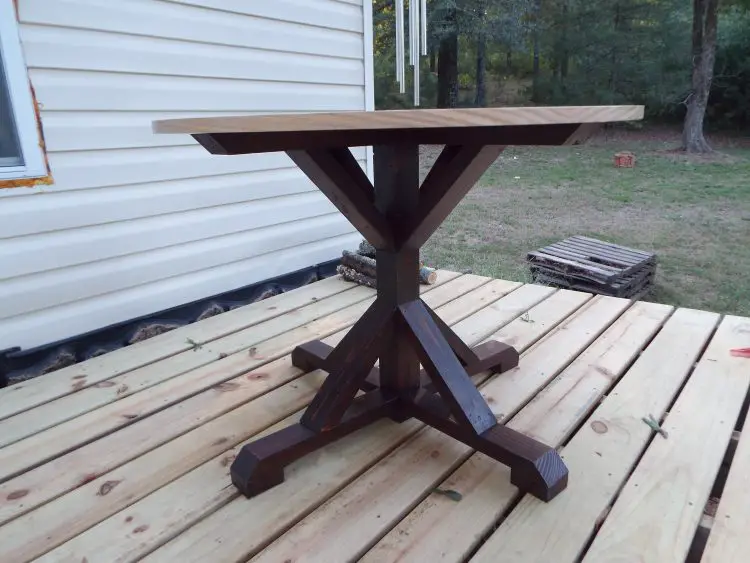
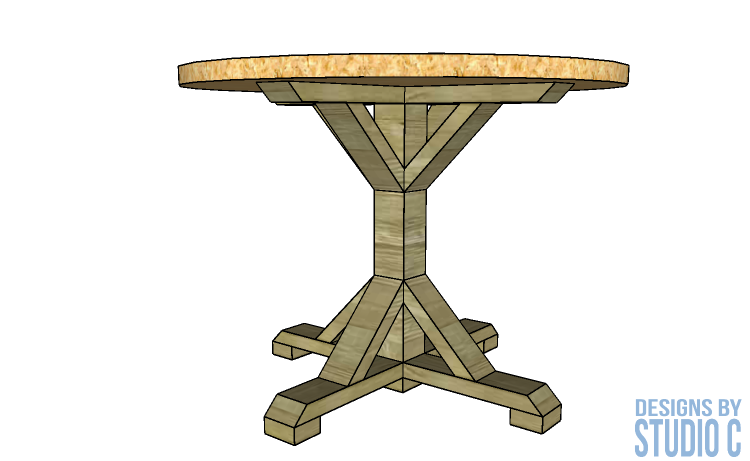
I just built a pieced plywood table top and I really love how it came out! A fabulous top like that deserves an equally fabulous base, am I right? The DIY furniture plans to build a round dining table pedestal base is constructed out of 2x4s and a piece of a 4×4 post. The arms and legs of the base are supported by pieces that join to the center to resemble an “X” depending on how you look at it!
The plan for the base is sized to fit a 40″ round table and can easily be adapted to fit a larger table by adjusting the length of the arms and legs (it is not necessary to adjust the length of the bracing).
The top is made by laminating two pieces of plywood together (making the piece approximately 1-1/2″ thick) and cutting it on a large circle jig with a band saw. 2″ edge banding is then used to cover the edges of the plywood. Take a look at this easy tutorial on building a jig to cut large circles on the bandsaw. 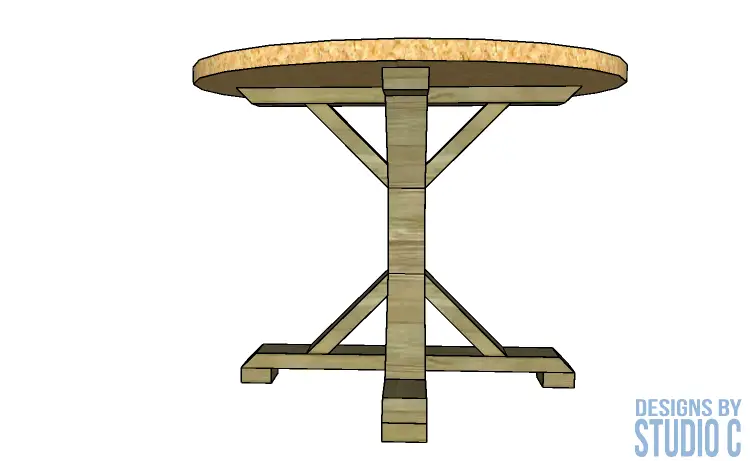
Materials:
- 2-1/2″ pocket hole screws (<– affiliate link!)
- 2-1/2″ screws
- 2″ brad nails
- Wood glue (<– affiliate link!)
- Sandpaper (100, 150, 220 grits)
- Finishing supplies (primer & paint, or stain, sealer)
Tools needed:
- Table saw
- Miter saw or circular saw
- Drill
- Pocket hole jig
- Brad nailer with compressor (or battery powered nailer)
- Sander
Lumber:
- 4 – 2×4 at 8′
- 1 – 4×4 at 4′
Cut List:
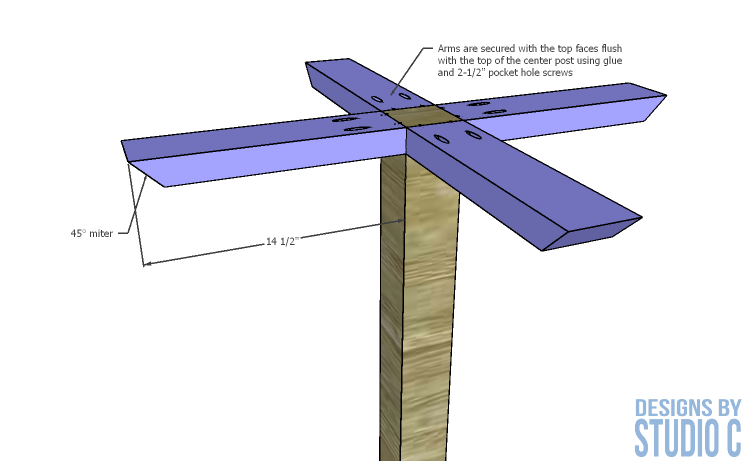
- 1 – 4×4 at 28-3/4″ – Center of Base
- 8 – 2×4 at 14-1/2″ – Arms & Legs
- 4 – 2×4 at 3″ – Feet
- 8 – 2×4 at 11-5/16″ – Bracing
Notes about the project:
I used my table saw to rip the rounded edges off of each of the boards, making them measure exactly 3″ wide. The plans are drawn for 3″ wide lumber but if you do not want to rip the rounded edges off, the plan can be easily altered for 3-1/2″ wide with no problems or other adjustments.
It will be much easier for finishing if each of the pieces are sanded prior to assembly!
Step One
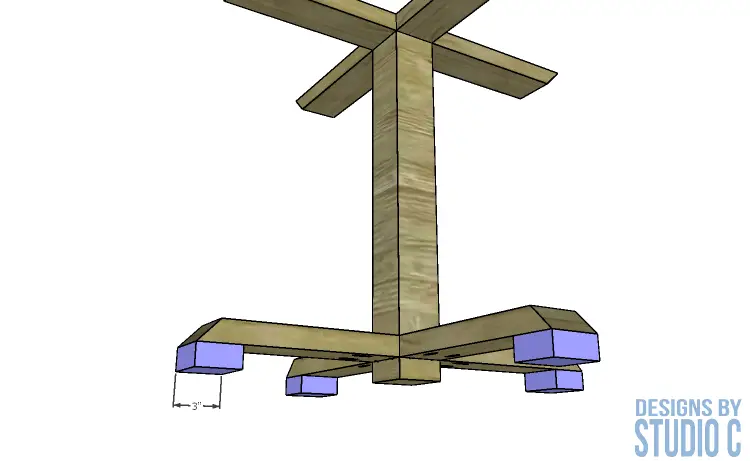
Cut the pieces for the base, legs and feet. With the pocket hole jig set for 1-1/2″ material, drill pocket holes in one end of each of the arms. In the other end of the arms, cut a 45° angle in the top face on the opposite side as the pocket holes. Secure the arms to the base using glue and 2-1/2″ pocket hole screws. The face of the arms with the pocket holes will face up and the arms will be flush with the top of the base.
Step Two
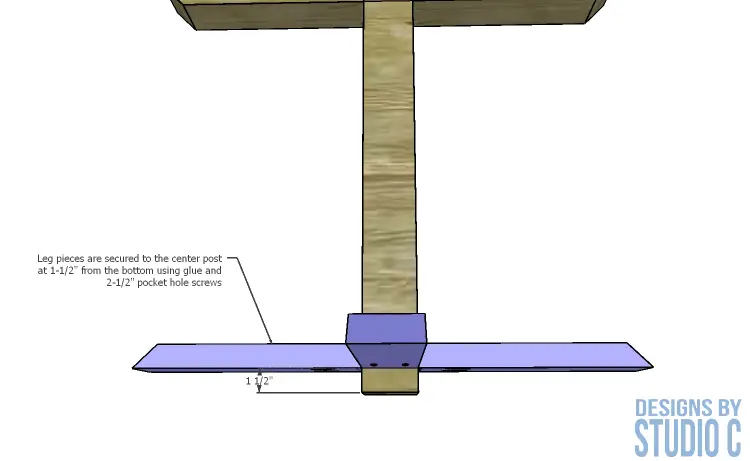
Cut the pieces for the arms and drill pocket holes in one end of each piece. In the opposite end, cut a 45° angle on the opposite side as the pocket holes. Secure the legs to each side of the base using glue and 2-1/2″ pocket hole screws. Note that the legs will be positioned 1-1/2″ up from the bottom of the base. Secure a foot to the bottom of each leg (opposite the 45° miter) using glue and 2-1/2″ screws.
Step Three
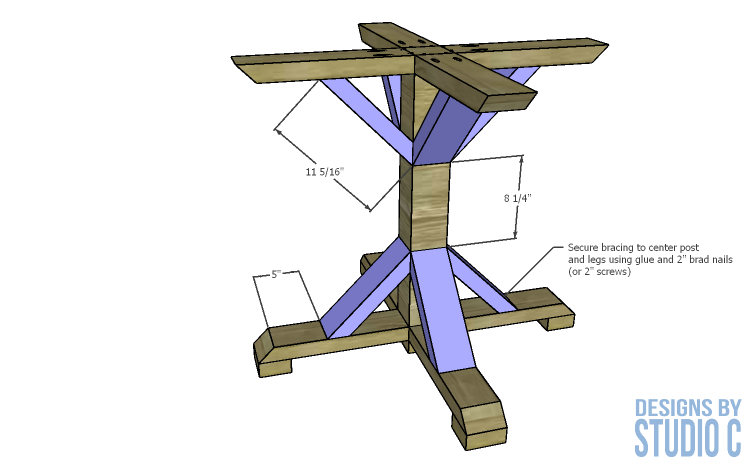
Cut the pieces for the arm and leg supports, cutting a 45° angle in each end of each piece. Secure the supports to the base, arms and legs using glue and 2″ brad nails.
Finish as desired.
Step Four
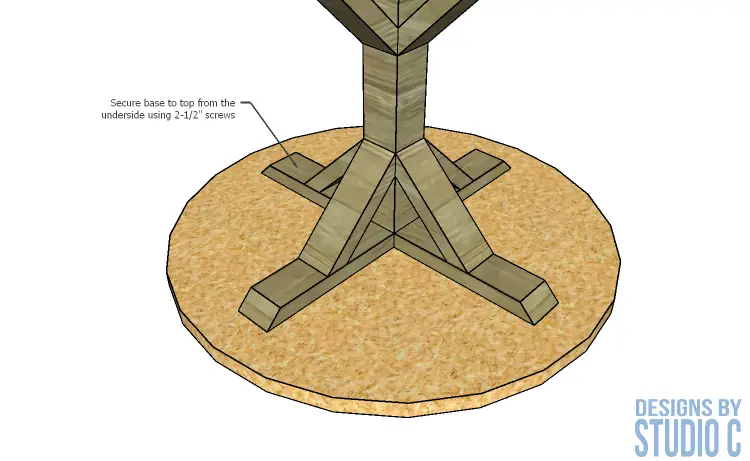
Position the base on the table top (upside down, of course) and secure to the top using countersunk 2-1/2″ screws.
I chose to finish the base in this project using a dark brown stain but I didn’t let it penetrate the wood for very long. I wanted a lighter, vintage-y look and I think I achieved it! It looks perfect with the pieced plywood round table top, right?
Have any questions about the DIY furniture plans to build a round dining table pedestal base? Leave a comment below!
