DIY Furniture Plans to Build a Griffin Coffee Table
A New Plan for a Pottery Barn Knock-Off Coffee Table
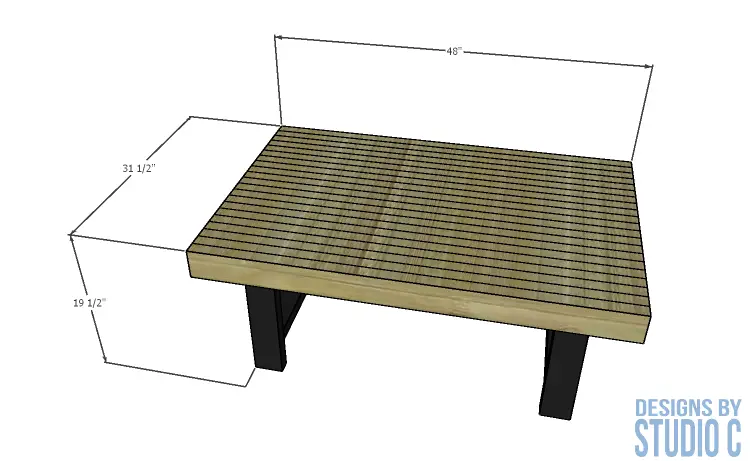
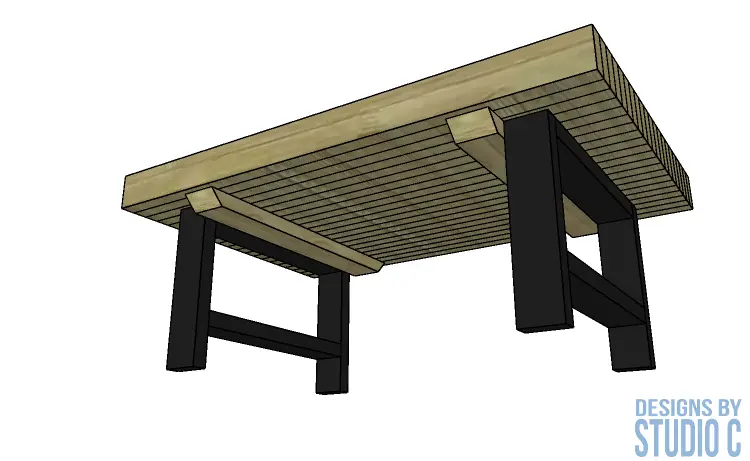
This plan is perfect for those who want to build a high end piece of furniture easily and inexpensively. The DIY furniture plans to build a Griffin coffee table (Pottery Barn inspired) is built entirely out of 2x4s making this an incredibly inexpensive project! The boards for the top are assembled on the side and secured underneath with two braces, then set atop two leg frames. The table can be finished however you desire, and can be completed in a weekend!
Materials:
- 2-1/2″ pocket hole screws (<– affiliate link!)
- 2-1/2″ screws
- 3″ screws
- Wood glue (<– affiliate link!)
- Sandpaper (80, 120, 220 grits)
- Finishing Supplies (Paint or Stain & Sealer)
Lumber:
- 12 – 2×4 at 8′ (the full 8′ boards not the 92-5/8″ framing 2x4s)
Cut List:
- 18 – 2×4 at 47-15/16″ (9 – 2x4s cut in half which will make them slightly shorter than 4′ each)
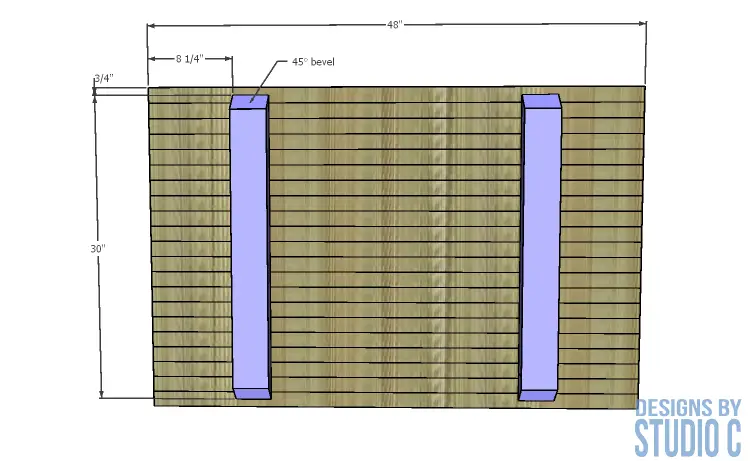
- 2 – 2×4 at 30″ – Top Bracing
- 4 – 2×4 at 16″ – Leg Assemblies
- 4 – 2×4 at 21-1/2″ – Leg Assemblies
Notes About the Project:
If a pocket hole jig is not available, I’ve included an alternate way to construct the leg assemblies in Step Three.
If staining the top, stain should be applied to each board individually before assembly. The entire top can be sealed as one unit after assembly.
Step One
Cut the pieces for the top. Stain the boards individually and let them completely dry. Place the boards on a flat surface (on their side) and glue them together to form the top. 2-1/2″ screws can be used randomly to secure the boards together as they are being glued.
Step Two
Cut the pieces for the top bracing. Cut a 45° bevel in the end of each board. Secure the braces to the underside of the table assembly, as shown in the drawing, using glue and slightly countersunk 2-1/2″ screws.
Step Three
Cut the pieces for the leg assemblies. If using a pocket hole jig, drill pocket holes in each end of the braces. Secure the bracing to the legs using glue and 2-1/2″ pocket hole screws.
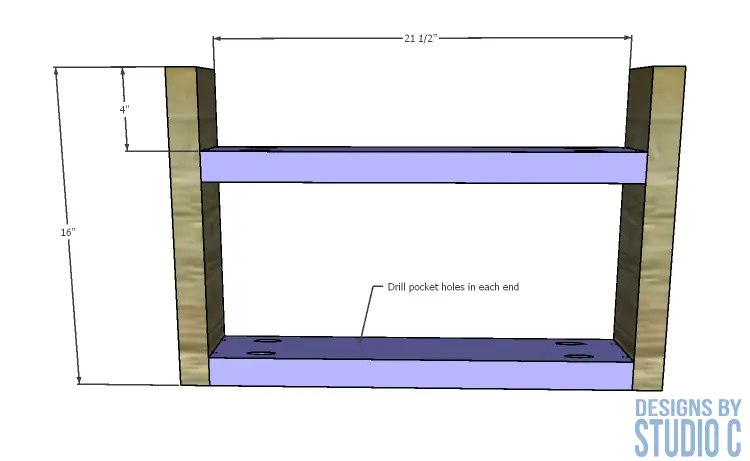
If a pocket hole jig is not available, the braces can be secured to the legs using countersunk 3″ screws from the outside of the legs into the ends of the braces.
Step Four
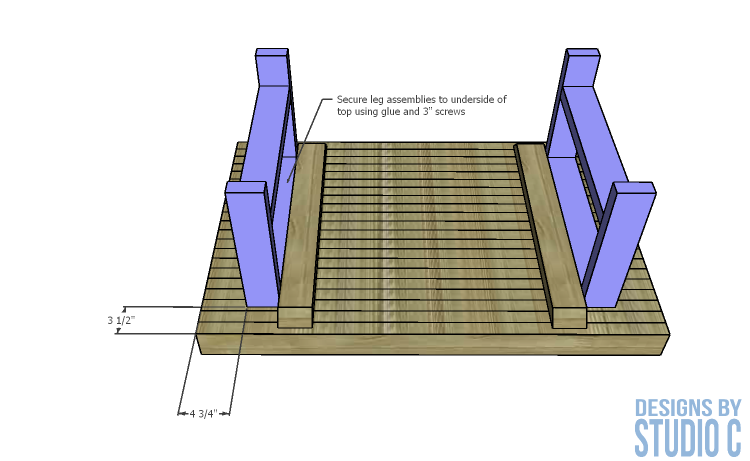
Position a leg assembly flush against the outside edge of the top braces on the underside of the top. Secure the assemblies to the top using glue and 3″ screws. The screws do not need to be countersunk (they may poke through the top).
Have any questions about the DIY furniture plans to build a Griffin coffee table? Leave a comment below!
Originally posted 2018-07-12 08:00:37.

