Build a Mod Storage Table on Casters
A Storage Piece with a Modern Vibe
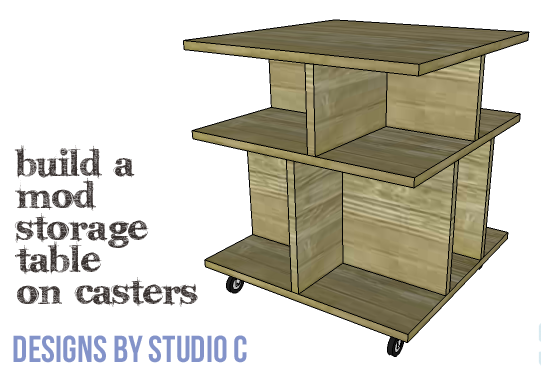
This table is not only ultra-functional – it is also an extremely easy build! The DIY furniture plans to build a Mod Storage Table on Casters features two levels of storage space for books, magazine, craft supplies, etc. all while functioning as an end table! The piece is also very inexpensive and the finish can be customized however desired!
Materials:
- 1-1/4″ pocket hole screws
- 1-1/2″ brad nails
- 1-3/4″ brad nails
- Edge banding
- Pocket hole plugs or wood filler
- 2″ casters
- Wood glue
- Sandpaper (100, 150, 220 grits)
- Finishing supplies (primer & paint, or stain, sealer)
Tools Needed:
- Table saw or circular saw
- Pocket hole jig
- Drill
- Iron for edge banding
- Right angle drill attachment (for tight spaces)
- Pneumatic brad nailer with compressor
- Sander
Lumber:
- 1 – 4′ x 8′ sheet of 3/4″ plywood
Cut List:
- 3 – 3/4″ plywood at 22″ x 22″ – Top, Middle & Bottom Shelves
- 1 – 3/4″ plywood at 12″ x 22″ – Lower Shelf Divider
- 4 – 3/4″ plywood at 10-5/8″ x 12″ – Lower Shelf Dividers
- 1 – 3/4″ plywood at 7″ x 22″ – Upper Shelf Divider
- 2 – 3/4″ plywood at 7″ x 10-5/8″ – Upper Shelf Dividers
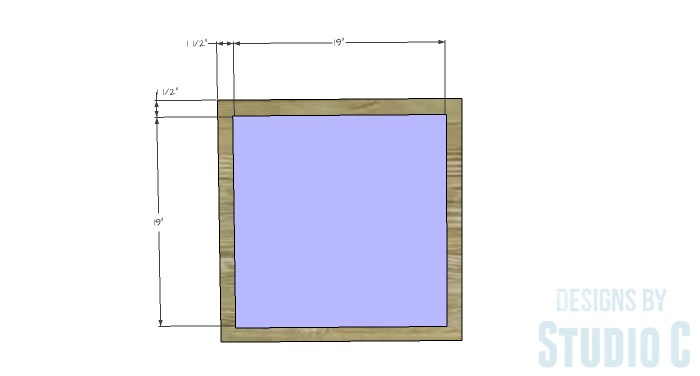
- 1 – 3/4″ plywood at 19″ x 19″ – Lower Platform
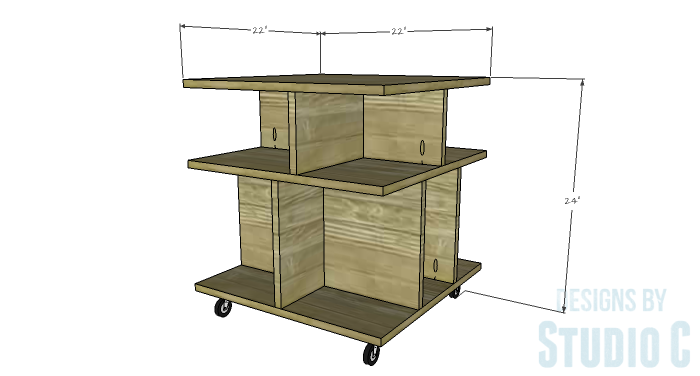
Click on the drawings for a larger view!
Edge banding will be applied to the exposed edges of the plywood prior to assembly.
Step One
Cut the pieces for the top, bottom and middle shelves. Apply edge banding to cover the exposed edges of the plywood using an iron.
Step Two
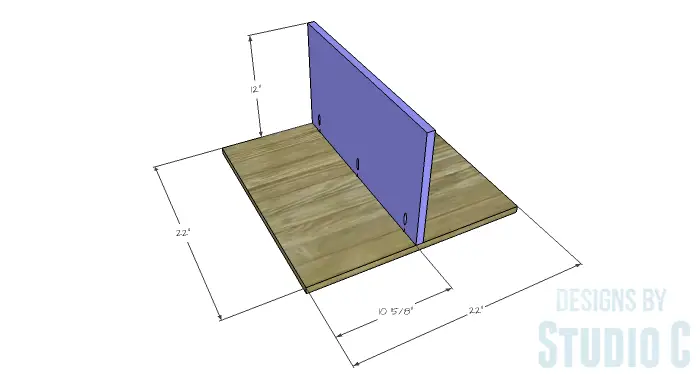
Cut the piece for the longer lower shelf divider and apply edge banding to the shorter edges. With the pocket hole jig set for 3/4″ material, drill pocket holes in one long edge of the piece. Secure the divider to the bottom piece using glue and 1-1/4″ pocket hole screws.
Step Three
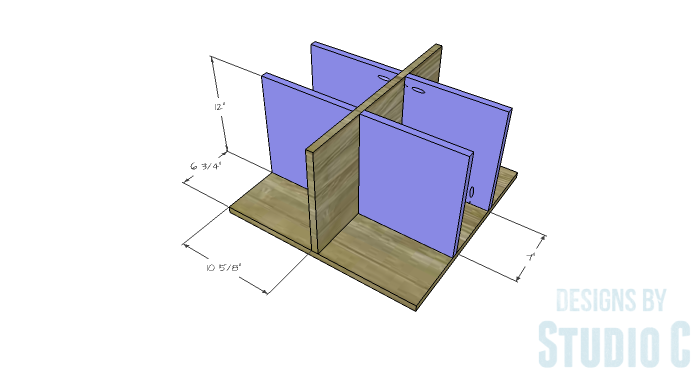
Cut the pieces for the remaining lover dividers and apply edge banding to the side edges (measuring 12″). Drill pocket holes in the bottom edge as well as one long edge treating the pieces as left and right (there will be two of each). Secure the dividers to the longer divider and the bottom using glue and 1-1/4″ pocket hole screws. Use a right angle drill where necessary.
Step Four
Secure the middle shelf to the top of the lower dividers using glue and 1-3/4″ brad nails.
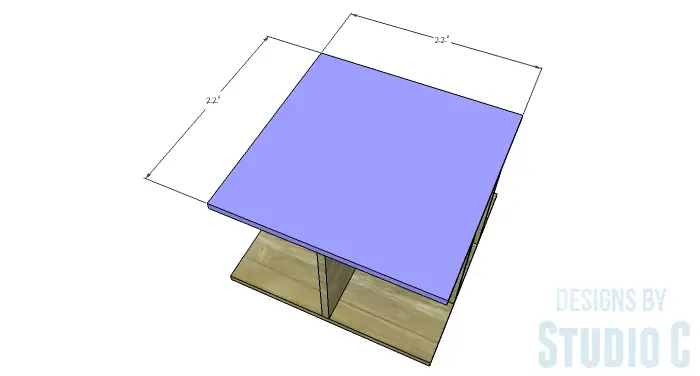
Step Five
Cut the piece for the longer upper divider and apply edge banding to the side edges of the piece. Drill pocket holes along one long edge. Secure the divider to the middle shelf using glue and 1-1/4″ pocket hole screws.
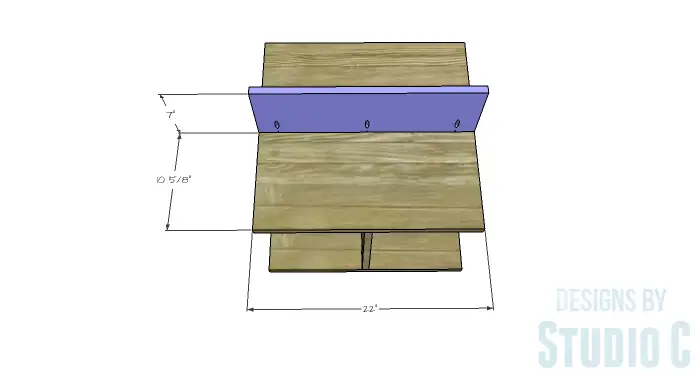
Step Six
Cut the pieces for the remaining upper dividers and apply edge banding to the side edges (measuring 7″). Drill pocket holes in the bottom edge as well as one long edge. Secure the dividers to the middle shelf and the longer divider using glue and 1-1/4″ pocket hole screws.
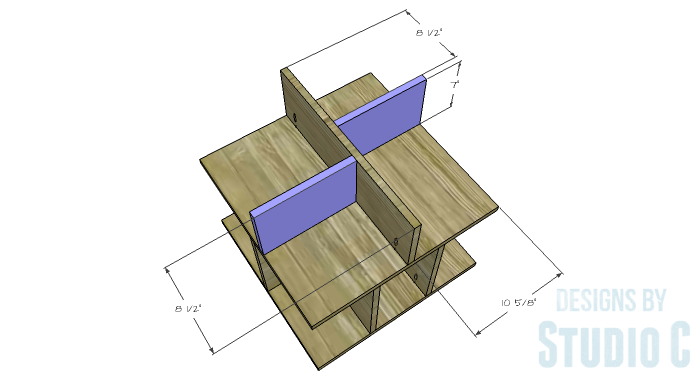
Step Seven
Secure the top piece to the upper dividers using glue and 1-3/4″ brad nails.
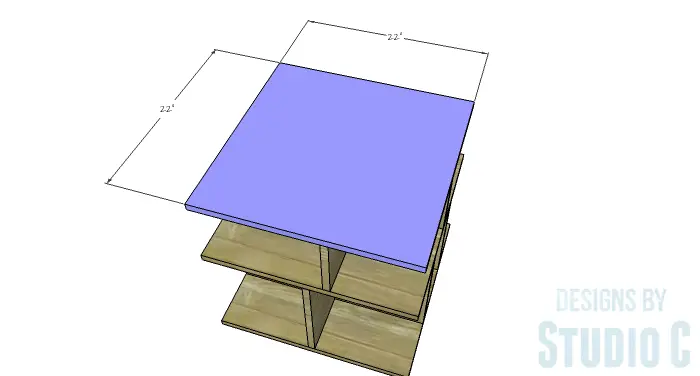
Step Eight
Cut the piece for the platform and apply edge banding to the exposed edges. Secure the piece to the underside of the bottom shelf using glue and 1-1/2″ brad nails.
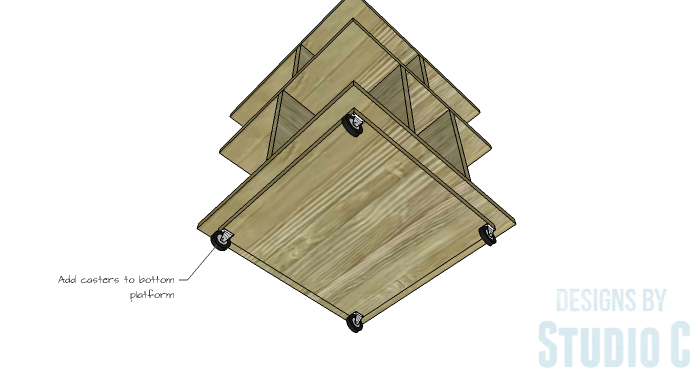
Finish as desired, then install the casters according to the manufacturer’s installation instructions.
What a great table, right? Built as a pair, they would be great nightstands in a bedroom as well! Have any questions about the DIY furniture plans to build a Mod Storage Table on Casters? Leave a comment below – I’m always happy to answer questions!
Originally posted 2016-03-22 08:00:36.


[…] modern storage table could be used as an end table or for extra storage in the craft room. Build it using these free […]
[…] Modern Storage […]