Build a Demilune Console Table
An Easy to Build Console Table with Lots of Storage
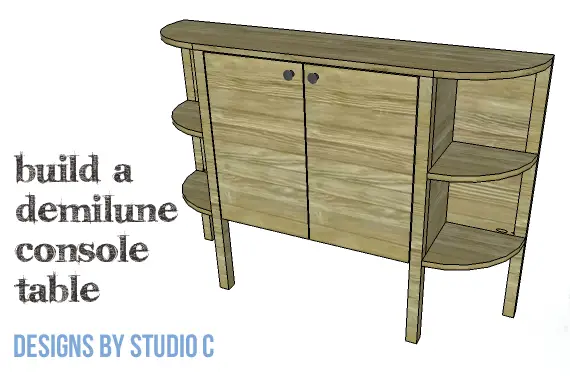
Seriously, demilune tables are really easy to build – don’t let those curves fool you! The DIY furniture plans to build a Demilune Console Table feature two center shelves behind doors, and two curved shelves on each side. This super-easy build can be completed in a weekend!
Materials:
- 1-1/4″ pocket hole screws
- 1-3/4″ brad nails
- Edge banding
- 2 sets of hinges
- Cabinet pulls
- Wood glue
- Sandpaper (100, 150, 220 grits)
- Finishing supplies (primer & paint, or stain, sealer)
Tools needed:
- Jigsaw or bandsaw
- Table saw
- Iron for edge banding
- Drill
- Pocket hole jig
- Right angle drill attachment (for tight spaces)
- Pneumatic brad nailer with compressor
- Sander
Lumber:
- 2 – 2×2 at 6′
- 1 – 4′ x 4′ sheet of 3/4″ plywood
- 1 – 4′ x 8′ sheet of 3/4″ plywood
Cut List:
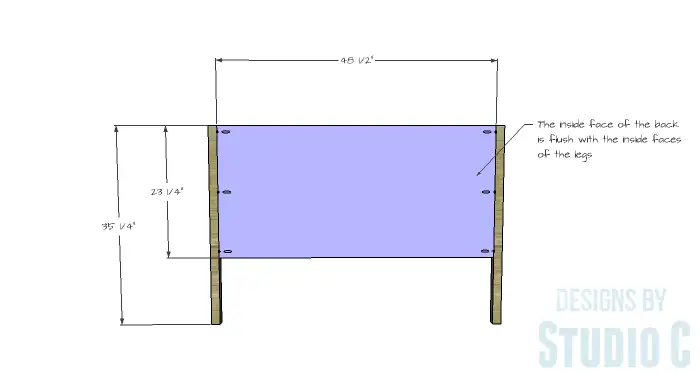
- 4 – 2×2 at 35-1/4″ – Legs
- 1 – 3/4″ plywood at 23-1/4″ x 48-1/2″ – Back
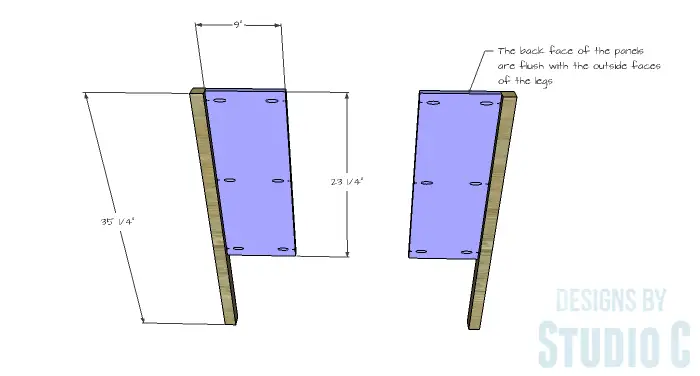
- 2 – 3/4″ plywood at 9″ x 23-1/4″ – Side Panels
- 2 – 3/4″ plywood at 9-3/4″ x 29″ – Center Shelves
- 4 – 3/4″ plywood at 10-1/2″ x 10-1/2″ – Outer Shelves
- 1 – 3/4″ plywood at 12″ x 51-1/2″ – Top
- 2 – 3/4″ plywood at 13-9/16″ x 23-1/8″ – Doors
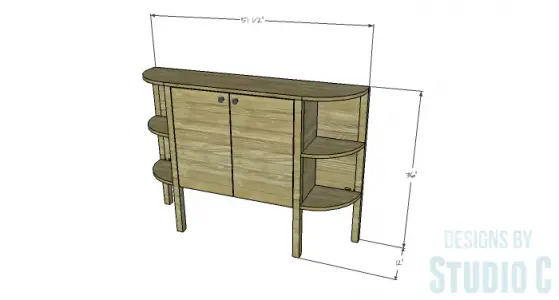
Click on the drawings for a larger view!
Edge banding will be applied to the exposed edges of the plywood prior to assembly.
Step One
Cut the pieces for the legs and the back. With the pocket hole jig set for 3/4″ material, drill pocket holes in each side edge of the back. Secure the back to two of the legs using glue and 1-1/4″ pocket hole screws. The inside face (with the pocket holes) will be flush with the inside face of the legs.
Step Two
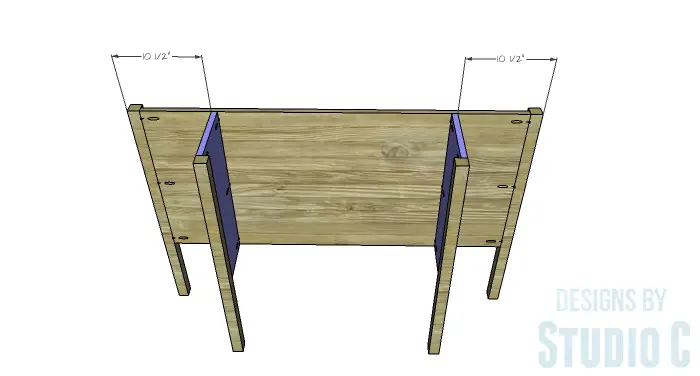
Cut the pieces for the side panels and drill pocket holes in the side edges. Secure the side panels to the legs using glue and 1-1/4″ pocket hole screws. The outside face (without pocket holes) will be flush with the outside face of the legs.
Step Three
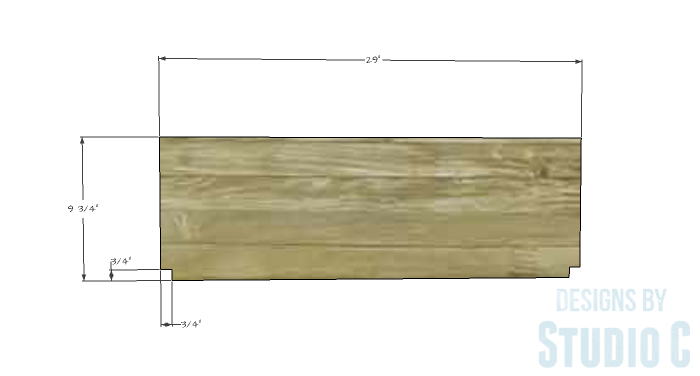
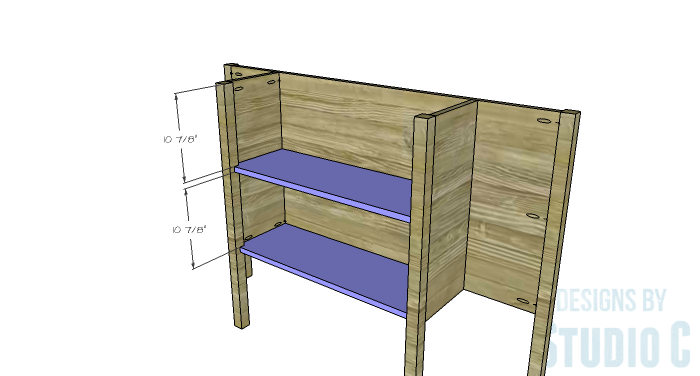
Cut the pieces for the center shelves and cut the notches with a jigsaw. Drill pocket holes in the side edges. Secure the shelves to the side panels using glue and 1-1/4″ pocket hole screws. The bottom shelf is flush with the bottom of the side panels.
Step Four
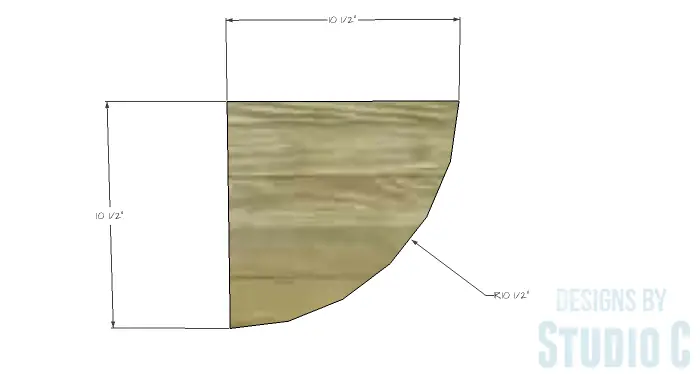
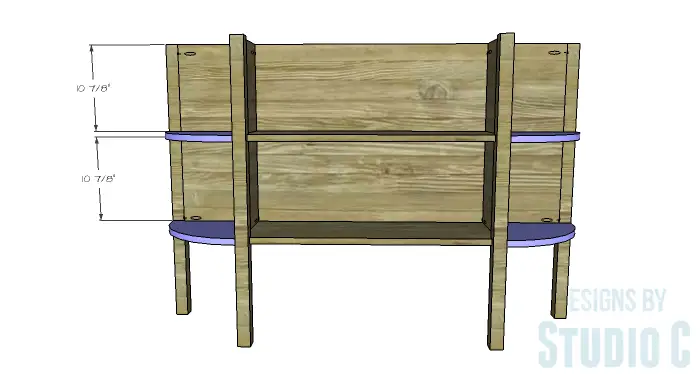
Cut the pieces for the outer shelves. Cut the arc in the shelves using a jigsaw or a bandsaw. Drill pocket holes in the straight edges of each shelf. Secure the shelves to the side panels and back panel using glue and 1-1/4″ pocket hole screws.
Step Five
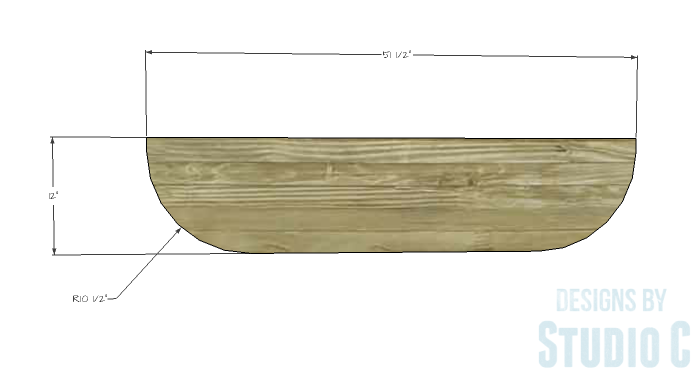
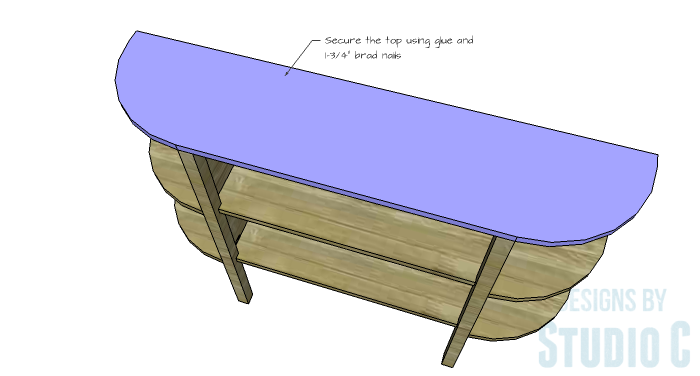
Cut the piece for the top. Cut the arcs using a jigsaw or bandsaw. Secure the top using glue and 1-3/4″ brad nails.
Step Six
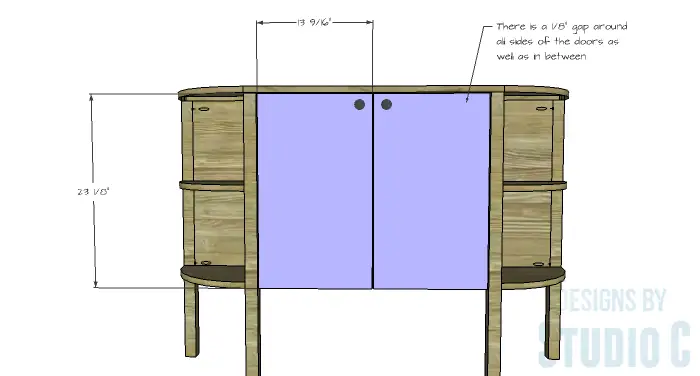
Cut the pieces for the doors. Install the hinges on the doors, then install the doors in the cabinet. There will be a 1/8″ gap around all sides of the doors in the opening as well as in between them. The bottom of the doors are flush with the bottom of the lower shelf.
The doors on this cabinet are the perfect blank canvas for a stencil or handpainted design! Have any questions about the DIY furniture plans to build a Demilune Console Table? Leave a comment below!
Originally posted 2016-03-09 08:00:58.

[…] demilune console table features two center shelves behind doors, and two curved shelves on each side. build it with these […]