
Build the Raylan Ottoman
An Easy to Build Ottoman for the Indoors or Outdoors
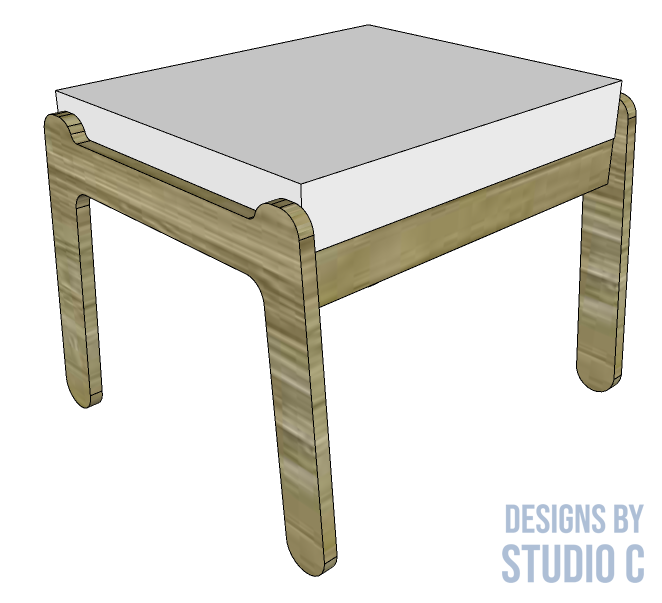
This amazing ottoman, inspired by Pottery Barn, is a really awesome build! The plans to build a Raylan ottoman include the templates for the side/leg combo in a plan suitable for all skill levels!
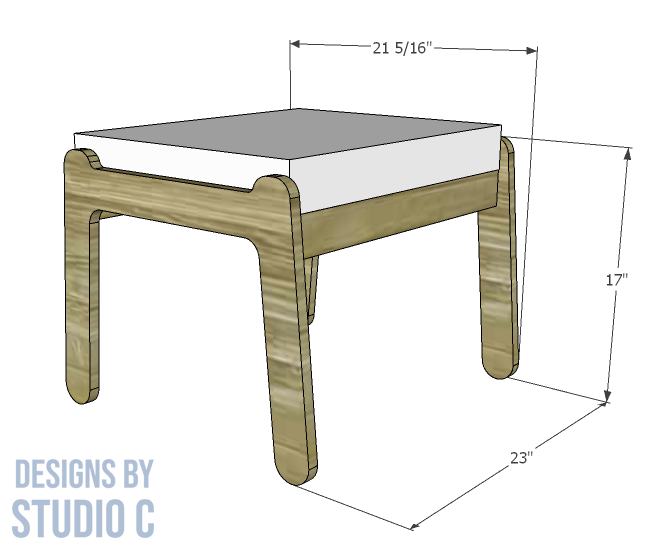
The templates can be transferred to a piece of poster board and traced on the plywood or board glue-up then cut out with a jigsaw or bandsaw.
Materials:
- 1-1/4″ pocket hole screws
- 3″ High density foam at 11″ x 22″
- Upholstery batting (<– affiliate link!)
- Fabric to cover foam
- Wood glue
- Sandpaper (80, 120, 220 grits)
- Finishing supplies
Lumber:
- 1 – 2′ x 4′ sheet of 3/4″ plywood
Cut List:
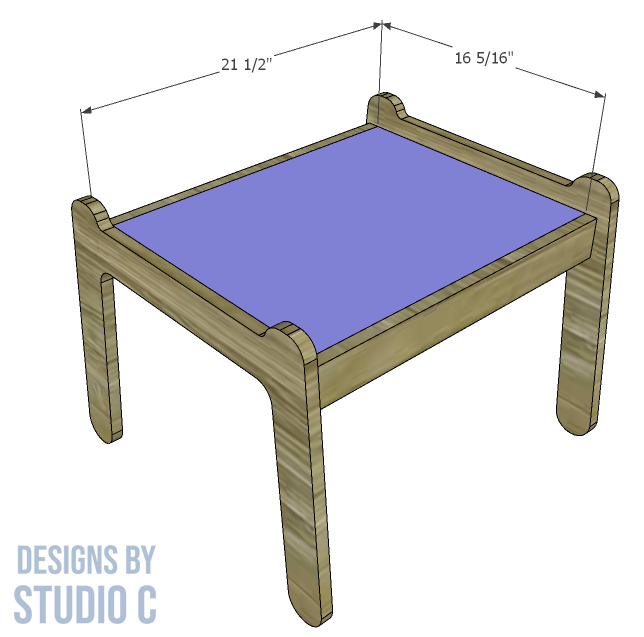
- 2 – 3/4″ plywood at 2-1/2″ x 21-1/2″ – Stretchers
- 1 – 3/4″ plywood at 16-5/16″ x 21-1/2″ – Base
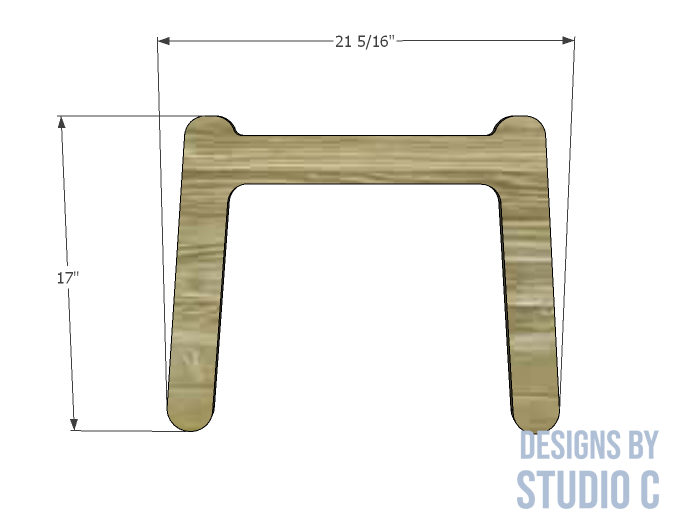
- 2 – Side and Leg Assemblies**
Notes About the Project:
- Print the templates, align the registration marks and tape the pieces together.
- The side/legs combo pieces will be cut out first, and the base and stretchers can be cut from the scrap.
- Sand the pieces prior to assembly!
Step One
Trace the template on the sheet of plywood. Cut the pieces out using a jigsaw or a bandsaw.
Step Two
Cut the pieces for the stretchers from the scrap. With the pocket hole jig set for 3/4″ material, drill pocket holes in each end of the stretcher pieces. Secure the stretchers to the side/legs pieces using glue and 1-1/4″ pocket hole screws. Make sure they are centered with a 16-5/16″ space between them.
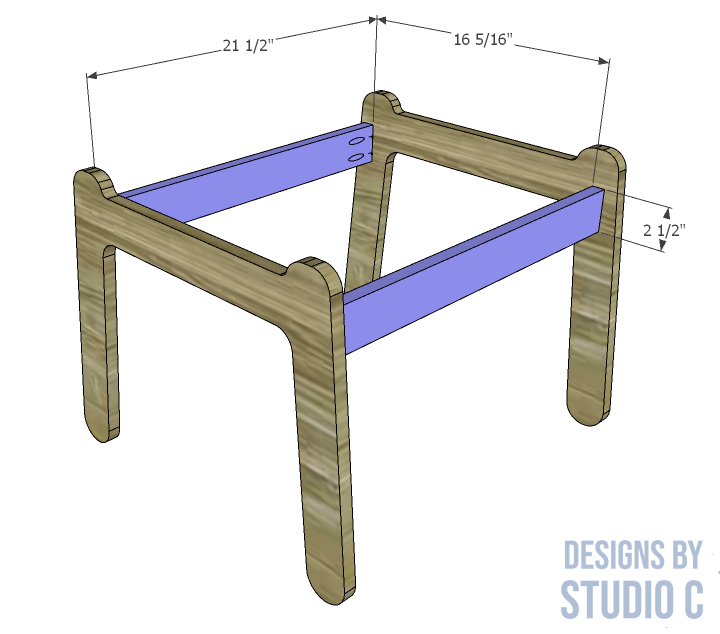
Step Three
Cut the piece for the base and drill pocket holes in all four sides. Secure the base to the stretchers and side/legs using glue and 1-1/4″ pocket hole screws. The top face of the base will be flush with the top face of the stretchers.
Finish as desired.
To Make the Cushion:
Here is a fabulous step by step tutorial I wrote years ago about making a box cushion… and it doesn’t require a zipper!
Have questions about the plans to build a Raylan ottoman? Leave a comment below!
