
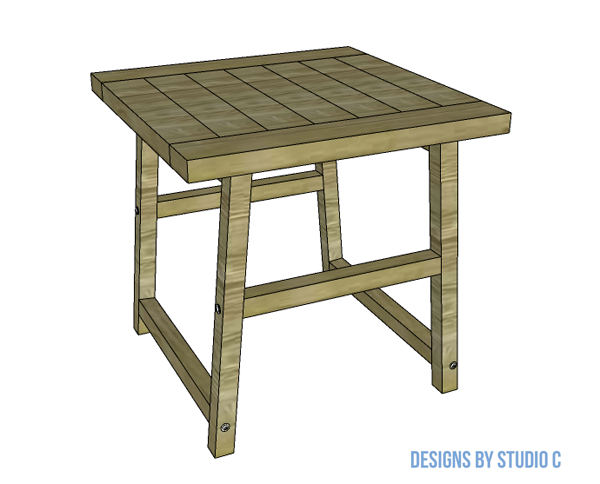
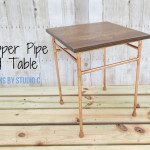
An Easy to Build Table with Off-the-Shelf Lumber
Hey there, DIYers! Ready to roll up your sleeves and get your hands dirty? In this guide, we’ll show you step-by-step how to build the Cornelia end table. Whether you’re a seasoned carpenter or a complete newbie, this is a great weekend project. Get ready to impress your friends with your building skills and create a stunning piece of furniture that will be the envy of all. Let’s dive in and get building!
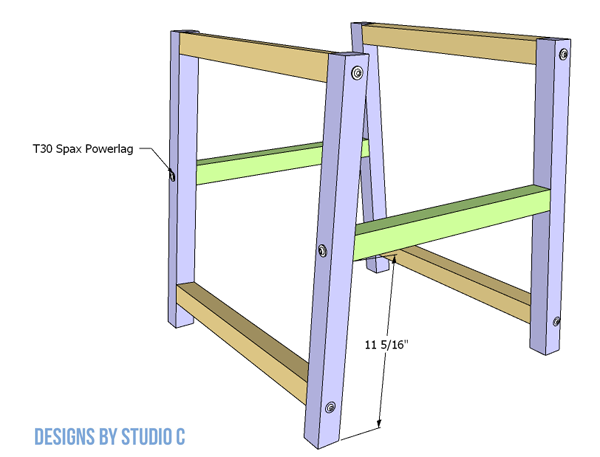
The leg frame on this table have a slight angle to them, and the frame is assembled with T30 Spax Powerlags (which can also be painted!) as a decorative feature. The top is assembled with 2-1/2″ pocket hole screws, then secured to the leg frame with 2-1/2″ screws.
Materials:
- 2-1/2″ pocket hole screws
- 2-1/2″ screws
- 3-1/2″ T30 Spax Powerlags (<– affiliate link!)
- Wood glue
- Sandpaper (80, 120, 220 grits)
Lumber:
- 3 – 2×2 at 8′
- 2 – 2×4 at 8′
Cut List:
- 7 – 2×4 at 17-1/2″ – Top
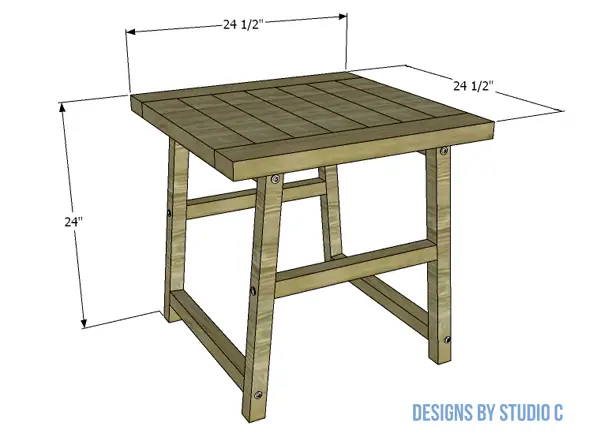
- 2 – 2×4 at 24-1/2″ – Ends
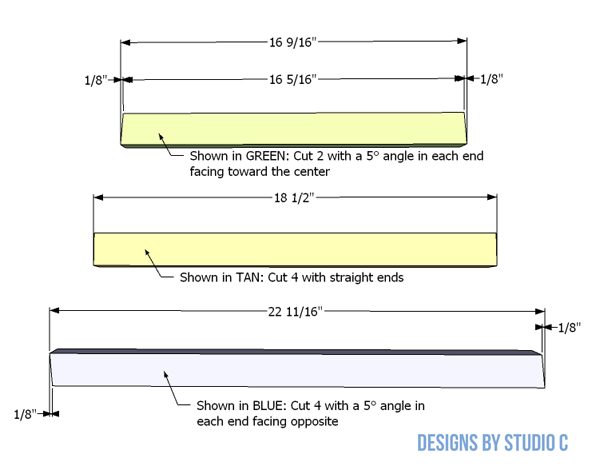
- 4 – 2×2 at 22-11/16″ – Legs
- 4 – 2×2 at 18-1/2″ – Leg Framing
- 2 – 2×2 at 16-5/16″ – Leg Framing
Notes About the Project:
- Sand all parts prior to assembly – this makes finishing MUCH easier!
- Use a pre-stain wood conditioner, if staining, for an even finish
- Wet sand the polyurethane sealer in between coats for a professional finish!
Step One
Cut the pieces for the top. With the pocket hole jig set for 1-1/2″ material, drill pocket holes along six of the seven pieces for the table top, as well as each end of all seven pieces. See drawing for reference. Assemble the top using glue and 2-1/2″ pocket hole screws.

Step Two
Cut the pieces for the leg frame. Take a look at the drawing and note the angles cut in each of the legs with the exception of the 18-1/2″ framing pieces. They are different, so make sure to label each piece before assembly.
Once the pieces have been cut, mark the position of the stretchers on the legs, and pre-drill a hole for the Powerlag screws (about 1/4″ in diameter). Assemble the leg frame using glue and the 3-1/2″ Powerlags.
Step Three
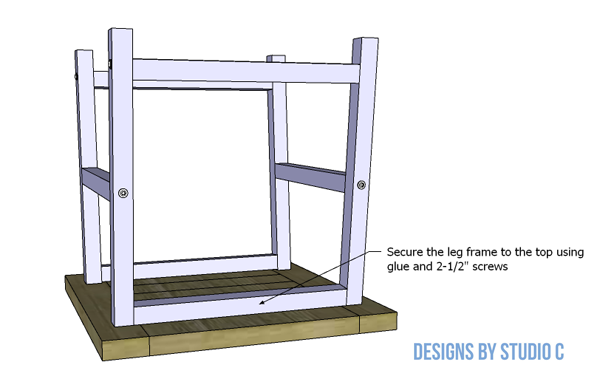
Lay the top face down on a flat surface. Position the leg frame on the underside of the table (facing up) and secure the leg frame in place using glue and 2-1/2″ screws.
Finish as desired!
This is such a fun project and with a beautiful finish, it will make an amazing piece of furniture! Have questions about the plans to build a Cornelia end table? Leave a comment below!


Comments are closed.