
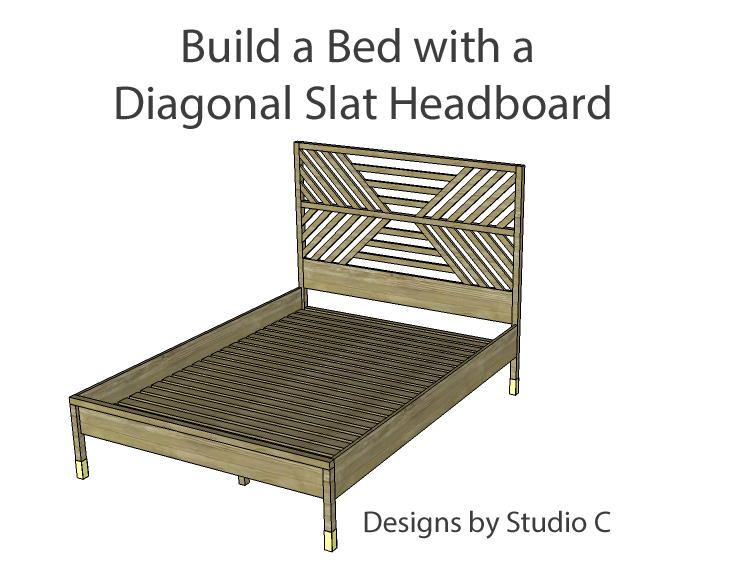
Build a Bed with a Diagonal Slatted Headboard
A Bed with a Stunning Headboard
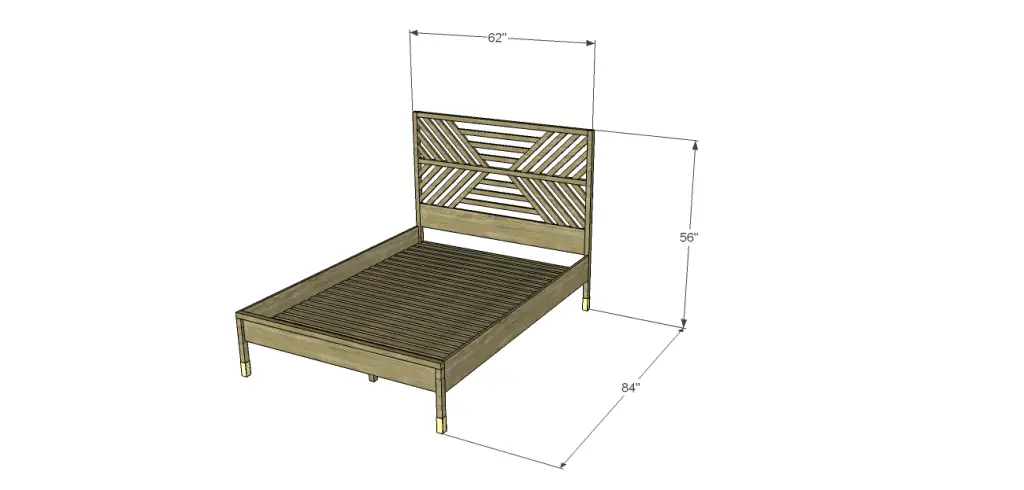
These are the first DIY plans for a bed I have on the site! I really like this style, plus it would be a cheap and easy build! The DIY plans to build a bed with a diagonal slatted headboard are written for a queen size. Adjusting the size up for a king or down for a full is just a matter of altering the diagonal slats in the headboard as well as adjusting the length of the footboard. Easy peasy, right? Of course, if you need help with the adjustment send me an email at cher {at} designsbystudioc {dot} com!
Materials:
- 1-1/4″ pocket hole screws
- 2-1/2″ pocket hole screws
- 1-1/4″ screws
- Bed rail brackets
- 2 – 1-1/2″ angle brackets
- Wood glue
- Sandpaper (100, 150, 220 grits)
- Finishing supplies
Lumber:
- 10 – 1×2 at 8′
- 23 – 1×3 at 6′
- 1 – 1×10 at 6′
- 2 – 1×10 at 8′
- 5 – 2×2 at 8′
Cut List:
- 2 – 2×2 at 56″ – Headboard Legs
- 2 – 2×2 at 59″ – Headboard Frame
- 1 – 1×10 (ripped to 8″ wide) at 59″ – Headboard Frame
- 1 – 2×3 at 59″ – Headboard Frame
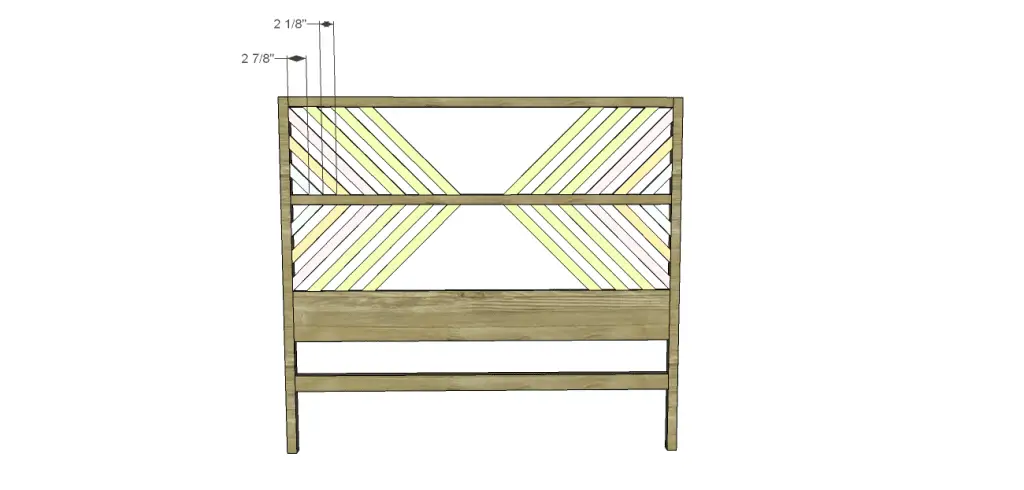
- 4 – 1×2 at 7-1/16″ – Headboard Diagonal Slats
- 4 – 1×2 at 13-1/16″ – Headboard Diagonal Slats
- 4 – 1×2 at 19-1/16″ – Headboard Diagonal Slats
- 12 – 1×2 at 20-9/16″ – Headboard Diagonal Slats
- 2 – 1×2 at 28-13/16″ – Horizontal Slats
- 2 – 1×2 at 21-9/16″ – Horizontal Slats
- 2 – 1×2 at 14-5/16″ – Horizontal Slats
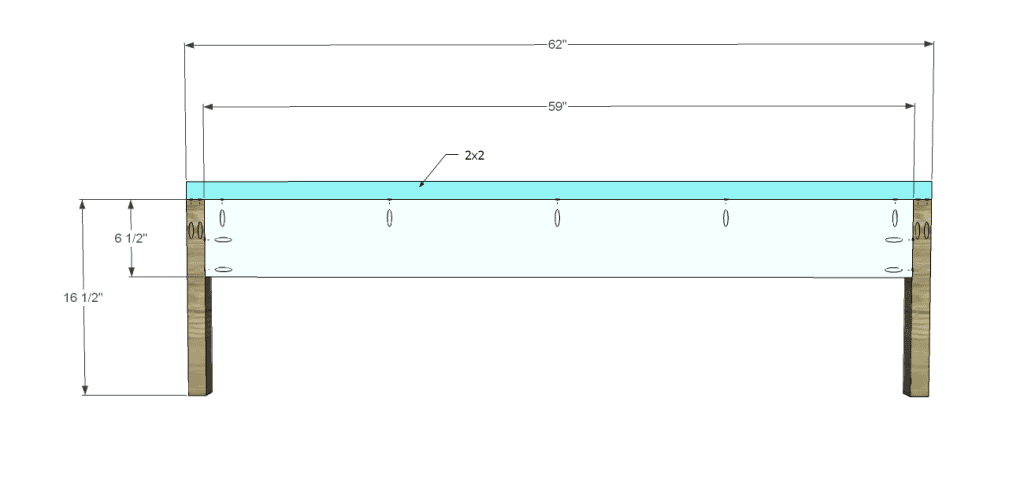
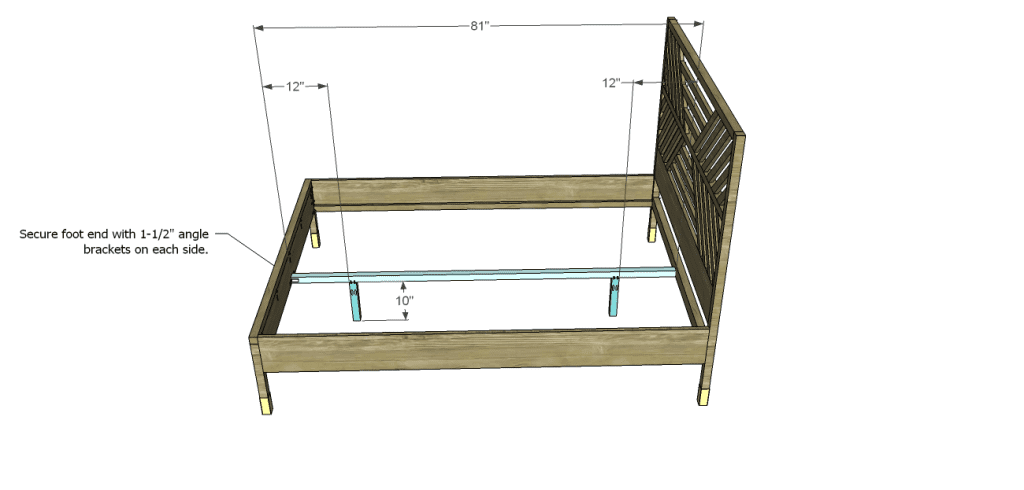
- 2 – 2×2 at 16-1/2″ – Footboard Legs
- 1 – 2×2 at 62″ – Footboard Frame
- 1 – 1×8 (ripped to 6-1/2″ wide) at 59″ – Footboard Panel
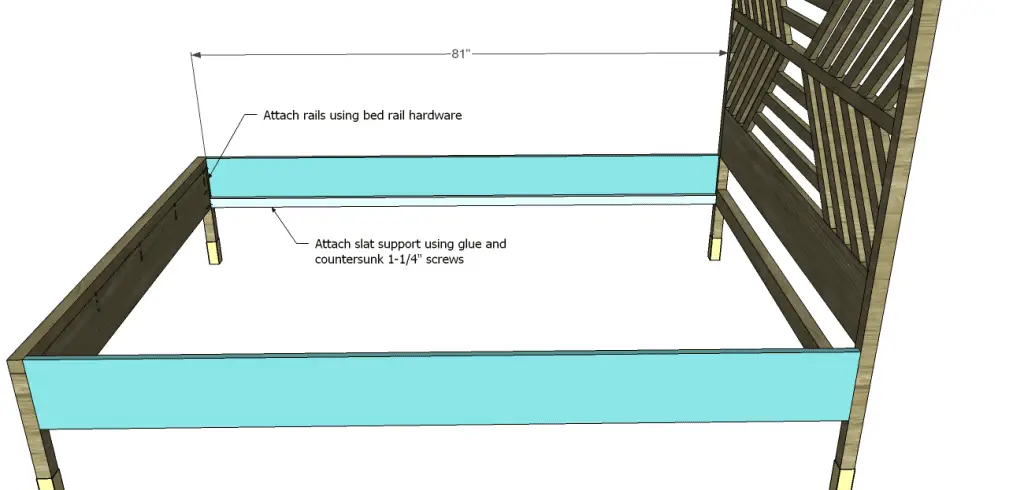
- 2 – 1×10 (ripped to 8″ wide) at 81″ – Side Rails
- 2 – 1×2 at 81″ – Slat Supports
- 1 – 2×2 at 81″ – Slat Support
- 2 – 2×2 at 10″ – Slat Support Legs
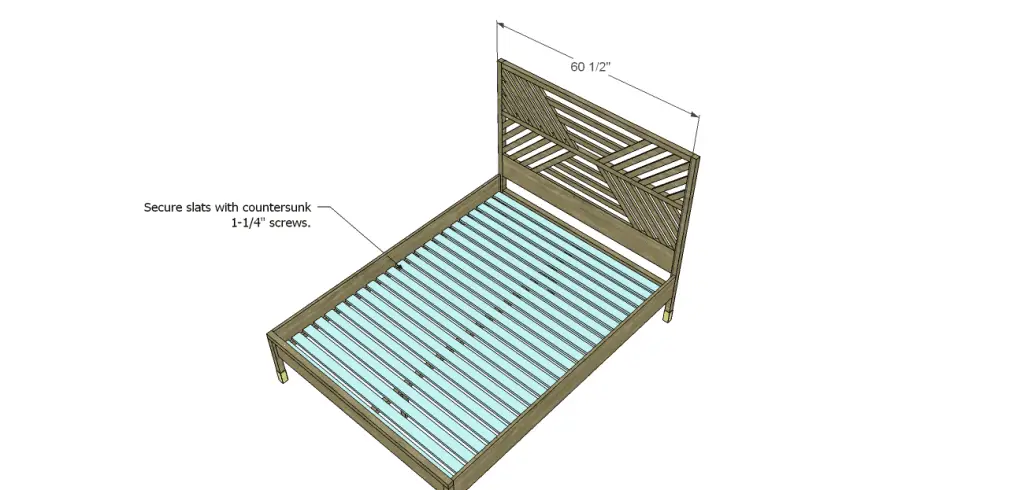
- 23 – 1×3 at 60-1/2″ – Slats
Step One
Cut the pieces for the footboard. Drill pocket holes in one end of each of the legs. Attach the top rail using glue and 2-1/2″ pocket hole screws.
Drill pocket holes in each end as well as one long edge of the footboard panel. Attach to the legs and top rail using glue and 1-1/4″ pocket hole screws. The back face of the panel will be flush with the inside face of the legs and rail.
Step Two
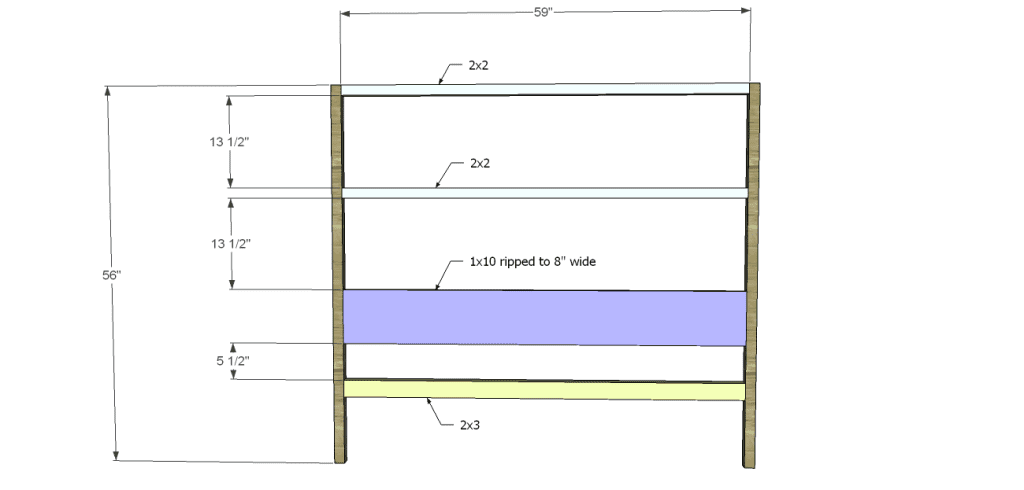
Cut the pieces for the headboard frame. Drill pocket holes in each end of the top rail, the 2×2 stretcher, the 2×3 stretcher, and the 8″ stretcher. Position the pieces as shown then secure using glue and 1-1/4″ pocket hole screws through the 8″ stretcher into the legs, and 2-1/2″ screws through the top rail and 2×3 stretcher into the legs. Make sure the pocket hole jig is set for the appropriate material thickness!
Step Three
All angles in the diagonal slat pieces for the headboard are cut at 45 degrees. Cut each piece as shown. Please note that adjustments may have to be made. check for fit. Drill pocket holes (one in each end may also be sufficient, provided that glue is used to secure the pieces in place) in each end, then secure to the headboard frame using glue and 1-1/4″ pocket hole screws. Start with the piece that will extend from the corner of the frame. Space the other pieces 2-1/8″ in either direction of this one.
Cut the pieces for the horizontal slat pieces and cut 45 degree miters in each end. Check for fit. Drill pocket holes (one in each end may also be sufficient, provided that glue is used to secure the pieces in place) in each end, then secure to the diagonal slat pieces using glue and 1-1/4″ pocket hole screws at the spacing indicated.


Step Four
Cut the pieces for the side rails and the slat supports. Secure the slat supports to the side rails using glue and countersunk 1-1/4″ screws. The bottom edge of the support will be flush with the bottom edge of the side rail.
Install the bed rail brackets according to the manufacturer’s installation instructions. Attach the side rails to the headboard and footboard.
Step Five
Cut the pieces for the slat support and slat support legs. Drill pocket holes in one end only of each piece. Attach the legs using glue and 2-1/2″ pocket hole screws. Attach the support to the center of the footboard panel using two 1-1/2″ angle brackets. Attach the other end to the 2×3 stretcher on the headboard using 2-1/2″ pocket hole screws. DO NOT use glue!
Step Six
Cut the pieces for the slats. Position then along the length of the supports with approximately 1″ spacing and secure using countersunk 1-1/4″ screws. Do not use glue! (The bed may have to be disassembled someday!)
Finish as desired!
Well, how is that for the first set of DIY bed plans? I have ideas for many more beds, so stay tuned! I really like this plan and I may build it for myself. Have questions about the plans to build a bed with a diagonal slatted headboard? Leave a comment below!
Originally posted 2013-09-12 08:00:03.

[…] Slatted Queen size Bed planThe unique slatted headboard for this queen size bed is not all that difficult to build. You can also size up for a king size or down for a full size […]