An Easy to Build Display Piece for Decorative or Everyday Plates
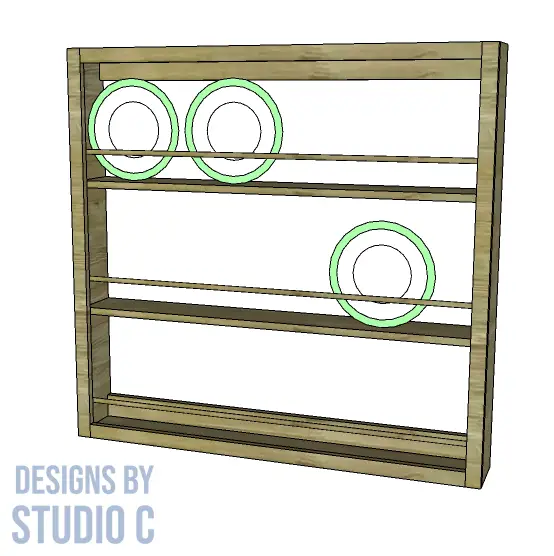
This simple display piece is a great first-time project. The plans to build an elegant plate rack feature three rows that will hold 3-5 decorative or everyday plates securely on a shelf behind a dowel rod. It’s the perfect piece to compliment farmhouse decor!
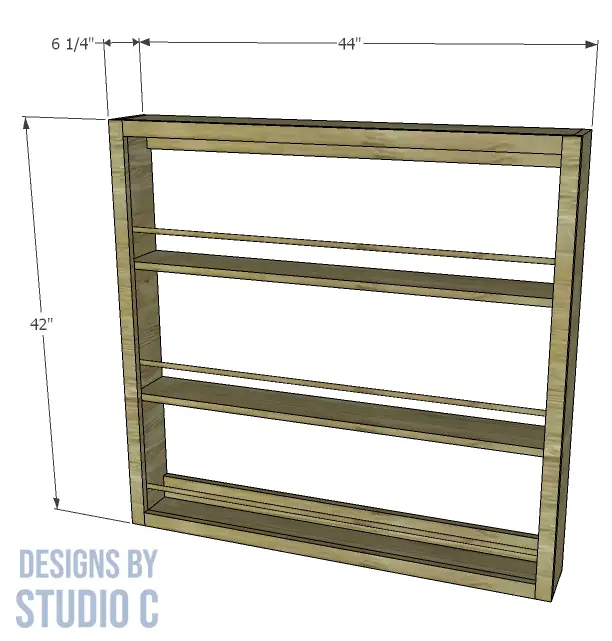
The plate rack uses off the shelf lumber in a plan suitable for all skill levels!
Materials:
- 1-1/2″ pocket hole screws
- 2″ brad nails
- Three 1/2″ diameter dowel rods at 48″ (<– affiliate link!)
- Wood glue
- Sandpaper (80, 120, 220 grits)
- Finishing supplies
Lumber:
- 3 – 1×2 at 8′
- 3 – 1×6 at 8′
Cut List:
- 2 – 1×6 at 42″ – Sides
- 2 – 1×6 at 42-1/2″ – Top and Bottom
- 3 – 1/2″ dowel rods at 42-7/8″
- 2 – 1×6 at 42-1/2″ – Shelves
- 2 – 1×2 at 42-1/2″ – Hanging Cleats
- 2 – 1×2 at 42″ – Face Frame
- 2 – 1×2 at 41″ – Face Frame
Notes About the Project:
- Sand all of the pieces before assembling, including the dowel rods.
- The dowels can be replaced with copper pipe, if desired.
- The holes for the dowels are drilled 3/8″ deep. If the hole is accidentally drilled all the way through, don’t worry! Just cut the dowel a little longer!
Step One
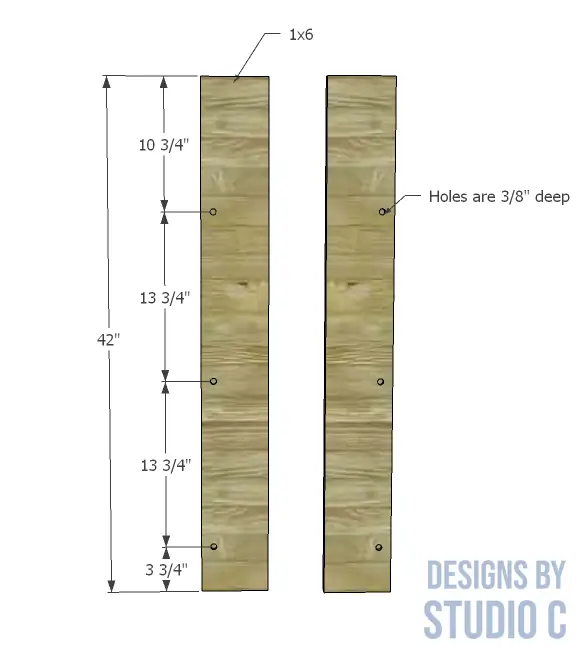
Cut the pieces for the sides. Using a 1/2″ Forstner bit, drill the holes for the dowels rods as shown, 3/8″ deep. Note that there will be a right piece and a left piece!
Step Two
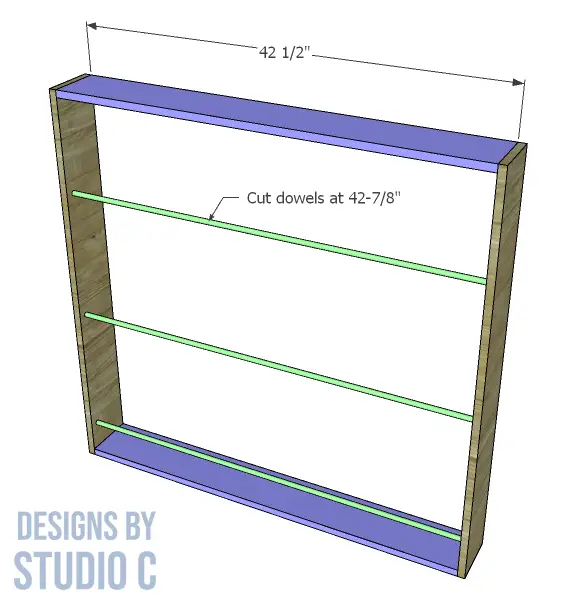
Cut the pieces for the dowels and the top and bottom. With the pocket hole jig set for 3/4″ material, drill pocket holes in each end of the top and bottom. Attach the top and bottom to one side piece using glue and 1-1/2″ pocket hole screws. Insert the dowel rods in the holes, then secure the opposite side piece using glue and 1-1/2″ pocket hole screws.
Step Three
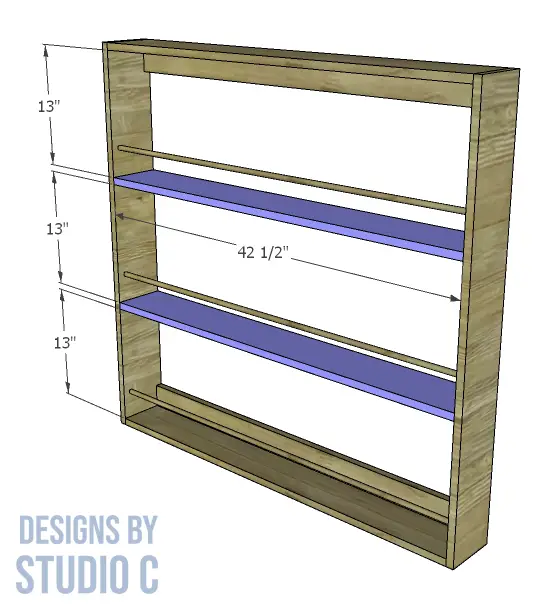
Cut the pieces for the shelves and drill pocket holes in each end of each piece. Secure the shelves to the sides as shown using glue and 1-1/2″ pocket hole screws.
Step Four
Cut the pieces for the hanging cleats and drill pocket holes along one long edge of each piece. Secure the cleats to the top and bottom pieces, flush with the back edge, using glue and 1-1/2″ pocket hole screws.

Step Five
Cut the pieces for the face frame. Install the longer vertical pieces first, using glue and 2″ brad nails, then install the shorter horizontal pieces.
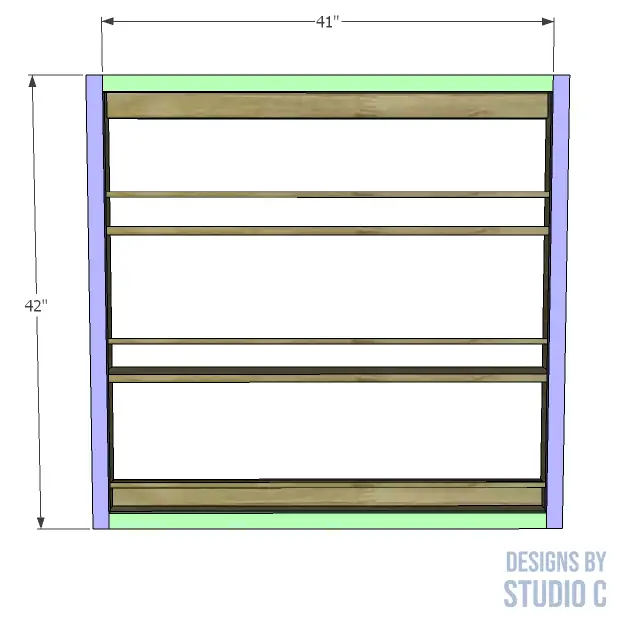
Finish as desired. An optional back can be added to the plate rack using 1/4″ plywood secured with brad nails.
To Hang the Plate Rack:
Drive screws through the hanging cleat into the wall studs using screws that are at least 3″ long.
This plate rack would also look really pretty with decorative trim or crown moulding around the top, or decorative moulding around the wall where the cabinet hangs. Have questions about the plans to build an elegant plate rack? Leave a comment below!
Originally posted 2022-03-08 08:00:58.

