A Gorgeous Addition to Your Décor Using These Tall Chest of Drawers Plans
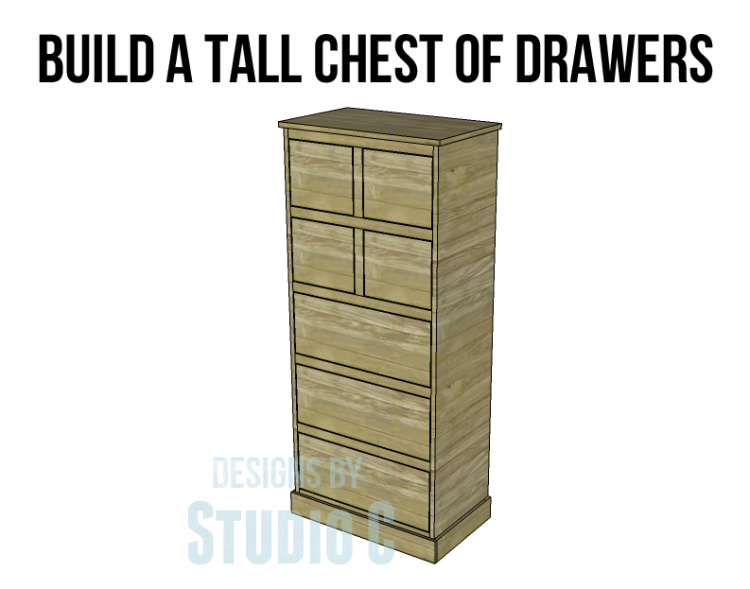
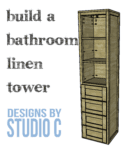
I absolutely adore dressers and chests, and let me tell you, these tall chest of drawers plans are simply amazing! They are so versatile and can fit perfectly in any space you have in mind. The best part is that you can customize and finish them exactly the way you want! They are absolutely perfect for a child’s room, a playroom, a bathroom, an entryway, or any other spot you can think of!
Materials:
- 1-1/4” pocket hole screws
- 1-1/4” brad nails
- Edge banding, optional
- 7 sets of 12″ Drawer slides
- Cabinet pulls
- Wood glue
- Sandpaper (100, 150, 220 grits)
- Finishing supplies (primer & paint, or stain, sealer)
Lumber:
- 2 – 1×2 at 8′
- 1 – 1×4 at 2′
- 4 – 1×8 at 8′
- 1 – 2×2 at 3′
- 2 sheets of 3/4″ plywood
Cut List:
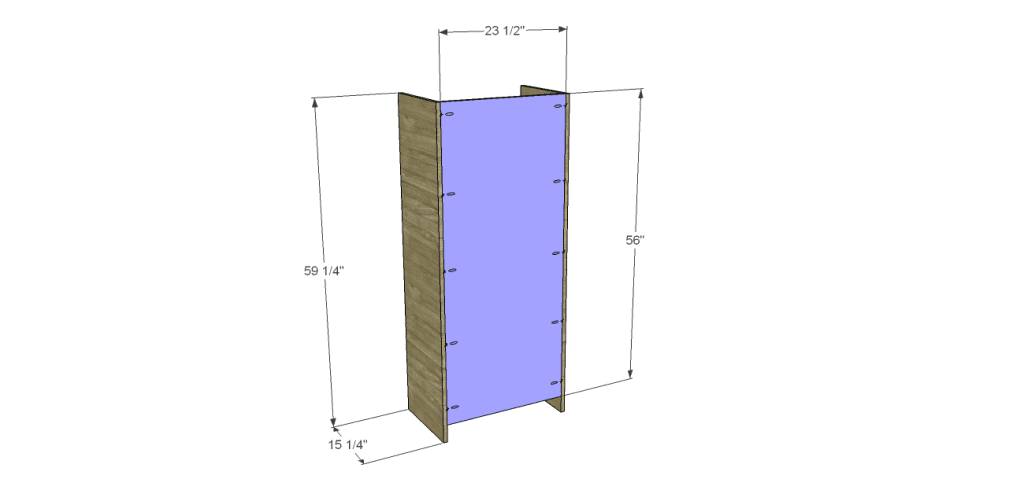
- 2 – 3/4″ plywood at 15-1/4″ x 59-1/4″ – Sides
- 1 – 3/4″ plywood at 23-1/2″ x 56″ – Back
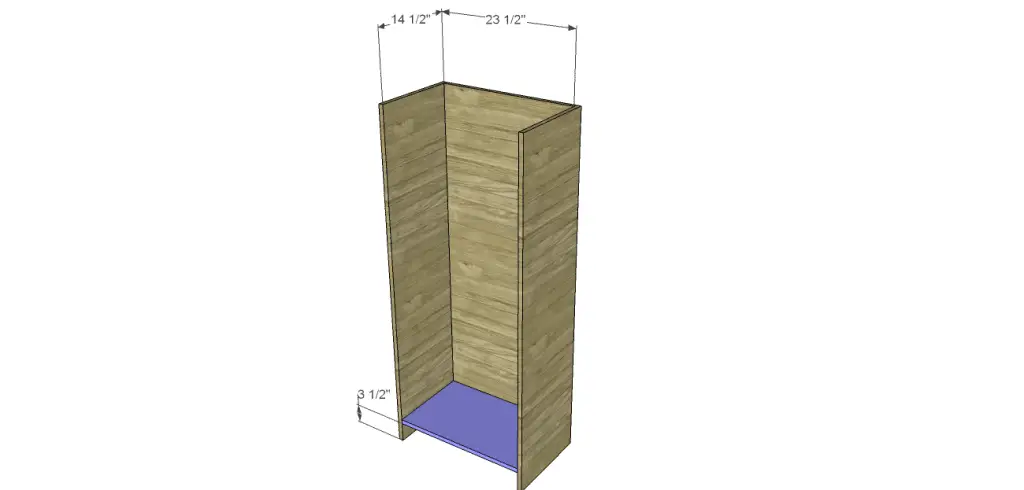
- 1 – 3/4″ plywood at 14-1/2″ x 23-1/2″ – Bottom
- 1 – 1×4 at 23-1/2″ – Lower Stretcher
- 5 – 1×2 at 23-1/2″ – Stretchers
- 2 – 1×2 at 9-1/2″ – Dividers
- 2 – 2×2 at 13-3/4″ – Drawer Spacers
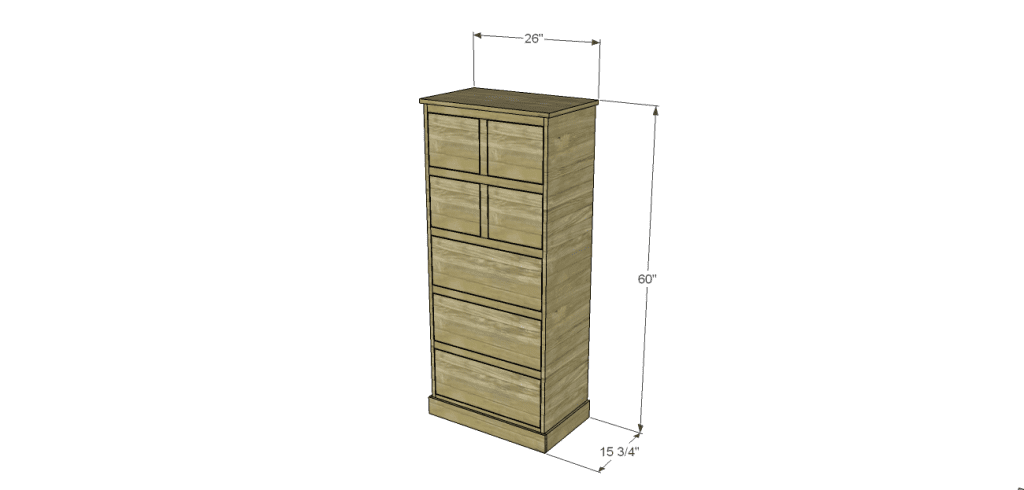
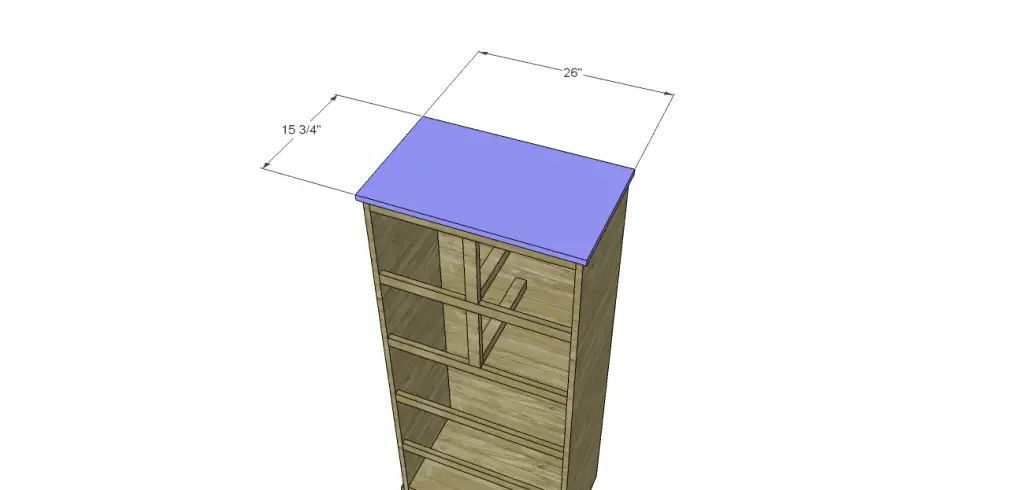
- 1 – 3/4″ plywood at 15-3/4″ x 26″ – Top
- Trim cut to fit
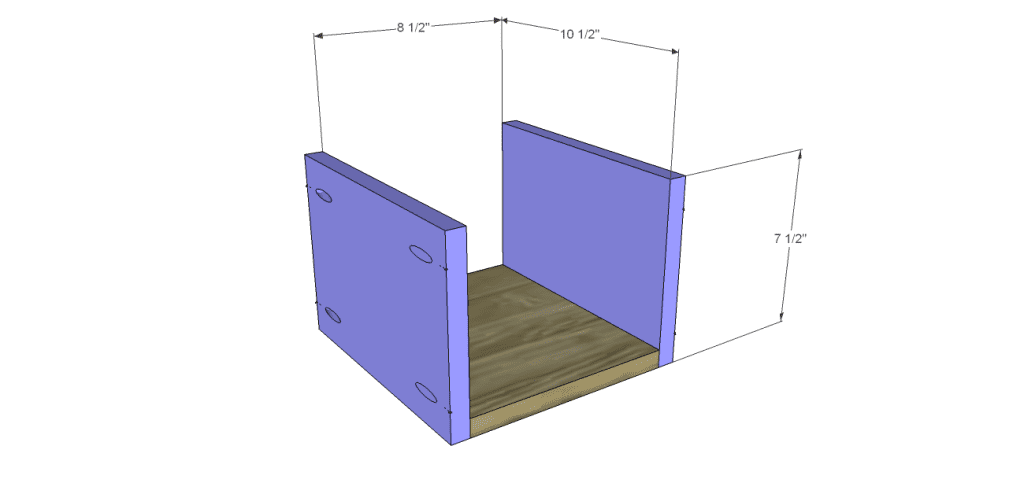
- 4 – 3/4″ plywood at 8-1/2″ x 10-1/2″ – Small Drawer Bottoms
- 8 – 1×8 at 10-1/2″ – Small Drawer Box Sides
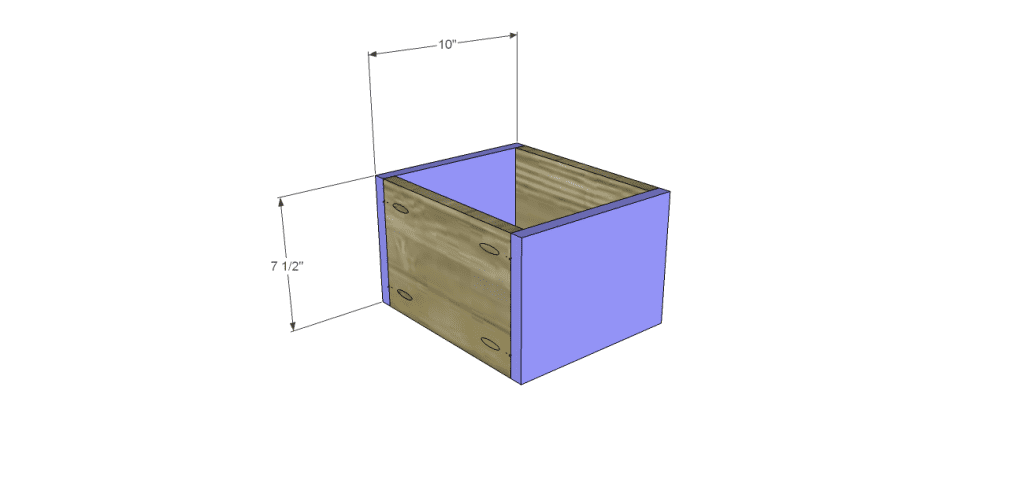
- 8 – 1×8 at 10″ – Small Drawer Box Front & Back
- 3 – 3/4″ plywood at 10-1/2″ x 21″ – Large Drawer Bottom
- 6 – 1×8 at 10-1/2″ – Large Drawer Sides
- 6 – 1×8 at 22-1/2″ – Large Drawer Front & Back
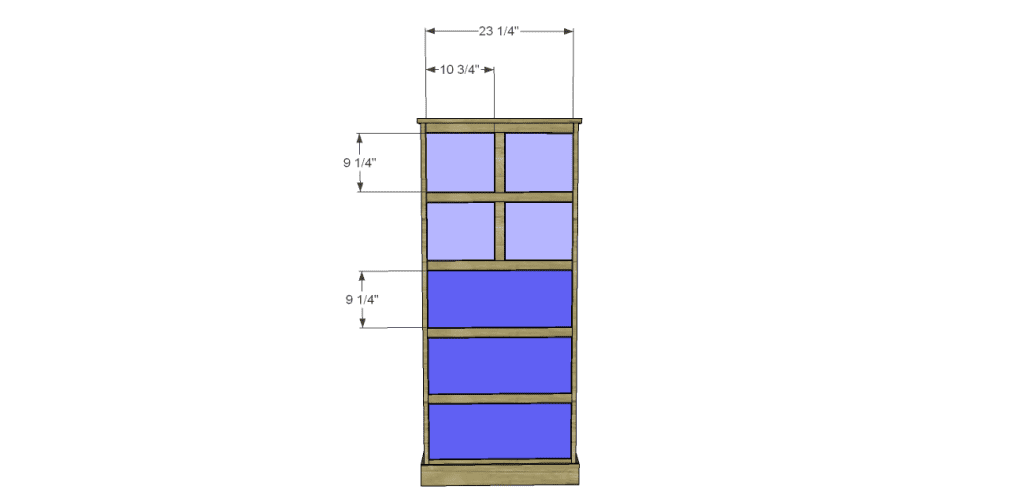
- 4 – 3/4″ plywood at 9-1/4″ x 10-3/4″ – Small Drawer Fronts
- 3 – 3/4″ plywood at 9-1/4″ x 23-1/4″ – Large Drawer Fronts
Notes:
Edge banding will be applied to the exposed edges of the plywood before starting to build the tall chest.
Step One
Cut the pieces for the sides and back. With the pocket hole jig set for 3/4″ material, drill pocket holes in the long edges of the back. Secure the back to the sides as shown using glue and 1-1/4″ pocket hole screws.
Step Two
Cut the piece for the bottom. Drill pocket holes in each side as well as the back edge. Secure to the sides and bottom using glue and 1-1/4″ pocket hole screws.
Step Three
Cut the piece for the lower stretcher and drill pocket holes at each end. Secure to the sides using glue and 1-1/4″ pocket hole screws. Use a few 1-1/4″ brad nails to secure the bottom to the stretcher.
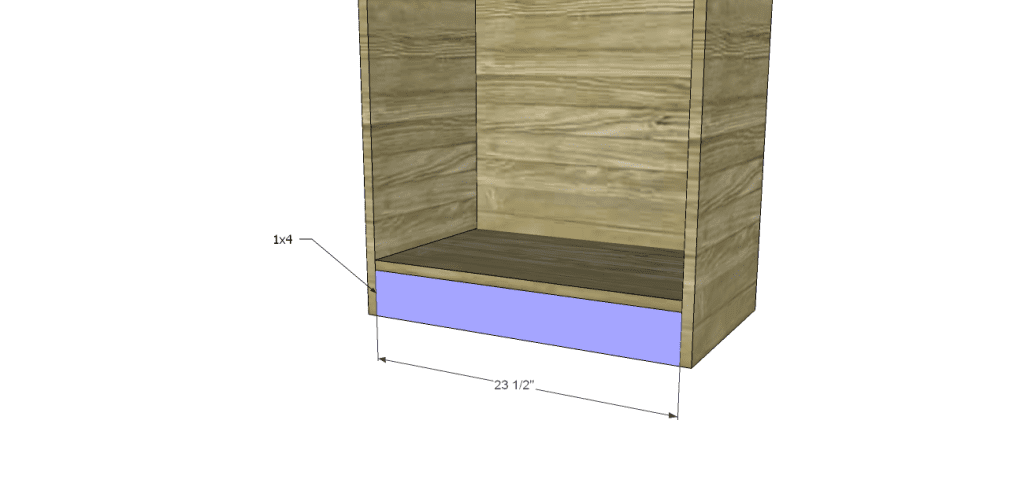
Step Four
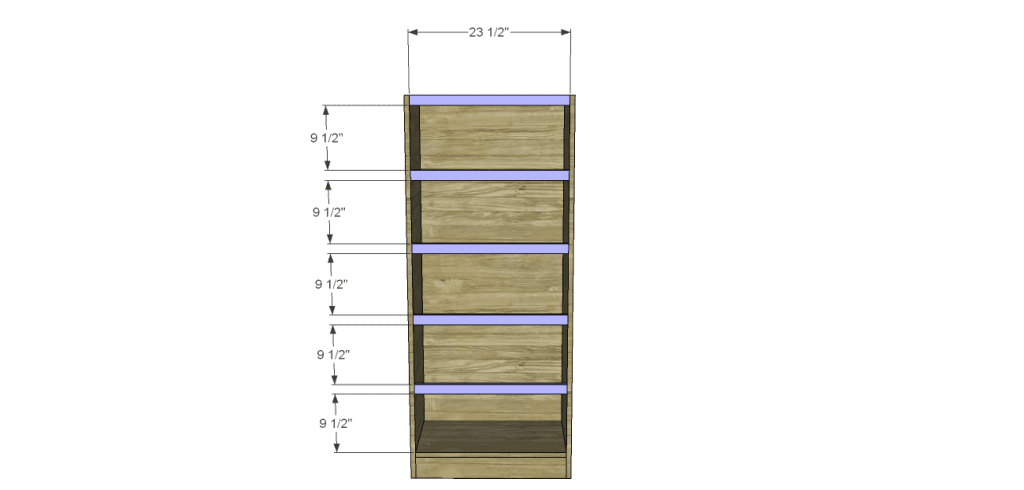
Cut the pieces for the stretchers and drill pocket holes in each end. Position as shown then secure using glue and 1-1/4″ pocket hole screws. It may be helpful to cut 9-1/4″ spacers from scrap wood to make sure the stretchers are positioned equally. (I do this all the time!)
Step Five
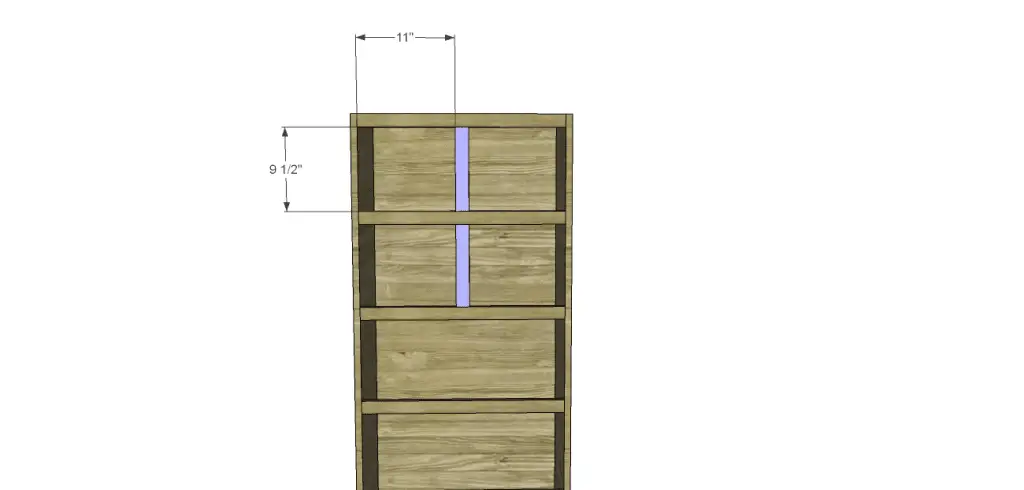
Cut the pieces for the dividers and drill pocket holes in each end. Position as shown then secure using glue and 1-1/4″ pocket hole screws.
Step Six
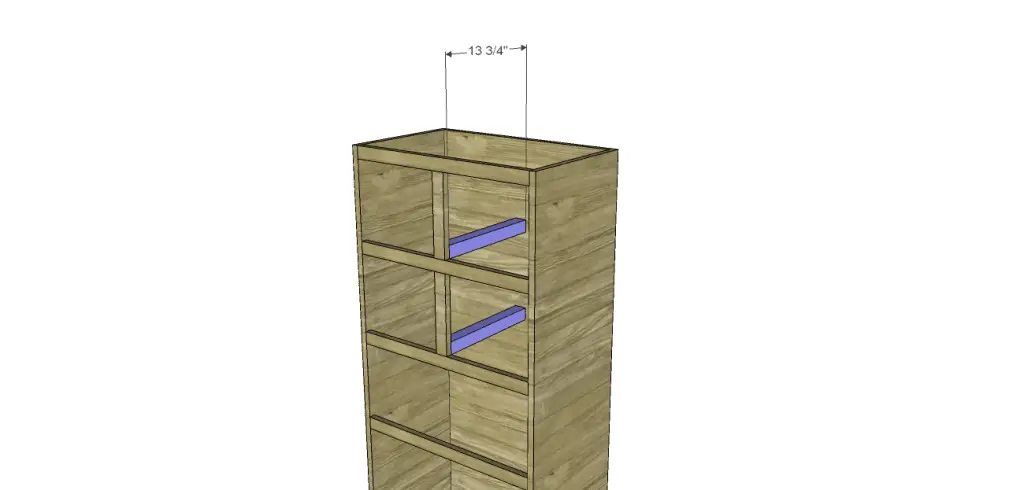
Cut the pieces for the drawer slide supports. Secure to the dividers and the back using glue and 1-1/4″ brad nails.
Step Seven
Cut the piece for the top. The front and sides will overhang by 1/2″. Secure to the cabinet using glue and 1-1/4″ brad nails through the top into the sides, back, and stretcher.
Step Eight
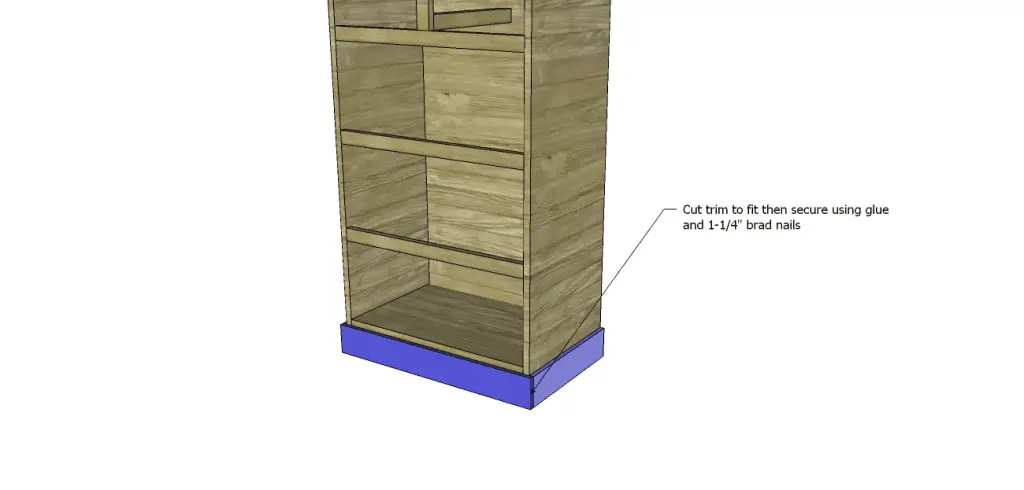
Cut the trim pieces to fit. Secure the sides first using glue and 1-1/4″ brad nails, then secure the front.
Step Nine
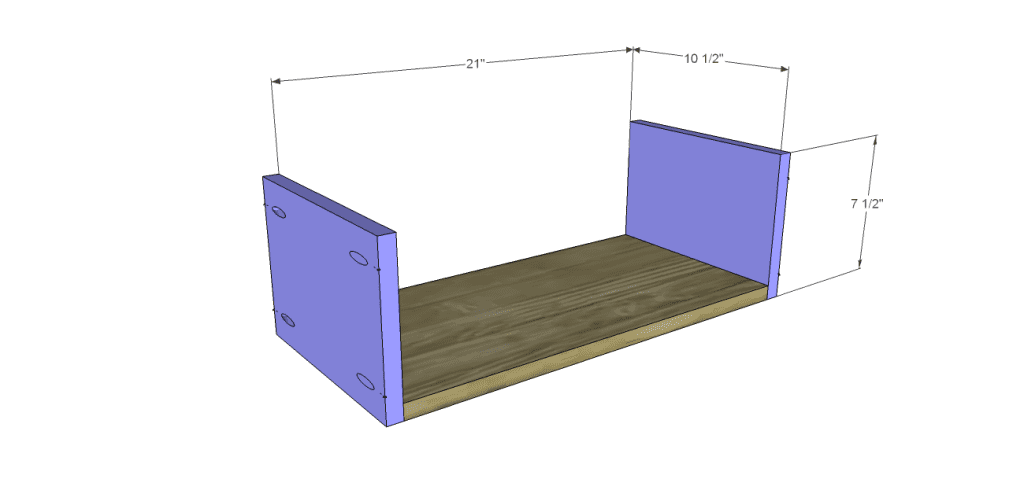
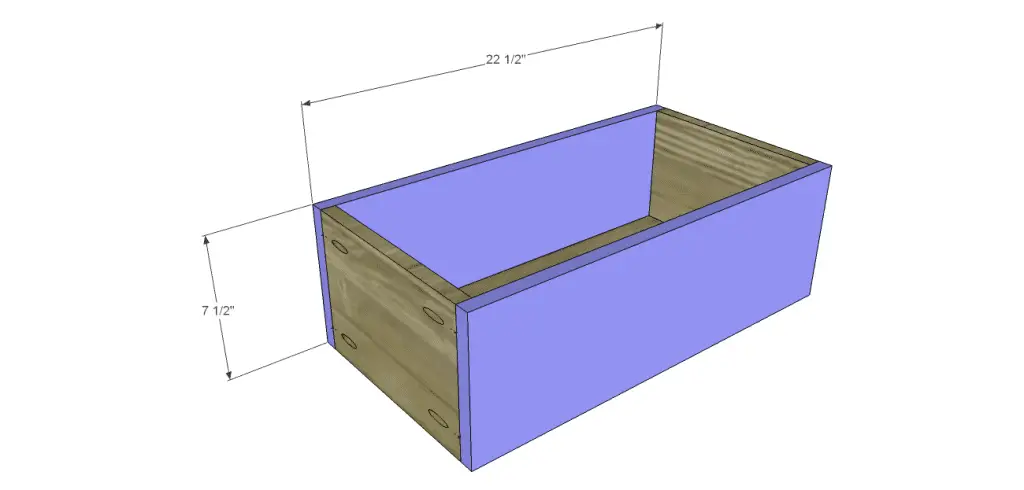
Cut the pieces for the drawer boxes. Drill pocket holes in all four edges of the bottom as well as each end of the sides. Assemble the drawer box as shown using glue and 1-1/4” pocket hole screws. Install the drawer slides according to the manufacturer’s installation instructions, locating them ¾” back from the front edge of the sides. This easy tutorial on installing drawer slides will be helpful. Make any necessary adjustments.
Step Ten
Cut the pieces for the drawer fronts. Mark the position for the drawer pulls and drill the holes. Shim the drawer front in the opening – there will be a 1/8” gap around all sides – then drive screws through the holes for the drawer pulls into the drawer box. Open the drawer, and secure the drawer front using countersunk 1-1/4” screws from the inside. Remove the screws from the holes for the drawer pull then finish drilling the holes. Install the drawer pull. This easy tutorial on installing drawer fronts will be a huge help!
Finish as desired!
These tall chest of drawers plans make for a quick and easy build, plus it is inexpensive! Need help with the plan? Leave a comment below!
Originally posted 2013-11-06 08:00:21.

10 Comments
You make it look so easy…
Thanks – its all magic, ha ha!!
I love it. I wish you could email it to me, because I know shipping will be crazy 😀 I often dream of converting my garage into a workshop. 🙂 Thanks Cher. Such a pleasure to drool over your DIY
Awww, thanks so much, Vidya!
Heck yeah it’s inexpensive! I’m thinking we should add up how much a whole bedroom set would cost to buy and then build. Holy crap.
The cost difference is amazing! I don’t think I’ve ever had “new” store-bought stuff because I won’t part with the money!
i love that you color code and add arrows to these plans. makes it so easy to not get lost and know exactly what to do.
Thanks so much! It is for more of a selfish reason – so that I don’t get lost when I build some of these projects. Than again, I get lost anyway!!
Pingback: wide chest drawers plans
Pingback: Wide Chest of Drawers Plans | Designs by Studio C