Build an Apple Art Easel
A DIY Mini Art Easel for a Budding Artist
Looking at this easel reminds of my kids when they were little… I still don’t think I’m old enough to have adult children! My birth certificate says I’m old enough and their birth certificates says I’m their mother so I guess it’s true!
Enough of that – the plans to build an Apple Art Easel is for the little ones to express their creativity. It features a handle at the top for easy transport and a shelf with a stop to corral wayward chalk or markers. The chalkboard in these DIY art easel plans can be replaced with a dry-erase board or a lauan panel with a large binder clip attached to it to hold paper, if desired!
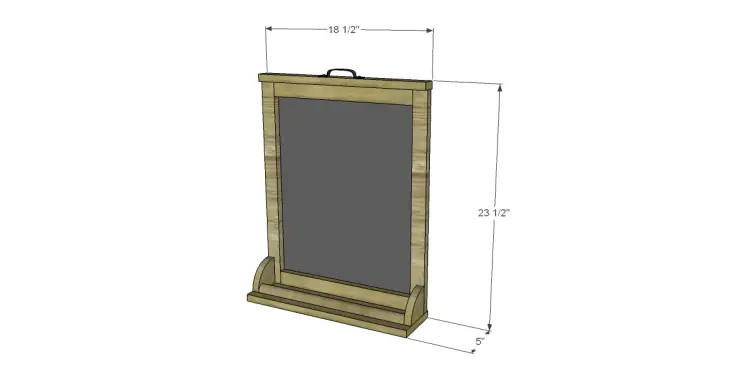
Materials:
Lumber:
- 1 – 1×2 at 8′
- 1 – scrap of 1×6 at 18-1/2″
- 1 – scrap of 1×4 at 6′
- 1 – 2′ x 4′ chalkboard sheet, dry erase sheet or 1/4″ plywood
Cut List:
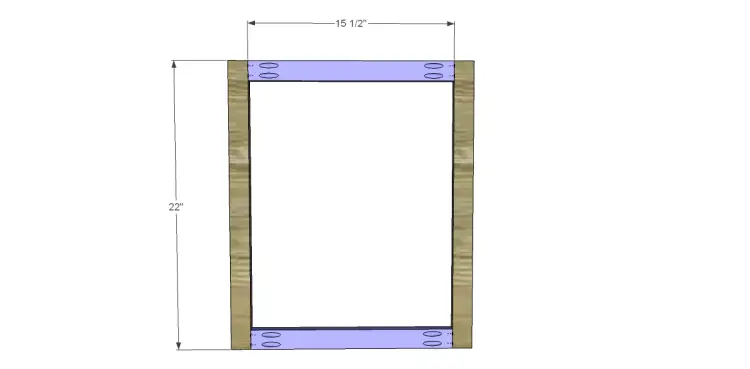
- 2 – 1×2 at 15-1/2″ – Frame
- 2 – 1×2 at 22″ – Frame
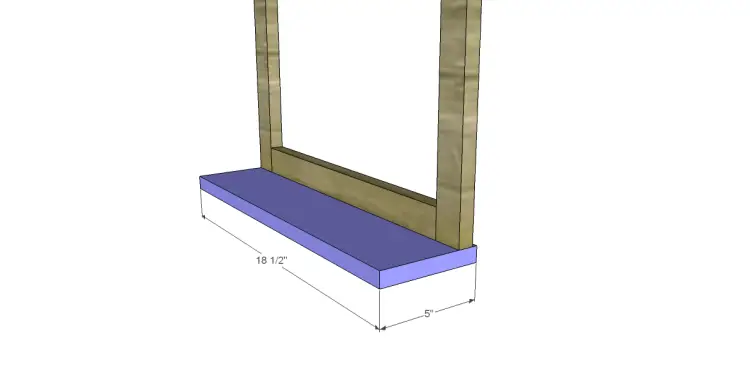
- 1 – 1×6 (ripped to 5″ wide) at 18-1/2″ – Shelf
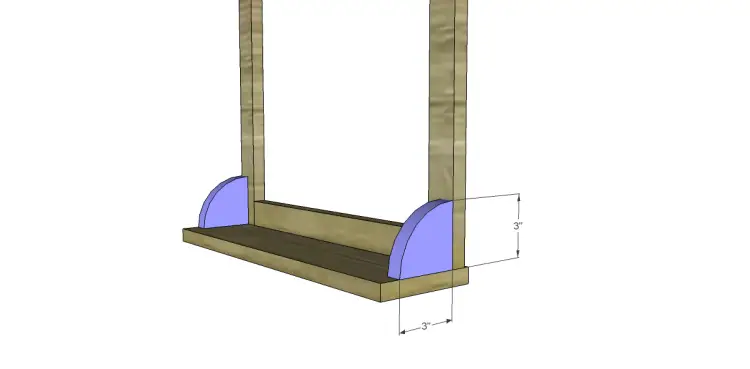
- 2 – 1×4 at 3″ – Brackets
- 1 – 1×2 at 18-1/2″ – Top Trim
- 1 – leftover scrap from ripping the 1×6 shelf piece at 17″ or scrap of shoe molding – Shelf Stop
- 1 – Chalkboard, Dry Erase Board, or 1/4″ lauan at 17-1/2″ x 21″ – Back of Frame
Step One
Cut the pieces for the frame. Drill pocket holes in each end of the shorter pieces. Assemble as shown using glue and 1-1/4″ pocket hole screws.
Step Two
Cut the piece for the shelf. Rip the piece to 5″ wide and set the scrap piece aside. Attach to the bottom of the frame using glue and 1-1/4″ brad nails.
Step Three
Cut the pieces for the brackets. They can either be quarter-circles or triangles as long as the edges attaching to the frame and shelf measure 3″ each. Attach using glue and 1-1/4″ brad nails.
Step Four
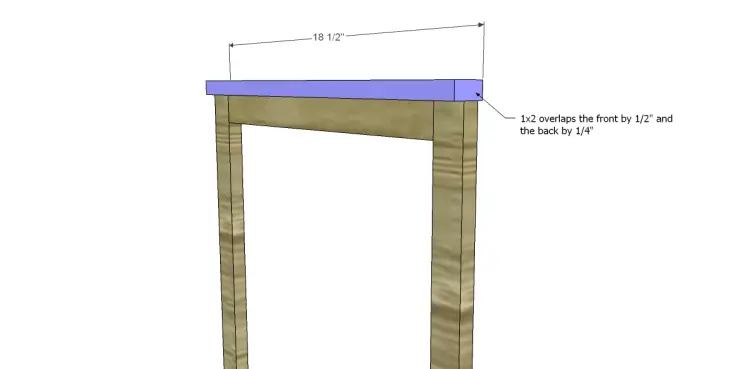
Cut the piece for the top trim. The front will overlap the frame by 1/2″ and the back will overlap the frame by 1/4″. Attach using glue and 1-1/4″ brad nails.
Step Five
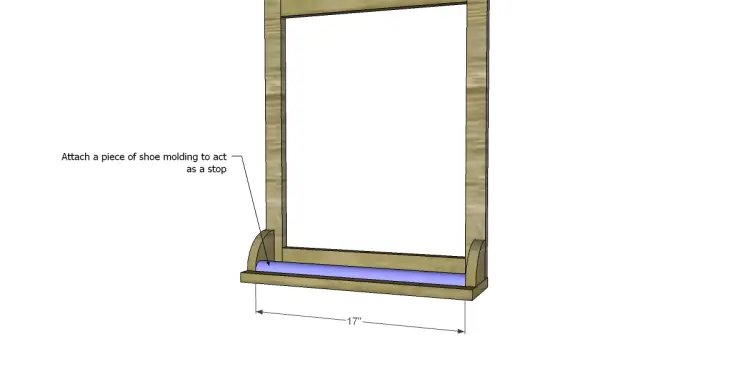
Cut the piece of scrap from ripping the 1×6 or a piece of shoe molding. Attach to the shelf using glue and brad nails. If using the scrap piece, use 5/8″ brad nails. If using shoe molding, use 1-1/4″ brad nails.
Step Six
Cut the piece for the back of the frame. Attach using 5/8″ brad nails.
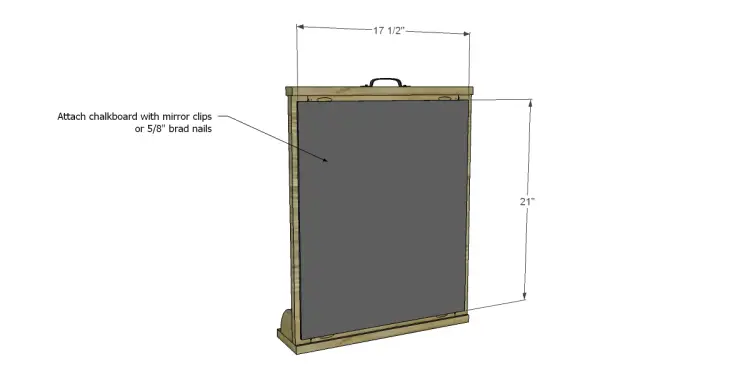
Finish as desired, then attach the handle to the top of the DIY mini art easel!
Have questions about the plans to build an Apple Art Easel? Leave a comment below!
Originally posted 2013-01-10 08:00:16.

Visiting from SITS – love all of your DIY projects and plans! Thanks for sharing:)!
Thank you so much! I appreciate it!
Visiting from SITS. I LOVE this project. I’ve been toying with a command center wall in our kitchen and something like this would be great! 🙂
[…] Build this easel with these free easy woodworking plans. It features a handle at the top for easy transport and a shelf with a stop to corral wayward chalk. […]