A Media Stand with a Movable Top and Storage
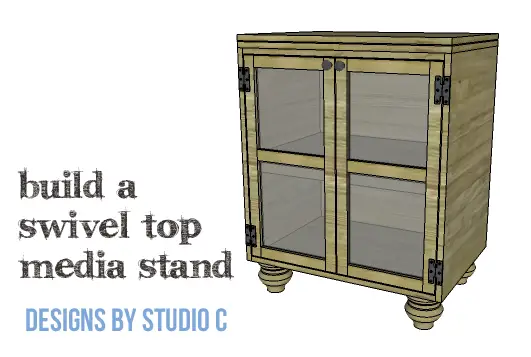
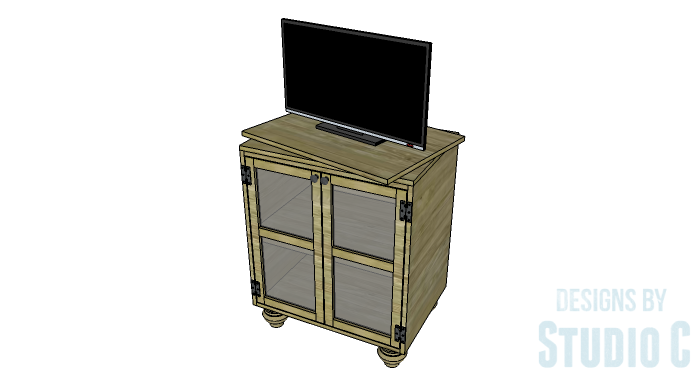
Sometimes, the TV needs to be turned temporarily during that awesome movie or big game… This TV stand lets you do just that! The DIY furniture plans to build a Swivel Top Media Stand feature a top on Lazy Susan hardware, and two doors with a shelf inside. The doors also have glass or Plexiglas inserts which can easily be replaced with punched aluminum or fabric! This is a project that can be completed in a weekend.
Materials:
- 1-1/4″ pocket hole screws
- 1-1/4″ brad nails
- 1-3/4″ brad nails
- Edge banding (<– affiliate link!)
- Lazy Susan hardware (<– affiliate link!)
- 2 sets of hinges
- 2 magnetic catches (<– affiliate link!)
- 2 cabinet pulls
- 4 – 2″ bun feet with mounting plates (<– affiliate link!)
- Glass or Plexiglas cut to fit the openings in the doors
- Wood glue
- Sandpaper (100, 150, 220 grits)
- Finishing supplies (primer & paint, or stain, sealer)
Tools Needed:
- Miter saw or circular saw
- Table saw
- Iron for edge banding
- Drill
- Pocket hole jig
- Router with 1/4″ rabbeting bit
- Pneumatic brad nailer with compressor
- Sander
Lumber:
- 3 – 1×2 at 8′
- 2 – 4′ x 8′ sheets of 3/4″ plywood
Cut List:
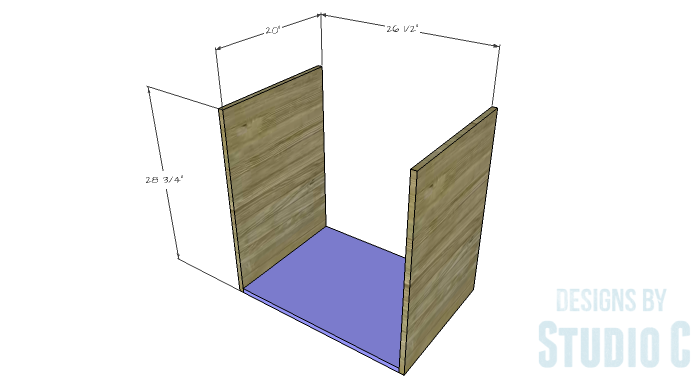
- 2 – 3/4″ plywood at 20″ x 28-3/4″ – Sides
- 1 – 3/4″ plywood at 20″ x 26-1/2″ – Bottom
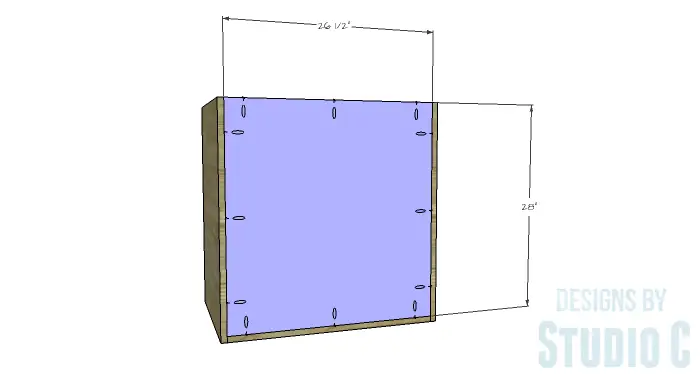
- 1 – 3/4″ plywood at 26-1/2″ x 28″ – Back
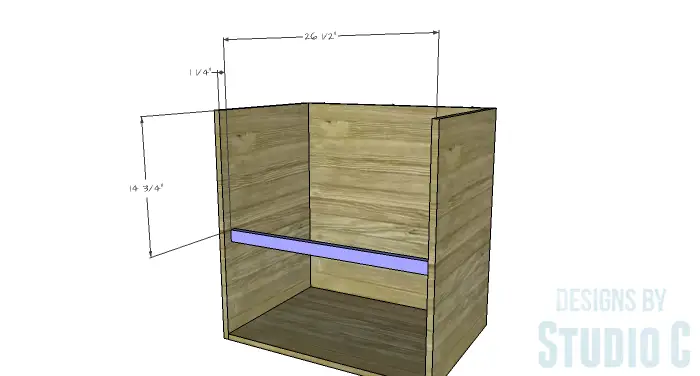
- 2 – 1×2 at 26-1/2″ – Upper & Middle Stretchers
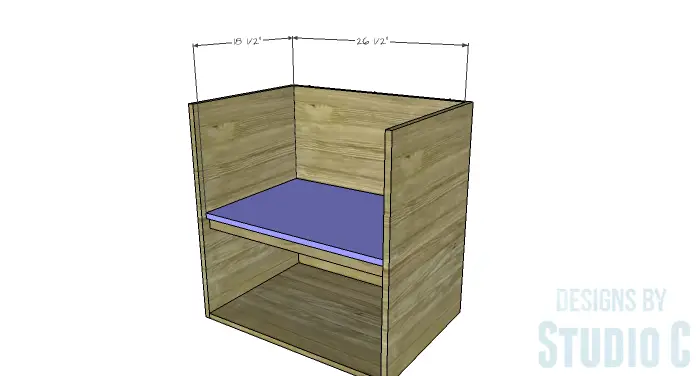
- 1 – 3/4″ plywood at 18-1/2″ x 26-1/2″ – Shelf
- 2 – 3/4″ plywood at 20″ x 28″ – Tops
- 4 – 1×2 at 27″ – Door Stiles
- 6 – 1×2 at 10-1/16″ – Door Rails
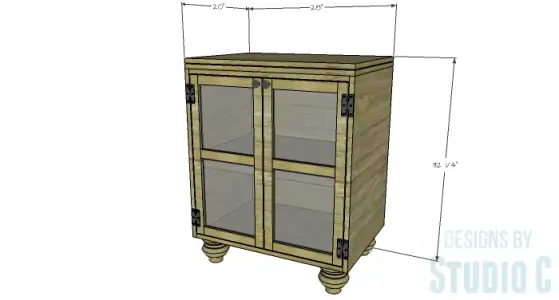
Click on the drawings for a larger view!
Edge banding will be applied to the exposed edges of the plywood prior to assembly.
Step One
Cut the pieces for the sides and the bottom. With the pocket holes jig set for 3/4″ material, drill pocket holes in the side edges of the bottom. Secure the bottom to the sides using glue and 1-1/4″ pocket hole screws. The pocket holes will face down (on the underside of the bottom).
Step Two
Cut the piece for the back and drill pocket holes in all four edges. Secure the back to the sides and bottom using glue and 1-1/4″ pocket hole screws.
Step Three
Cut the pieces for the upper and middle stretchers. Drill pocket holes in each end. Secure the middle stretcher to the sides as shown (positioning it 1-1/4″ back from the front edge of the sides) using glue and 1-1/4″ pocket hole screws. Set the upper stretcher aside.
Step Four
Cut the piece for the shelf. Drill pocket holes in the side edges and one long edge for the back. Position the shelf on the middle stretcher then secure the sides and back with glue and 1-1/4″ pocket hole screws. Add a few 1-3/4″ brad nails through the top of the shelf into the stretcher.
Step Five
Secure the upper stretcher to the top edge of the sides using glue and 1-1/4″ pocket hole screws.
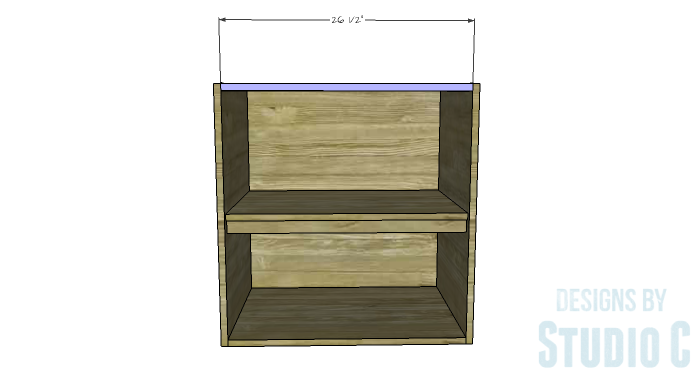
Step Six
Cut the pieces for the tops. Secure one of the tops to the cabinet using glue and 1-1/4″ pocket hole screws through the back, and 1-3/4″ brad nails through the top into the sides. A few 1-1/4″ brad nails can be used to secure the top to the upper stretcher.
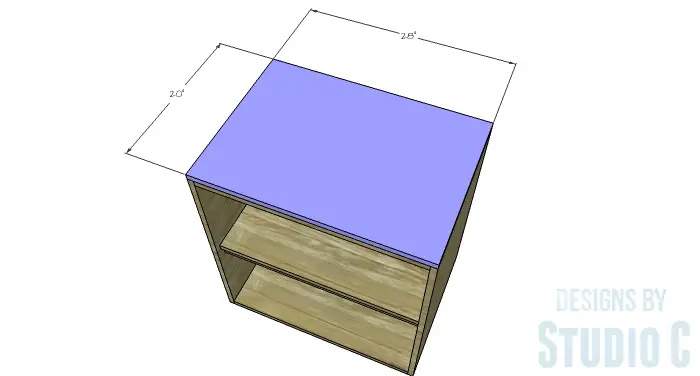
Step Seven
Install the mounting plates and the bun feet on the bottom of the cabinet.
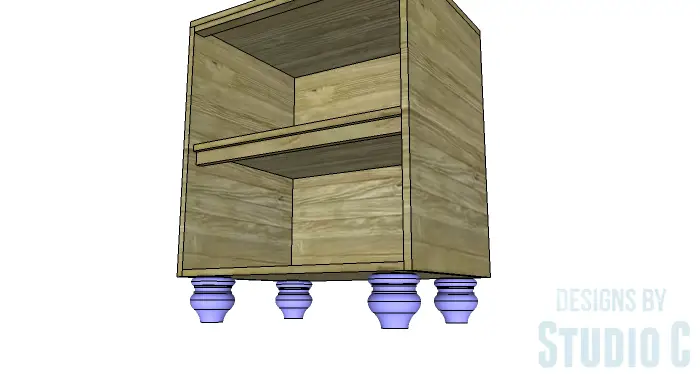
Step Eight
Install the Lazy Susan hardware according to the manufacturer’s instructions on the top of the cabinet and the remaining top piece. See my easy tutorial on how to install lazy susan hardware.
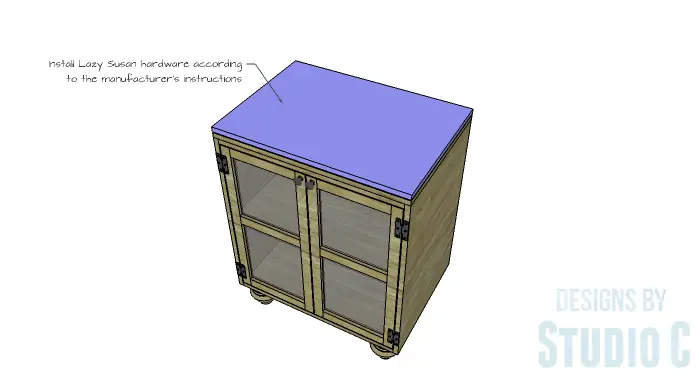
Step Nine
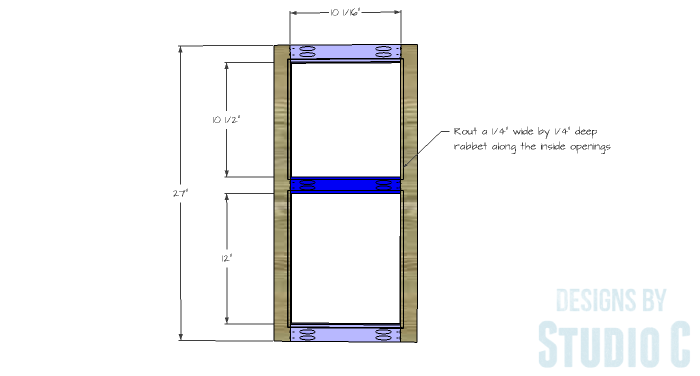
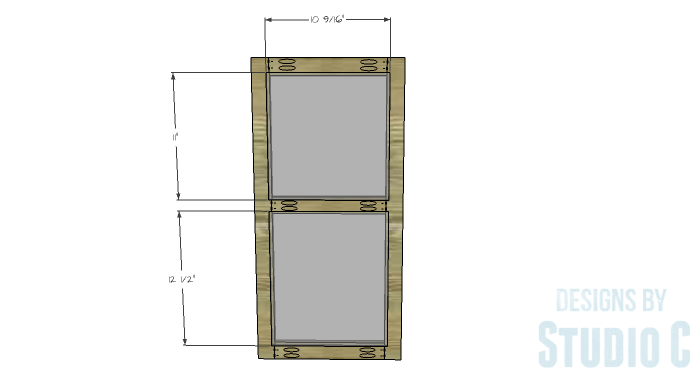
Cut the pieces for the doors. Drill pocket holes in the shorter pieces (the rails) positioning them close together so they won’t interfere with the rabbet that will be cut for the glass or Plexiglas. Assemble the doors as shown using glue and 1-1/4″ pocket hole screws.
Use the router with the 1/4″ rabbeting bit to cut a 1/4″ deep rabbet along the inside of each opening on the doors.
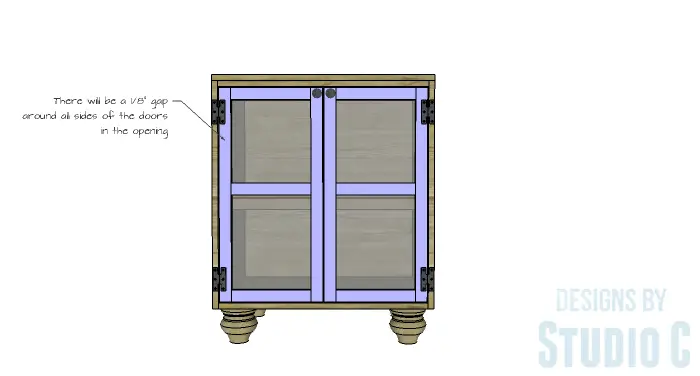
Finish as desired. Cut the glass or Plexiglas to fit the openings in the doors securing in place with a thin bead of adhesive. Install the hinges on the doors, then install the doors in the cabinet. Install the cabinet pulls and the magnetic catches.
For a different look, the swivel top can be omitted. The glass or Plexiglass can also be replaced with 1/4″ plywood – painted with chalkboard paint, perhaps? Have any questions about the DIY furniture plans to build a Swivel Top Media Stand? Leave a comment below!
Originally posted 2016-01-27 08:00:45.

