An Easy to Build DIY Wall-Mounted Dinnerware Organizer Rack
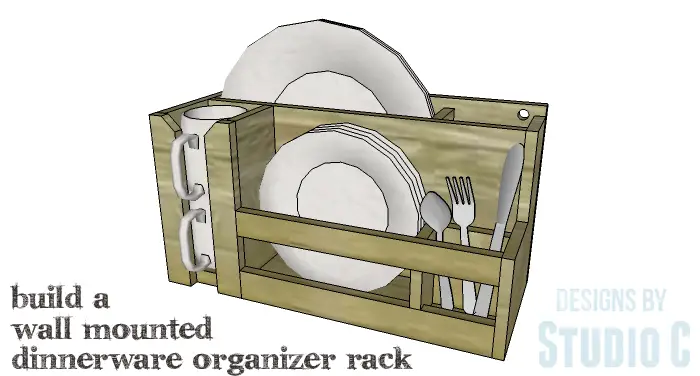
The new year is usually all about organization so why not start things off with a dinnerware organizer that mounts directly to the wall! The DIY furniture plans to build a Wall Mounted Dinnerware Organizer Rack feature spaces for dinner plates (measuring 11-3/4″ wide max), salad plates (measuring 8-1/2″ wide max), mugs, silverware and cooking utensils. (The plan can easily be modified if your plates are wider!) This rack is a great way to display your favorite dishes in a fabulous way!
Materials:
- 1-1/4″ brad nails
- 1″ pocket hole screws (2 total)
- Edge banding, optional (<– affiliate link!)
- Wood glue
- Sandpaper (100, 150, 220 grits)
- Finishing supplies (primer & paint, or stain, sealer)
Lumber:
- 1 – 4′ x 4′ sheet of 1/2″ plywood
Cut List:
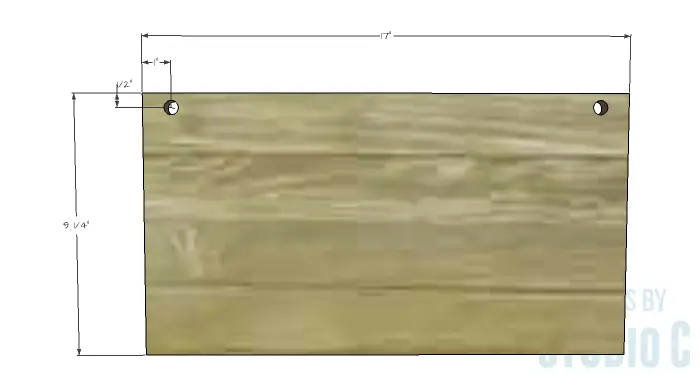
- 1 – 1/2″ plywood at 9-1/4″ x 17″ – Back
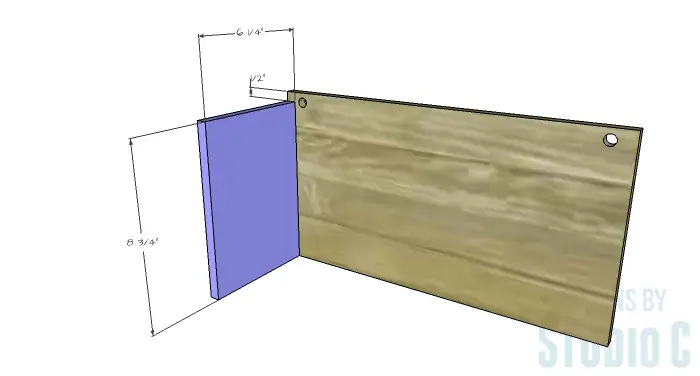
- 1 – 1/2″ plywood at 6-1/4″ x 8-3/4″ – Left Side
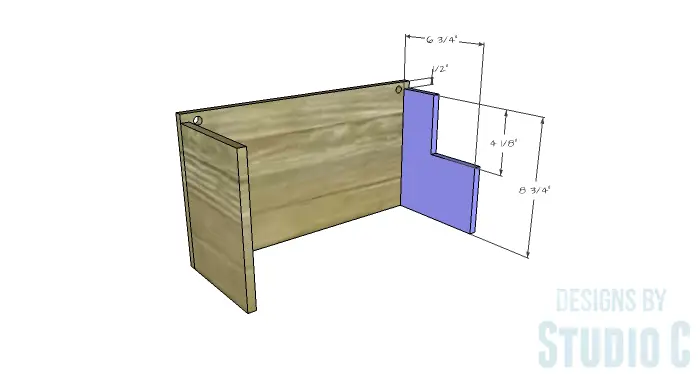
- 1 – 1/2″ plywood at 6-3/4″ x 8-3/4″ – Right Side
- 1 – 1/2″ plywood at 6-1/4″ x 16″ – Bottom
- 1 – 1/2″ plywood at 8″ x 16″ – Plate Divider
- 1 – 1/2″ plywood at 2-3/8″ x 8″ – Plate Divider
- 1 – 1/2″ plywood at 3-3/8″ x 8″ – Plate Divider
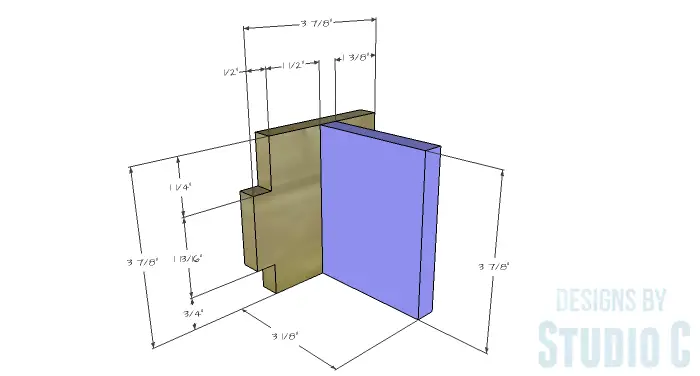
- 1 – 1/2″ plywood at 3-7/8″ x 3-7/8″ – Silverware Divider
- 1 – 1/2″ plywood at 3-1/8″ x 3-7/8″ – Silverware Divider
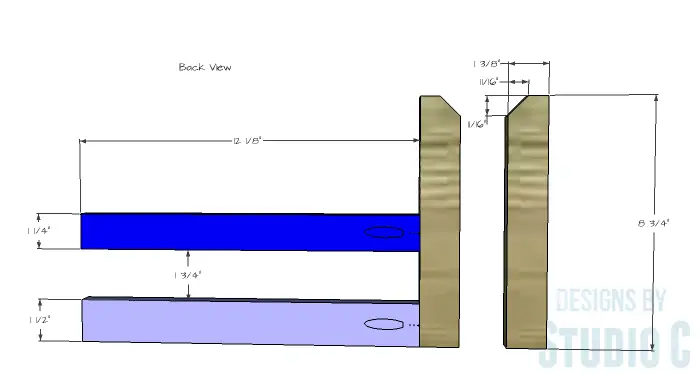
- 2 – 1/2″ plywood at 1-3/8″ x 8-3/4″ – Front Pieces
- 1 – 1/2″ plywood at 1-1/4″ x 12-1/8″ – Front Pieces
- 1 – 1/2″ plywood at 1-1/2″ x 12-1/8″ – Front Pieces
Click on the drawings for a larger view!
Step One
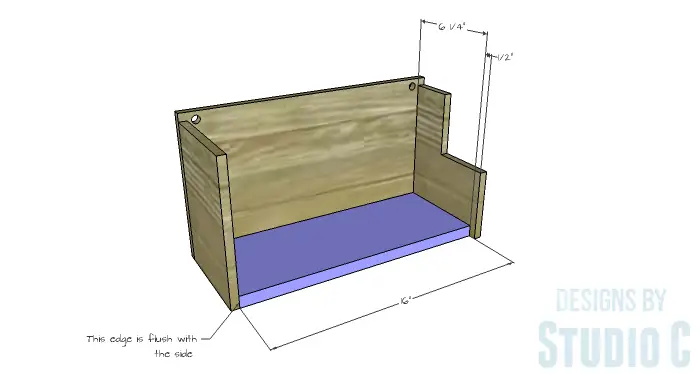
Cut the piece for the back. Mark the position for the holes (for hanging) and drill them.
Step Two
Cut the piece for the left side. Secure the left side to the back using glue and 1-1/4″ brad nails. Note that the side piece is 1/2″ shorter than the overall height of the back.
Step Three
Cut the piece for the right side. Cut the notch using a jigsaw. Secure the right side using glue and 1-1/4″ brad nails. The right side is also shorter in height than the back, and is also 1/2″ longer than the left side.
Step Four
Cut the piece for the bottom. Secure the bottom to the back and sides using glue and 1-1/4″ brad nails. The front edge of the bottom will be flush with the front edge of the left side, and will be 1/2″ shorter in width than the right side.
Step Five
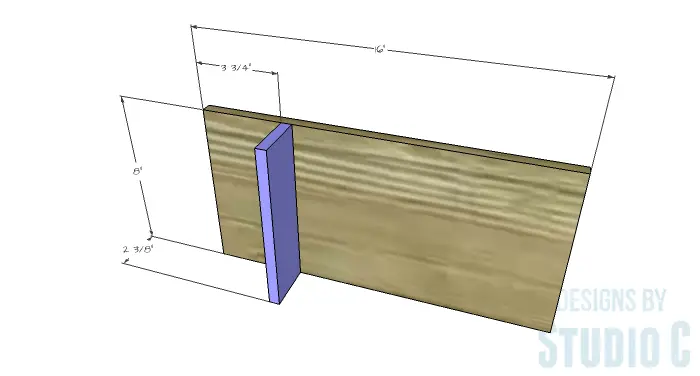
Cut the pieces for the plate divider. Secure the narrower divider piece (the 2-3/8″ piece – this piece will face the back) to the longer piece as shown using glue and 1-1/4″ brad nails.
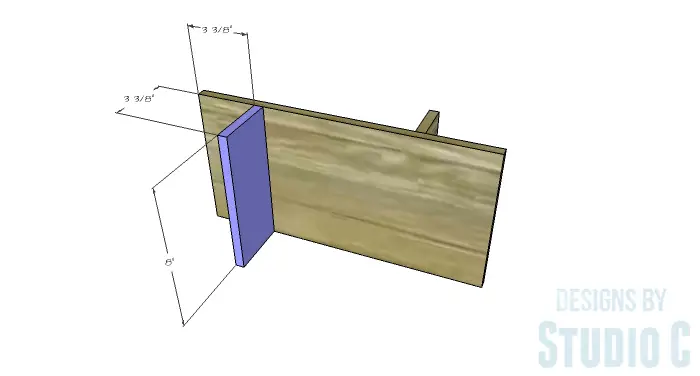
Secure the remaining divider piece (the 3-3/8″ piece which will face to the front) using glue and 1-1/4″ brad nails.
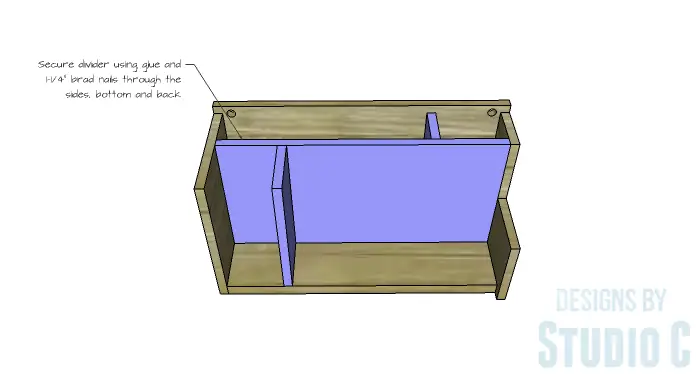
Secure the plate divider assembly to the sides, back and bottom using glue and 1-1/4″ brad nails.
Step Six
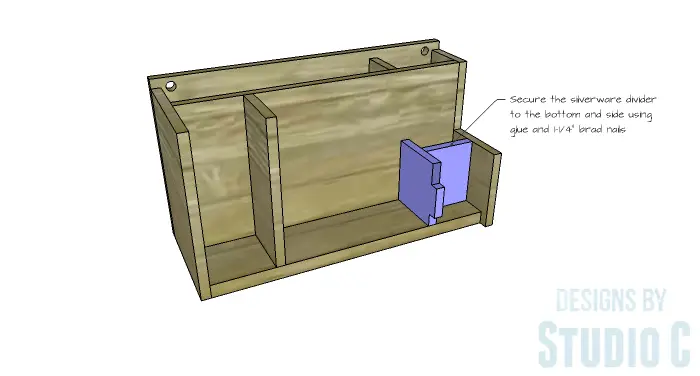
Cut the pieces for the silverware dividers. Cut the notches in the larger piece using a jigsaw. The front pieces will rest above and below the notch when they are assembled. Secure the notched divider piece to the remaining divider piece using glue and 1-1/4″ brad nails.
Secure the silverware divider assembly to the bottom and right side using glue and 1-1/4″ brad nails. The back edge of the notched piece will be secured with glue only.
Step Seven
Cut the pieces for the front. Pocket holes will be used to secure the horizontal pieces to one of the vertical pieces. Set the pocket hole jig for 1/2″ material and drill one pocket hole in each piece. Secure the horizontal pieces to the vertical piece using glue and 1″ pocket hole screws.
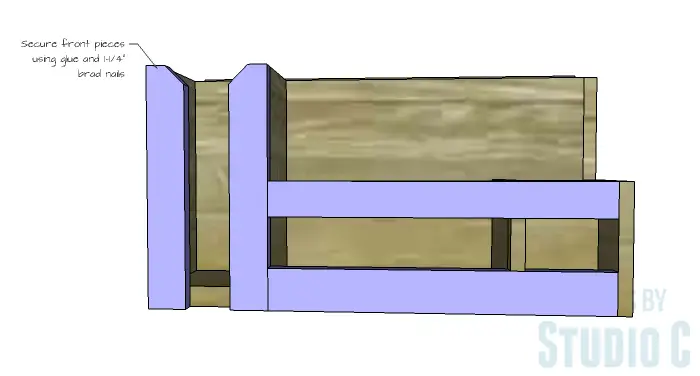
Secure the front piece assembly to the dividers and the right side using glue and 1-1/4″ brad nails. Secure the remaining piece to the left side using glue and 1-1/4″ brad nails. The outside edge of the front piece will be flush with the outside face of the left side.
Finish as desired.
This rack would also be a great way to organize disposable dinnerware and silverware for a party. It can be freestanding and within easy reach of dinner guests! Have any questions about the DIY furniture plans to build a Wall Mounted Dinnerware Organizer Rack? Leave a comment below!


1 Comment
What a great idea – I love this!