An Excellent Bench for an Entryway or Mudroom
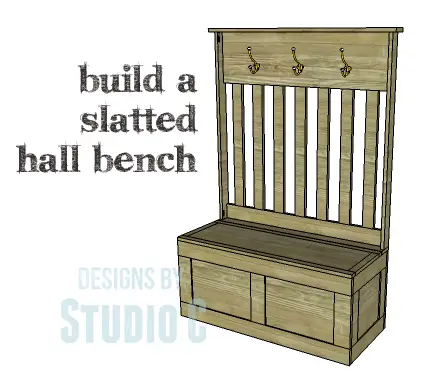
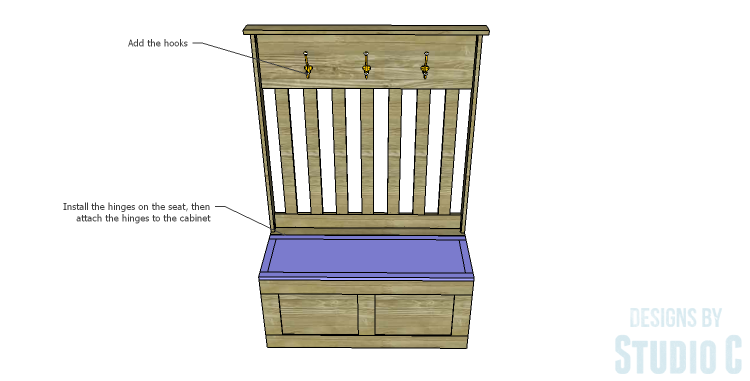
Hey there! Are you in need of a spot to keep all your coats, backpacks, scarves, and whatnot? Well, guess what? I’ve got an amazing solution for you! Introducing the DIY plans to create a Slatted Hall Bench. It’s got a tall back with hooks and even a seat with a lid for some extra storage. The best part? It’s a breeze to build and can be finished in just one weekend. How awesome is that?
Materials:
- 1″ pocket hole screws
- 1-1/4″ pocket hole screws (<– affiliate link!)
- 1-1/4″ brad nails
- 3 hinges or 1 continuous hinge for the seat lid
- Coat hooks (as many as you’d like!)
- Wood glue
- Sandpaper (100, 150, 220 grits)
- Finishing supplies (primer & paint, or stain, sealer)
Lumber:
- 2 – 1×2 at 8′
- 1 – 1×3 at 4′
- 3 – 1×3 at 8′
- 6 – 1×4 at 8′
- 1 – 1×12 at 4′
- 1 – 4′ x 4′ sheet of 1/2″ plywood
- 1 – 4′ x 4′ sheet of 3/4″ plywood
Cut List:
- 4 – 1×4 at 42″ – Side Frames
- 6 – 1×4 at 11″ – Side Frames
- 4 – 1/2″ plywood at 11″ x 15-3/4″ – Side Panels
- 4 – 1×4 at 16-1/2″ – End Frames
- 4 – 1×4 (ripped to 2-3/4″ wide) at 11″ – End Frames
- 2 – 1/2″ plywood at 11″ x 11″ – End Panels
- 3 – 1×2 at 16-1/2″ – Bottom Frame
- 4 – 1×2 at 19-1/8″ – Bottom Frame
- 1 – 3/4″ plywood at 16-1/2″ x 40-1/2″ – Bottom
- 1 – 1×4 at 42″ – Hinge Board
- 2 – 1×3 at 43-1/2″ – Back Sides
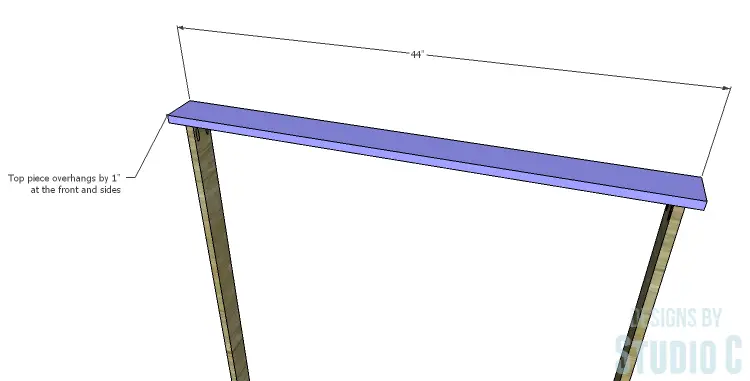
- 1 – 1×4 at 44″ – Top
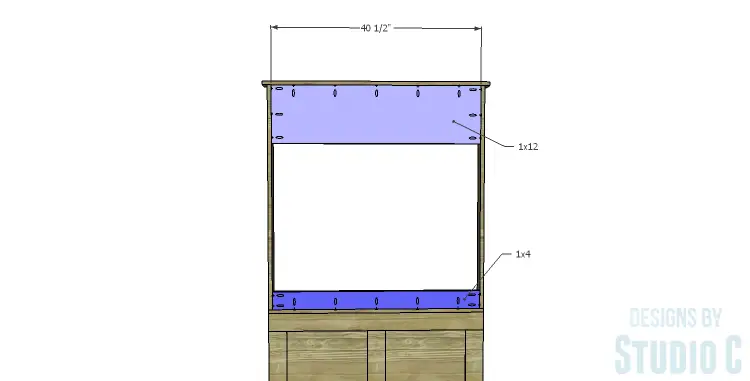
- 1 – 1×4 at 40-1/2″ – Back
- 1 – 1×12 at 40-1/2″ – Back
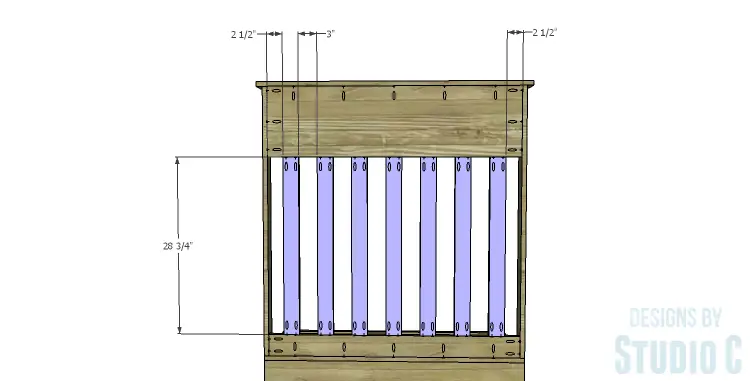
- 7 – 1×3 at 28-3/4″ – Back Slats
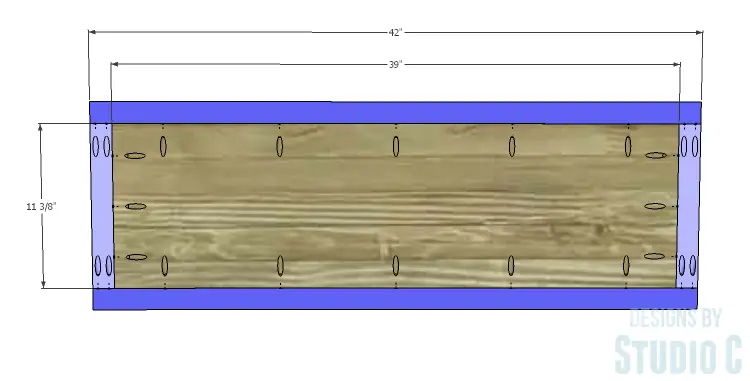
- 2 – 1×2 at 42″ – Seat Trim
- 2 – 1×2 at 11-3/8″ – Seat Trim
- 1 – 3/4″ plywood at 11-3/8″ x 39″ – Seat
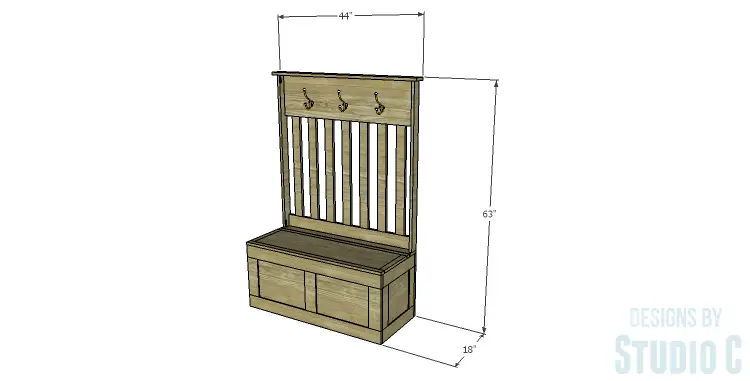
Click on the drawings for a larger view!
Step One
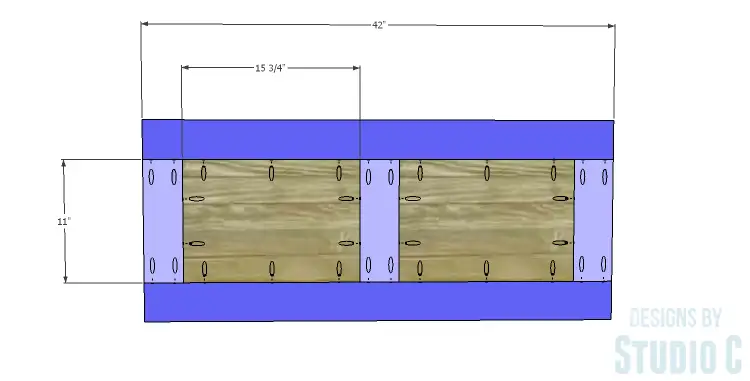
Cut the pieces for the side frames. With the pocket hole jig set for 3/4″ material, drill pocket holes in each end of the shorter pieces as shown in the drawing. Assemble the frame using glue and 1-1/4″ pocket hole screws.
Cut the pieces for the side panels. Set the pocket hole jig for 1/2″ material and drill pocket hole screws in all four edges. Insert the panels into the frame, then secure using glue and 1″ pocket hole screws. The back face of the panels will be flush with the inside face of the frame.
Step Two
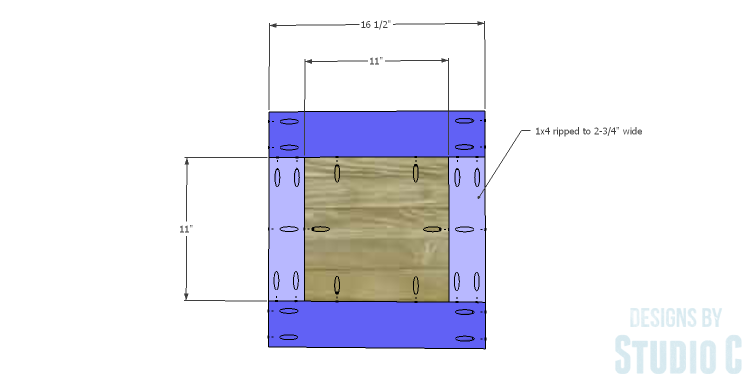
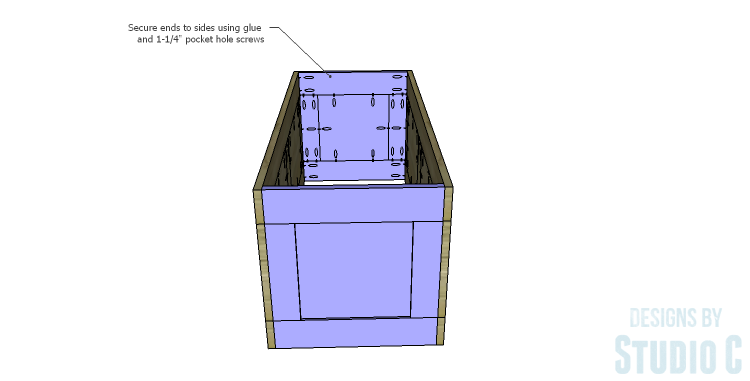
Cut the pieces for the end frames. Set the pocket hole jig for 3/4″ material and drill pocket holes in each end of the shorter pieces as well as one long edge of the shorter pieces (this will allow the end frames to be attached to the side frames). Assemble the frames using glue and 1-1/4″ pocket hole screws.
Cut the pieces for the end panels. Set the pocket hole jig for 1/2″ material and drill pocket hole screws in all four edges. Insert the panels into the frame, then secure using glue and 1″ pocket hole screws. The back face of the panels will be flush with the inside face of the frame.
Secure the end frames to the side frames using glue and 1-1/4″ pocket hole screws.
Step Three
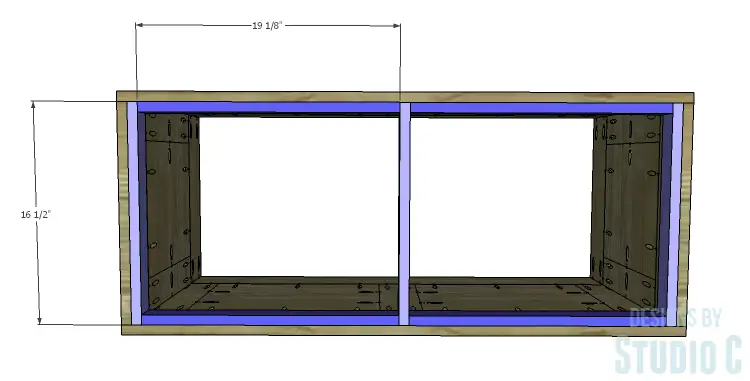
Cut the pieces for the bottom frame. Attach the frame pieces to the inside lower edge of the frames using glue and 1-1/4″ brad nails.
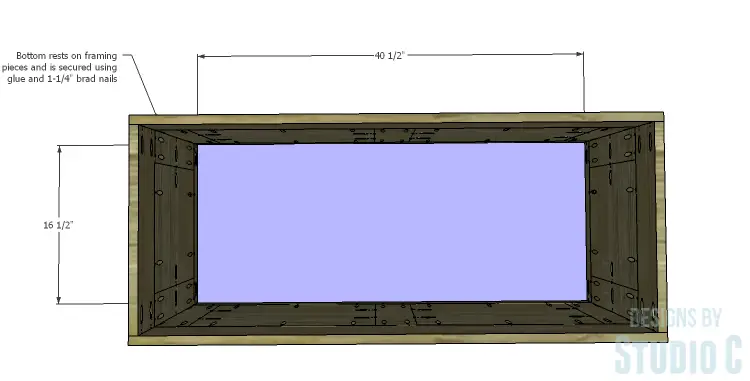
Cut the piece for the bottom. The bottom piece will rest on top of the frame. Secure in place using glue and 1-1/4″ brad nails.
Step Four
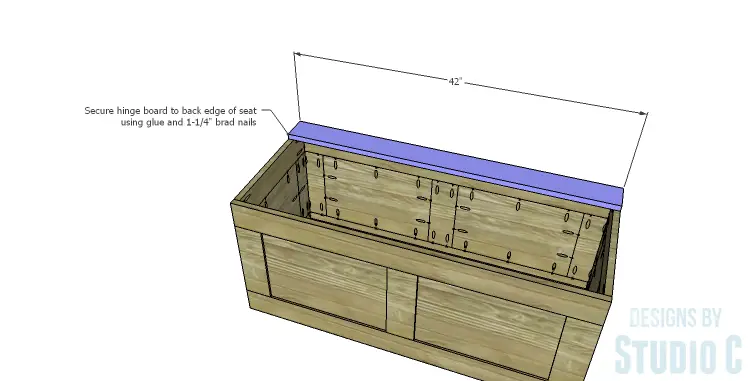
Cut the piece for the hinge board. The hinge board will be flush with the sides and the back edge of the bench box. Secure in place using glue and 1-1/4″ brad nails.
Step Five
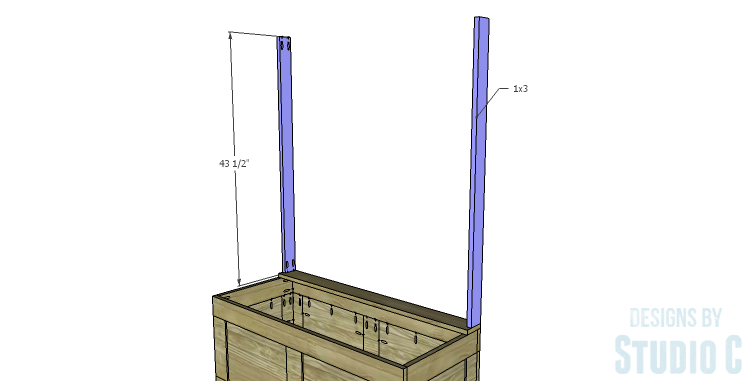
Cut the pieces for the sides. Set the pocket hole jig for 3/4″ material and drill pocket holes in each end. Secure the sides to the top of the hinge board (with the side and back edges flush) using glue and 1-1/4″ pocket hole screws.
Cut the piece for the top. The front and sides of the top will overhang the sides by 1″. Secure in place using glue and 1-1/4″ pocket hole screws.
Step Six
Cut the pieces for the back. Drill pocket holes in each end and one long edge of each piece. Secure the 1×4 to the hinge board and the sides using glue and 1-1/4″ pocket hole screws. Secure the 1×12 board to the sides and top using glue and 1-1/4″ pocket hole screws.
Step Seven
Cut the pieces for the slats and drill pocket holes in each end. Space the slats as shown in the drawing, securing in place using glue and 1-1/4″ pocket hole screws.
Step Eight
Cut the pieces for the seat trim and the seat panel. Drill pocket holes in each end of the shorter pieces as well as all four edges of the panel. Assemble the seat as shown using glue and 1-1/4″ pocket hole screws.
Install the hinges on the seat, then attach the hinges to the hinge board. The front edge of the seat will be flush with the front edge of the side leaving a 1/8″ gap between the hinge board and the seat.
Finish as desired.
This is such a great piece and it will look fantastic in any area of the home. I can also be finished in a variety of ways to make it truly your own! Have any questions about the DIY plans to build a Slatted Hall Bench? Leave a comment below!
Originally posted 2014-11-21 08:00:12.



1 Comment
Pingback: Hall Bench – Free Woodworking Plan.com