DIY Plans to Build a Howell Bar Cabinet
A Great Piece for Entertaining
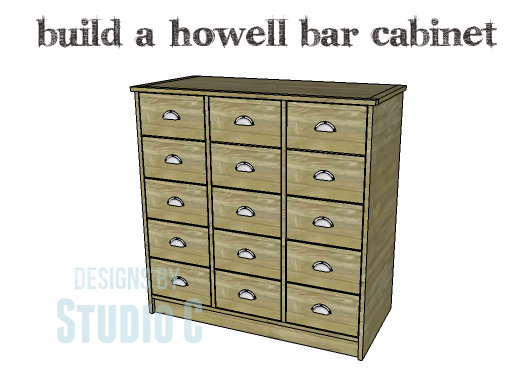
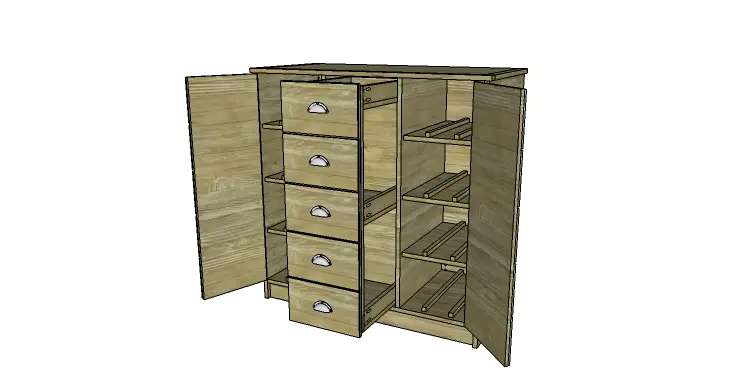
Do you enjoy hosting parties and having a good time with friends? Then you’re going to love this amazing bar cabinet! The DIY plans to build a Howell bar cabinet include a clever design with wine storage hidden behind two doors that look like drawers, as well as a convenient pull-out cabinet in the middle. You’ll have plenty of space to store all your entertaining essentials and favorite spirits in this fantastic cabinet!
Materials:
- 1-1/4″ pocket hole screws (<– affiliate link!)
- 5/8″ brad nails
- 1-1/4″ brad nails
- Edge banding, optional
- 3 sets of 18″ ball-bearing drawer slides
- 2 sets of hinges
- 15 cabinet pulls
- Wood glue
- Sandpaper (100, 150, 220 grits)
- Finishing supplies (primer & paint, or stain, sealer)
Lumber:
- 1 – 1×2 at 8′
- 1 – 1×3 at 4′
- 1 – 1×3 at 6′
- 1 – 4′ x 4′ sheet of 1/4″ plywood
- 1 – 4′ x 4′ sheet of 1/2″ plywood
- 3 sheets of 4′ x 8′ 3/4″ plywood
- 8 – 3/4″ square dowels at 4′ or 16 – 3/4″ square dowels at 3′
Cut List:
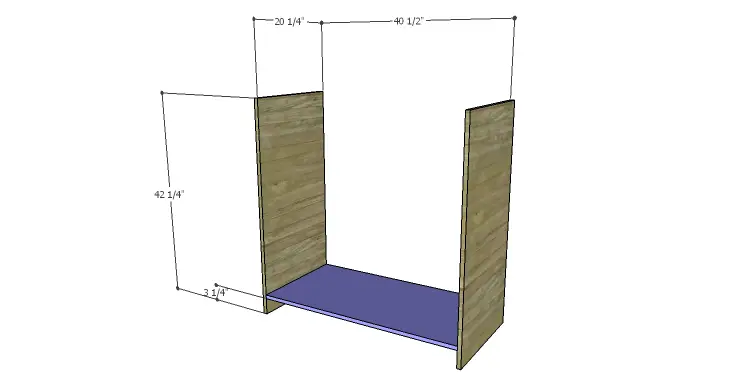
- 2 – 3/4″ plywood at 20-1/4″ x 42-1/4″ – Sides
- 1 – 3/4″ plywood at 20-1/4″ x 40-1/2″ – Bottom
- 2 – 3/4″ plywood at 3-1/4″ x 40-1/2″ – Kick Plates
- 1 – 3/4″ plywood at 38-1/4″ x 40-1/2″ – Back
- 2 – 3/4″ plywood at 19-1/2″ x 38-1/4″ – Dividers
- 16 – 3/4″ square dowels at 18-3/4″ – Wine Bottle Stops
- 6 – 3/4″ plywood at 13″ x 18-3/4″ – Shelves
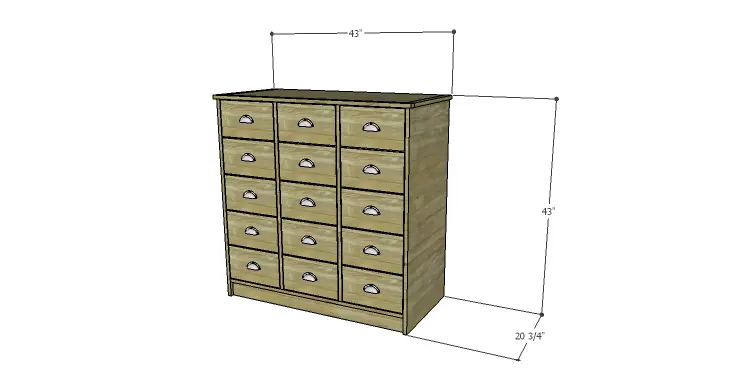
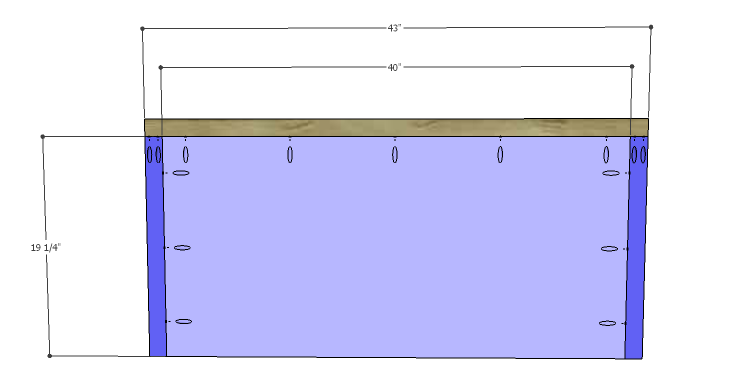
- 1 – 3/4″ plywood at 19-1/4″ x 40″ – Top Panel
- 2 – 1×2 at 19-1/4″ – Top Side Trim
- 1 – 1×2 at 43″ – Top Front Trim
- 2 – 3/4″ plywood at 12″ x 37-1/2″ – Drawer Front & Back
- 3 – 3/4″ plywood at 12″ x 16-1/2″ – Drawer Shelf Bottom
- 6 – 1×3 at 16-1/2″ – Drawer Sides
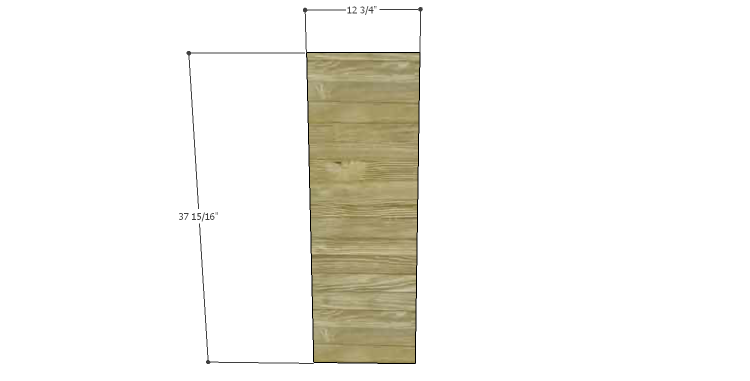
- 3 – 1/2″ plywood at 12-3/4″ x 37-15/16″ – Door & Drawer Base
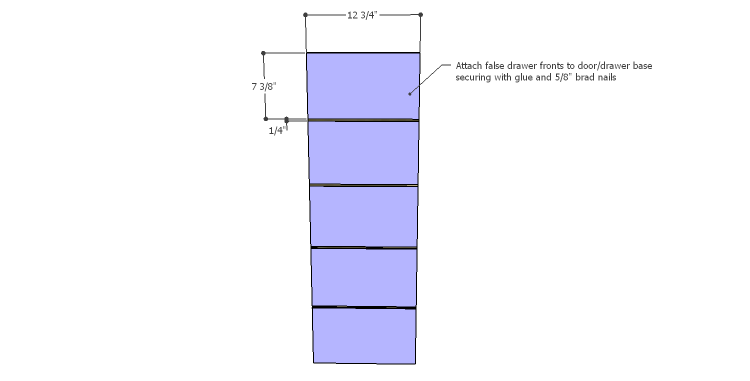
- 15 – 1/4″ plywood at 7-3/8″ x 12-3/4″ – False Drawer Fronts
Step One
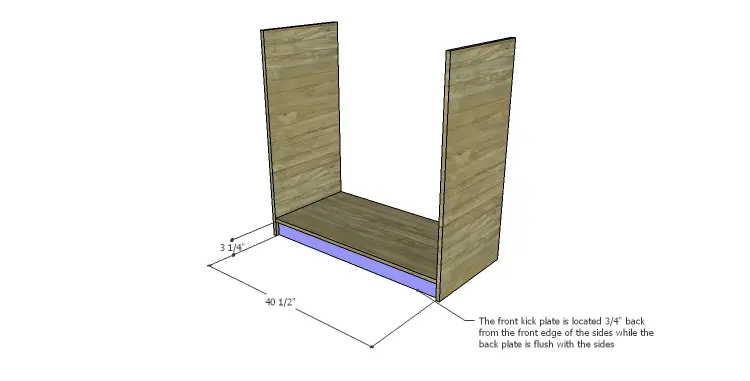
Cut the pieces for the sides and the bottom. With the pocket hole jig set for 3/4″ material, drill pocket holes in each end of the bottom. Position the bottom 3-1/4″ up from the bottom edge of the sides securing in place using glue and 1-1/4″ pocket hole screws.
Step Two
Cut the pieces for the kick plates and drill pocket holes in each end. Secure to the sides under the bottom using glue and 1-1/4″ pocket hole screws. The front kick plate will be positioned 3/4″ back from the front edge of the sides while the back kick plate will be flush with the sides. Add a few 1-1/4″ brad nails through the bottom into the kick plates.
Step Three
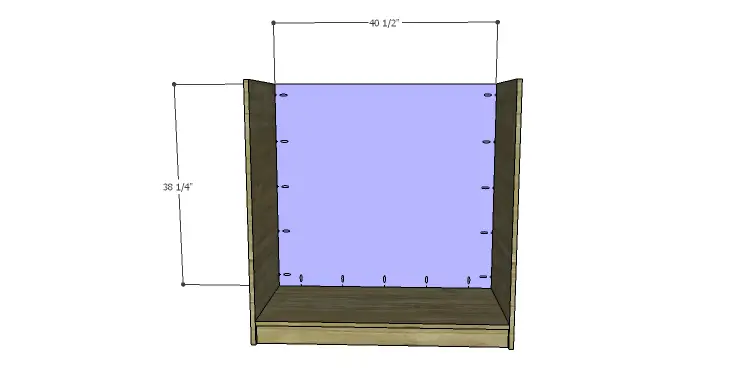
Cut the piece for the back and drill pocket holes in the side and bottom edges. Secure to the sides and bottom using glue and 1-1/4″ pocket hole screws.
Step Four
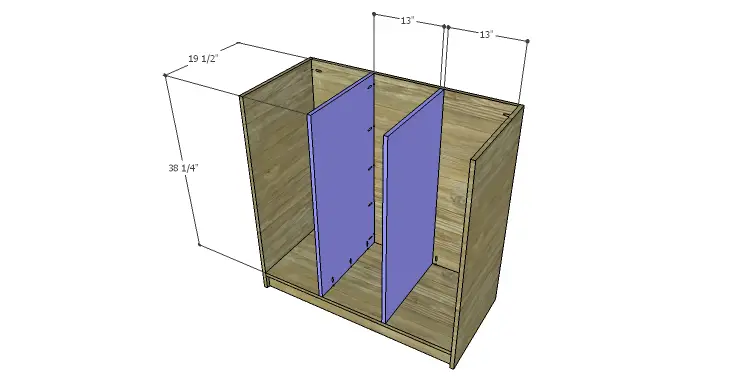
Cut the pieces for the dividers. Drill pocket holes in the back and bottom edges, treating the pieces as if they are a left and a right (this way the pocket holes will be hidden in the center drawer area).
Step Five
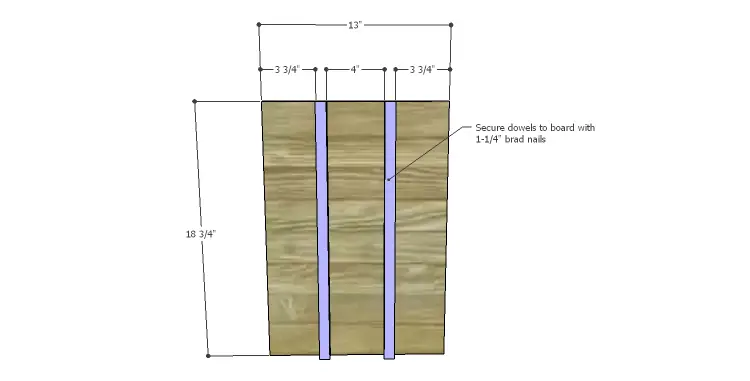
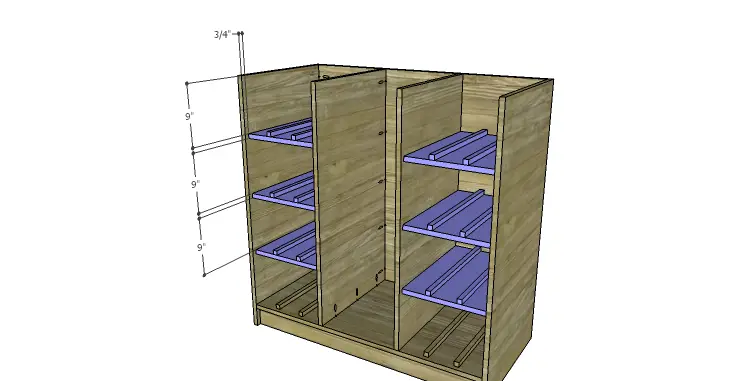
Cut the pieces for the wine bottle stops and the shelves. Attach two stops the bottom of each outer cubby as shown, locating them 3/4″ back from the front edge of the bottom. Secure the stops in place using glue and 1-1/4″ brad nails.
Drill pocket holes in the side and back edges of the shelves. Attach the remaining stops to the top of the shelves as shown using glue and 1-1/4″ brad nails. Position the shelves in the outer side cubbies as shown securing in place with glue and 1-1/4″ brad nails.
Step Six
Cut the piece for the top and the top trim. Drill pocket holes in the side and front edges of the panel as well as one end of the side trim. Attach the side trim to the panel first, using glue and 1-1/4″ pocket hole screws. Attach the front trim piece using glue and 1-1/4″ pocket hole screws. Use a router and a decorative bit to cut a fancy edge on the top!
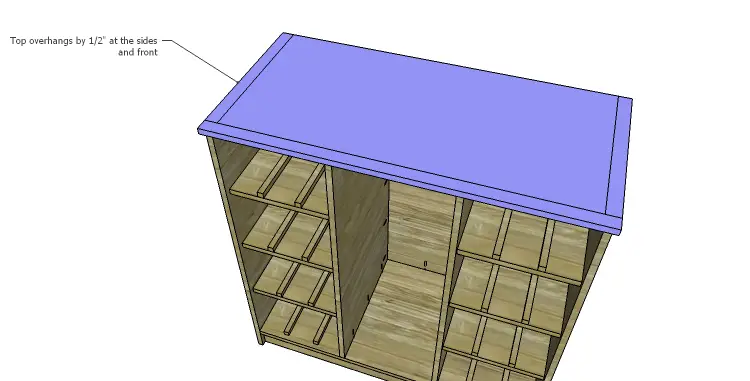
Position the top so that the back edge is flush and the sides and front overhang by 1/2″. Secure the top to the cabinet using glue and 1-1/4″ brad nails.
Step Seven
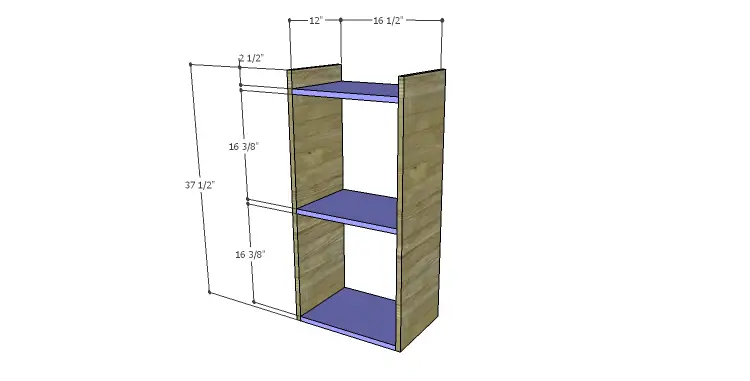
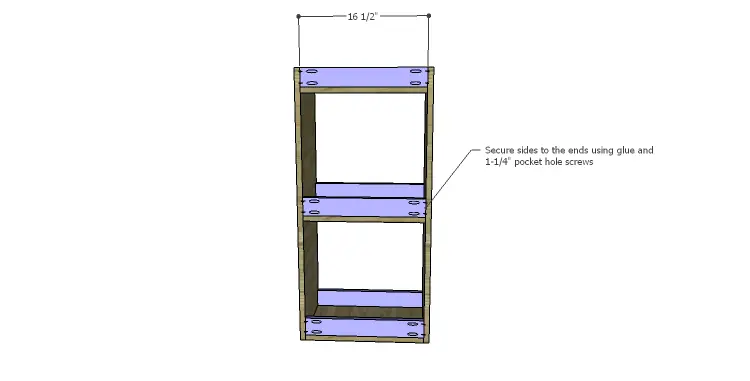
Cut the pieces for the center drawer. This drawer is similar to a traditional drawer but has three shelf compartments. Drill pocket holes in the narrower edges of each bottom piece. Secure the bottom pieces to the front and back pieces as shown using glue and 1-1/4″ pocket hole screws.
Drill pocket holes in each end of the side pieces. Position the side pieces over each bottom piece, securing in place with glue and 1-1/4″ pocket hole screws.
Mark the position for the drawer slides on the dividers – the drawer will sit 1/8″ above the bottom. Install the cabinet side pieces of the drawer slides on the dividers locating the slides 3/4″ back from the front edge, then install the drawer side pieces of the slides on the sides of the drawer. Test fit the drawer and make any necessary to the slides.
Step Eight
Cut the pieces for the door/drawer front bases, then cut the pieces for the false drawer fronts. Draw placement lines on the base for the false fronts. The top false front will be located approximately 1/16″ down from the top of the base. The remaining false fronts will be spaced 1/4″ apart. Secure the false fronts using glue and 5/8″ brad nails. drill holes in each false front, all the way through the base, for the cabinet pulls.
Step Nine
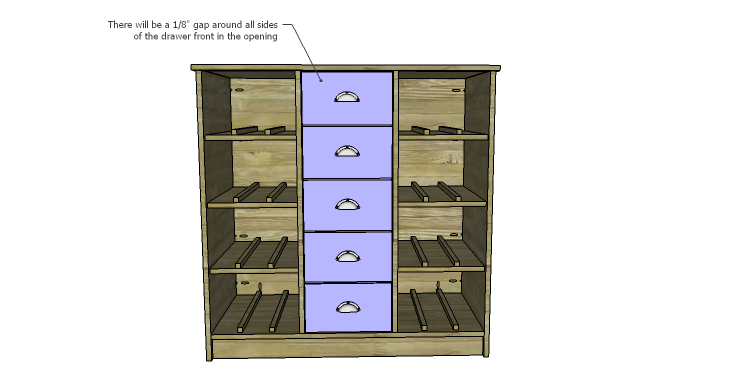
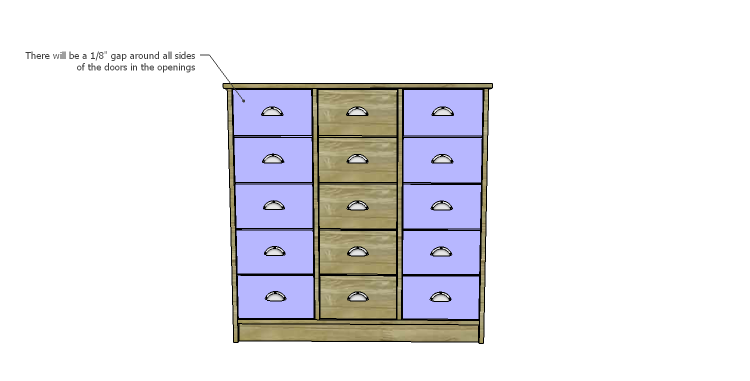
Shim the drawer front assembly in the center cubby over the drawer. There will be a 1/8″ gap around all sides. Drive screws through the holes drilled for the cabinet pulls into the drawer. Open the drawer, and secure the drawer front from the inside with countersunk 1-1/4″ screws. Finish drilling the holes through the drawer for the cabinet pulls, then install the pulls.
Step Ten
Install the hinges on the doors, then install the doors in the cabinet. There will be a 1/8″ gap around all sides of the doors in the openings. Install the pulls.
Finish as desired.
Casters can be added to the bottom of the cabinet to make it portable. The wine stops can be omitted and the cart can be used as an island, as well! Have any questions about the DIY plans to build a Howell bar cabinet? Leave a comment below or contact me at cher {at} designsbystudioc {dot} com!

I like to entertain. I like wine. I like spirits. I like this!
Thanks, Linda! This is certainly one of my favorites!