Build a Chair with a Woven Seat – Super-Easy and Beautiful!
A friend of mine, Jake, builds some really fabulous pieces of furniture and recently got into making rush seats for stools, as well as for chair repairs. He does really fabulous work, and learned by research and watching You Tube videos. I’ve really wanted to try rush seats as well, and it wasn’t until I ran across an old American Woodworker magazine (now under Popular Woodworking) with an article on how to weave chair seats with flat reed that I decided to give it a try. That is where the DIY plans to build a splint seat chair were born!
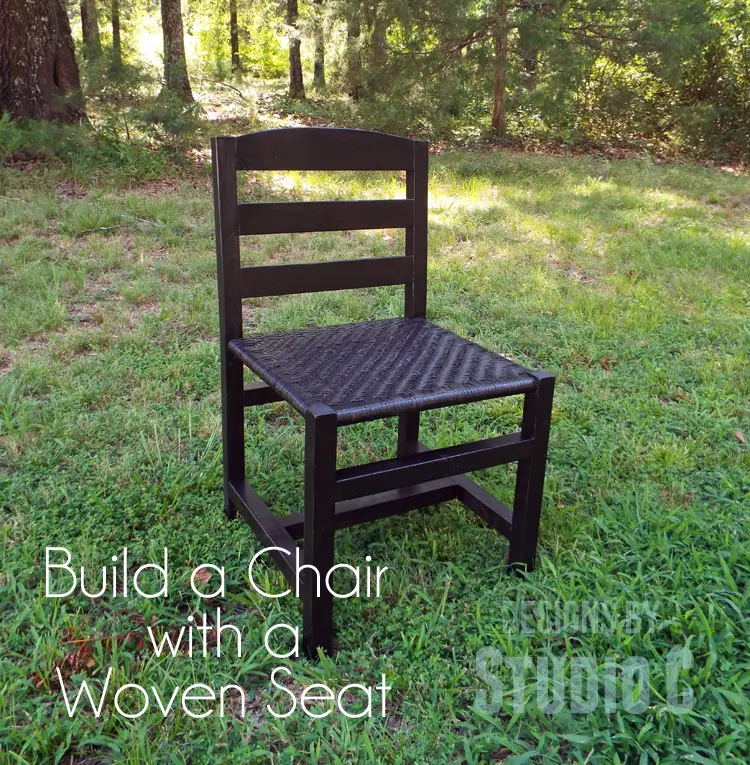
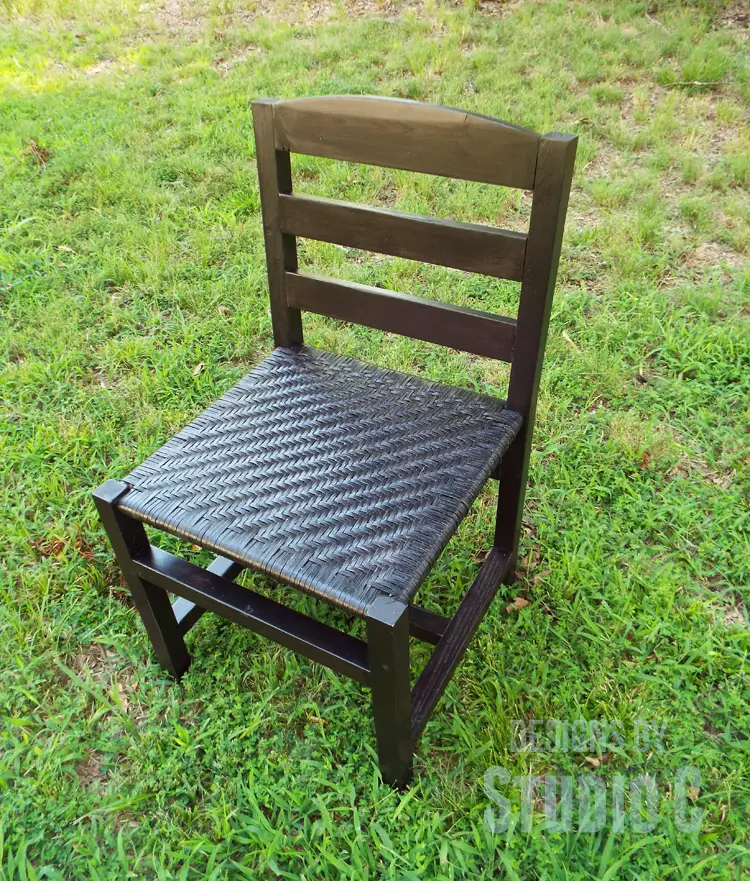
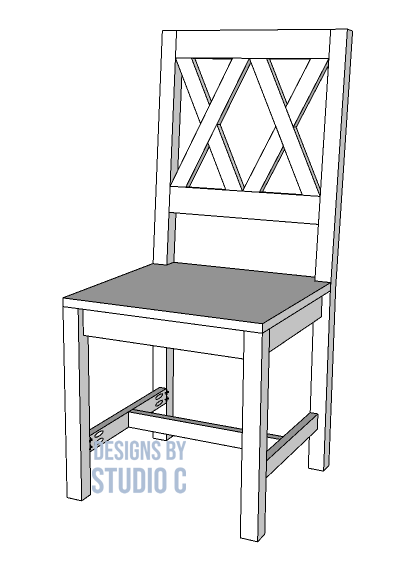
I had a box of flat reed splint that I bought several years ago to repair a papasan chair and I thought it would be perfect to create a seat for a chair. The chair plan is entirely my own design featuring dowels as the frame for the seat with lower stretchers to help hold everything together. The chair is really easy to construct and the DIY woven chair seat is very easy to create!
Materials:
- 1-1/4″ pocket hole screws
- 2-1/2″ pocket hole screws
- 1/4″ wide flat reed splints
- Regular office stapler
- 5/8″ brad nails
- Wood glue
- Sandpaper (100, 150, 220 grits)
- Finishing supplies (primer & paint, or stain, sealer)
Lumber:
- 1 – 1×3 at 4′
- 1 – scrap of 1×4 at 16″
- 2 – 2×2 at 8′
- 1 – 2×4 at 6′
- 2 – 1″ round dowel rods at 3′
Cut List:
- 2 – 2×4 at 35″ – Back Legs
- 1 – 2×2 at 16″ – Lower Back Stretcher
- 1 – 1″ round dowel at 16-1/2″ – Back Seat Stretcher
- 2 – 1×3 at 16″ – Back Rest
- 1 – 1×4 at 16″ – Upper Back Rest
- 2 – 2×2 at 18-1/4″ – Front Legs
- 1 – 2×2 at 16″ – Front Stretcher
- 1 – 1″ round dowel at 16-1/2″ – Front Seat Stretcher
- 2 – 2×2 at 16″ – Side Stretchers
- 2 – 1″ round dowels at 16-1/2″ – Side Seat Stretchers
- 1 – 2×2 at 16″ – Center Stretcher
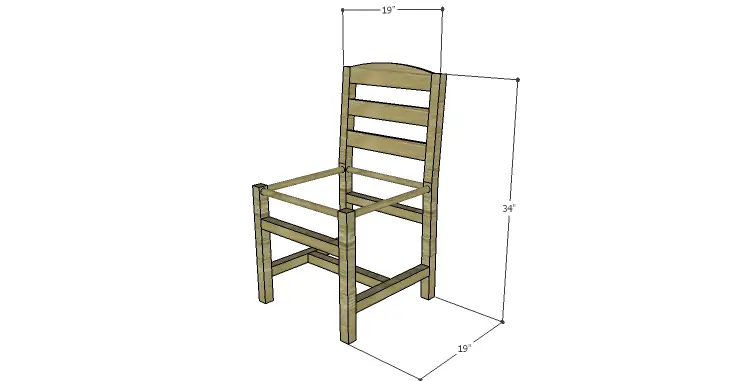
Click on the drawings for a larger view!
Step One
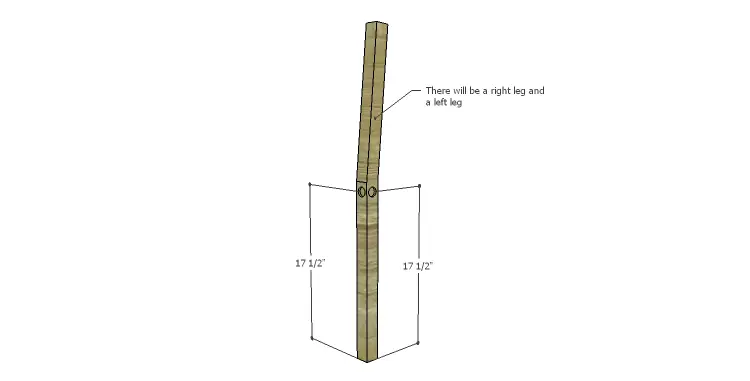
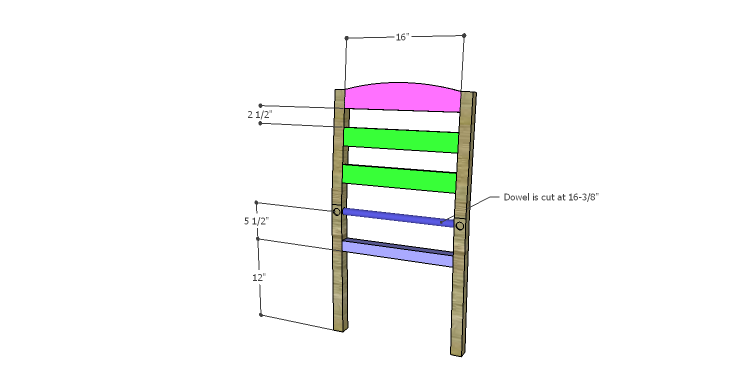
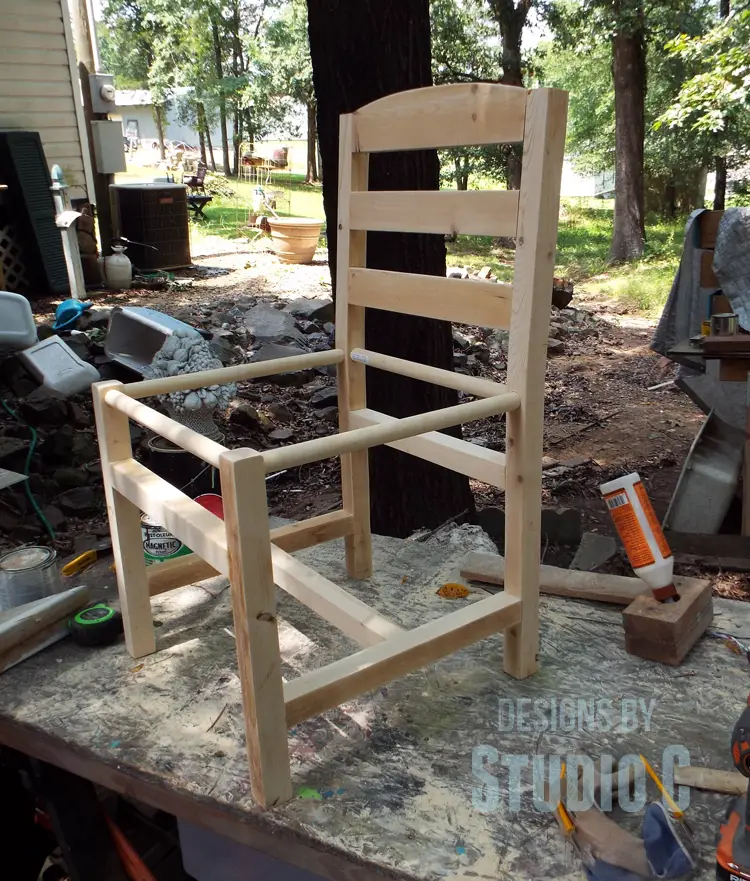
Cut the 2×4 pieces to length for the back legs. Draw the back legs on each piece as shown and cut out using a jigsaw or a bandsaw. Mark the position for the dowel holes noting that there will be a right leg and a left leg. Use a 1″ Forstner bit to drill a 1/4″ deep hole in the front of the leg and the inside of each leg.

Step Two
Cut the pieces for the lower back stetcher, the back seat stretcher (the dowel), the back rest, and the upper back rest. Mark the arc on the 1×4 piece and cut with a jigsaw or a bandsaw. Set the pocket hole jig for 3/4″ material and drill pocket holes in each end of the upper back rest, as well as the 1×3 back rest pieces.
Set the pocket hole jig for 1-1/2″ material and drill pocket holes in each end of the back stretcher.
Mark the position for the back rest pieces as well as the stretchers and assemble the chair back as shown sandwiching the dowel in the holes (after adding glue in the holes to secure the dowel) and using the appropriate pocket hole screw for the thickness of the material – 1-1/4″ pocket hole screws for 3/4″ material and 2-1/2″ pocket hole screws for 1-1/2″ material. The back rests will be flush with the front face of the legs. The pocket hole sin the lower stretcher will face down so they will not have to be filled.
Step Three
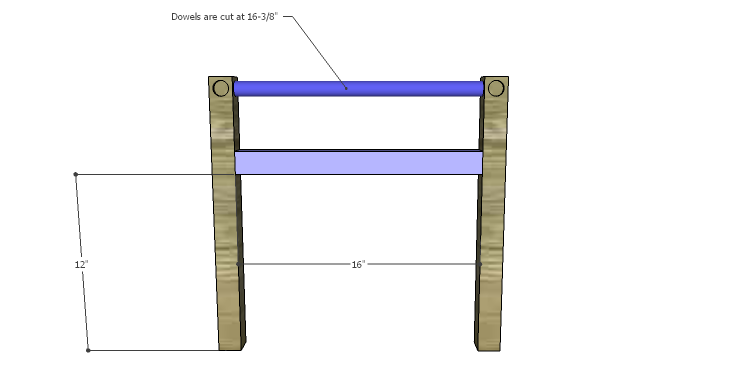
Cut the pieces for the front legs and drill the holes for the dowels using the 1″ Forstner bit – the holes are 1/4″ deep.
Cut the pieces for the front frame and the front seat stretcher, and drill pocket holes in each end of the front stretchers. Assemble the front frame by again sandwiching the dowel in the holes (after adding glue to the holes) and securing the front stretcher using glue and 2-1/2″ pocket hole screws. The pocket holes in the lower stretcher will face down so they will not have to be filled.
Step Four
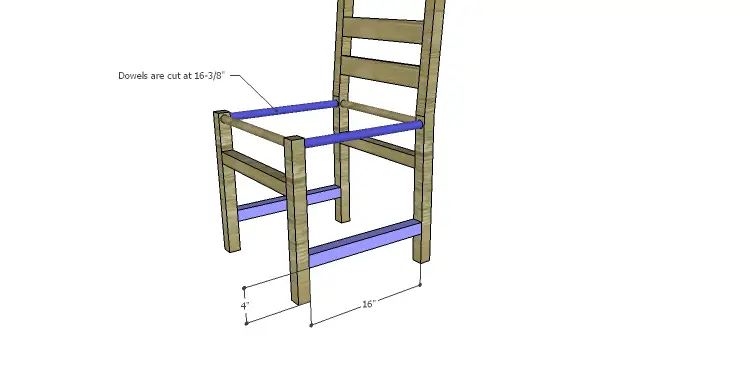
Cut the pieces for the side stretchers and the side seat stretchers. Drill pocket holes in each end of the stretchers. Assemble the sides in by sandwiching the dowel in the holes (after adding glue to the holes) and securing the side stretcher using glue and 2-1/2″ pocket hole screws. The pocket holes in the side stretcher will face down so they will not have to be filled.
Step Five
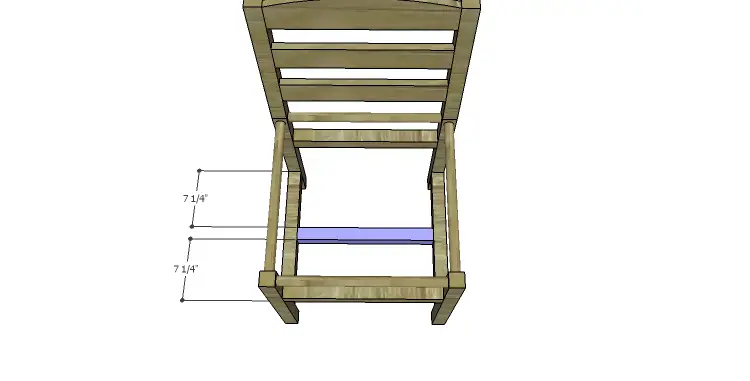
Cut the piece for the center stretcher and drill pocket holes in each end. Secure to the lower side stretchers as shown using glue and 2-1/2″ pocket hole screws. The pocket holes in the center stretcher will face down so they will not have to be filled.
To create the seat:
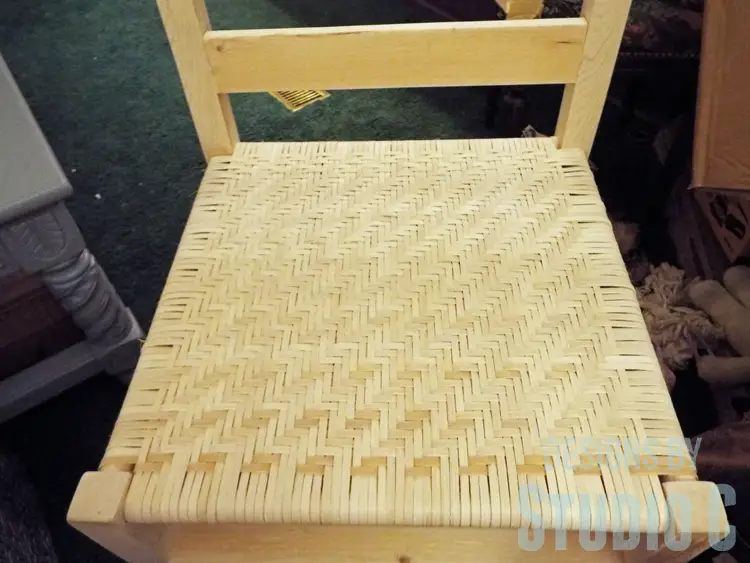
I found the instructions for making the woven seat on the Popular Woodworking website. I thought the instructions were a tad confusing (maybe it was just me!). I didn’t use the “weaver” piece as outlined in the instructions. I had 57 “strips” in the warp and started the weave by going under the first three, then over the next three – continuing in this pattern to the end. Wrap the reed over the dowel stretcher, then repeat the pattern on the underside of the warp (the bottom of the seat). On the second row, go over the first warp strip, under the next three, then over the next three continuing the three and three pattern to the end. Repeat on the other side. On the third row, go over the first two warp strips, under the next three, then over the next three, and continue. On the fourth row, go over the first three, under the next three, etc. On the fifth row, go under the first, over the next three, then under the next three. Continue in the “over for three rows, under for three rows” (at the beginning) pattern until the seat is complete. Use a butter knife to help guide the strips as you get closer to the end of the seat. It gets really tight and you’ll need all the help you can get!

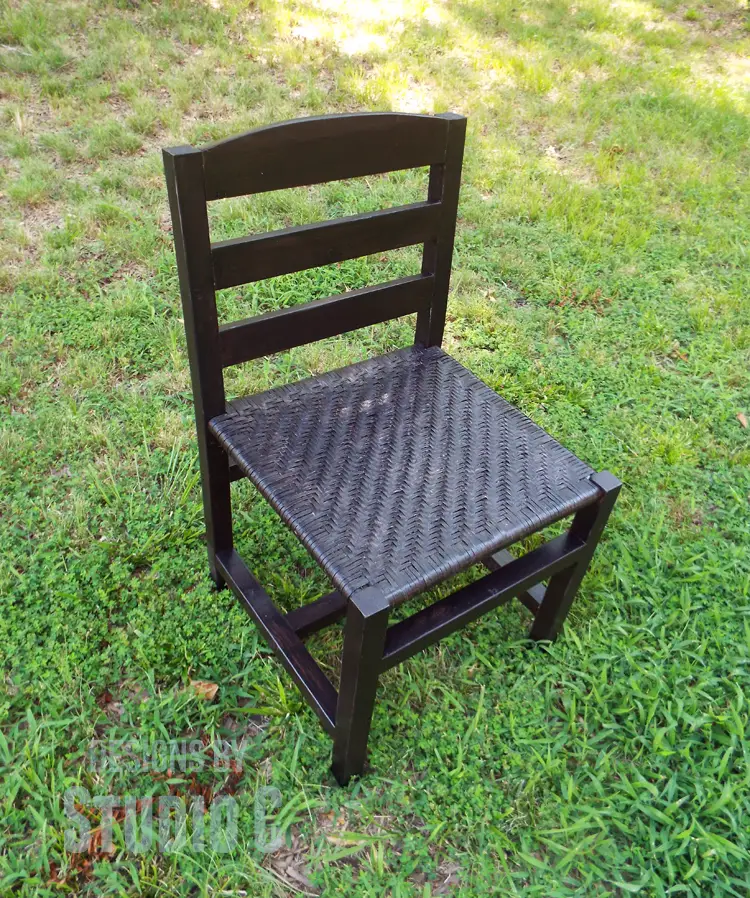
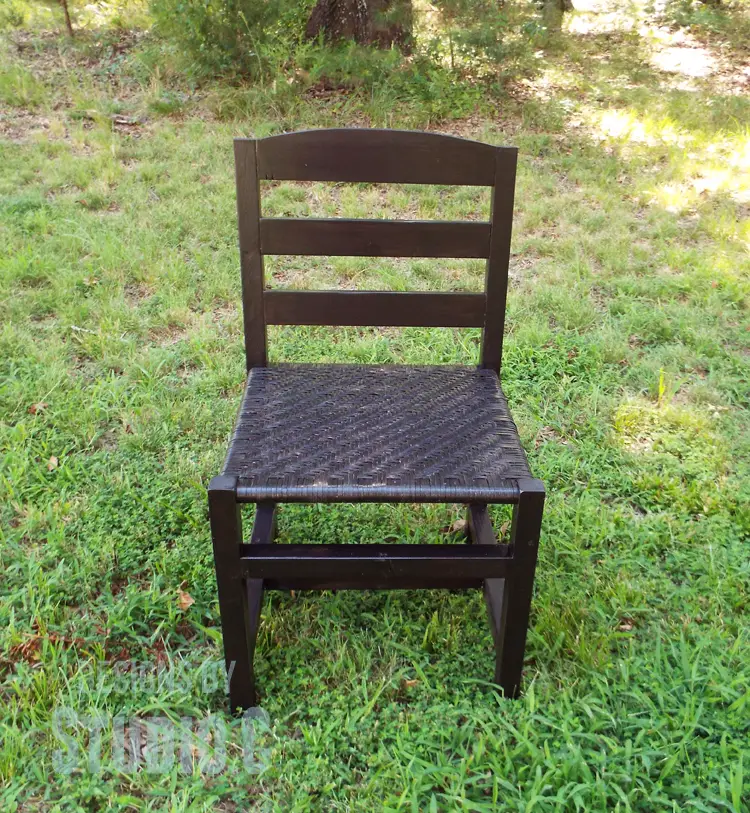
Weaving a seat is not a quick project – it is a binge-watching-your-favorite-show-on-Netflix type of project (I watched Call of the Wildman – my favorite!). I did have to start over because I got confused but I am so proud of this chair and have just the place to put it! Have any questions about the DIY plans to build a splint seat chair? Leave a comment below or contact me at cher {at} designsbystudioc {dot} com!
Sharing with: H2O Bungalow DIY Sunday Showcase
Originally posted 2014-07-30 08:00:30.


2 Comments
Wow Cher, your carpentry skills impressed the heck out of me! Excellent tutorial as well. There is no way I could have sat in front of the tv weaving without having to constantly go back to fix my mistakes. You go girl!
Thanks so much, Marie! It took FOREVER to weave that seat and I would do it again in a heartbeat! Thanks for stopping by!