
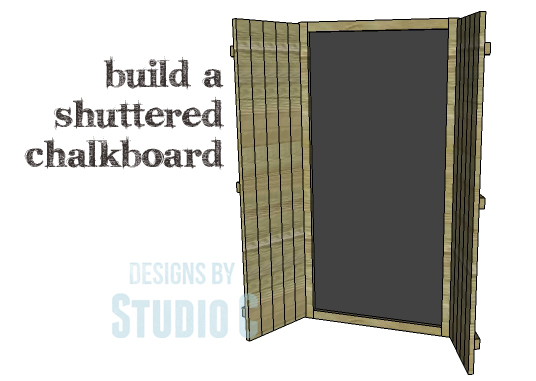
Build a Shuttered Chalkboard
DIY Furniture Plans – A Beautiful Chalkboard For Organization and as Wall Art
I wish I had the wall space for one of these beauties… The chalkboard makes an excellent place to create to-do lists, meal menus, or to list important dates. It is also a great place to write message for family get-togethers or dinner parties! The doors will keep the notes or lists covered and out of sight. The DIY plans to build a Shuttered Chalkboard are some of the easiest plans to construct taking just a few hours from start to finish!
Materials:
- 1-1/4″ pocket hole screws (<– affiliate link!)
- 3/4″ screws
- 1-1/4″ screws
- 3″ screws or auger anchors with screws (to secure the board to the wall)
- 1 – 2′ x 4′ chalkboard panel
- 2 sets of hinges
- Wood glue
- Sandpaper (100, 150, 220 grits)
- Finishing supplies (primer & paint, or stain, sealer)
Lumber:
- 3 – 1×2 at 8′
- 10 – 1×3 at 6′
Cut List:
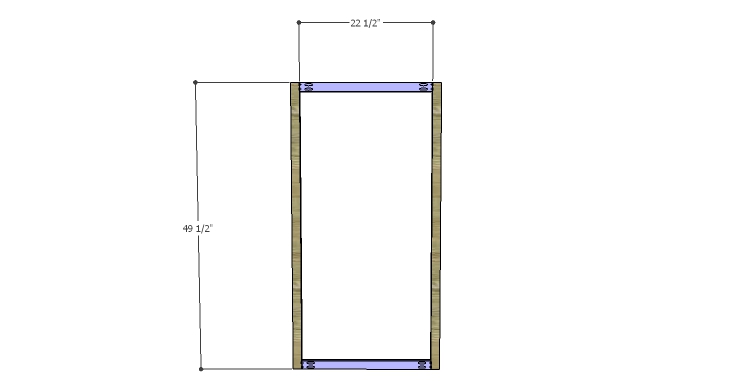
- 2 – 1×2 at 22-1/2″ – Chalkboard Frame
- 2 – 1×2 at 49-1/2″ – Chalkboard Frame
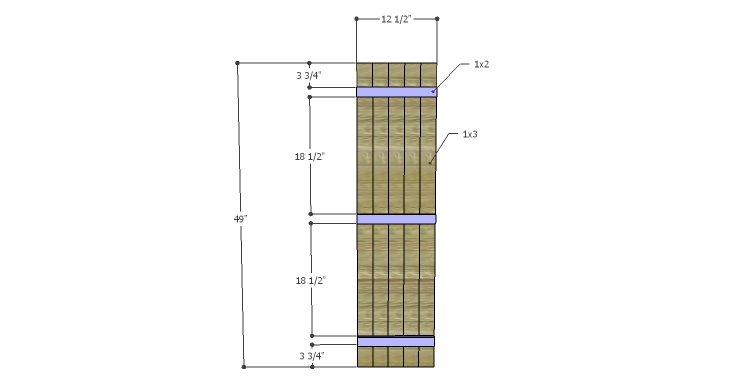
- 10 – 1×3 at 49″ – Doors
- 6 – 1×2 at 12-1/2″ – Doors
Step One
Cut the pieces for the chalkboard frame. With the pocket hole jig set for 3/4″ material, drill pocket holes in each end of the shorter frame pieces. Assemble the frame using glue and 1-1/4″ pocket hole screws.
Step Two
Fasten the chalkboard panel to the back of the frame using glue and 3/4″ screws.

Step Three
Cut the pieces for the doors. Lay the 1×3 pieces in two groups of five and secure the 1×2 pieces across them using glue and countersunk 1-1/4″ screws.
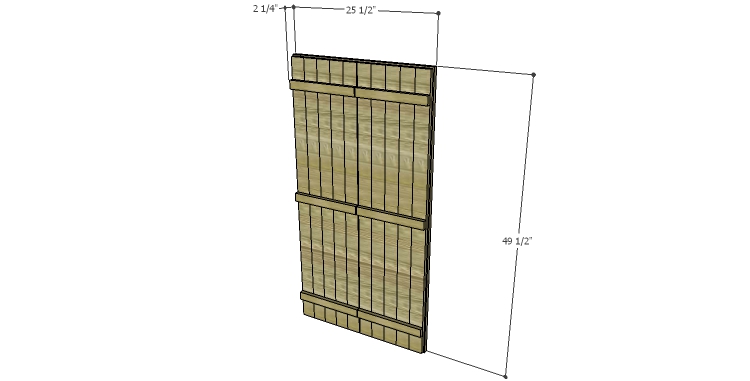
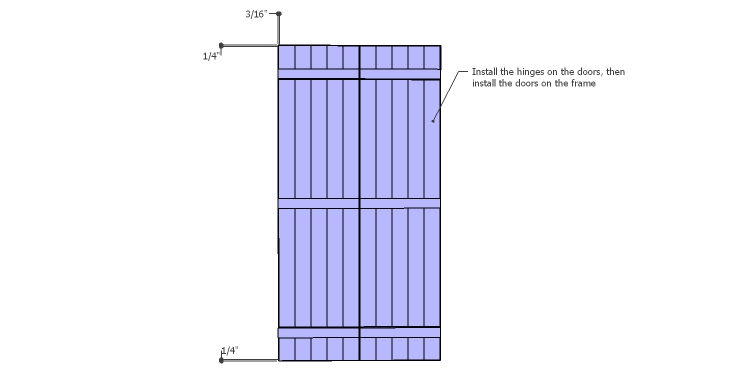
Install the hinges on the doors, then install the doors on the frame. The doors will be positioned 1/4″ from the top and bottom of the frame, and 3/16″ in from each side. The doors can also be positioned so they are flush with the sides of the frame but the gap at the center (between the doors) will be wider.
Finish as desired. To hang the chalkboard, drive 3″ screws through the frame into the wall studs. If there are no wall studs where the chalkboard is to be hung, use auger anchors and the appropriate screws to secure the chalkboard.
The chalkboard would be a welcome addition in any room, and would be awesome for a kid’s room or in a family room. The chalkboard panel can also be replaced with a dry erase panel, if desired. Leave a comment below if there are any questions about the DIY plans to build a Shuttered Chalkboard!
Disclaimer:
This post contains an affiliate link. What that means is that if the link is clicked and a purchase made, I will receive a commission.
Originally posted 2014-11-06 08:00:29.