
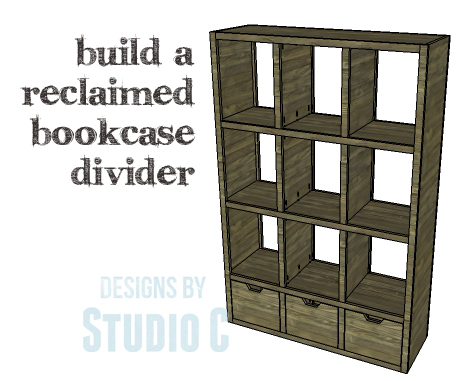
DIY Plans to Build a Reclaimed Bookcase Divider
An Easy to Build Triple-Duty Bookcase
Hey there! This awesome bookcase is not only super easy to build, but it also serves three amazing purposes! First off, it’s an open bookcase on both sides, perfect for displaying your favorite books and knick-knacks. But wait, there’s more! It can also be used as a room divider, creating separate spaces in your home. And guess what? It even has storage! How cool is that?
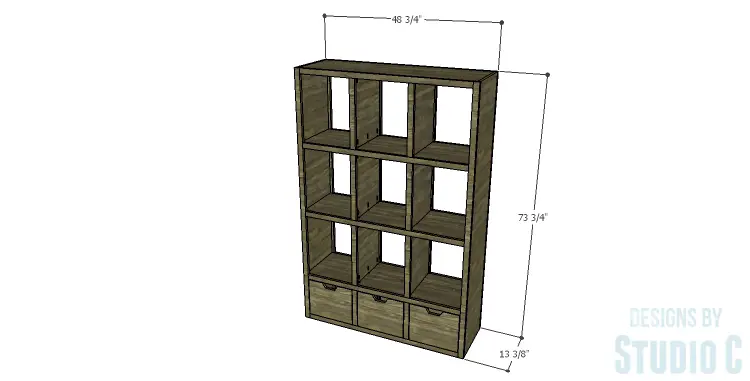
The DIY plans for this Reclaimed Bookcase Divider include three handy bins at the bottom, divided shelves for organizing your stuff, and beautiful full face frames on each side. Plus, you’ll love that it’s a budget-friendly project. We’ve designed it to make the most out of each sheet of plywood, minimizing waste and saving you money.
So, if you’re looking for a versatile, stylish, and cost-effective bookcase that you can easily build yourself, this is the one for you! Get ready to show off your DIY skills and enjoy the benefits of this amazing piece of furniture. Happy building!
Materials:
- 1-1/4″ pocket hole screws (<– affiliate link!)
- 1-1/4″ brad nails
- Wood glue
- Sandpaper (100, 150, 220 grits)
- Finishing supplies (primer & paint, or stain, sealer)
- Paste wax
Lumber:
- 8 – 1×2 at 8′
- 2 – 4′ x 8′ sheets of 3/4″ plywood
Cut List:
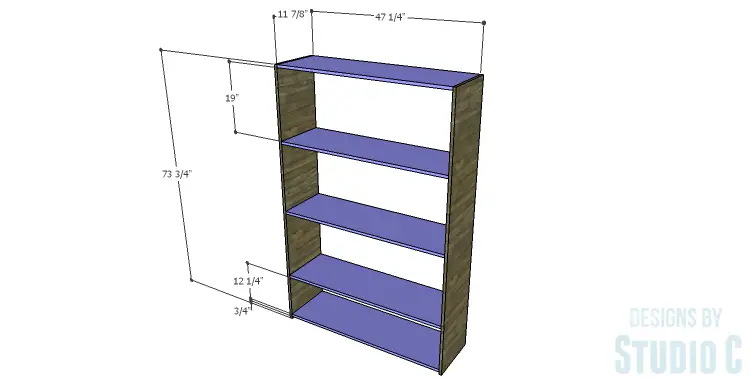
- 2 – 3/4″ plywood at 11-7/8″ x 73-3/4″ – Bookcase Sides
- 5 – 3/4″ plywood at 11-7/8″ x 47-1/4″ – Bookcase Shelves
- 6 – 3/4″ plywood at 11-7/8″ x 19″ – Dividers
- 2 – 3/4″ plywood at 11-7/8″ x 12-1/4″ – Dividers
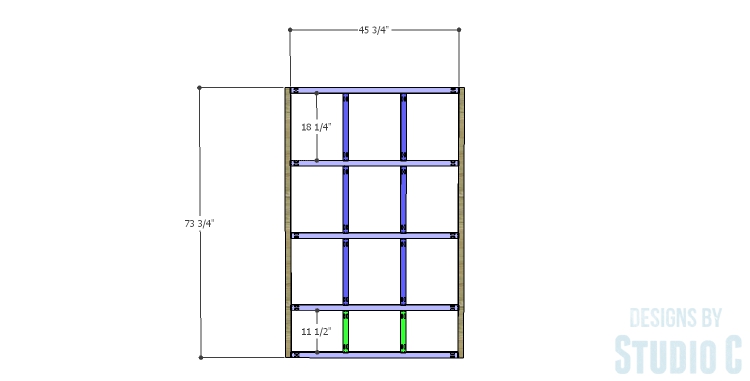
- 12 – 1×2 at 18-1/4″ – Face Frames
- 4 – 1×2 at 11-1/2″ – Face Frames
- 10 – 1×2 at 45-3/4″ – Face Frames
- 4 – 1×2 at 73-3/4″ – Face Frames
- 3 – 3/4″ plywood at 12-1/2″ x 11-7/8″ – Bin Bottoms
- 6 – 3/4″ plywood at 11-3/8″ x 11-7/8″ – Bin Sides
- 6 – 3/4″ plywood at 11-3/8″ x 14″ – Bin Front & Back
Step One
Cut the pieces for the sides and shelves. With the pocket hole jig set for 3/4″ material, drill pocket holes in each end of the shelf pieces. Secure the shelves to the sides using glue and 1-1/4″ pocket hole screws. Note that the bottom shelf will be located 3/4″ up from the bottom edge of the sides.
Step Two
Cut the pieces for the dividers and drill pocket holes in each end. Secure the dividers to the shelves using glue and 1-1/4″ pocket hole screws.

Step Three
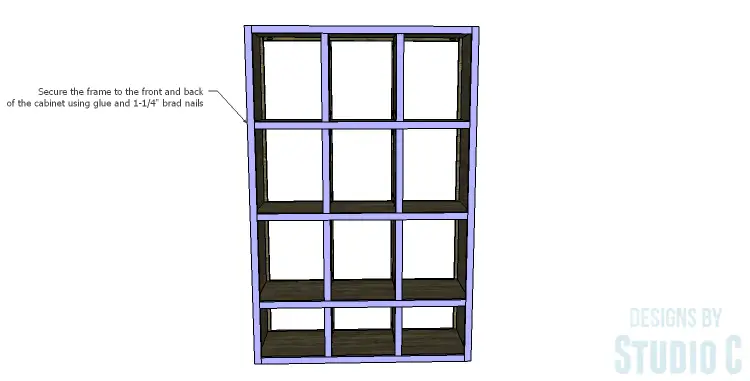
Cut the pieces for the face frames. Drill pocket holes in each end of each piece except for the longest side pieces. Assemble the frames as shown using glue and 1-1/4″ pocket hole screws.
Position the face frames on each side of the bookcase. The vertical framing pieces will be centered on the dividers while the horizontal pieces will be flush with the top face of the shelves. The outer edges of the frames will be flush with the outer faces of the bookcase. Secure the frames in place using glue and 1-1/4″ brad nails.
Step Four
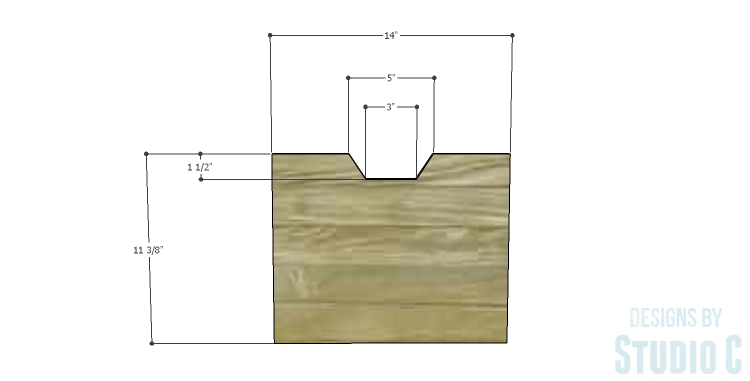
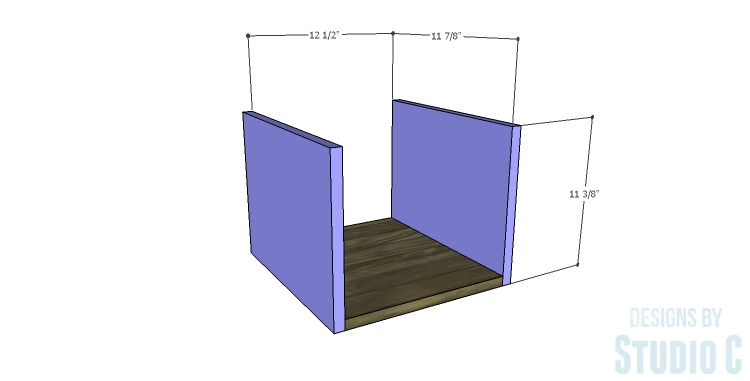
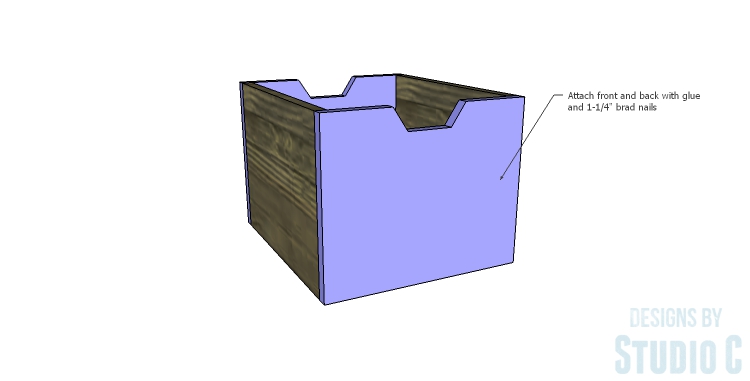
Cut the pieces for the bins. Cut the notches in the front and back pieces using a jigsaw. Secure the sides to the bottom first, using glue and 1-1/4″ brad nails, then secure the front and back.

Finish as desired. Apply a coat of paste wax to the bottom of the bins to allow them to slide smoothly in the openings.
This bookcase would be a great way to separate two spaces yet keep everything organized and in easy reach! Have any questions about the DIY plans to build a Reclaimed Bookcase Divider? Leave a comment below!