
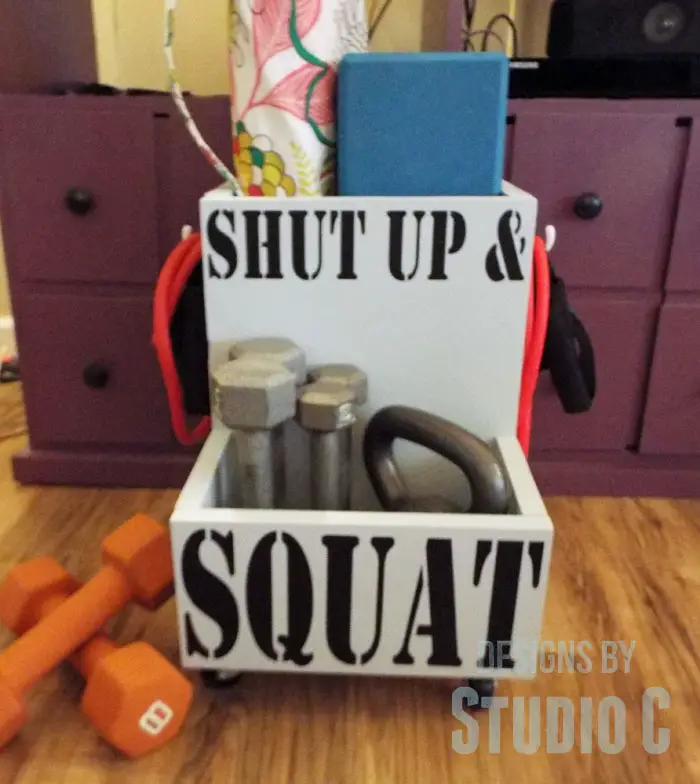
DIY Exercise Equipment Organizer
All About Organization – Power Tool Challenge ’16
Yahoo!! It is the very first Power Tool Challenge for the year! Once a month, I join fellow DIY bloggers to create awesome, easy to build projects. This month’s theme is “Organization” and my project is a DIY Exercise Equipment Organizer for the Power Tool Challenge, something that is greatly needed since I decided to take my health a lot more seriously (I have equipment stashed everywhere!).
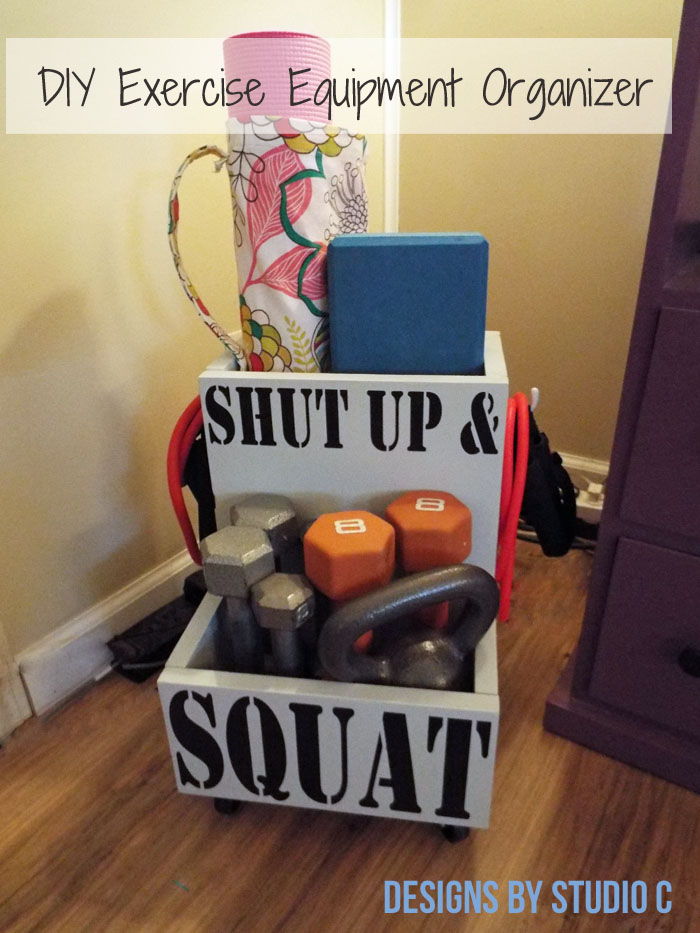
This easy to build box can house up to three sets of dumbbells and a small kettlebell in the front with space for a yoga mat and blocks in the back. The box also features hooks on the sides to hang resistance bands or a jump rope, and is on casters so it can be easily moved!
Materials:
- 1-1/4″ pocket hole screws (about six) (<– affiliate link!)
- 1-3/4″ brad nails
- Wood glue
- Paint or stain of your choice
- Vinyl lettering or stencils with craft paint
- 2″ casters (with plates) and 3/4″ screws
- 2 single coat hooks
Lumber:
- Scrap pieces of 1×6
- 1 – 1×12 at 6′
Cut List:
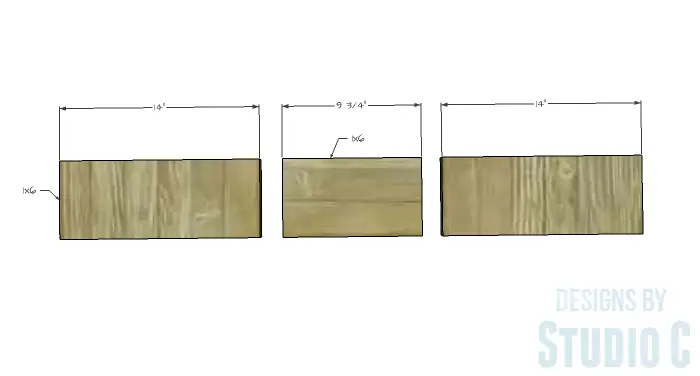
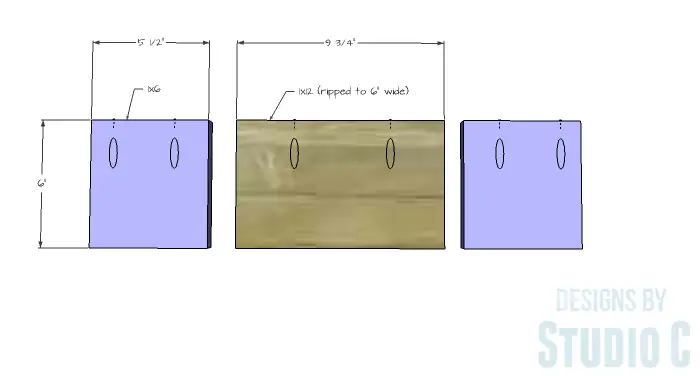
- 2 – 1×6 at 14″ – Larger Box Sides
- 1 – 1×6 at 9-3/4″ – Larger Box Bottom
- 2 – 1×12 at 14″ – Larger Box Front & Back
- 1 – 1×12 (ripped to 6″ wide) at 9-3/4″ – Front Box Bottom
- 2 – 1×6 at 6″ – Front Box Sides
- 1 – 1×6 at 11-1/4″ – Front Box Front
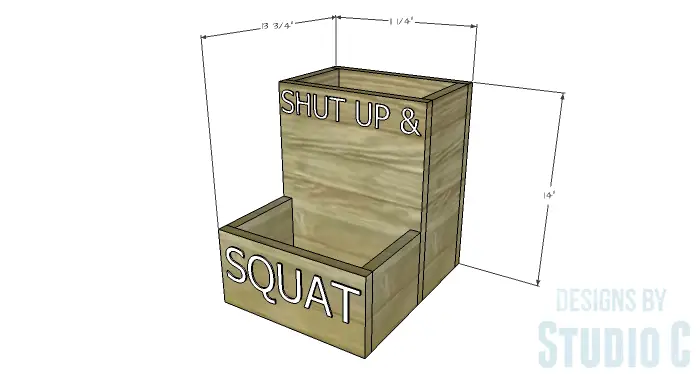
Click on the drawings for a larger view!
Step One
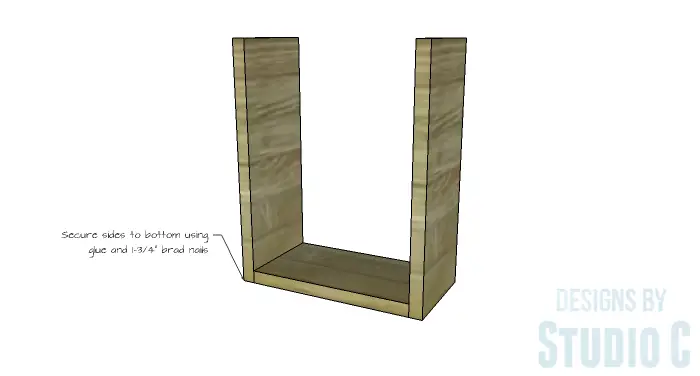
Cut the pieces for the larger box sides and bottom. Secure the sides to the bottom using glue and 1-3/4″ brad nails.
Step Two
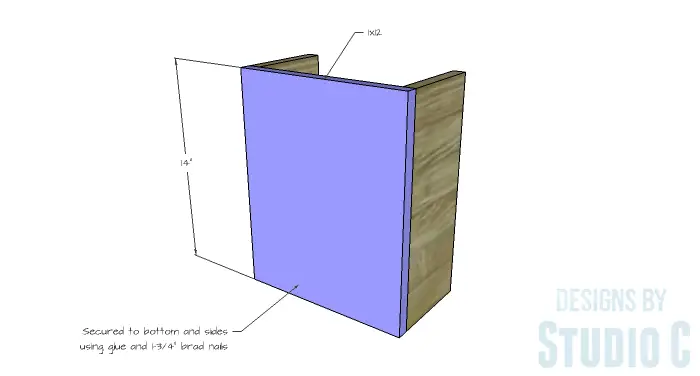
Cut the pieces for the larger box front and back. Secure one of the pieces to the sides and bottom using glue and 1-3/4″ brad nails – this will be the front of the box. Set the other piece aside.
Step Three
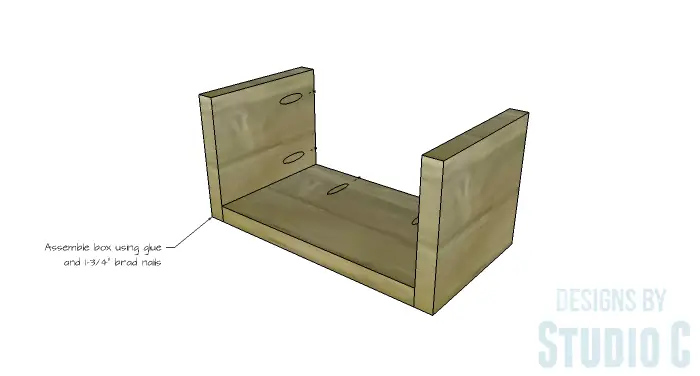
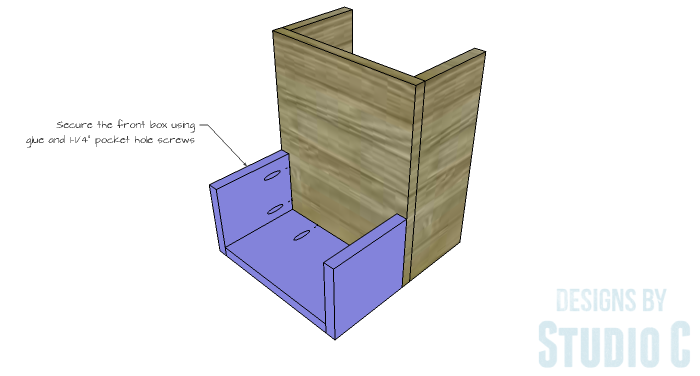
Cut the pieces for the front box sides and bottom. Set the pocket hole jig for 3/4″ material and drill pocket holes in each piece as shown. Secure the sides to the bottom using glue and 1-3/4″ brad nails.
Secure the front box to the larger box using glue and 1-1/4″ pocket hole screws. The bottom of each box will be flush with each other.
Step Four
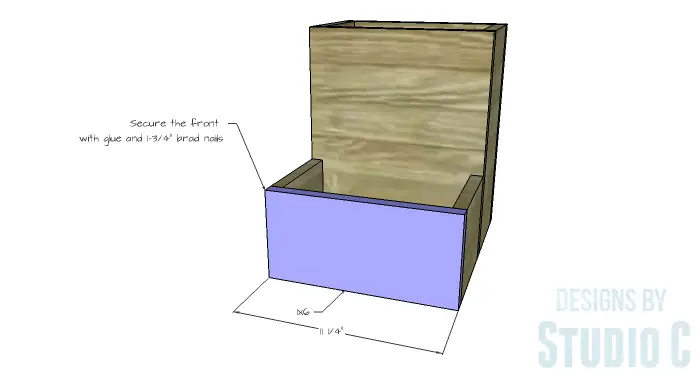
Cut the piece for the front box front. Do not secure it yet…
I found it was easier to leave the front piece and larger back piece off of the box so that I could paint. (I painted the other pieces separately.) This way, I made less of a mess! The box and pieces can also be stained, if desired.
Step Five
Once the finish is dry, secure the larger box back piece using glue and 1-3/4″ brad nails. Secure the front box front piece using glue and 1-3/4″ brad nails.

I used vinyl lettering to add a bit of sassy motivation to the front of the box. This can also be achieved with stencils and craft paint.

Secure the casters to the bottom using 3/4″ screws, and secure the hooks to the sides using 3/4″ screws.
Check out the other amazingly awesome projects for organization from my fellow bloggers…
Now exercise equipment can be added to the box so it is organized and ready for the next big workout! Have any questions about the DIY Exercise Equipment Organizer for the Power Tool Challenge? Leave a comment below!
Originally posted 2016-01-14 05:00:20.
Oh Cher I so enjoy the stencilled sentiment on your equipment organizer – that’s too good! Great idea to keep exercise equipment organized and ready to go.
Ha ha, thank you so much, Marie! I’m better friends with squats than I used to be!
great organizer for workout gear. I love the sassy motivation Cher! We all need motivation sometimes, right?
pinning!
gail
Thank you, Gail! Sometimes I need motivation wherever I can get it!
I so need this! It should also say…put the cookie down! Super way to keep all the excersize stuff organized, I especially like the side hooks too:) Fun!
That would be hilarious!! Thanks so much, Wendi!
Love it, perfect way to organize the workout gear + motivation! I agree with Wendi, got to put the cookie down first. 🙂
Thanks, Amy! Put the cookie down among other things (brownies, cake, etc.)… 🙂
Such a great idea! Love it!
Thanks so much! I really love it and I can move it out of the way when I am finished working out!
What a creative way to organize your exercise equipment. I love that you added wheels so that it can easily be rolled to your exercise area and then rolled away when the workout is complete.
The casters make it so handy to roll the organizer out of the way! Thanks for stopping by!
I know you are glad to have a dedicated space for all that equipment, but does it motivate you to use it?? Ha ha. That’s what I need, although the “Shut up, and Squat” might just do the trick…love it!
Of course it does (really!) and I love having it all contained! Thanks so much for stopping by!