
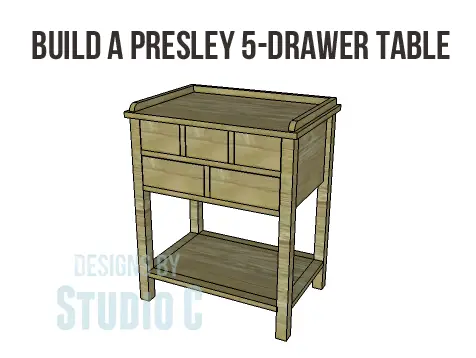
The Presley 5 Drawer Table Plans
Revamp Your Space with This DIY 5 Drawer Table
I absolutely adore little tables with plenty of drawers, and this one is no different! The Presley 5-Drawer Table Plans are simply fantastic, with a total of five drawers – three smaller ones on top and two larger ones at the bottom. It also has lovely raised trim on the sides and back, along with a spacious shelf at the bottom. This versatile table can be used as an end table or a nightstand, making it perfect for any room in your home.
Materials:
- 1-1/4″ pocket hole screws
- 1-1/4″ brad nails
- 5 – labeled drawer pulls
- Edge banding, optional
- Wood glue
- Sandpaper (100, 150, 220 grits)
- Finishing supplies (primer & paint, or stain, sealer)
Lumber:
- 2 – 1×2 at 6′
- 2 – 2×2 at 6′
- 1 half sheet of 3/4″ plywood
- 1 full sheet of 3/4″ plywood
Cut List:
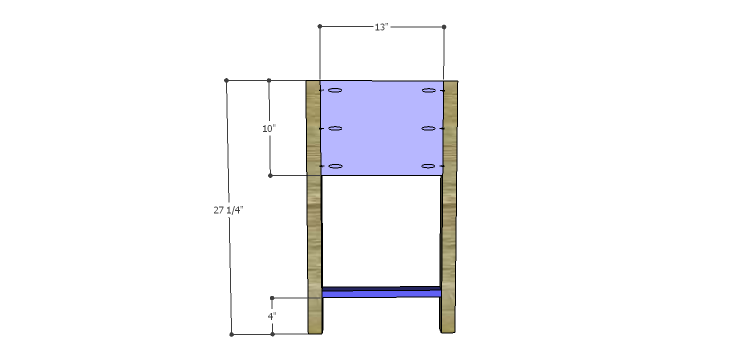
- 4 – 2×2 at 27-1/4″ – Legs
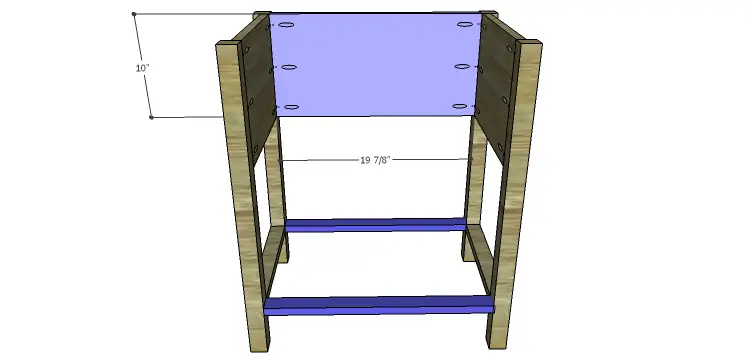
- 2 – 3/4″ plywood at 10″ x 13″ – Side Panels
- 2 – 1×2 at 13″ – Lower Leg Stretchers
- 1 – 3/4″ plywood at 10″ x 19-7/8″ – Back
- 2 – 1×2 at 19-7/8″ – Lower Front & Back Stretchers
- 1- 3/4″ plywood at 13″ x 19-7/8″ – Lower Shelf
- 2 – 3/4″ plywood at 14-1/2″ x 19-7/8″ – Lower & Upper Drawer Shelves
- 3 – 3/4″ plywood at 4-1/4″ x 14-1/2″ – Lower & Upper Dividers
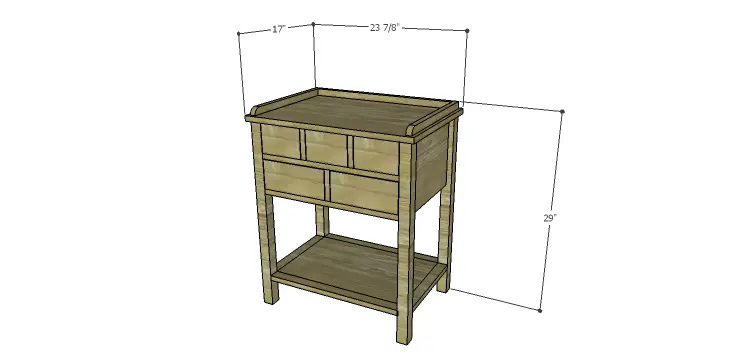
- 1 – 3/4″ plywood at 17″ x 23-7/8″ – Top
- 1 – 1×2 (ripped to 1″ wide) at 21-3/8″ – Top Back Trim
- 2 – 1×2 (ripped to 1″ wide) at 16″ – Top Side Trim
- 3 – 3/4″ plywood at 4-1/2″ x 13″ – Smaller Drawer Bottoms
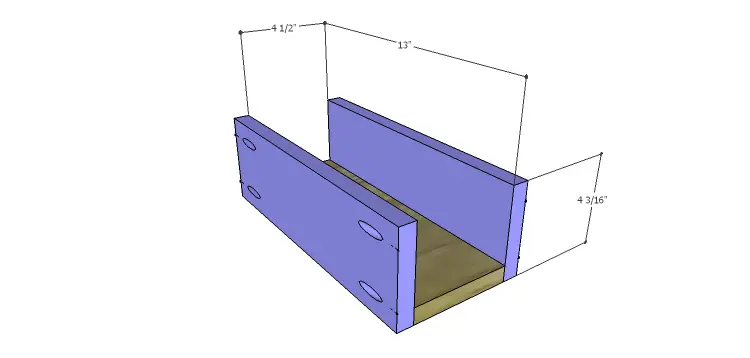
- 6 – 3/4″ plywood at 4-3/16″ x 13″ – Smaller Drawer Sides
- 6 – 3/4″ plywood at 4-3/16″ x 6″ – Smaller Drawer Front & Back
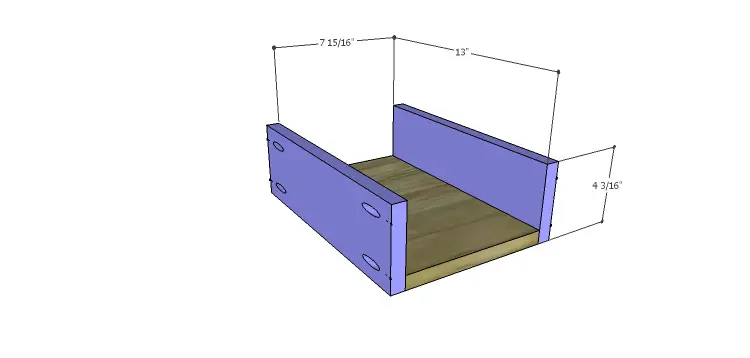
- 2 – 3/4″ plywood at 7-15/16″ x 13″ – Larger Drawer Bottoms
- 4 – 3/4″ plywood at 4-3/16″ x 13″ – Larger Drawer Sides
- 4 – 3/4″ plywood at 4-3/16″ x 9-7/16″ – Larger Drawer Front & Back
Step One
Edge banding will be applied to the exposed edges of the plywood prior to assembly.
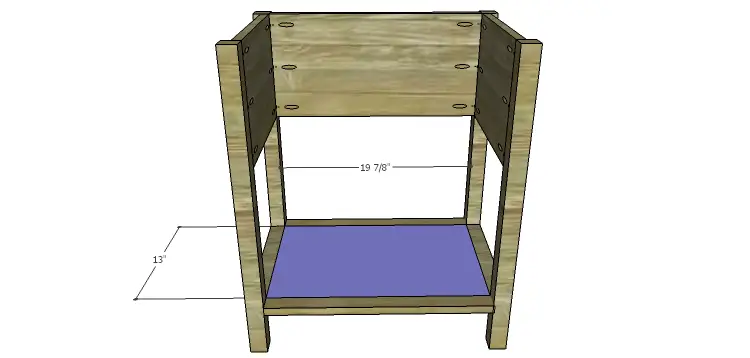
Cut the pieces for the legs, the side panels, and the lower leg stretchers. With the pocket hole jig set for 3/4″ material, drill pocket holes in each end of the stretchers as well as the side edges of the panels. Secure the side panels to the legs using glue and 1-1/4″ pocket hole screws. The back side of the panels will be flush with the inside face of the legs.
Secure the lower leg stretchers as shown orienting the pocket holes so they face down. If it is a tight fit, a close-quarter drill or a right angle drill attachment may have to be used.
Step Two
Cut the pieces for the back panel and the lower front and back stretchers. Secure the back panel to the legs using glue and 1-1/4″ pocket hole screws. The back side of the panel will be flush with the inside face of the legs.
Secure the lower leg stretchers as shown orienting the pocket holes so they face down.
Step Three
Cut the piece for the bottom shelf and drill pocket holes in all four edges. Secure the shelf to the lower stretchers using glue and 1-1/4″ pocket hole screws.
Step Four
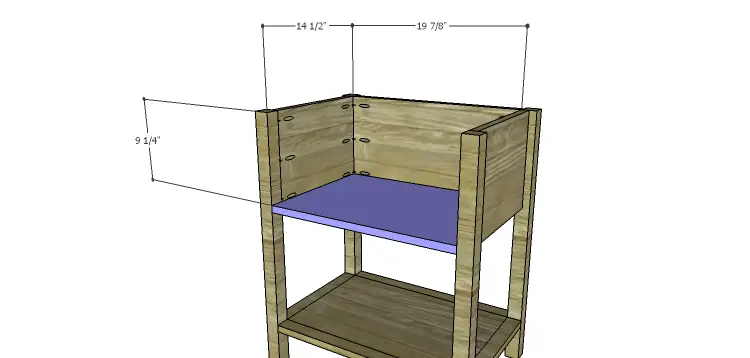
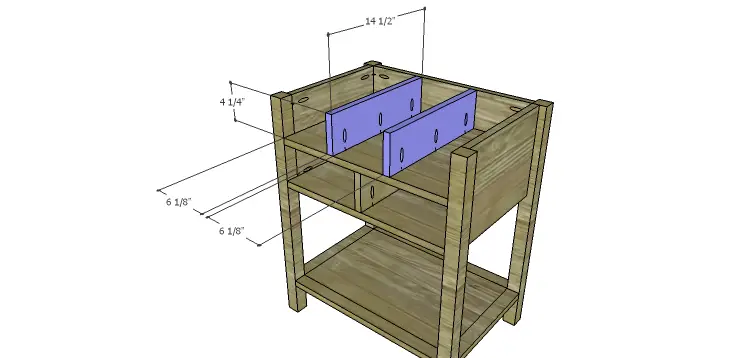
Cut the pieces for the lower and upper shelves, as well as the lower and upper dividers. Drill pocket holes in all four edges of the lower shelf only. Position the lower shelf as shown, then secure to the side panels, back panel, and legs using glue and 1-1/4″ pocket hole screws.
Drill pocket holes in the lower edge of each of the dividers. Position the first divider on the lower shelf, and secure using glue and 1-1/4″ pocket hole screws.
Step Five
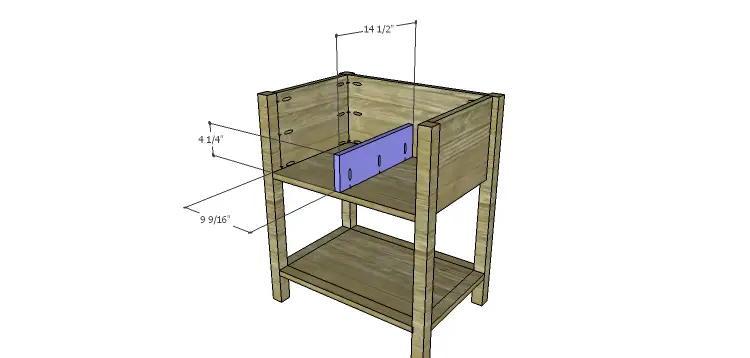
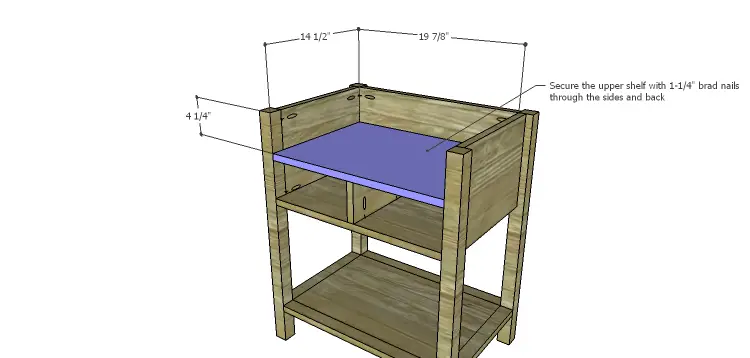
Position the upper shelf on the lower divider as shown then secure to the sides, back, and lower divider using glue and 1-1/4″ brad nails.
Position the remaining two dividers on the upper shelf securing them in place using glue and 1-1/4″ pocket hole screws.
Step Six
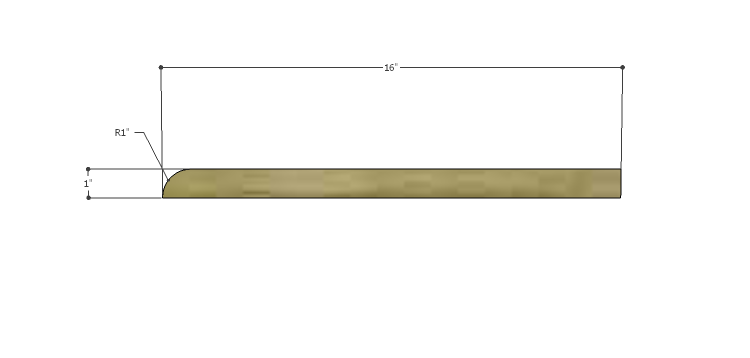
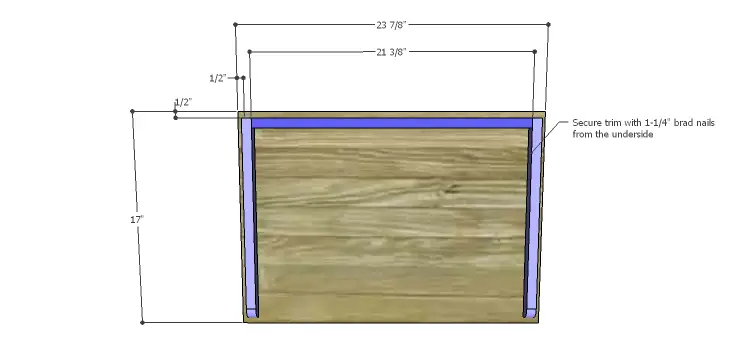
Cut the pieces for the top and the top trim. Cut the curve in the side trim pieces using a jigsaw or a bandsaw. Secure the trim pieces to the top locating the trim pieces 1/2″ from each edge using glue and 1-1/4″ brad nails through the bottom into the trim. Add a few brad nails to the side trim into the back trim.
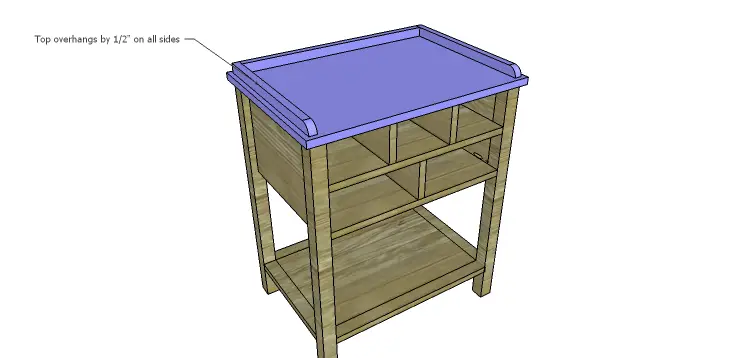
Position the top on the cabinet so that 1/2″ overlaps on all sides. Secure the top in place using glue and 1-1/4″ brad nails.
Step Seven
Cut the pieces for the smaller drawers. Drill pocket holes in all four edges of the bottom as well as each end of the sides. Assemble the drawer box as shown using glue and 1-1/4” pocket hole screws.

Step Eight
Cut the pieces for the smaller drawers. Drill pocket holes in all four edges of the bottom as well as each end of the sides. Assemble the drawer box as shown using glue and 1-1/4” pocket hole screws.
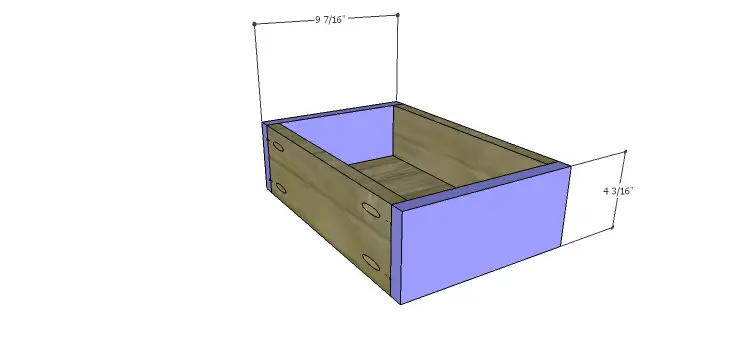
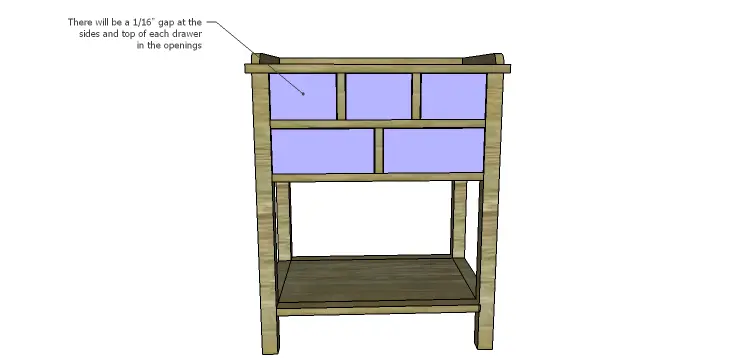
Finish as desired, and apply a coat of paste wax to the bottom of each drawer to help it slide smoothly in the opening.
Although this project may seem intimidating to build given the number of drawers, it is relatively simple and would be the perfect first project! Have any questions about the Presley 5-drawer table plans? Leave a comment below or contact me at cher {at} designsbystudioc {dot} com!
Originally posted 2014-07-11 08:00:49.

[…] table is very versatile. It could be used for an end table, nightstand or side table. Here are the step-by-step instructions to build […]