A Large Dining Table with a Simple Design
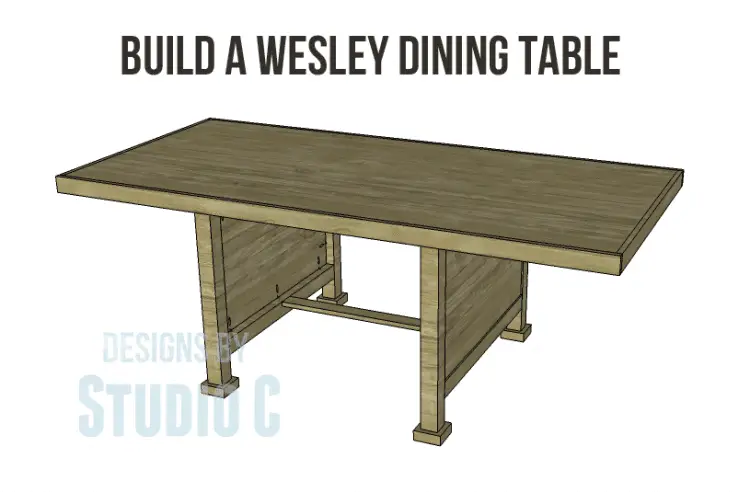
This table can easily sit several people for a fantastic meal. With it’s large, flat top constructed out of plywood with a 1×2 edge, the free plans to build a Joss & Main inspired Wesley Dining Table are suitable for any skill level and any budget! It is simple and would look great with a fabulous bench on each side!
Materials:
- 1-1/4″ pocket hole screws
- 2-1/2″ pocket hole screws (<– affiliate link)
- 1-1/4″ brad nails or 1-1/4″ screws
- 3″ screws
- Finishing Supplies
Lumber:
- 8 – 3×3 posts at 3′ or 6 – 2×4 at 8′
- 2 – 1×3 at 8′
- 3 – 1×4 at 8′
- 1 – 2×4 at 4′
- Scrap of 2×6
- 1 – 4’x8′ sheet of 3/4″ plywood
- 1 – 4’x4′ sheet of 3/4″ plywood
Cut List:
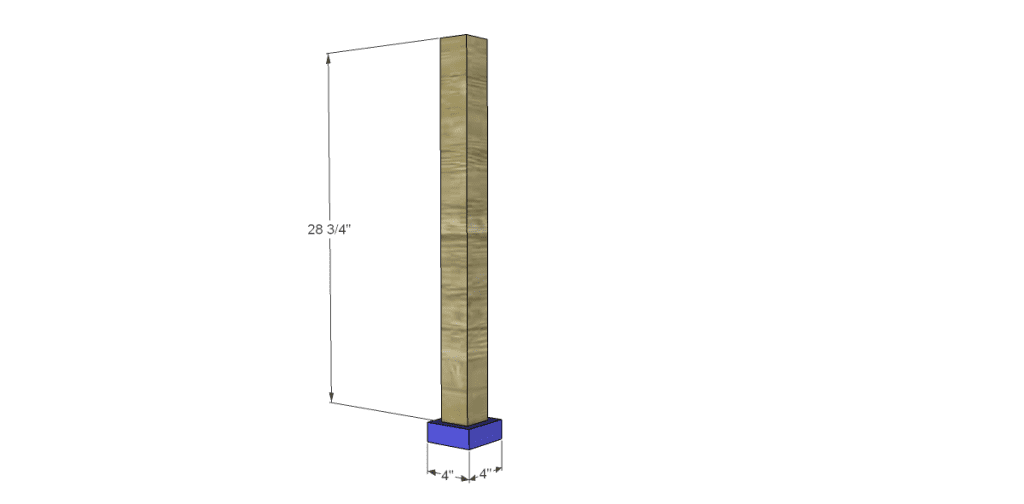
- 4 – 3×3 posts at 28-3/4″ – Legs
- 4 – 2×6 (ripped to 4″ wide) at 4″ – Feet
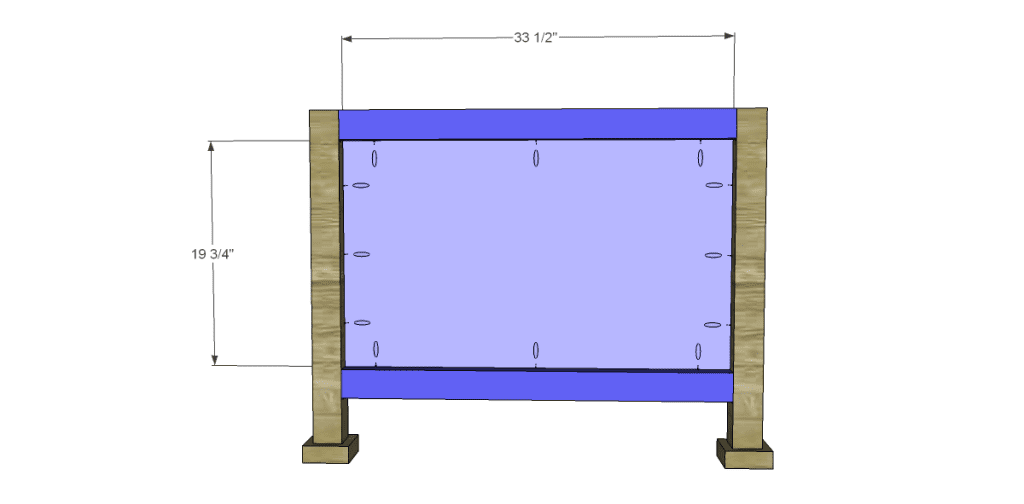
- 4 – 3×3 posts at 33-1/2″ – Leg Frames
- 2 – 3/4″ plywood at 19-3/4″ x 33-1/2″ – Leg Panels
- 1 – 2×4 at 32″ – Stretcher
- 4 – 1×3 at 38-1/2″ – Top Supports
- 1 – 3/4″ plywood at 38-1/2″ x 82-1/2″ – Top
- 2 – 1×4 at 38-1/2″ – Side Trim
- 2 – 1×4 at 84″ – Long Trim

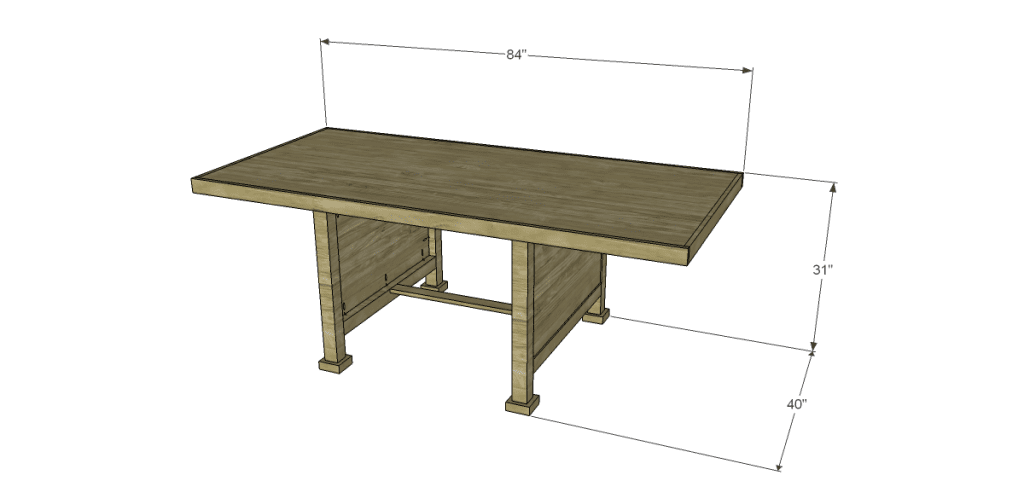
Step One
Cut the pieces for the legs. If 3×3 posts are not available (or too expensive), 2x4s glued together and ripped on the table saw can be used. Check out this easy tutorial on building DIY dining table legs using 2x4s.
Cut the pieces for the feet. Position the legs so they will be centered on the feet and secure using glue and countersunk 3″ screws.
Step Two
Cut the pieces for the leg frames and panels. Drill pocket holes in each end of the frame pieces as well as all four edges of the panels. Assemble the frame using glue and 2-1/2″ pocket hole screws. Insert the panels and secure using glue and 1-1/4″ pocket hole screws. The outside face of the panels will be flush with the outside face of the frames.
Step Three
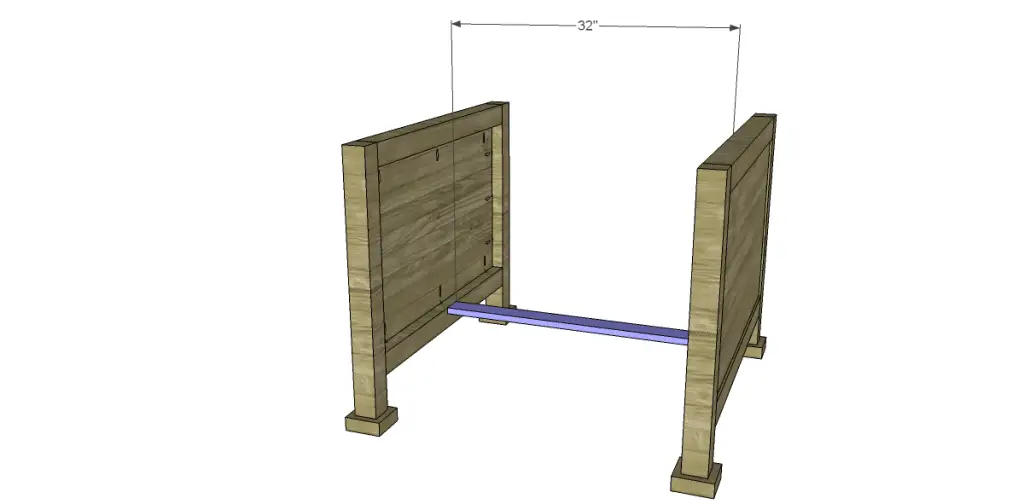
Cut the piece for the stretcher and drill pocket holes in each end. Attach to the lower frame pieces (connecting them) using glue and 2-1/2″ pocket hole screws. Orient the pocket holes so they are facing down.
Step Four
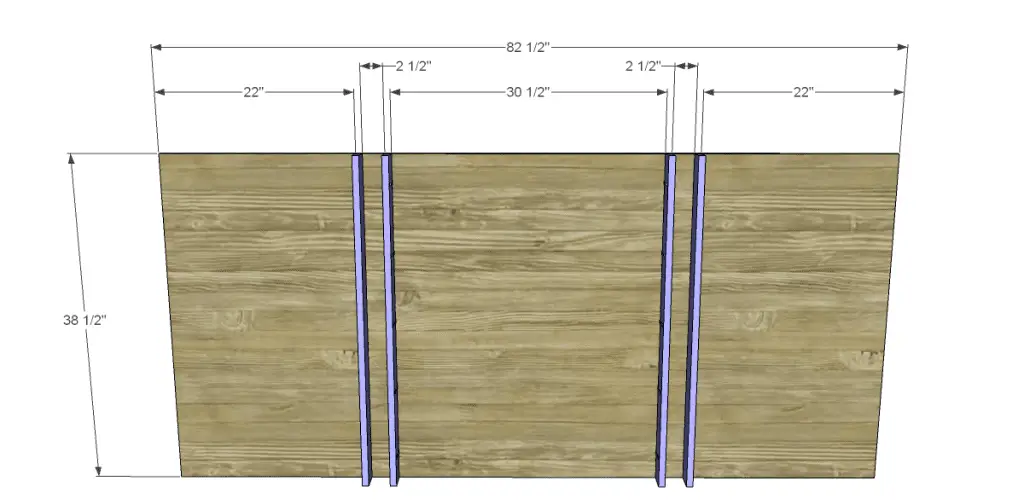
Cut the pieces for the top and the top supports. Drill pocket holes in one long edge of each support piece. Secure to the underside of the top as shown using glue and 1-1/4″ pocket hole screws. Position the table top so that the supports are on either side of the frame pieces and secure with countersunk 3″ screws through the supports into the frame.
Step Five
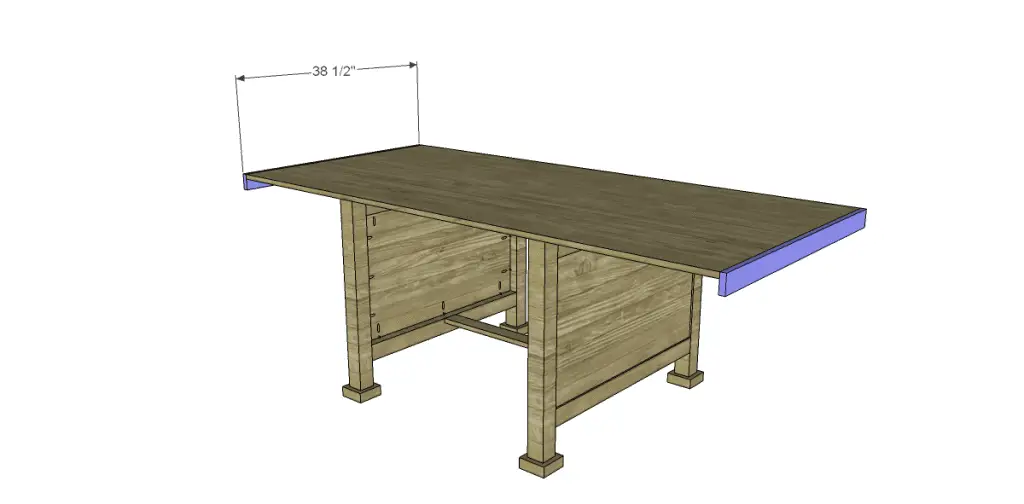
Cut the pieces for the trim. Attach the side pieces first using glue and 1-1/4″ brad nails or countersunk 1-1/4″ screws, then attach the longer pieces in the same manner. The top of the trim pieces will be flush with the top of the table.
Free Plans to Build a Joss & Main Inspired Wesley Dining Table
Finish as desired!
Have questions about the free plans to build a Joss & Main inspired Wesley Dining Table? Leave a comment below!
Originally posted 2013-02-08 08:00:12.



Comments are closed.