A Beautiful and Easy to Build Wine Cabinet
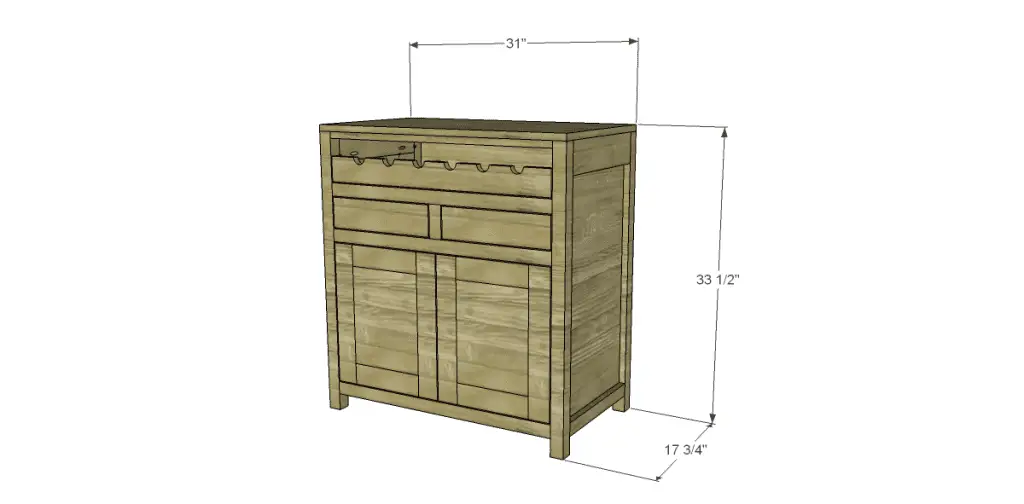
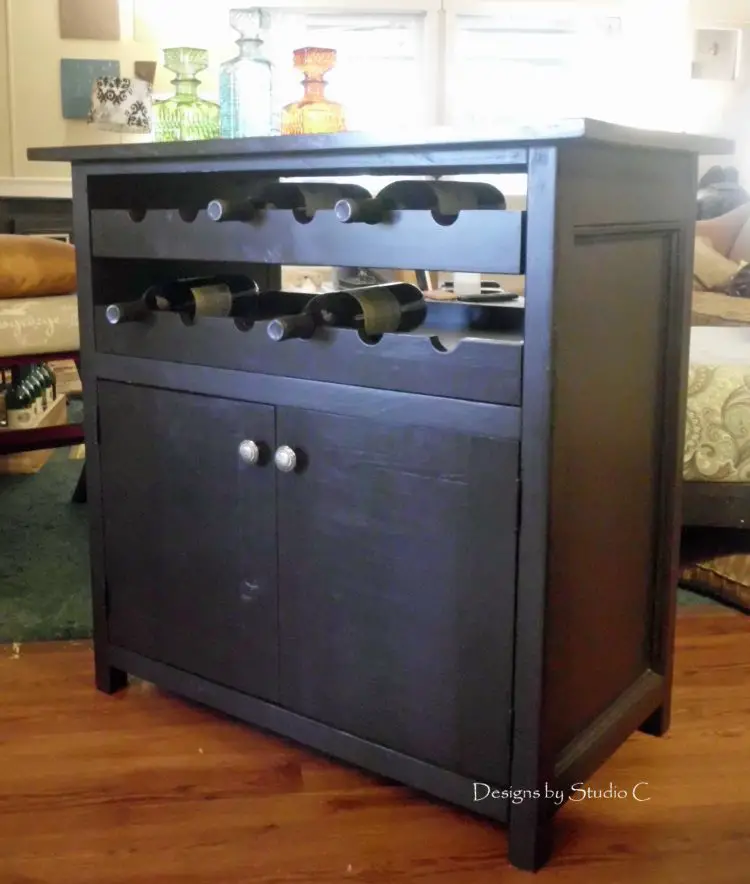
Hey there! I’m so excited to share another amazing piece with you! You’re going to love the free plans for the Adele Wine Cabinet. It’s got a special drawer just for wine, plus two smaller drawers for all your wine (or other beverage) accessories. And don’t forget the large cabinet for even more storage! It’s seriously awesome.
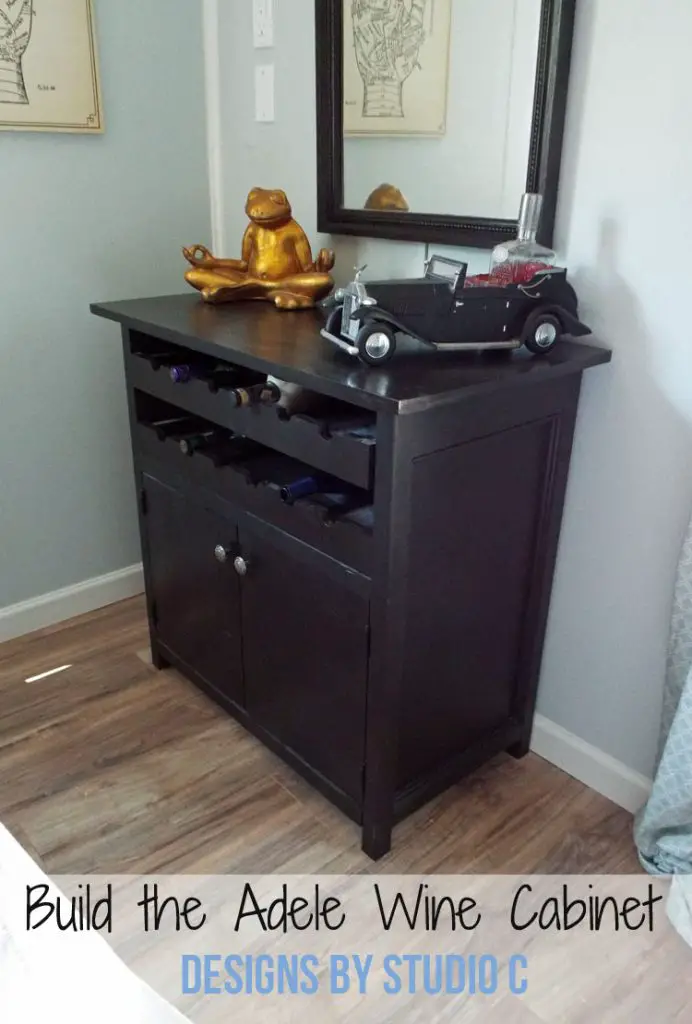
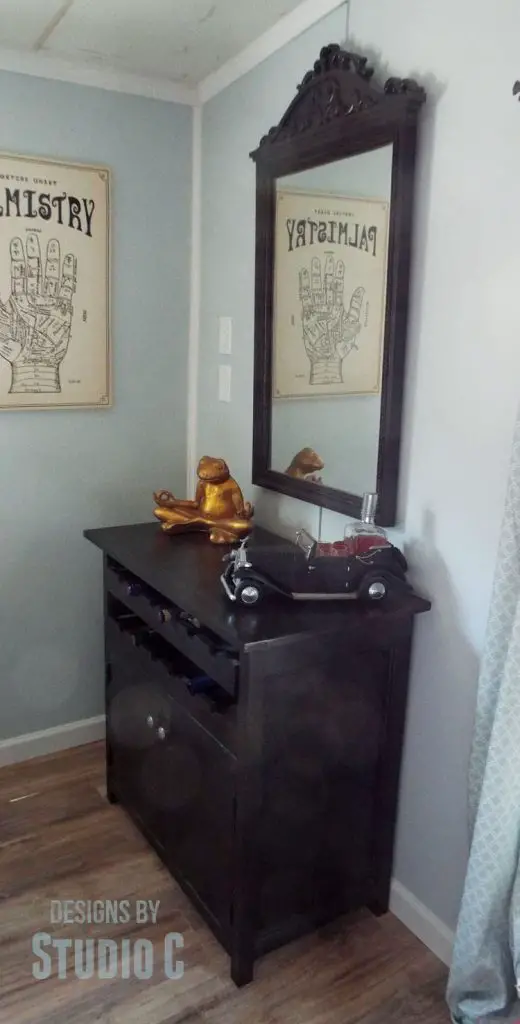
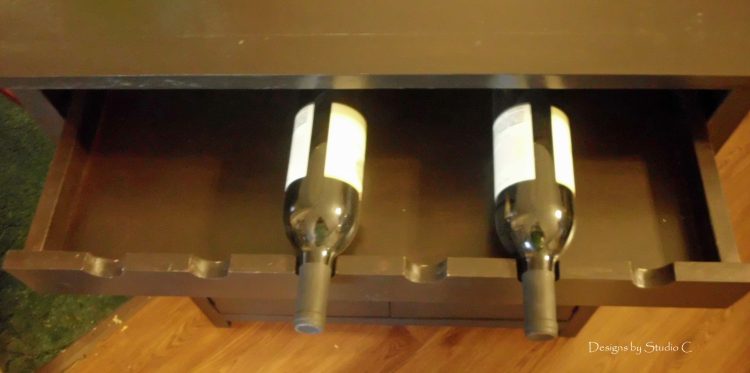
I built this cabinet for myself (out of Purebond plywood!) but made a modification – instead of one wine drawer and two smaller drawers, I omitted the smaller drawers and built two drawers for storing wine. I used Rust-Oleum’s Ultimate Wood Stain in Kona with three coats of Rust-Oleum’s Ultimate Polyurethane in Soft Touch Matte. I also made the top a little larger than outlined in these DIY wine cabinet plans.
Materials:
- 1-1/4″ pocket hole screws
- 2″ pocket hole screws
- 1-1/4″ brad nails
- Edge banding for exposed edges of plywood, optional
- Three sets of 14″ drawer slides (<– affiliate link!)
- Two sets of hinges
- Four door or drawer pulls
- Wood Glue
- Sandpaper
- Finishing Supplies
Lumber:
- 3 – 2×2 at 6′
- 3 – 1×2 at 8′
- 2 – 1×3 at 6′
- 1 – 1×4 at 6′
- 1 – 1×6 at 3′
- Half sheet of 1/4″ plywood
- One sheet of 3/4″ plywood
Cut List:
- 4 – 2×2 at 32-3/4″ – Legs
- 2 – 2×2 at 14-1/2″ – Side Frames
- 2 – 2×4 at 14-1/2″ – Side Frames
- 2 – 3/4″plywood at 14-1/2″ x 25-3/4″ – Side Panels
- 7 – 1×2 at 28″ – Stretchers & Drawer Dividers
- 1 – 1×2 at 3-3/4″ – Drawer Divider
- 2 – 3/4″ plywood at 15-1/4″ x 28″ – Shelves
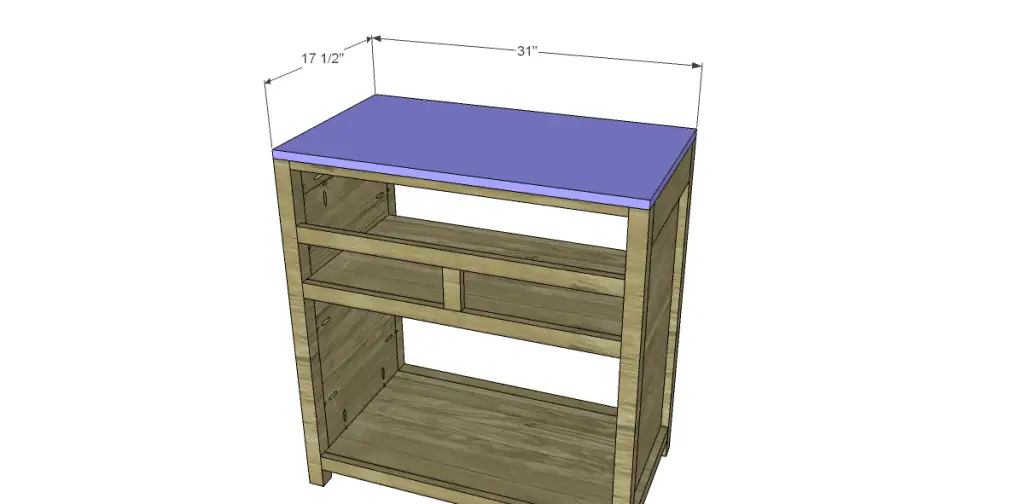
- 1 – 3/4″ plywood at 17-1/2″ x 31″ – Top
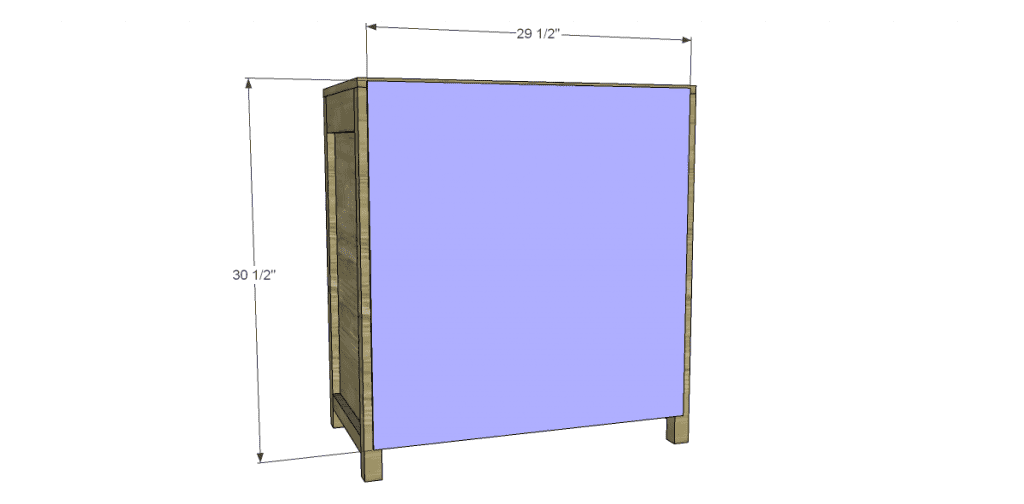
- 1 – 1/4″ plywood at 29-1/2″ x 30-1/2″ – Back
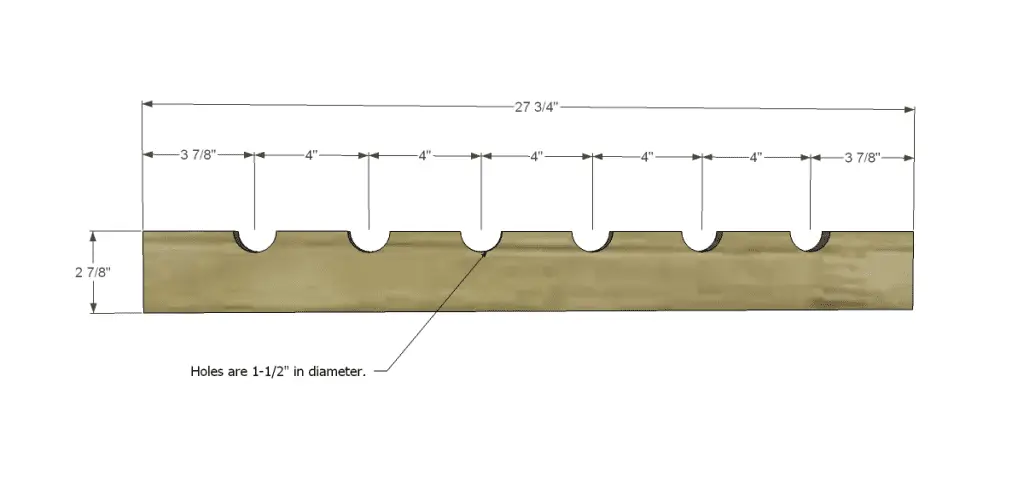
- 1 – 1×6 at 27-3/4″ – Wine Drawer Front
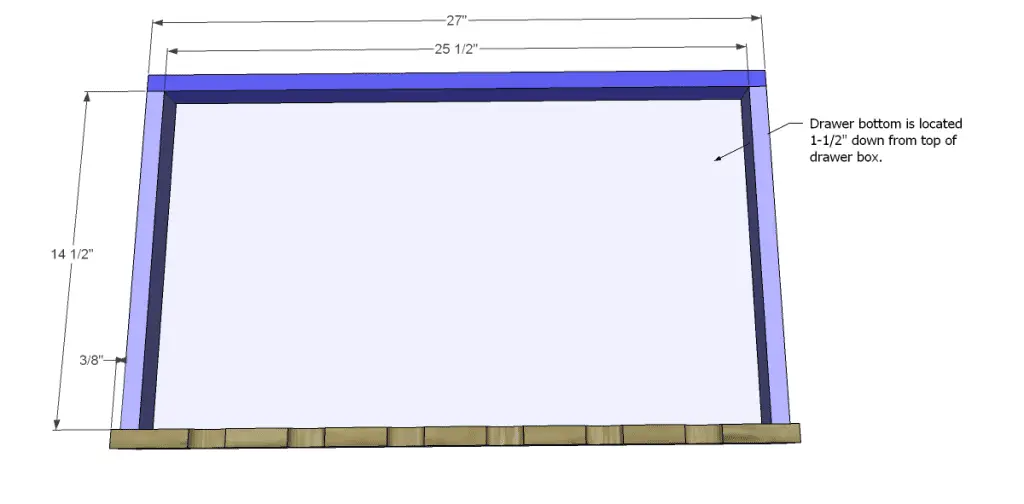
- 2 – 1×4 (ripped to 2-7/8″) at 14-1/2″ – Wine Drawer Sides
- 1 – 1×4 (ripped to 2-7/8″) at 27″ – Wine Drawer Back
- 1 – 3/4″ plywood at 14-1/2″ x 25-1/2″ – Wine Drawer Bottom
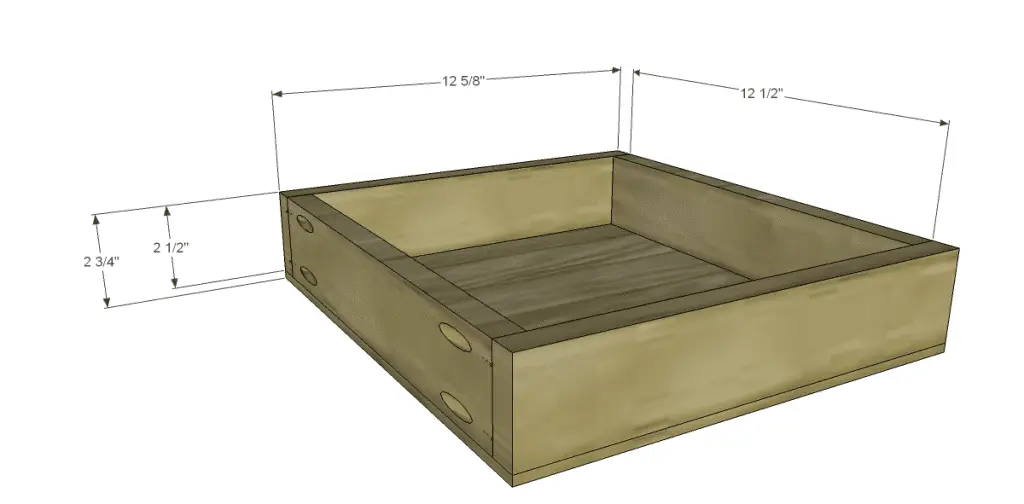
- 4 – 1×3 at 12-1/2″ – Lower Drawer Box Sides
- 4 – 1×3 at 12-5/8″ – Lower Drawer Box Front & Back
- 2 – 1/4″ plywood at 12-5/8 x 14″ – Lower Drawer Box Bottom
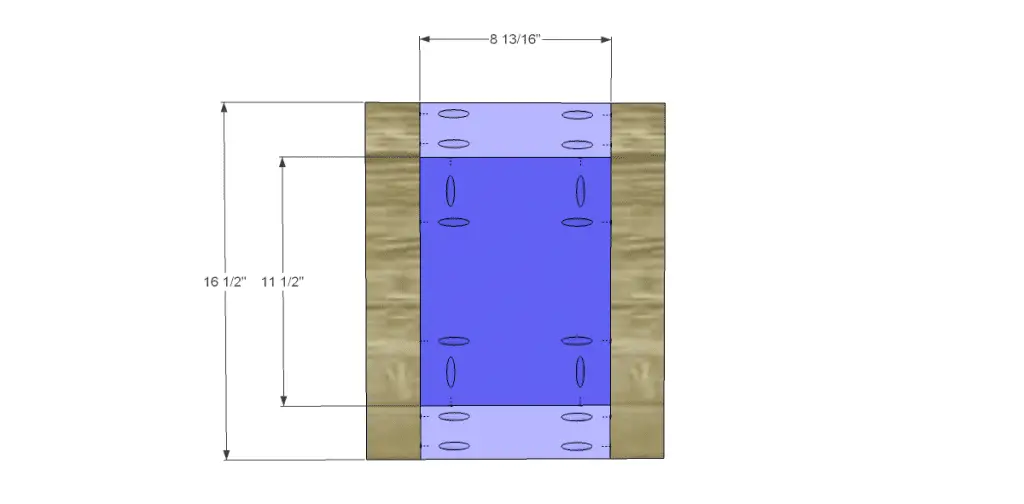
- 2 – 1×2 at 8-13/16″ – Door Frame
- 2 – 1×2 at 16-1/2″ – Door Frame
- 2 – 3/4″ plywood at 8-13/16″ x 11-1/2″ – Door Panels
Step One
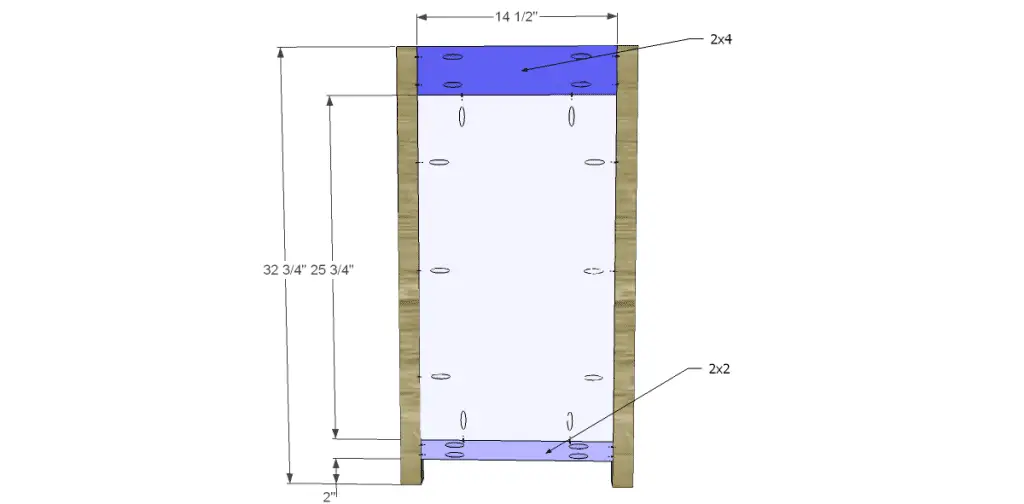
Cut the pieces for the legs, the side frames, and the side panels. Drill pocket holes in all four edges of the panels as well as each end of the frame pieces. Attach the frame pieces to the panels using glue and 1-1/4″ pocket hole screws. The back side of the panels should be flush with the back side of the frame pieces.
Attach the assembly to the legs using glue and pocket hole screws. Use 1-1/4″ through the panels into the legs, and 2″ pocket hole screws through the frame pieces into the legs.
Step Two
Cut the pieces for the stretchers and the dividers. Drill pocket holes at each end of each piece. Attach to the legs using glue and 1-1/4″ pocket hole screws. The lowest stretcher and the dividers will be positioned vertically (with the 1-1/2″ edge facing out) and the other stretchers will be positioned horizontally.
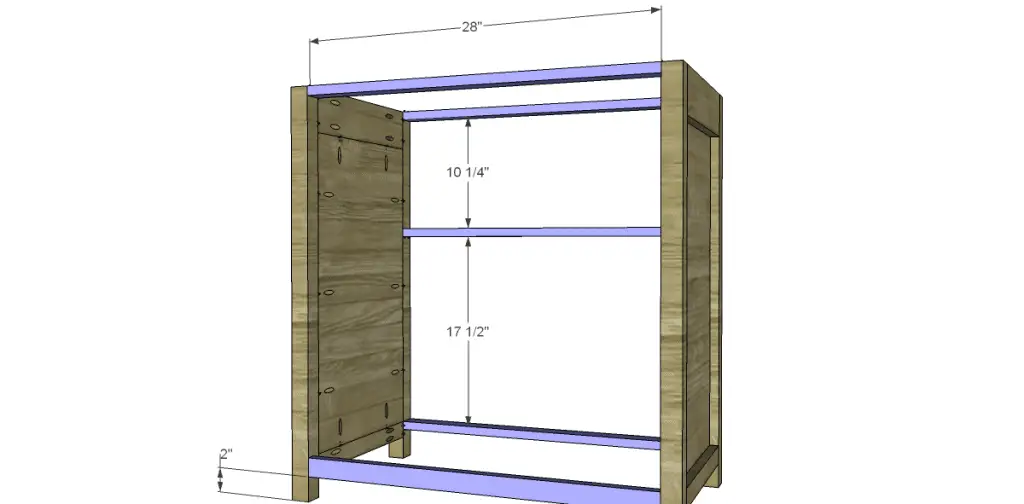
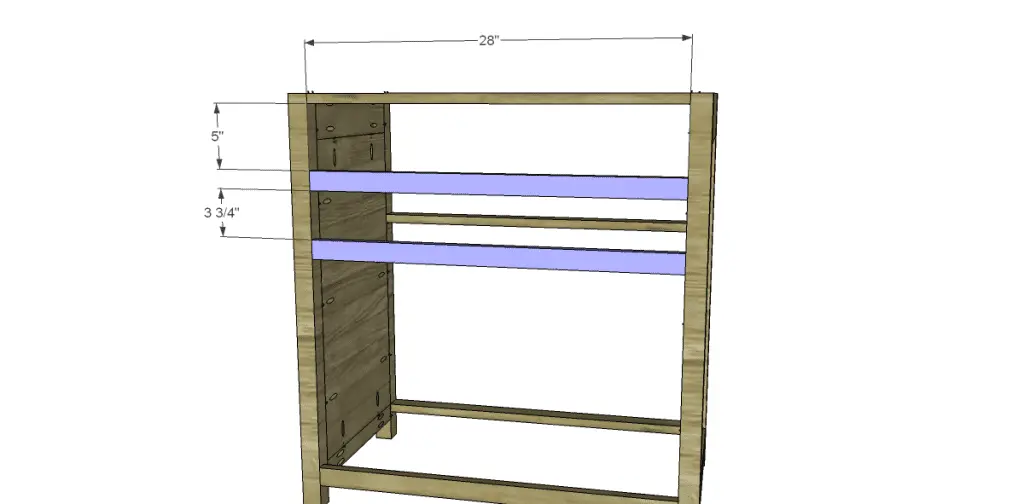
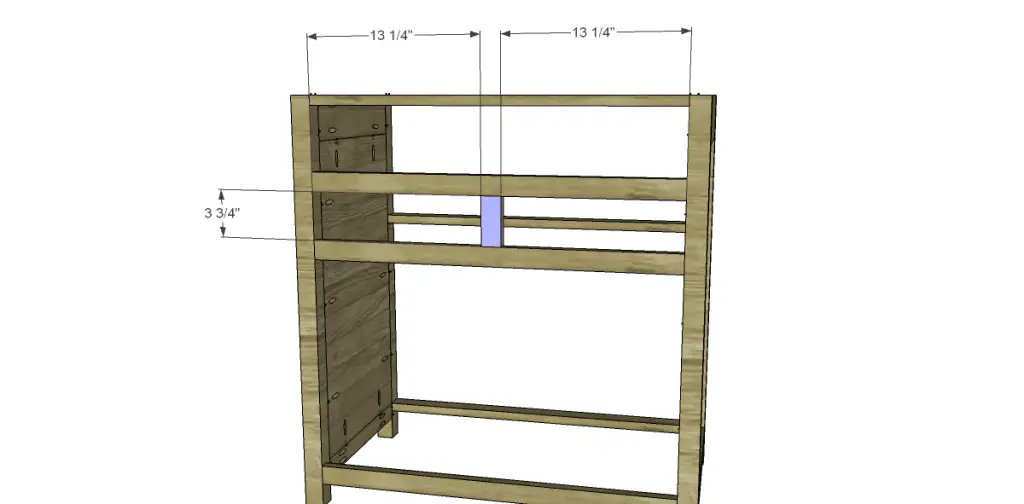
Step Three
Cut the pieces for the shelves and drill pocket holes in all four edges. Attach as shown using glue and 1-1/4″ pocket hole screws.
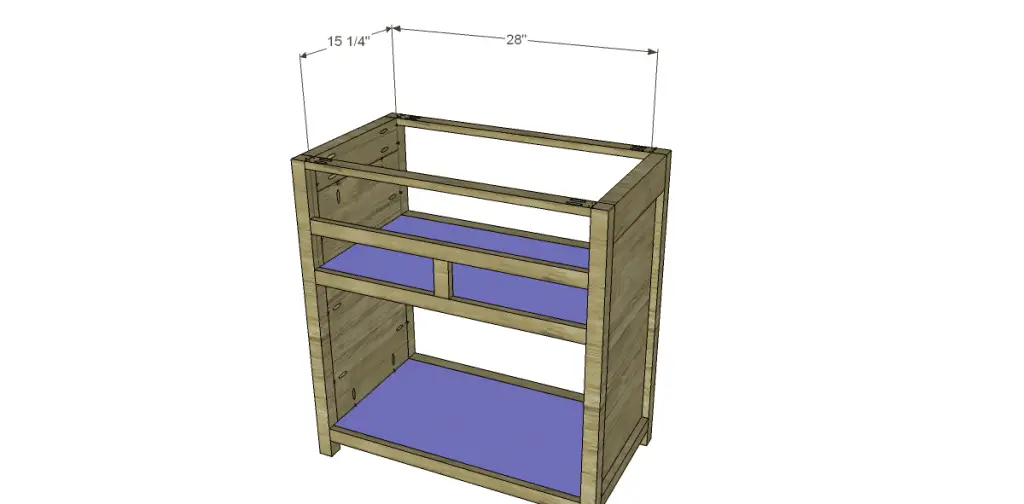
Step Four
Cut the piece for the top. Attach using glue and 1-1/4″ brad nails through the top into the legs, side frames, and stretchers.
Step Five
Cut the piece for the back. Attach using glue and 1-1/4″ brad nails.
Step Six
Cut the pieces for the drawer boxes. Starting with the wine drawer front, it will be easier to drill a complete hole and cut the piece apart rather than drill half of a hole. Draw a line 2-7/8″ from one long edge then mark the position for the centers of the circles – about 4″ on center. Cut the holes using a 1-1/2″ Forstner bit, paddle bit, or hole saw. Cut the piece apart at the line drawn 2-7/8″ from the edge.
Drill pocket holes in each end of the side pieces and assemble the box using glue and 1-1/4″ pocket hole screws. Cut the piece for the drawer bottom and drill pocket holes along all four edges. Position the drawer 1-1/2″ down from the top and secure in place using glue and 1-1/4″ pocket hole screws.
Assemble the two smaller drawers as shown using glue and 1-1/4″pocket hole screws. Attach the bottoms using glue and 1-1/4″ brad nails.
Install the drawer slides according to the manufacturer’s instructions. To make installation easy, follow this tutorial on installing drawer slides.
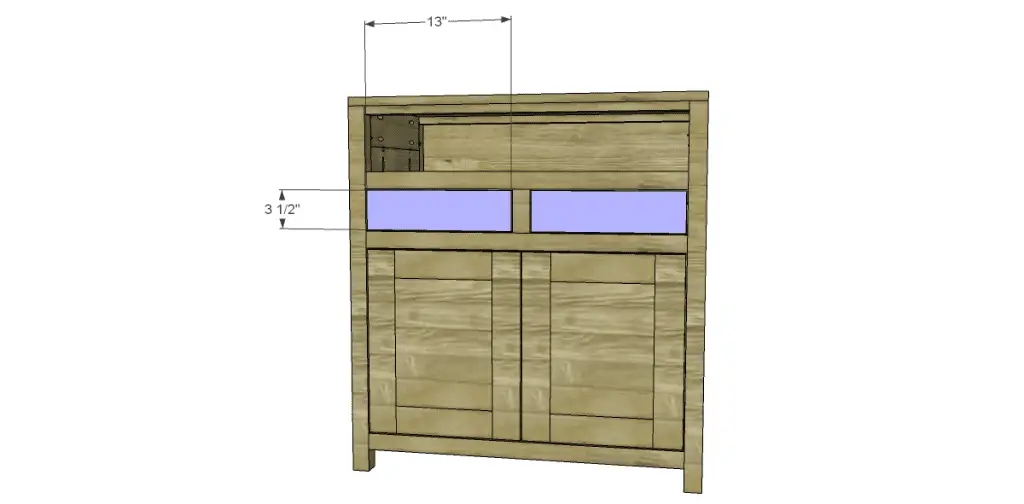
Cut the pieces for the drawer fronts. There will be a 1/8″ gap around all sides. Here’s another easy tutorial – this one is on installing drawer fronts! Install the drawer hardware.
Step Seven
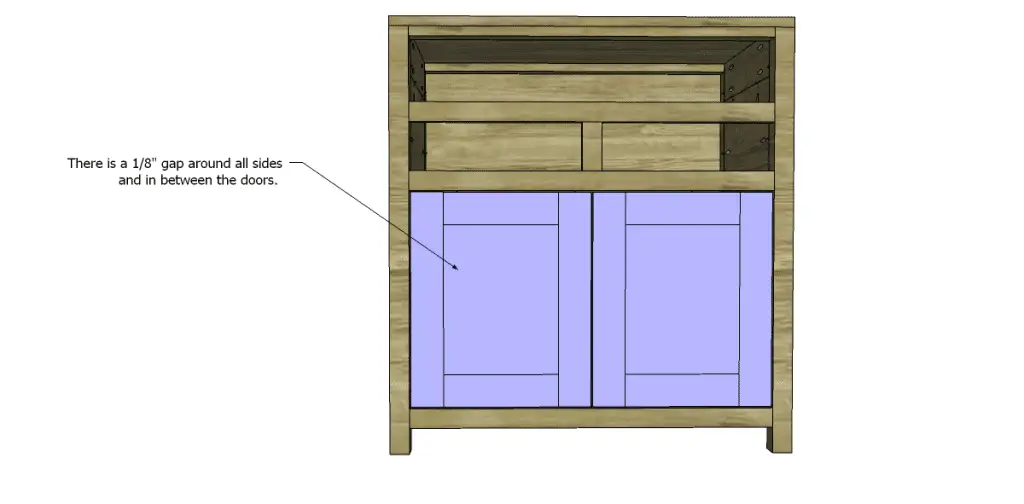
Cut the pieces for the doors. Drill pocket holes along all four edges of the panels as well as in each end of the shorter pieces of the frame. Attach the shorter frame pieces to the panels using glue and 1-1/4″ pocket hole screws, then attach the longer pieces in the same manner. There will be a 1/8″ gap around all sides as well as in between the doors. Install the hinges and the pulls according to the manufacturer’s instructions.
Finish as desired.
Have any questions about the plans to build an Adele Wine Cabinet? Leave a comment below!
Originally posted 2012-11-26 08:00:35.

Comments are closed.