Build the Sona Cabinet – Perfect for Beginners!
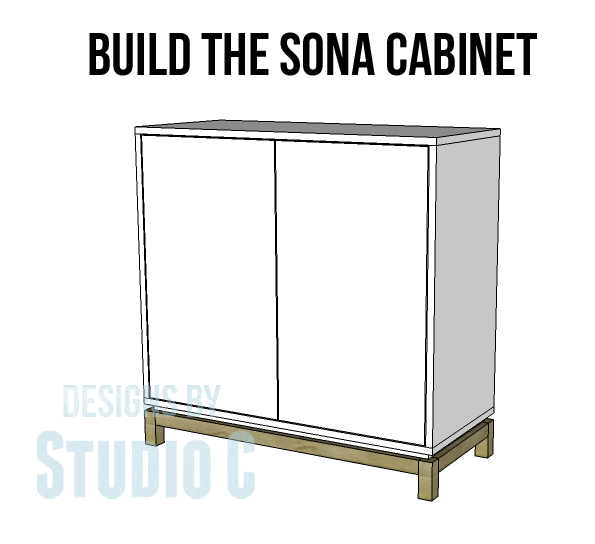
Sometimes it is the simplest plan that makes the most impact. That is how it is with the DIY Sona Cabinet Plans! So easy, yet so stunning especially since it is a virtual blank canvas and can be stenciled, stained using the GLUE RESIST technique, painted and distressed, etc. However you choose to finish it, this piece will be a gorgeous addition to your decor!
Materials:
- 1-1/4″ pocket hole screws
- 2-1/2″ pocket hole screws
- 1-1/4″ brad nails
- Edge banding, optional
- 2 sets of non-mortise hinges
- 2 – Cabinet pulls
- Wood glue
- Sandpaper (100, 150, 220 grits)
- Finishing supplies (primer & paint, or stain, sealer)
Lumber:
- 2 – 2×2 at 6′
- 1 – half sheet of 3/4″ plywood
- 1 – full sheet of 3/4″ plywood
Cut List:
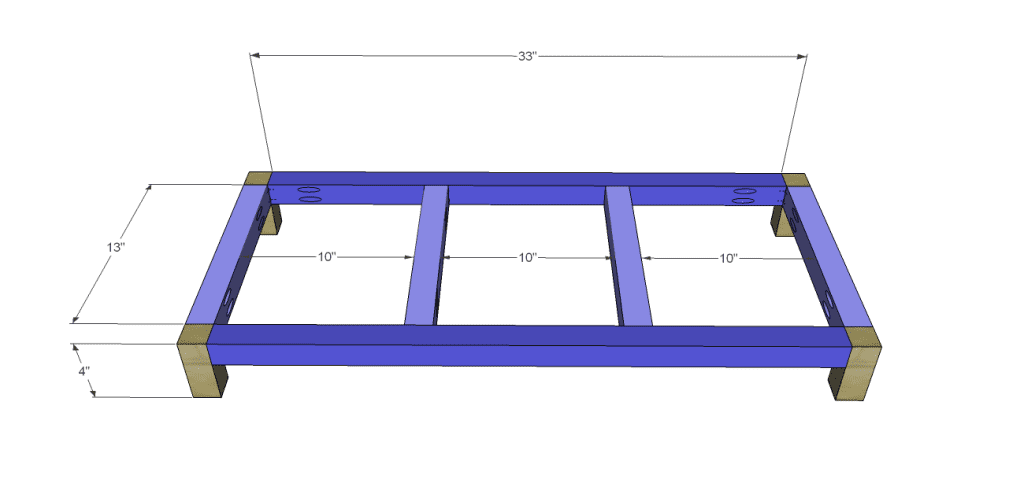
- 4 – 2×2 at 4″ – Base Legs
- 4 – 2×2 at 13″ – Base Frame
- 2 – 2×2 at 33″ – Base Frame
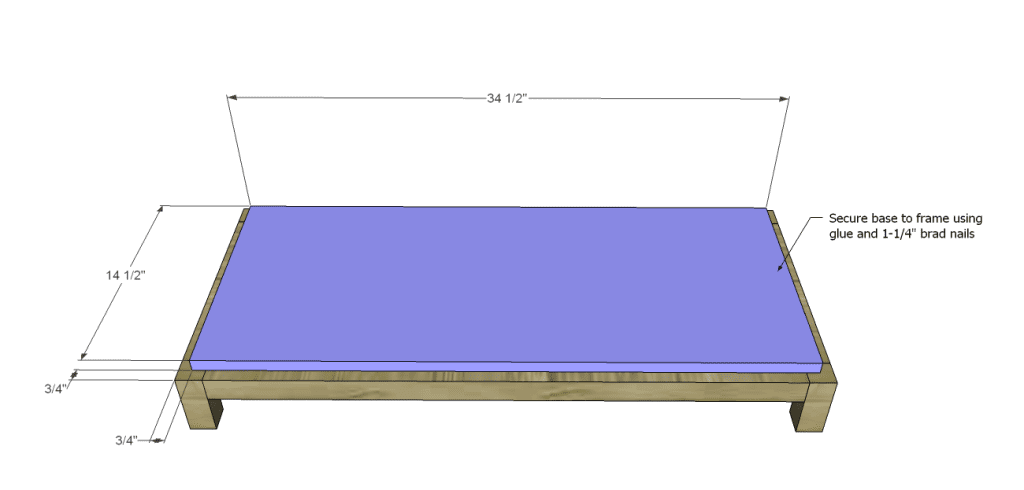
- 1 – 3/4″ plywood at 14-1/2″ x 34-1/2″ – Base
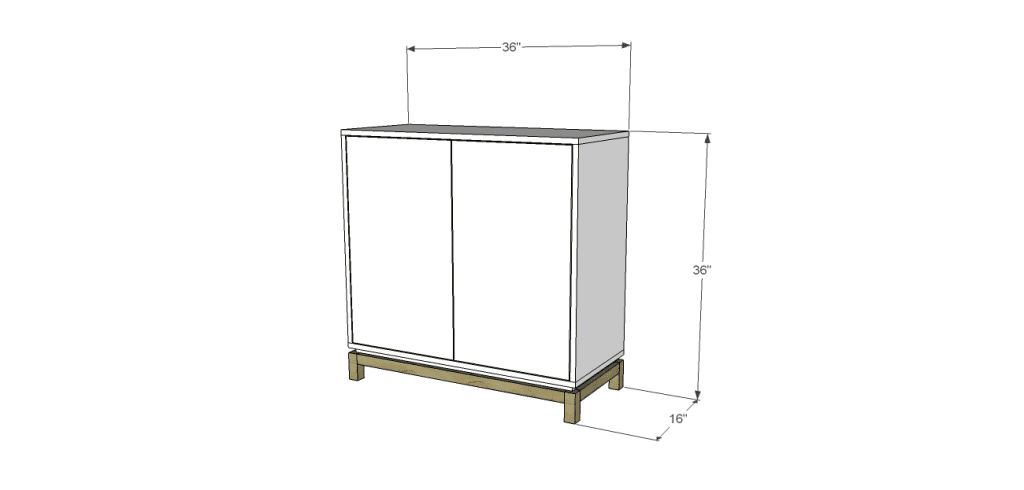
- 2 – 3/4″ plywood at 16″ x 36″ – Bottom & Top
- 2 – 3/4″ plywood at 16″ x 29-3/4″ – Sides
- 1 – 3/4″ plywood at 29-3/4″ x 34-1/2″ – Back
- 1 – 3/4″ plywood at 14-1/4″ x 34-1/2″ – Shelf
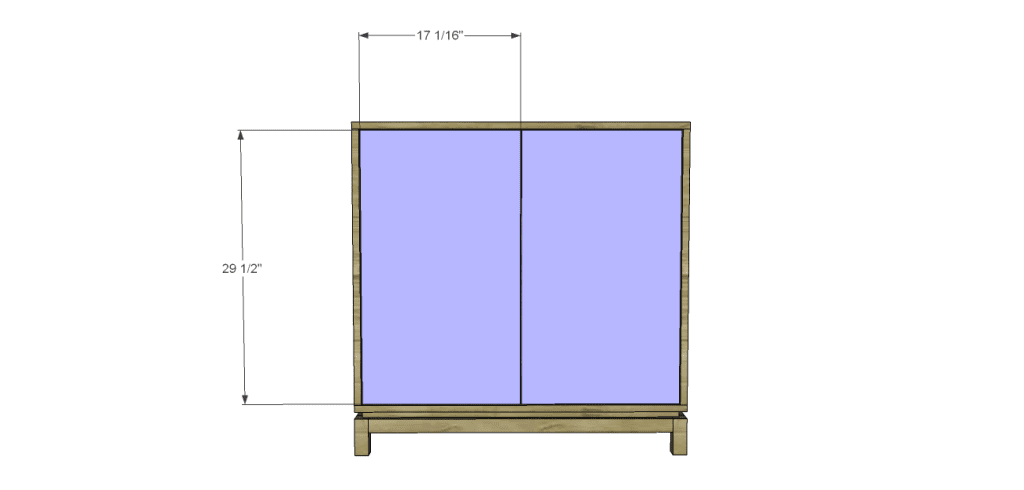
- 2 – 3/4″ plywood at 17-1/16″ x 29-1/2″ – Doors
Notes About the Project:
Edge banding will be applied to the exposed edges of the plywood prior to assembly.
Step One
Cut the pieces for the legs and base frame. With the pocket hole jig set for 1-1/2″ material, drill pocket holes in each end of the shorter base frame pieces. Assemble the frame as shown using glue and 2-1/2″ pocket hole screws.
Step Two
Cut the pieces for the base and the bottom. Position the base on the frame with a 3/4″ border at all sides. Secure to the base using glue and 1-1/4″ brad nails.
Position the bottom on top of the base with the edges of the bottom lining up with the sides of the base. Secure to the base using glue and 1-1/4″ brad nails.
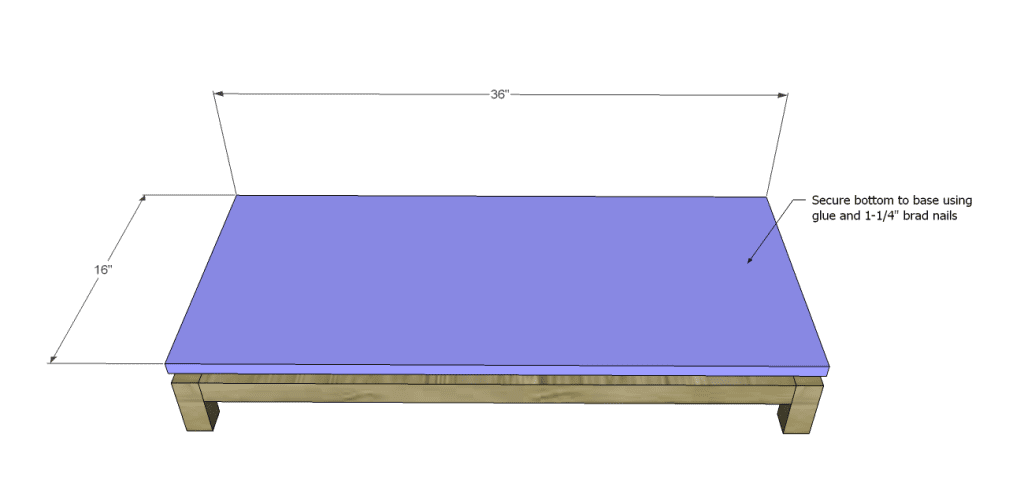
Step Three
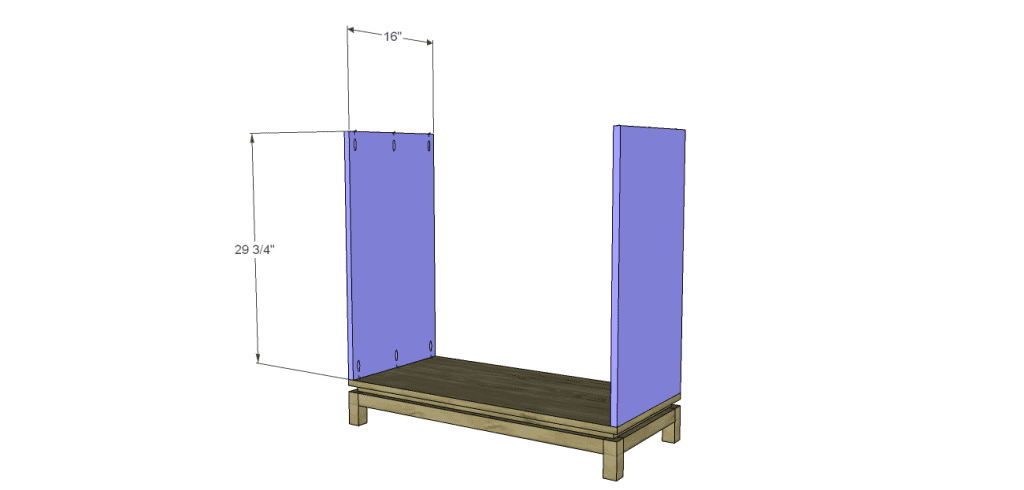
Cut the pieces for the sides. Set the pocket hole jig for 3/4″ material and drill pocket holes in the top and bottom edges. Position the sides as shown, then secure using glue and 1-1/4″ pocket hole screws.
Step Four
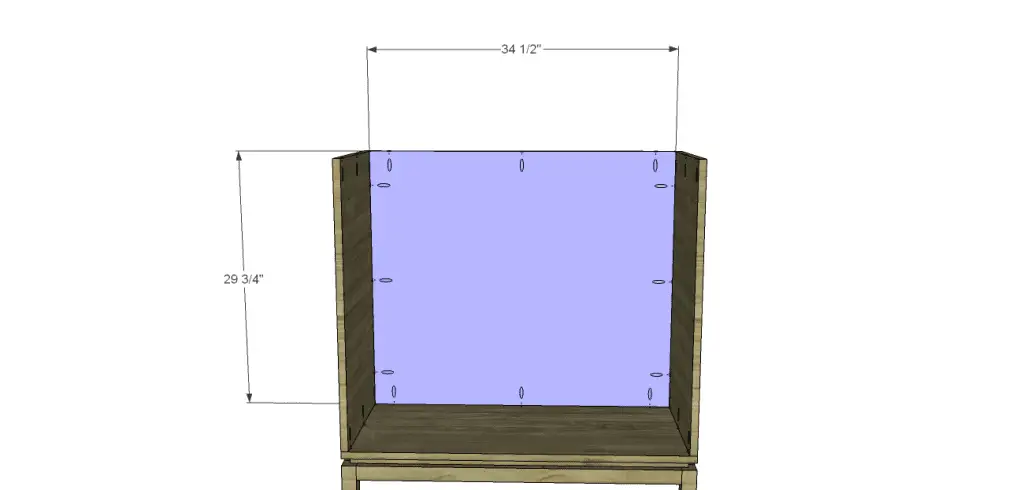
Cut the piece for the back and drill pocket holes in all four edges. Secure to the sides and bottom using glue and 1-1/4″ pocket hole screws.
Step Five
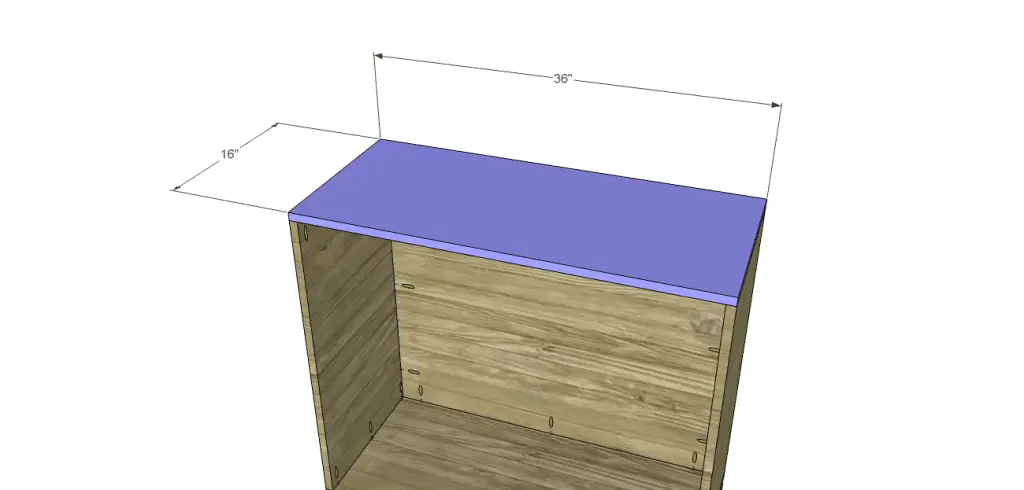
Cut the piece for the top. Secure to the sides and back using glue and 1-1/4″ pocket hole screws.
Step Six
Cut the piece for the shelf and drill pocket holes in the sides as well as the back edge. Position in the cabinet as shown then secure using glue and 1-1/4″ pocket hole screws.
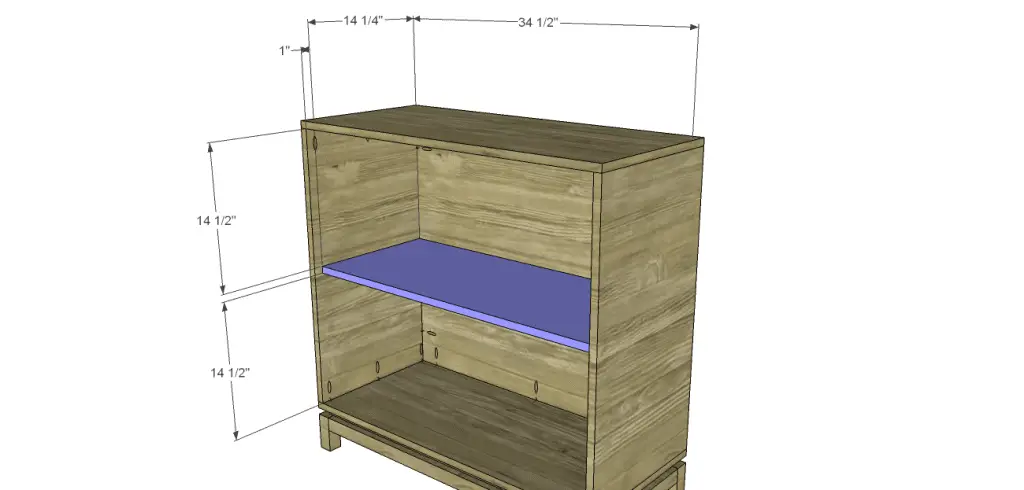
Step Seven
Cut the pieces for the doors. There will be a 1/8″ gap around all sides as well as in between. Install the hinges on the doors, then install the doors in the cabinet. Install the cabinet pulls.
Finish as desired.
The DIY Sona cabinet plans are very easy and inexpensive which makes it perfect for beginners! Need help? Let me know at cher {at} designsbystudioc {dot} com!
Originally posted 2013-12-18 08:00:55.



5 Comments
I am itching to make this on my own… haha.. somebody stop me before I take matters in my own hands lol. Great DIY Cher 🙂
You can do it, Vinma, I swear! It will be awesome!
I am not very handy, but this sounds very doable! Perhaps this will be my new project over the new year!
If you ever want to try, let me know! I can walk you through it!