A Rustic Sideboard with a Modern Twist
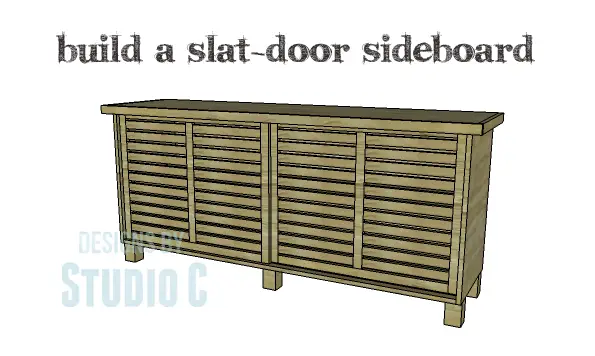
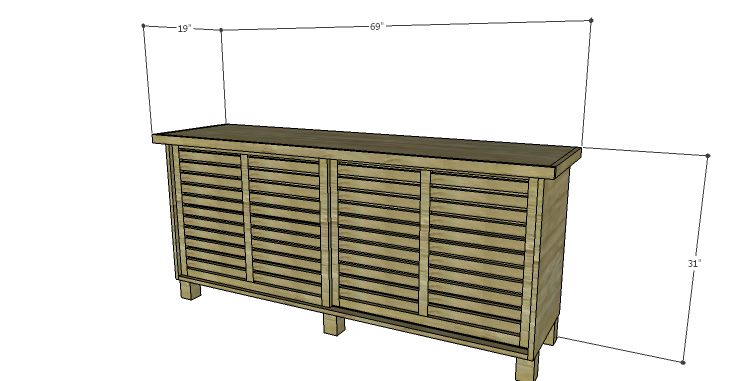
Wow, this sideboard is absolutely amazing! I am in love with the slatted bypass doors – they are so cool! If you’re looking for a piece that’s perfect for entertaining, the DIY plans to build a Slat-Door sideboard are just what you need. It has a spacious, continuous shelf inside that’s perfect for storing all your party essentials. Plus, it’s super easy to build and can be done in just one weekend!
Materials:
- 1-1/4″ pocket hole screws (<– affiliate link!)
- 1-1/4″ brad nails
- 1-1/4″ screws
- 2-1/2″ screws
- Edge banding, optional
- Sliding door hardware like this
- Wood glue
- Sandpaper (100, 150, 220 grits)
- Finishing supplies (primer & paint, or stain, sealer)
Lumber:
- 12 – 1×2 at 8′
- 1 – 1×3 at 6′
- 1 – 3×3 post at 4′
- 1 – 4′ x 8′ sheet of 1/4″ plywood
- 2 – 4′ x 8′ sheets of 3/4″ plywood
Cut List:
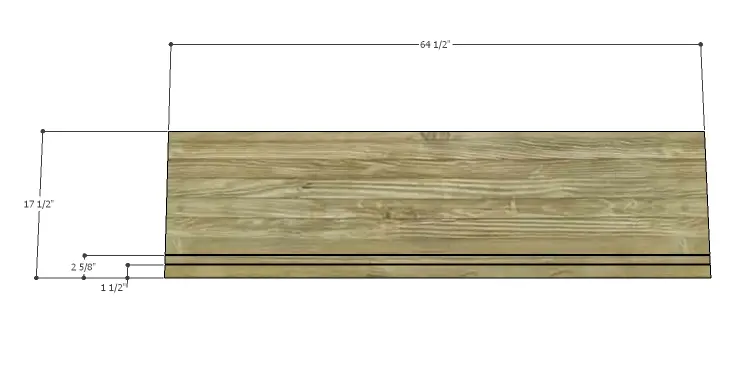
- 1 – 3/4″ plywood at 17-1/2″ x 64-1/2″ – Bottom
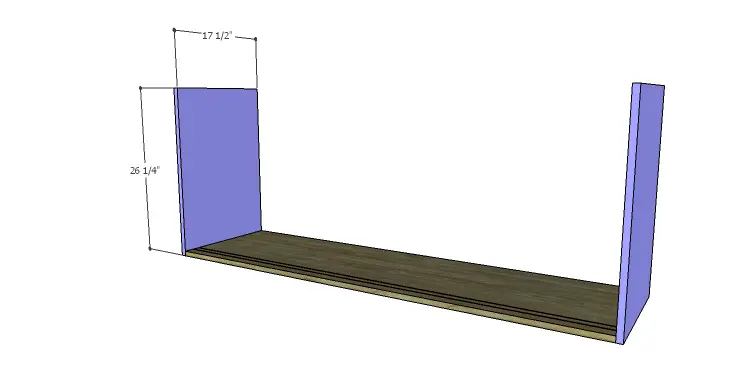
- 2 – 3/4″ plywood at 17-1/2″ x 26-1/4″ – Sides
- 4 – 3×3 posts at 4″ – Feet
- 1 – 1×3 at 64-1/2″ – Back Stretcher
- 2 – 1×2 at 64-1/2″ – Shelf Frame
- 3 – 1×2 at 12″ – Shelf Frame
- 1 – 3/4″ plywood at 13-3/4″ x 64-1/2″ – Shelf
- 4 – 1×2 at 25-1/4″ – Door Frame
- 4 – 1×2 at 29-3/8″ – Door Frame
- 2 – 1×2 at 22-1/4″ – Door Frame
- 44 – 1×2 at 13-15/16″ – Door Frame
- 1 – 3/4″ plywood at 18-1/4″ x 67-1/2″ – Top Panel
- 2 – 1×2 at 18-1/4″ – Top Side Trim
- 1 – 1×2 at 69″ – Top Front Trim
- 1 – 1/4″ plywood at 26-1/4″ x 65-1/4″ – Back
Step One
Edge banding will be applied to the exposed edges of the plywood prior to assembly.
Cut the piece for the bottom panel. Use a router and a 1/8″ straight bit to cut two dadoes along one long edge of one face of the panel. The first dado will be located 1-1/2″ back from the edge and the second dado will be located 1″ back from the first dado. With a pocket hole jig set for 3/4″ material, drill pocket holes along the back side edges of the bottom.
Step Two
Cut the pieces for the sides. Secure the sides to the bottom using glue and 1-1/4″ pocket hole screws. The pocket holes in the bottom will face down.
Step Three
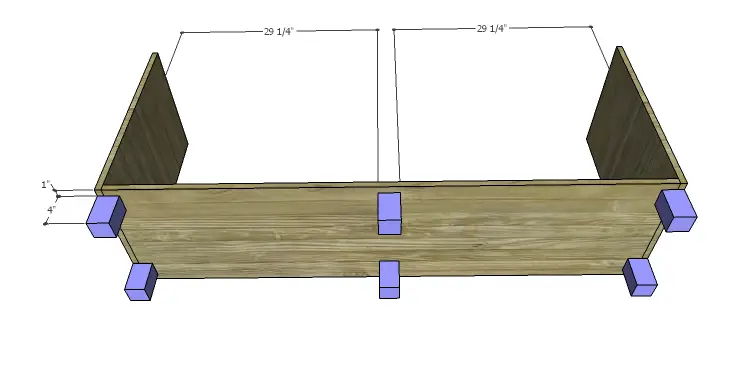
Cut the pieces for the feet. Position the feet as shown in the drawing and secure in place using glue and countersunk 2-1/2″ screws. For best results, use four screws per foot, if possible!
Step Four
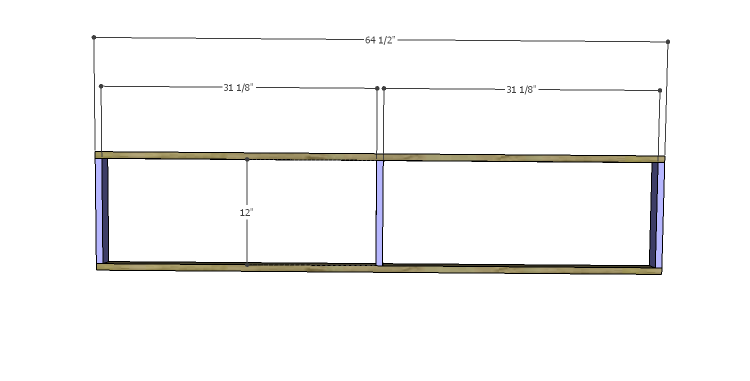
Cut the pieces for the shelf frame and drill pocket holes in each end of the shorter pieces. Assemble the frame as shown using glue and 1-1/4″ pocket hole screws.
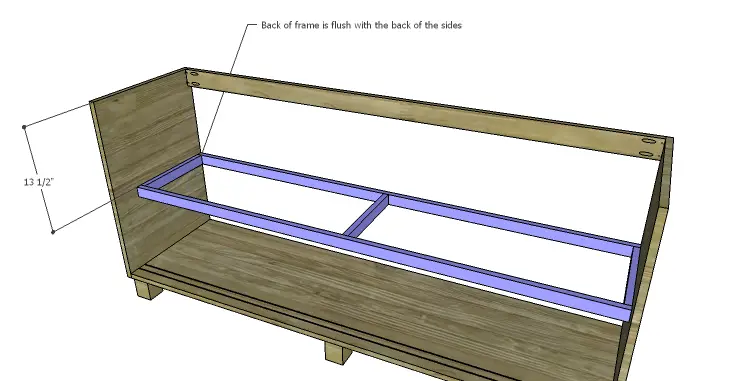
Position the frame in the cabinet as shown – the back of the frame will be flush with the back edge of the sides, securing in place using glue and 1-1/4″ countersunk screws.
Step Five
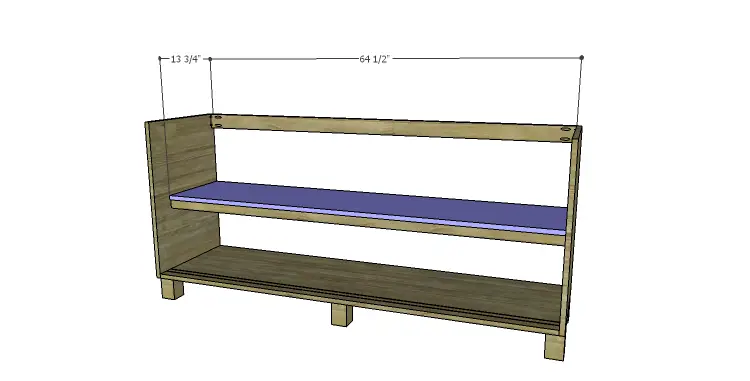
Cut the piece for the shelf. The front edge of the shelf will extend past the frame by 1/4″ while the back edge is flush with the frame. Secure in place using glue and 1-1/4″ brad nails.
Step Six
Cut the pieces for the doors. Drill pocket holes in the pieces indicated in the drawing. Assemble the doors as shown using glue and 1-1/4″ pocket hole screws. Install the sliding door hardware according to the manufacturer’s installation instructions.

Step Seven
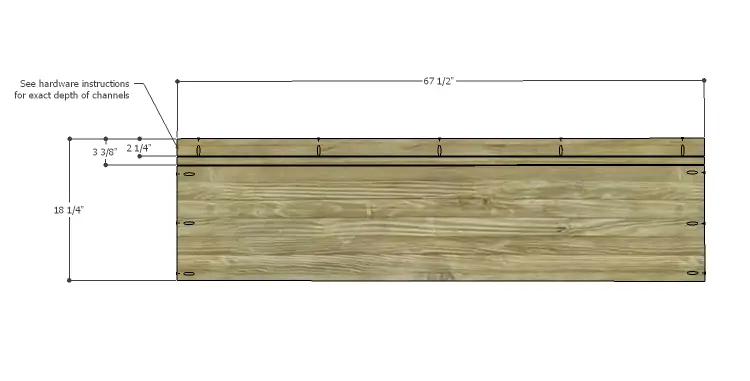
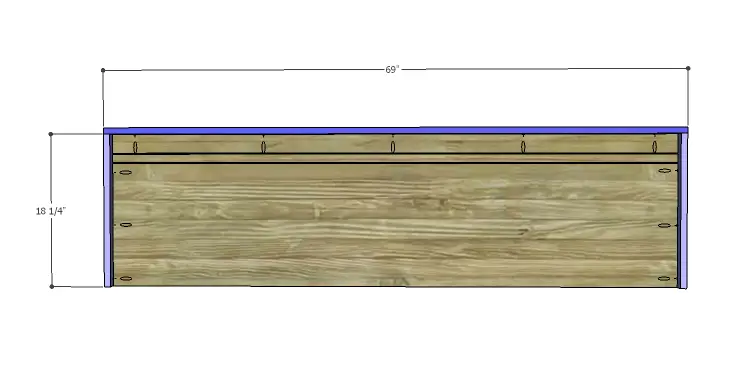
Cut the pieces for the top panel and the top trim. Use a router and a 1/8″ straight bit to cut two dadoes along one long edge of one face of the top panel. The first dado will be located 1-1/2″ back from the edge and the second dado will be located 1″ back from the first dado. Drill pocket holes as shown to attach the trim.
Attach the side trim using glue and 1-1/4″ pocket hole screws, then install the front trim piece. Add a few brad nails through the front trim piece into the ends of the side pieces.
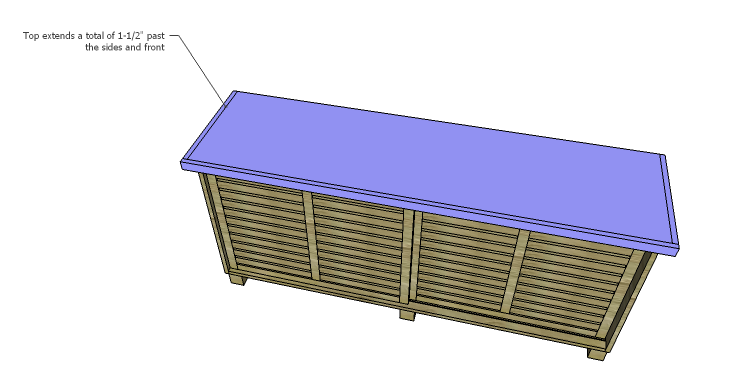
The top will extend past the sides and front by 1-1/2″ including the trim. Insert the doors into the channels on the bottom, then insert the hardware into the channels at the underside of the top. Once the top is correctly positioned and any necessary adjustments have been made to the doors, secure the top to the sides and stretcher using glue and 1-1/4″ brad nails.
Finish as desired.
When constructing the sideboard, it may be easier to sand each piece before assembly. It will also be easier to finish the doors, top, and cabinet separately, then install the doors and the top.
The sideboard would also make a great media stand! Have any questions about the DIY plans to build a Slat-Door Sideboard? Leave a comment below or contact me at cher {at} designsbystudioc {dot} com!



Comments are closed.