A Simple to Build Queen Platform Bed
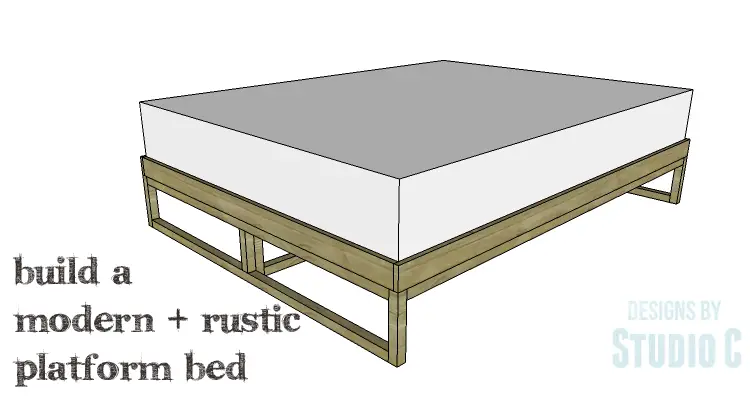
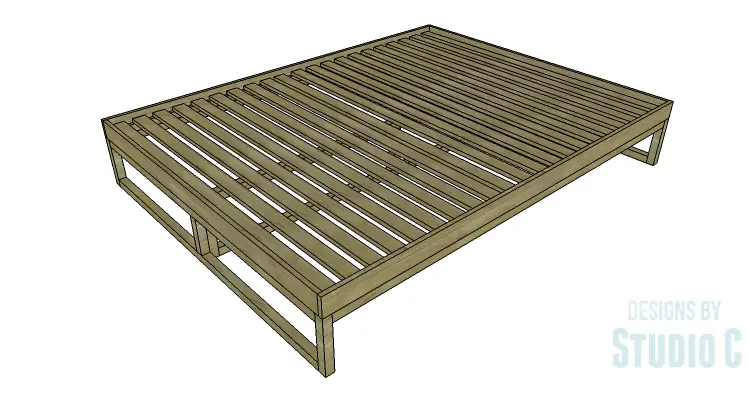
Looking for the easiest diy platform bed to build? The plans to build a modern rustic platform bed fit that bill perfectly! The bed uses straight off-the-shelf lumber, is super -sturdy, and really easy to build. These free platform bed plans are perfect for those new to woodworking and will make an excellent first project!
Materials:
- 1-1/2″ pocket hole screws
- 2-1/2″ pocket hole screws
- 1-1/4″ screws (<– affiliate link!)
- 2-1/2″ screws
- Wood glue
- Sandpaper (100, 150, 220 grits)
- Finishing supplies (primer & paint, or stain, sealer)
Lumber:
- 2 – 1×2 at 6′
- 2 – 1×2 at 8′
- 21 – 1×3 at 6′
- 2 – 1×4 at 6′
- 2 – 1×4 at 8′
- 5 – 2×2 at 6′
- 5 – 2×2 at 8′
Cut List:
- 4 – 2×2 at 62″ – Base Leg Framing
- 4 – 2×2 at 10″ – Base Leg Framing
- 2 – 2×2 at 7″ – Base Leg Framing
- 2 – 2×2 at 82″ – Base Framing Rails
- 2 – 1×4 at 85″ – Rails
- 2 – 1×4 at 63-1/2″ – Rails
- 2 – 1×2 at 83-1/2″ – Bed Slat Framing
- 2 – 1×2 at 62″ – Bed Slat Framing
- 2 – 2×2 at 79″ – Center Support Framing
- 2 – 2×2 at 11-1/2″ – Center Support Framing
- 1 – 2×2 at 8-1/2″ – Center Support Framing
- 21 – 1×3 at 63-1/2″ – Slats
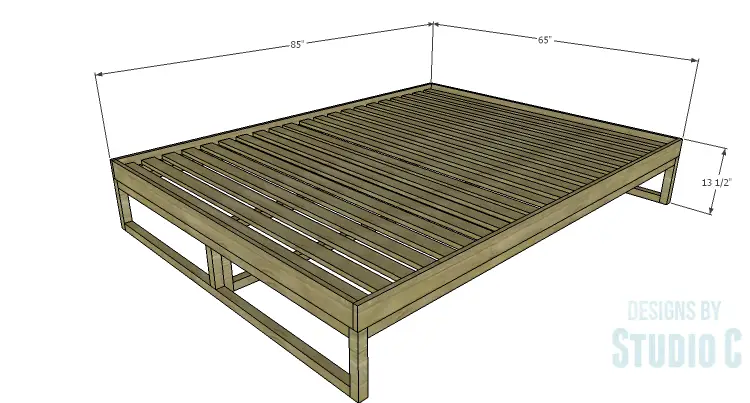
Click on the drawings for a larger view!
Step One
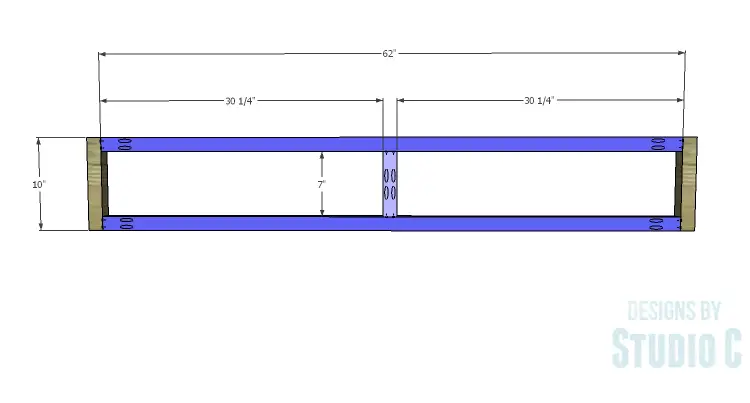
Cut the pieces for the base leg framing. With the pocket hole jig set for 1-1/2″ material, drill pocket holes in each end of the longer pieces, and the shortest piece as shown. Assemble the frames as shown using glue and 2-1/2″ pocket hole screws.
Step Two
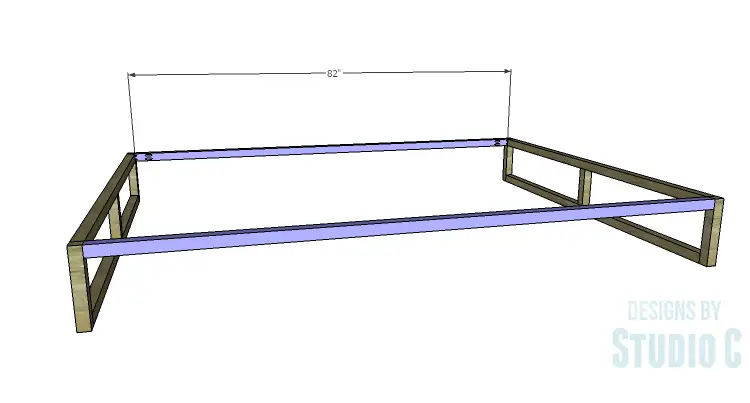
Cut the pieces for the base framing rails and drill pocket holes in each end. Secure the rails to the leg framing using glue and 2-1/2″ pocket hole screws.
Step Three
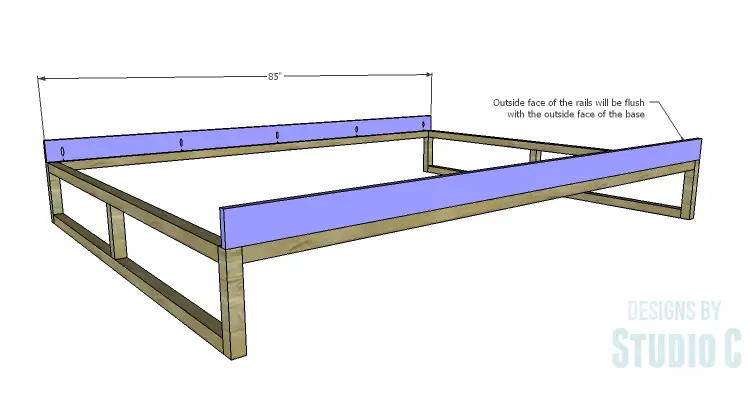
Cut the pieces for rails. Set the pocket hole jig for 3/4″ material and drill pocket holes along one long edge of each piece, as well as each end of the shorter pieces. Secure the longer rails to the base framing rails using glue and 1-1/2″ pocket hole screws. The outside face will be flush with the outside face of the base framing rails.
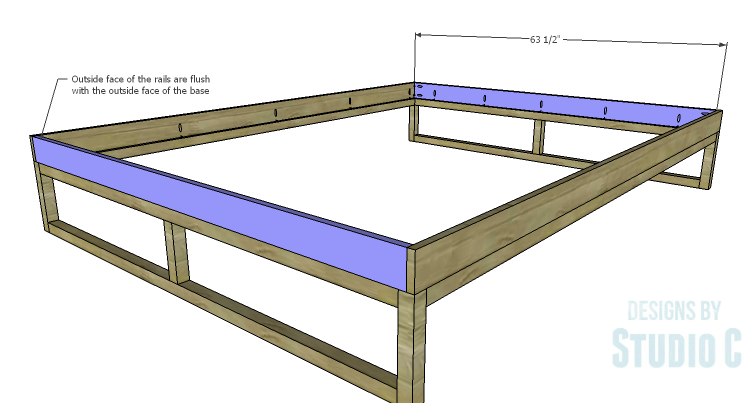
Secure the shorter rails between the longer rails securing in place using 1-1/2″ pocket hole screws. Do not use glue! The shorter pieces will be flush with the outside face of the base framing.
Step Four
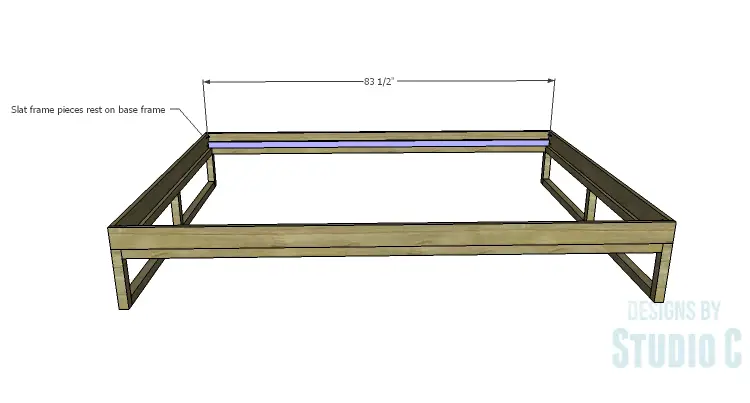
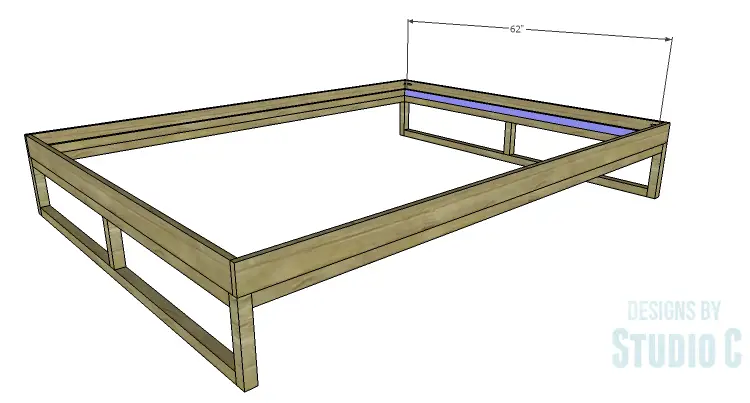
Cut the pieces for the slat supports. Secure the longer slat supports to the inside of the 1×4 rails – they will rest on the base framing rails – using 1-1/4″ screws.
Secure the shorter slat supports between the longer supports in the same manner as the longer rails, resting on the base leg framing.
Step Five
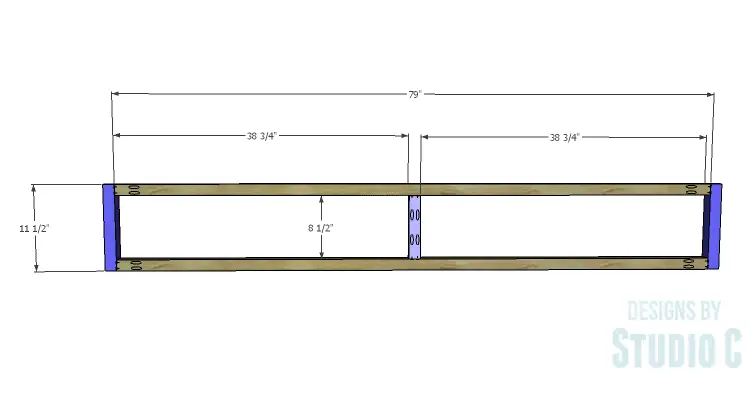
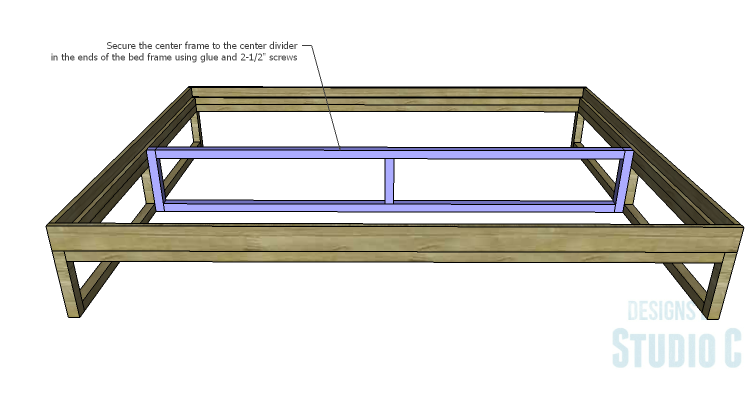
Cut the pieces for the center support framing. Set the pocket hole jig for 1-1/2″ material and drill pocket holes in each end of the longer pieces and the shortest piece. Assemble the frame using glue and 2-1/2″ pocket hole screws.
Secure the center support framing to the inside of the base leg framing using 2-1/2″ screws through the outer leg of the center support framing into the center leg of the base leg framing.
Step Six
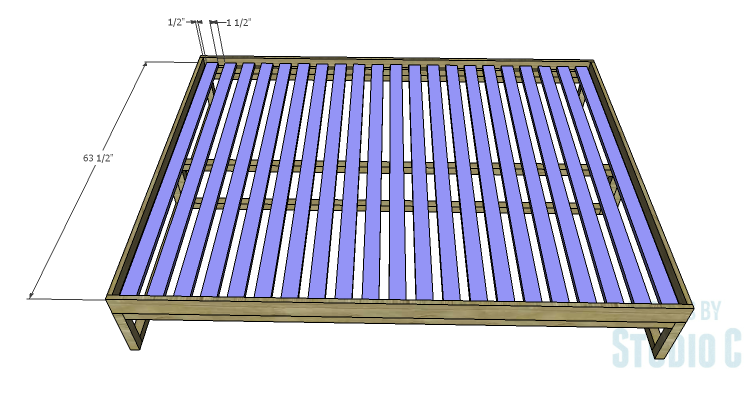
Cut the pieces for the slats. The slats are spaced approximately 1-1/2″ apart and starting 1/2″ from the head and foot rails. Secure the slats using 1-1/4″ screws. Wider plywood planks can be used, as well, as long as there are ventilation holes drilled in the pieces (mattresses have to breathe!).
Finish as desired.
The bed frame is easily customizable to a different size of mattress. Have any questions about the DIY plans to build a modern rustic platform bed? Leave a comment below! Also, if you build from this or any other plans, please share photos! I would love to see your work!
Originally posted 2015-08-26 08:00:57.



Comments are closed.