
An Easy to Build DIY Wood Wall Shelf
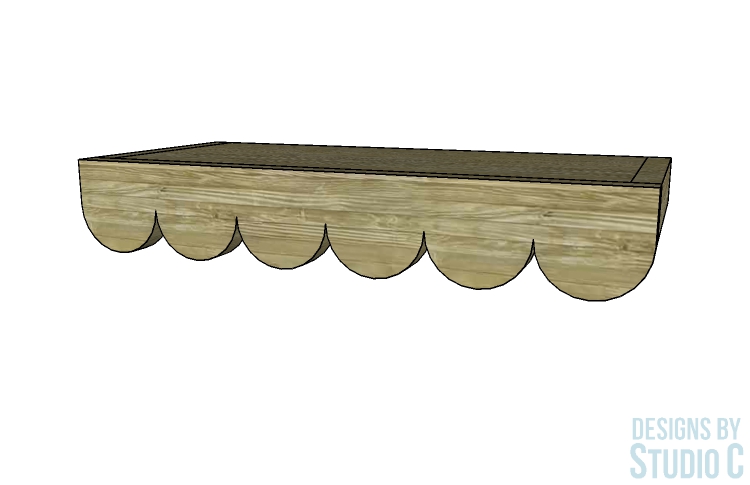
This easy to make shelf, inspired by a shelf from Anthropologie, is simple in construction. The plans to build a scalloped shelf use off-the-shelf boards with a front apron cut using a jigsaw or a band saw. The plan includes printable templates for the scalloped apron, or you can get creative and draw your own decorative design. Either way, this DIY wood wall shelf is the perfect piece of décor for any room! The shelf is hung on a cleat (made from a 3/4″ square dowel) mounted to the wall.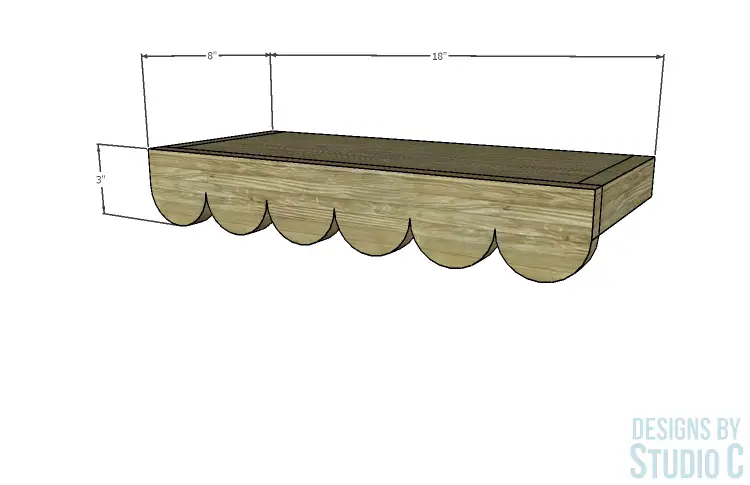
Materials:
- 1-1/2″ brad nails (<– affiliate link!)
- Wood glue
- Sandpaper
- Finishing supplies
- Screws for Hanging
Tools Used:
- Saw for straight cuts- Hand saw or Miter saw
- Saw for curved cuts – jigsaw or bandsaw
- Clamps
- Pneumatic brad nailer OR
- Hammer and nails AND
- Drill with a bit the same diameter as the nails (for pilot holes)
Lumber:
The length of the purchased boards will depend on how many shelves you’d like to make (or how much scrap you have laying around!)
- 1×2 for the side pieces
- 1×4 for the scalloped front apron
- 1×8 for the shelf
- 3/4″ square dowel
Cut List:
- 1 – 1×8 at 16-1/2″ – Shelf Base
- 2 – 1×2 at 7-1/4″ – Shelf Side Aprons
- 1 – 1×4 at 18″ – Shelf Front Apron
- 1 – 3/4″ square dowel at 16-7/16″ – Wall Cleat
Notes about the project:
- Sand all pieces prior to assembly.
- Mount the cleat to the wall and secure it into at least one wall stud before hanging the shelf.
- Make several – they make great gifts!
Step One
Cut the 1×8 piece for the shelf base, and the 1×2 pieces for the shelf sides. Secure the sides to the ends of the 1×8 using glue and clamp until dry. Use a pneumatic brad nailer and 1-1/2″ brad nails to further secure the sides to the shelf or pre-drill pilot holes and use a hammer and nails.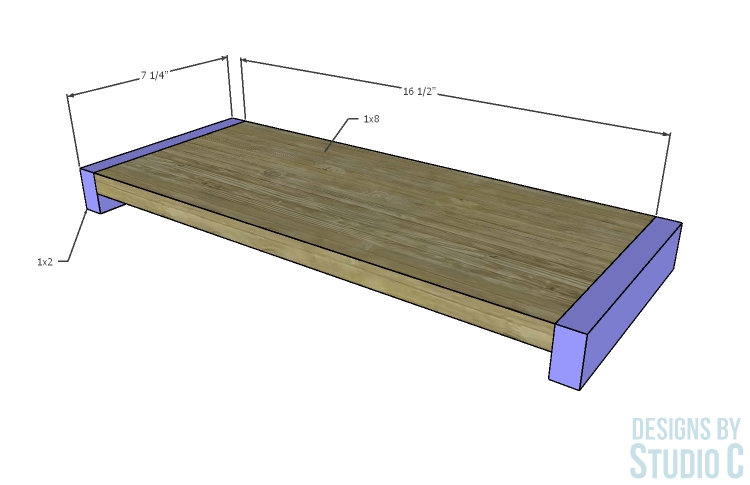
Step Two
Cut the 1×4 piece for the scalloped apron. Print the templates and align the registration marks on the templates. Tape the sheets together and cut out the template. If the template is going to be used several times, print it on cardstock. If not, the template can be adhered to the 1×4 using a light-tack spray adhesive then cut out.
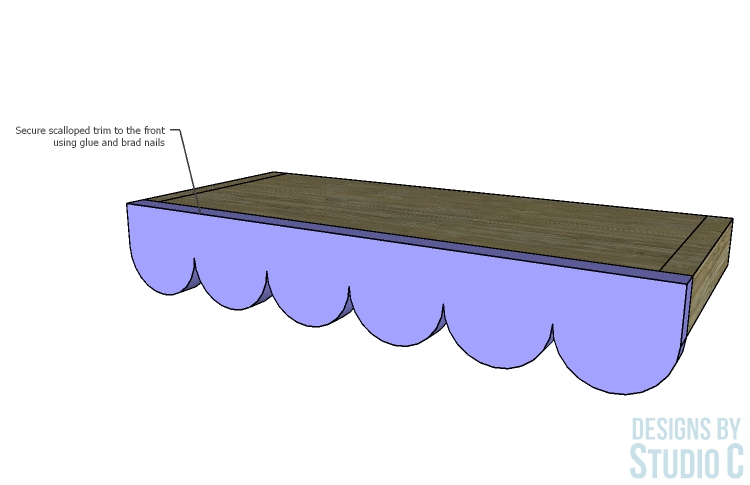
Once the scalloped front apron is cut out, it can be secured to the shelf base and sides with glue then clamped until dry. The piece can be further secured using brad nails or a hammer and nails in the same manner as the sides.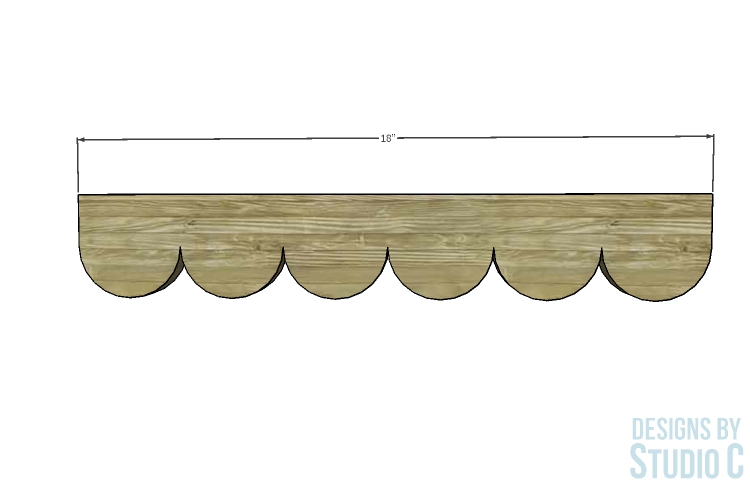
Finish as desired.
Step Three
To hang the shelf on the wall, position the cleat as desired making sure it is over at least one wall stud. Pre-drill holes for screws, then screw the cleat to the wall. Hang the shelf over the cleat (the cleat will be under the shelf base and between the sides) and secure the shelf to the cleat with a couple of screws driven from the top face of the shelf down into the cleat.

Have questions about the DIY furniture plans to build a scalloped shelf? Leave a comment below!
Originally posted 2020-07-25 16:27:57.


Comments are closed.