A Beautiful Cabinet Inspired by a Catalog Retailer
This cabinet is very simple but so elegant! The DIY furniture plans to build a Gabrielle Cabinet feature two doors with additional trim detail with shelving behind. The case is constructed out of 3/4″ plywood with a 1x face frame. The base features 2×2 legs with 1×2 framing. This easy to build cabinet can be completed in a weekend and would look fabulous with any finish!
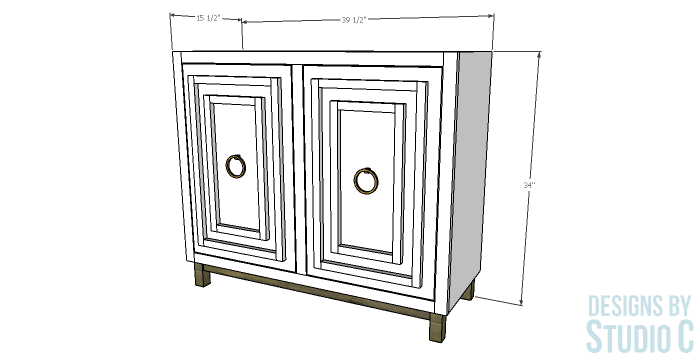
Materials:
- 1-1/4″ pocket hole screws (<– affiliate link!)
- 1-1/4″ brad nails (<– affiliate link!)
- 2″ screws
- Edge banding, optional (<– affiliate link!)
- 2 – cabinet pulls
- 2 sets of hinges for inset doors (<– affiliate link!)
- Wood glue
- Sandpaper (80, 120, 220 grits)
- Finishing Supplies
Lumber:
- 4 – 1×2 at 8′
- 1 – 2×2 at 2′
- 1 – 4′ x 4′ sheet of 1/4″ plywood
- 1 – 4′ x 4′ sheet of 3/4″ plywood
- 1 – 4′ x 8′ sheet of 3/4″ plywood
- Scrap pieces of 1x boards or decorative trim at 1″ wide
Cut List:
-
- 2 – 3/4″ plywood at 14-3/4″ x 28-1/2″ – Case Sides
- 2 – 3/4″ plywood at 14-3/4″ x 38″ – Case Top & Bottom
- 1 – 3/4″ plywood at 14-3/4″ x 28-1/2″ – Case Divider
- 2 – 3/4″ plywood at 14-3/4″ x 18-5/8″ – Case Shelves
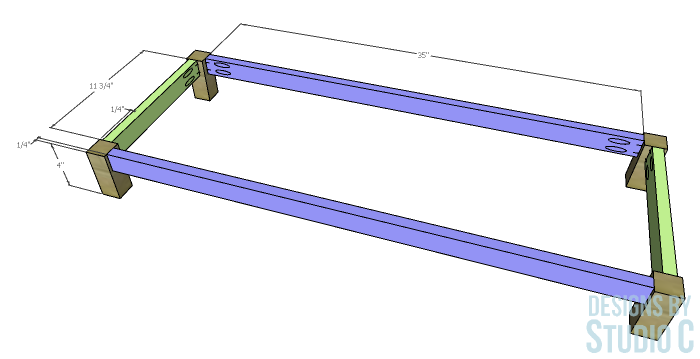
- 4 – 2×2 at 4″ – Base Legs
- 2 – 1×2 at 35″ – Base Frame
- 2 – 1×2 at 11-3/4″ – Base Frame
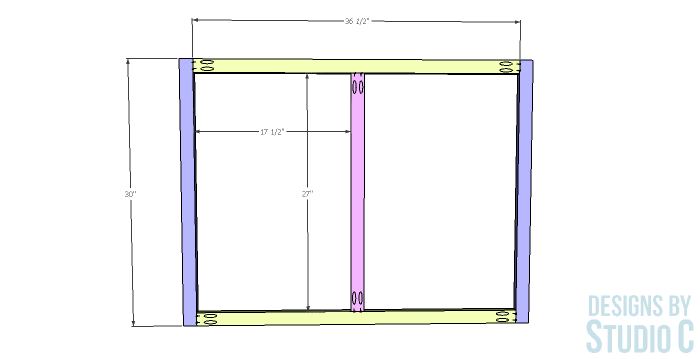
- 2 – 1×2 at 30″ – Face Frame
- 2 – 1×2 at 36-1/2″ – Face Frame
- 1 – 1×2 at 27″ – Face Frame
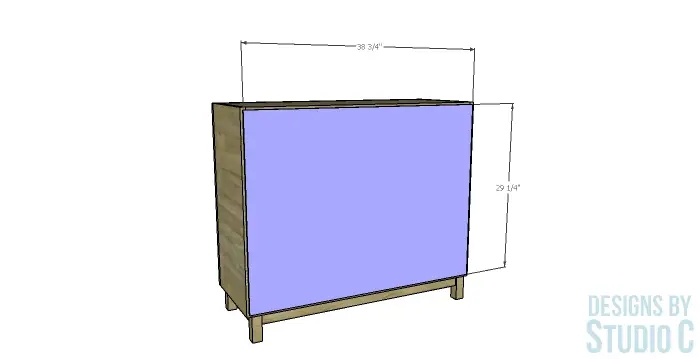
- 1 – 1/4″ plywood at 29-1/4″ x 38-3/4″ – Back
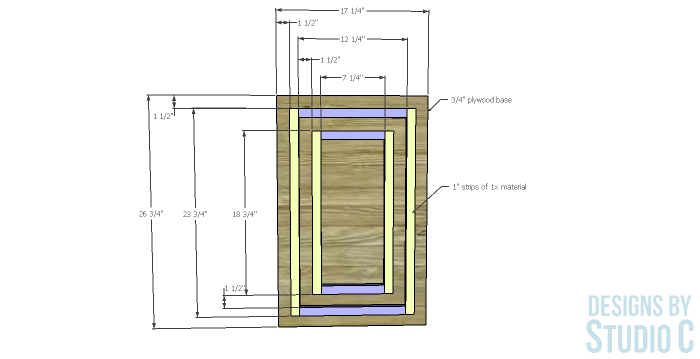
- 2 – 3/4″ plywood at 17-1/4″ x 26-3/4″ – Doors
- 4 – 1″ strips of 1x material at 23-3/4″- Door Detail
- 4 – 1″ strips of 1x material at 18-3/4″- Door Detail
- 4 – 1″ strips of 1x material at 12-1/4″- Door Detail
- 4 – 1″ strips of 1x material at 7-1/4″- Door Detail
Notes About the Project:
Edge banding will be applied to the exposed edges of the plywood prior to assembly.
Step One
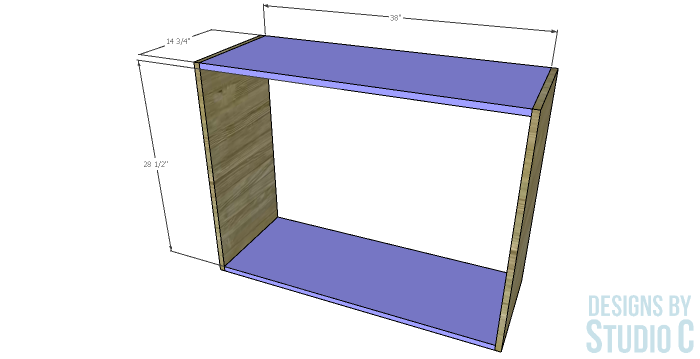
Cut the pieces for the case sides, top and bottom. With the pocket hole jig set for 3/4″ material, drill pocket holes in each end of the top and bottom pieces. Secure the top and bottom to the sides using glue and 1-1/4″ pocket hole screws.
Step Two
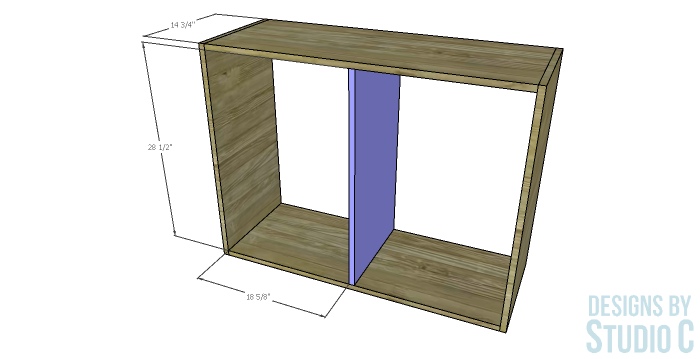
Cut the piece for the divider and drill pocket holes at each end. Secure the divider to the top and bottom pieces using glue and 1-1/4″ pocket hole screws.
Step Three
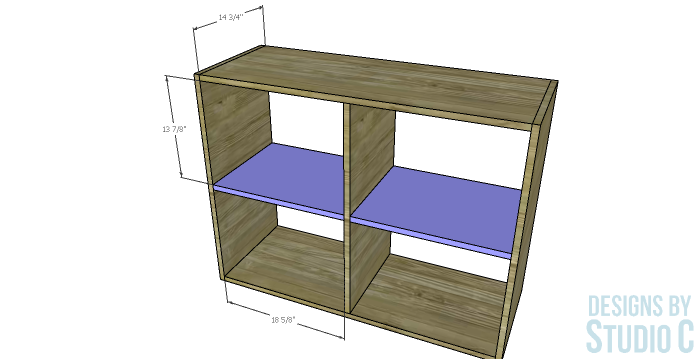
Cut the pieces for the shelves and drill pocket holes at each end. Secure the shelves to the divider and side pieces using glue and 1-1/4″ pocket hole screws.
Step Four
Cut the pieces for the base, and drill pocket holes in each end of the 1×2 pieces. Secure the 1×2 pieces to the legs using glue and 1-1/4″ pocket hole screws. The front faces of the 1x2s will be set back 1/4″ from the outside faces of the legs.
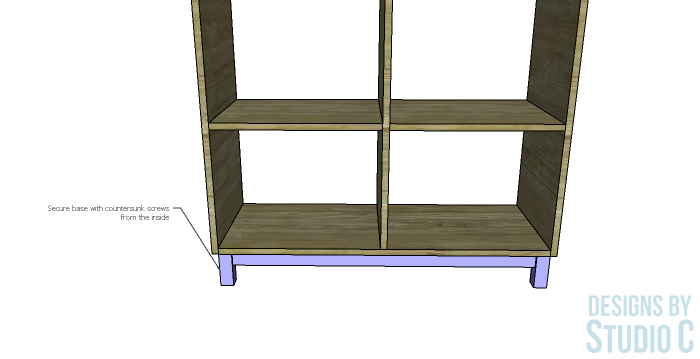
Secure the base to the bottom of the case using glue and 2″ screws from the inside of the case.
Step Five
Cut the pieces for the face frame. Assemble the frame using glue and 1-1/4″ pocket hole screws.
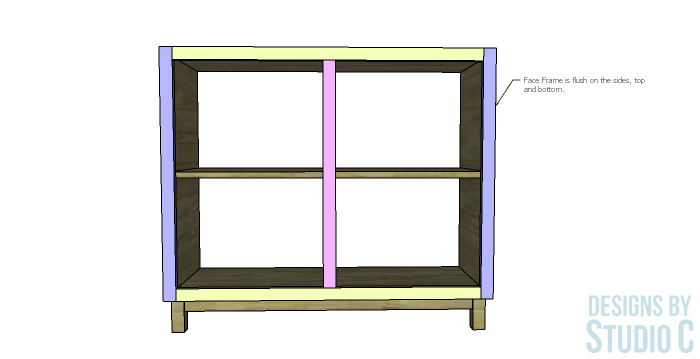
Position the frame over the front of the cabinet: it should be flush with the case on all sides. Secure the frame in place using glue and 1-1/4″ brad nails.
Step Six
Cut the piece for the back. Secure in place using glue and 1-1/4″ brad nails.
Step Seven
Cut the pieces for the doors and the trim. Depending on the trim style chosen, the corners can also be mitered but note that the horizontal trim pieces will have to be cut a little longer to compensate for the miter.
Install the hinges on the door, then install the door in the openings making adjustments as necessary.
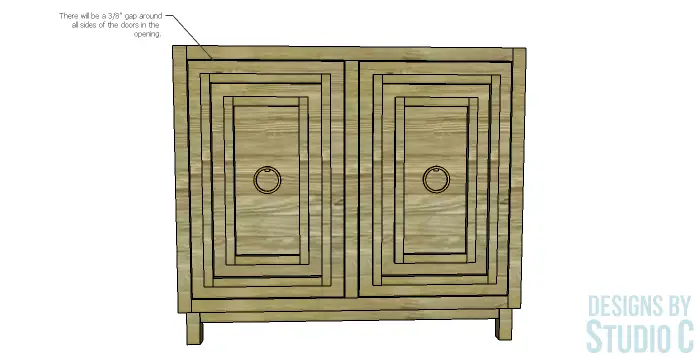
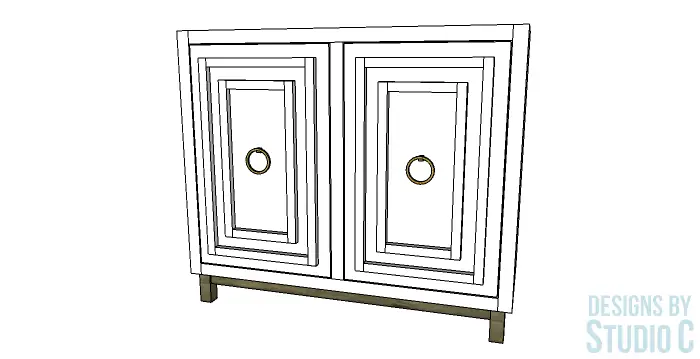
Finish the cabinet as desired.
Personally, I love the design of this cabinet and plan on building it for myself. It would make a great media stand and be the perfect place for our turntable and speakers! Have questions about the DIY furniture plans to build a Gabrielle Cabinet? Leave a comment below!
Other easy to build cabinet plans:
Originally posted 2019-03-06 08:00:46.




Comments are closed.