
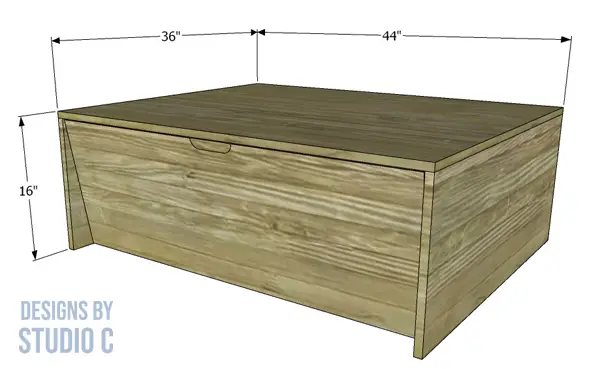
An Easy to Build Coffee Table with Storage!
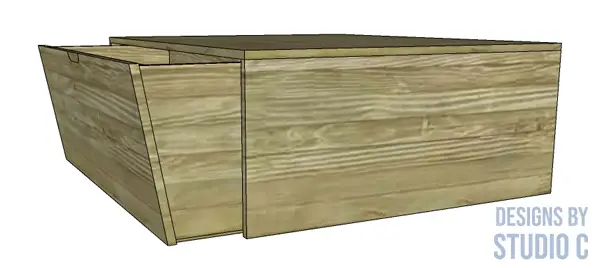
This is a pretty cool coffee table with a drawer on each side but what is extra-cool in the plans to build the Zander coffee table is that the drawers are angled to allow for foot room. Think of it as being similar to a kick plate on a kitchen or bathroom cabinet! There is one drawer on either side of the coffee table for storing blankets, pillows, games, snacks, etc. This project is perfect for any skill level, and can be completed in a weekend!
Materials:
- 1-1/4″ pocket hole screws
- 1-1/4″ brad nails
- Edge banding (<– affiliate link!)
- 2 sets of 15″ drawer slides (<– affiliate link!)
- Wood glue
- Sandpaper (80, 120, 220 grits)
- Finishing Supplies
Lumber:
- 1 – 1×2 at 4′
- 1 – 4′ x 4′ sheet of 1/4″ plywood
- 1 – 4′ x 4′ sheet of 3/4″ plywood
- 2 – 4′ x 8′ sheets of 3/4″ plywood
Cut List:
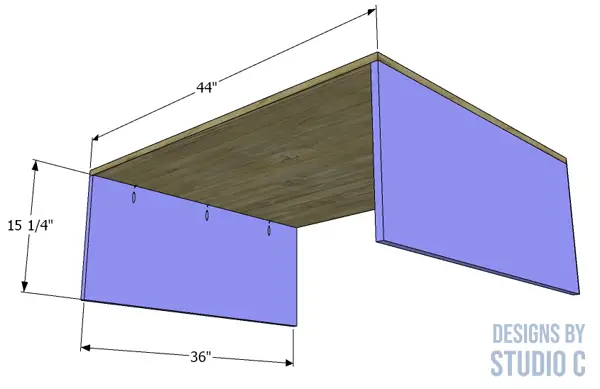
- 1 – 3/4″ plywood at 36″ x 44″ – Top
- 2 – 3/4″ plywood at 15-1/4″ x 36″ – Sides
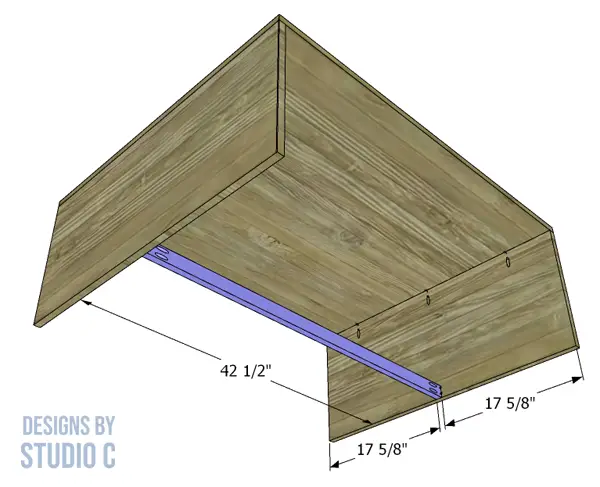
- 1 – 1×2 at 42-1/2″ – Center Stretcher
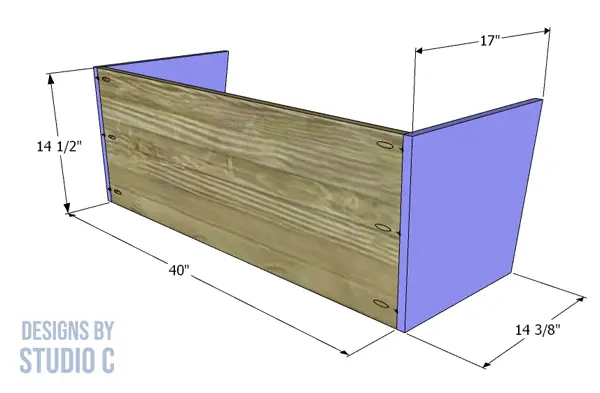
- 2 – 3/4″ plywood at 14-1/2″ x 40″ – Drawer Box Back
- 4 – 3/4″ plywood at 14-1/2″ x 17″ – Drawer Box Sides
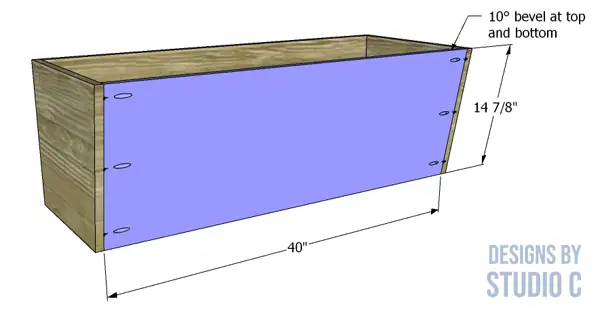
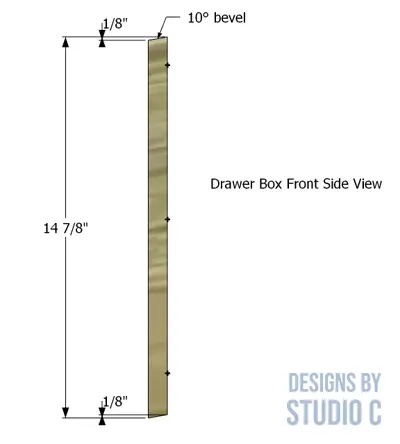
- 2 – 3/4″ plywood at 14-7/8″ x 40″ – Drawer Box Front
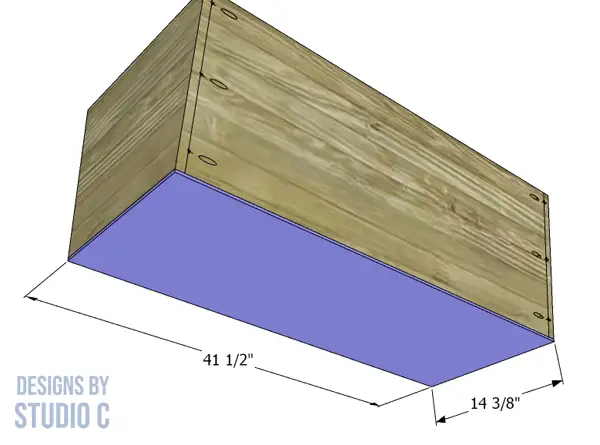
- 2 – 1/4″ plywood at 14-3/8″ x 41-1/2″ – Drawer Box Bottom
- 2 – 3/4″ plywood at 15-3/8″ x 42-1/4″ – Drawer Front
Notes About the Project:
- Apply edge banding to the exposed edges of the plywood before sanding
- Sand all of the pieces prior to assembly!
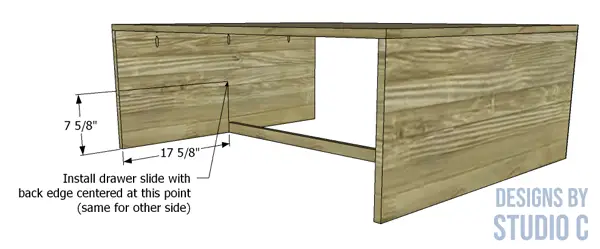
- Pay close attention to the drawer slide installation: they are installed at the center of the sides with the back edge even with the edge of the center stretcher (see the drawing for details)!
Step One
Cut the pieces for the top and the sides. With the pocket hole jig set for 3/4″ material, drill pocket holes in the top edge of each of the side pieces. Secure the sides to the top using glue and 1-1/4″ pocket hole screws.
Step Two
Cut the piece for the center support and drill pocket holes in each end. Secure the support to the center of the lower edge of the sides using glue and 1-1/4″ pocket hole screws.
Step Three
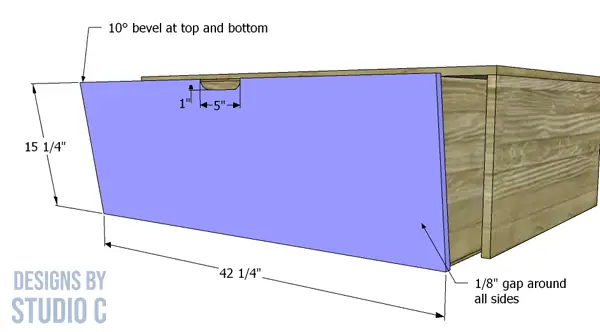
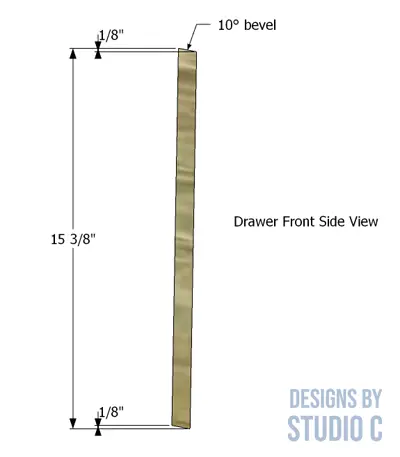
Cut the pieces for the drawers. The piece for the back of the drawer box will not be angled. The sides will have an angle cut in them (see the drawing), and the front will have 10° bevels cut in the top and bottom edges. Drill pocket holes in each end of the back and front pieces. Assemble the drawer box as shown, using glue and 1-1/4″ pocket hole screws.
Step Four
Cut the pieces for the drawer bottoms. Secure the bottoms to the boxes using glue and 1-1/4″ brad nails.
Step Five
Install the drawer slides along the center line of the sides of the both the table itself (see the drawing) and the sides of the drawer box. Make sure the back edge of the drawer slide is flush with the back edge of the sides of the drawer box (the square edges).
Step Six
Cut the pieces for the drawer fronts, and cut a 10° bevel in the top and bottom edges. Mark the position for the handhold, and cut using a jigsaw. Position the drawer front in the opening and secure it to the drawer box using glue and 1-1/4″ brad nails.
Finish as desired!
Have questions about the plans to build a Zander coffee table? Leave a comment below!


Comments are closed.