A Simple Desk Perfect for Back to School
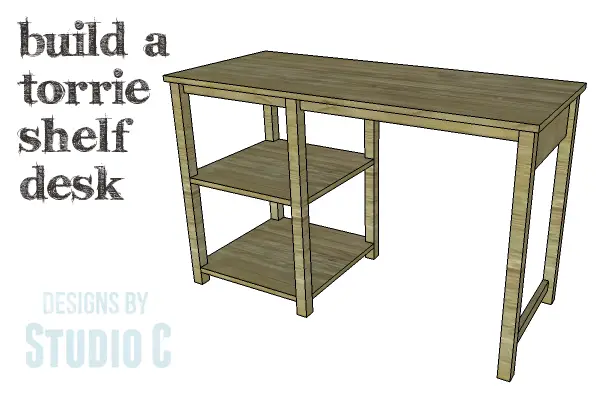
This ultra-simple desk is perfect for any student going back to school. The DIY plans to build a Torrie Shelf Desk feature two shelves on one side, and a wide opening for a chair on the other side. This is a great plan for any skill level and can be completed in a weekend.
Materials:
- 1-1/4″ pocket hole screws (<– affiliate link!)
- 1-1/4″ brad nails
- Edge banding
- Wood glue
- Sandpaper (100, 150, 220 grits)
- Finishing supplies (primer & paint, or stain, sealer)
Lumber:
- 2 – 1×2 at 8′
- 1 – 1×6 at 2′
- 2 – 2×2 at 8′
- 1 – 4′ x 4′ sheet of 3/4″ plywood
Cut List:
- 4 – 2×2 at 29-1/4″ – Legs
- 2 – 1×2 ar 16-1/2″ – Shelf Framing
- 2 – 1×2 at 17″ – Shelf Framing
- 2 – 3/4″ plywood at 19-1/2″ x 20″ – Shelves
- 1 – 1×6 at 17″ – Opposite Leg Assembly
- 1 – 1×2 at 17″ – Opposite Leg Assembly
- 2 – 2×2 at 29-1/4″ – Opposite Leg Assembly
- 2 – 1×2 at 26″ – Connector Stretchers
- 1 – 3/4″ plywood at 21″ x 48″ – Top
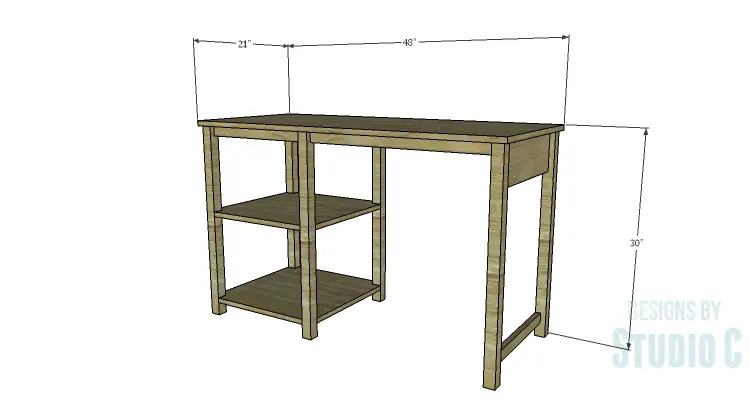
Click on the drawings for a larger view!
Edge banding will be applied to the exposed edges of the plywood prior to assembly.
Step One
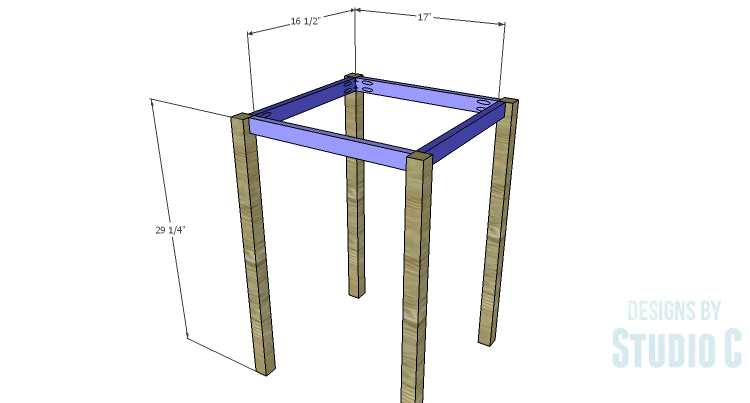
Cut the pieces for the shelf framing pieces and the legs. With the pocket hole jig set for 3/4″ material, drill pocket holes in each end of the framing pieces. Secure the framing to the legs using glue and 1-1/4″ pocket hole screws. The inside faces of the stretchers will be flush with the inside faces of the legs.
Step Two
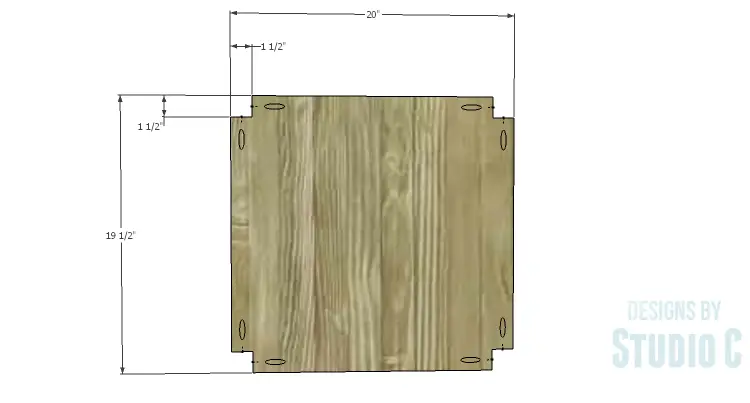
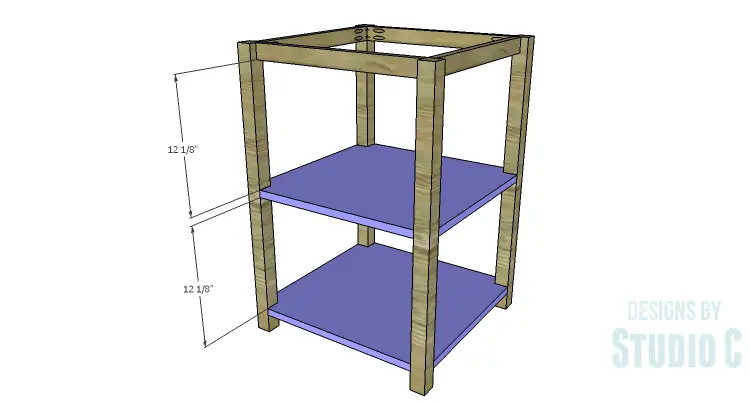
Cut the pieces for the shelves. Cut the notches in each corner with a jigsaw, and drill pocket holes in the notches as shown using a portable pocket hole jig.
Secure the shelves to the legs as shown using glue and 1-1/4″ pocket hole screws.
Step Three
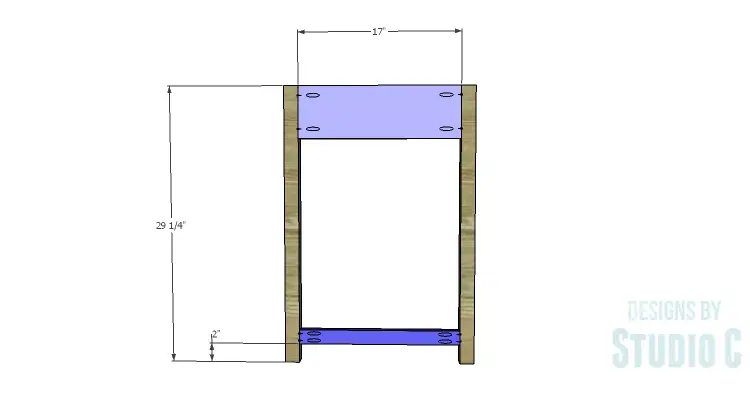
Cut the pieces for the opposite leg assembly. Drill pocket holes in each end of the 1×2 and 1×6 pieces. Secure the pieces to the legs using glue and 1-1/4″ pocket hole screws. The back faces will be flush with the inside faces of the legs.
Step Four
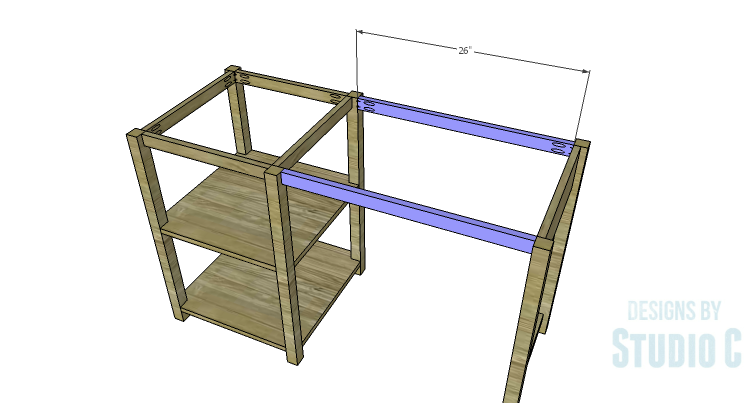
Cut the pieces for the connector stretchers and drill pocket holes in each end. Secure the stretchers to the leg assembly and the shelf assembly as shown using glue and 1-1/4″ pocket hole screws.
Step Five
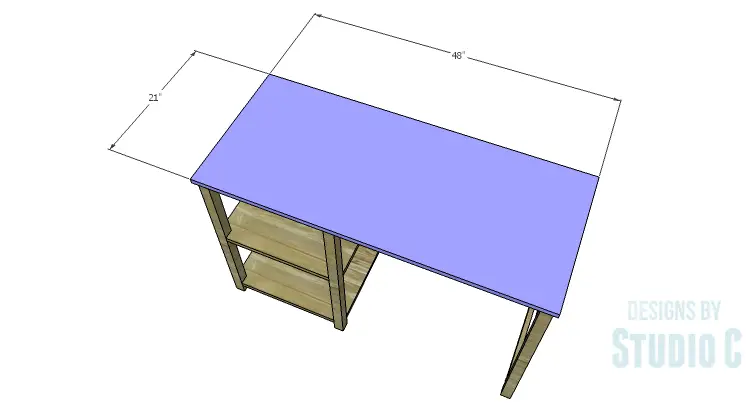
Cut the piece for the top. The top will overhang the entire desk frame by 1/2″ on all sides. Secure the top in place using glue and 1-1/4″ brad nails through the top into the legs, framing, and connectors.
Finish as desired.
The shelves in this desk are the perfect size for a printer or baskets for office supplies. This would also be a great desk for crafting! Have any questions about the DIY plans to build a Torrie Shelf Desk? Leave a comment below!
Originally posted 2015-08-10 08:00:08.

Comments are closed.